
How to Remove a Stuck Drill Bit From a Chuck: Step-by-Step
This post contains affiliate links. As an Amazon Associate, we earn from qualifying purchases.
To remove a stuck drill bit from a chuck, you must first determine if the bit is jammed in the jaws or if the entire chuck is seized on the spindle. For a jammed bit, the proven sequence is: apply penetrating oil, use the drill’s reverse function with manual chuck grip, employ locking pliers on the bit shank, tap the chuck with a soft hammer, and finally, as a last resort, apply targeted heat to the chuck body. Forcing the wrong step first damages the chuck.
The bit is stuck, but the chuck mechanism might not be. That distinction changes everything. A bit jammed by sawdust or a burred shank is a cleaning job. A chuck frozen by corrosion or a failed left-hand screw is a disassembly problem. Most guides mash them together and you end up using a pipe wrench on a chuck that just needed a drop of oil. This is why it’s crucial to correctly diagnose how to remove a stuck drill bit from a chuck.
What follows: a diagnostic ladder for how to remove a stuck drill bit from a chuck that starts with the fix that can’t break anything and ends with the one you hope you never need. We’ll walk the factory procedures from DEWALT, Milwaukee, and YUKIWA SEIKO, including where they disagree on using heat, and the one field trick that works when the manual doesn’t.
Key Takeaways
- Start with penetrating oil and reverse torque. This combination can free many stuck bits caused by packed debris or light corrosion without risking chuck damage.
- Never strike the chuck with a steel hammer. DEWALT and BLACK+DECKER specify a wooden mallet; YUKIWA SEIKO warns a steel hammer “may hurt the chuck.”
- Identify the left-hand threaded screw. On most reversing drills, a left-hand threaded screw inside the chuck bottom must be removed clockwise before the chuck body can be loosened.
- Heat is a brand-specific last resort. Milwaukee’s service manual explicitly calls for applying heat to the screw head before removal, while DEWALT and BLACK+DECKER guides do not mention it.
- Know when to stop. If the chuck spins on the spindle but won’t open, the internal jaws are likely jammed with metal chips, a repair for a service center, not your bench vise.
The 5-Step Escalation Ladder (From Safe to Aggressive)
Follow these steps in order. Each step has a specific failure mode it addresses. Skipping to step three because step one “seems too simple” is how you turn a ten-minute fix into a $50 chuck replacement.
Step 1: Penetrating Oil and Reverse Torque
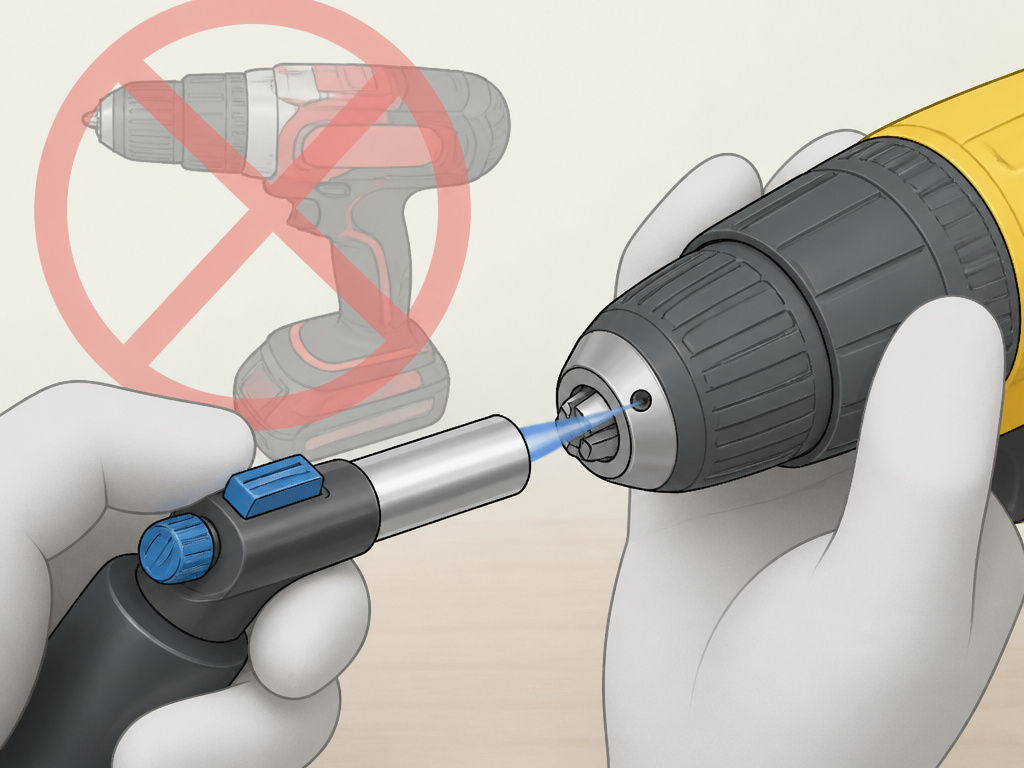
Open the chuck jaws as wide as they will go. Apply a few drops of a penetrating oil like WD-40 directly into the gaps around the bit shank. Let it soak for several minutes.
Now, set your drill’s direction selector to reverse. Grip the chuck’s outer collar firmly with your hand. If the drill is cordless, remove the battery for safety. Briefly pull the trigger at low speed while maintaining strong resistance with your hand. The reverse torque unloads the self-tightening force in a keyless chuck. If you hear a click and the bit spins free, you’re done.
Where this goes sideways: Using the drill’s hammer mode while trying this. The impact pulses can crack the carbide jaws in a keyless chuck. Keep the selector on the standard drilling setting.
Step 2: Locking Pliers on the Bit Shank
If reverse torque didn’t work, the bit is mechanically jammed. You need to break the friction between the bit’s shank and the chuck jaws.
Get a pair of locking pliers (Vise-Grips). Open the chuck fully. Clamp the pliers onto the smooth, non-fluted portion of the drill bit shank, as close to the chuck nose as possible. Pad the plier jaws with a strip of duct tape or a rag to prevent marring the steel. The goal is to create a handle you can twist.
Hold the chuck stationary with your other hand. Use the pliers to twist the bit back and forth, working it in a counterclockwise direction (to unscrew it). Don’t just pull, a twisting motion breaks corrosion bonds better than direct force.
Step 3: Soft Hammer Taps
This step targets a chuck that is slightly out of round or has jaws misaligned from a sideways impact. A sharp, focused tap can realign them.
Use a wooden mallet or a dead-blow hammer. Tap the side of the chuck body, not the top. Rotate the chuck a quarter turn and tap again. The goal is a sharp, resonant ping, not a dull thud. You’re shocking the assembly, not smashing it.
After a few taps, try Step 1 again. Often, the vibration from tapping is enough to loosen the grip when combined with the penetrating oil already inside.
Step 4: Controlled Heat (The Last-Ditch Safe Method)
Heat expands metal. If the bit is stuck due to galvanic corrosion (dissimilar metals welding together), a careful temperature rise can break the bond.
Use a heat gun on low setting. Direct the airflow at the chuck body, not the drill’s motor housing, for a short time. You want the chuck warm to the touch, not hot enough to discolor the metal. Wear gloves.
Immediately try Step 2 again with the locking pliers. The expanded chuck may release its grip. Never use an open flame like a propane torch, the risk of overheating and damaging the chuck’s temper or internal plastic parts is too high.
Step 5: Mechanical Chuck Disassembly
If the bit remains stuck after all the above, the problem isn’t the bit, it’s the chuck mechanism itself. The next step is to remove the entire chuck from the drill to access the jammed jaws from the inside. This leads directly into the procedures the manufacturers publish.
The Chuck Screw: Your First (and Most Missed) Step
Before you can remove a chuck, you must remove the screw that holds it on. Most people turn it counterclockwise, which only tightens it further.
For a keyed chuck, to loosen the left-hand screw, strike a chuck key placed in a hole on the right side of the chuck in a clockwise direction with a wooden mallet. . DEWALT & BLACK+DECKER Support Articles
The process changes based on your chuck type. Here’s the breakdown from the OEM guides.
| Chuck Type | Tool for Screw | Direction to Loosen | Tool for Chuck Body |
|---|---|---|---|
| Keyed | Chuck key in right-side hole | Strike key clockwise with wooden mallet | Chuck key in left-side hole, strike counter-clockwise |
| Keyless | Screwdriver into chuck bottom | Turn screwdriver clockwise | 1/4″ or larger Allen wrench, strike long end counter-clockwise |
| Torqued (No Screw) | N/A | N/A | 1/4″ (6.4mm) hex key, strike counter-clockwise with soft hammer |
Why the left-hand thread? It’s a safety feature. The normal rotation of the drill (clockwise) would gradually loosen a standard right-hand thread screw. A left-hand thread ensures the drilling torque tightens the retaining screw, not loosens it.
Sensory cue: When you successfully loosen the set screw, you’ll feel a distinct release, not just continued spinning. If the screw just spins, it’s already out.
When the Problem Isn’t the Bit: A Seized Chuck on the Spindle
Sometimes the bit comes out, but the chuck itself won’t unscrew from the drill’s spindle. This is a different problem with two main causes: a tapered spindle jammed by corrosion, or a threaded spindle locked by overtightening.
For a tapered spindle chuck, YUKIWA SEIKO advises driving a wedge-shaped jig into the space between the chuck and the taper to separate them. You’re breaking a metal-to-metal seal, not unscrewing anything.
For a threaded spindle chuck, you need significant force. The factory method varies: for some keyless chucks, you tighten the chuck onto the short end of a 1/4″ or larger hex key (DEWALT/BLACK+DECKER), while Milwaukee specifies a 1/2” or 10mm Allen key.
- Secure the drill in a vise with soft jaws (remove the belt clip first).
- Slide a 12”-18” metal pipe over the Allen key to increase force.
- Apply steady, counter-clockwise force to break the chuck loose.
Milwaukee’s service manual for its M18 Fuel drill specifies this exact method, noting it may require a “cheater bar” for sufficient torque.
Manufacturer Methods: Where DEWALT, Milwaukee, and YUKIWA Disagree
The official guides don’t always align. Knowing the differences prevents you from following advice that doesn’t suit your tool.
| Point of Contention | Milwaukee Tool Position | DEWALT / BLACK+DECKER Position | YUKIWA SEIKO Position |
|---|---|---|---|
| Using Heat on Screw | Recommends it. “Apply heat into the chuck opening… Using a small pencil tip torch or an air reduction nozzle on a heat gun.” | Does not mention it. Instructions focus on striking with a mallet or using a screwdriver. | Does not mention it. Advises using a wedge or turning with a hex key. |
| DIY Disassembly | Manual details full removal. | Suggests service center if stuck. | Strongly warns against: “Do not disassemble drill chucks yourself as they are press-fitted and there is danger.” |
Milwaukee’s call for heat is included in their service manual, which also specifies a torque of 461 kg/cm (about 33 ft/lbs) for installing a new screw. That’s a lot. The heat breaks the thread-locking compound they likely use at the factory.
For a homeowner-grade DEWALT or BLACK+DECKER drill, that compound usually isn’t present, so the striking method works. If you apply a torch to a plastic-geared drill housing, you’ll melt it.
Common mistake: Using a Milwaukee-specific heat technique on a DEWALT drill. You risk damaging the chuck’s internal plastic retainer, a part you can’t buy separately.
How to Prevent a Stuck Bit Before It Happens
A bit usually sticks for one of three reasons: overtightening, dirty jaws, or using a damaged bit shank.
- Overtightening by hand: With a keyless chuck, snug is enough. Your grip strength is greater than the drill’s torque. If you crank it until your knuckles are white, you’re deforming the jaws slightly. They’ll grip the bit shank unevenly and bind. Tighten just enough to prevent slippage.
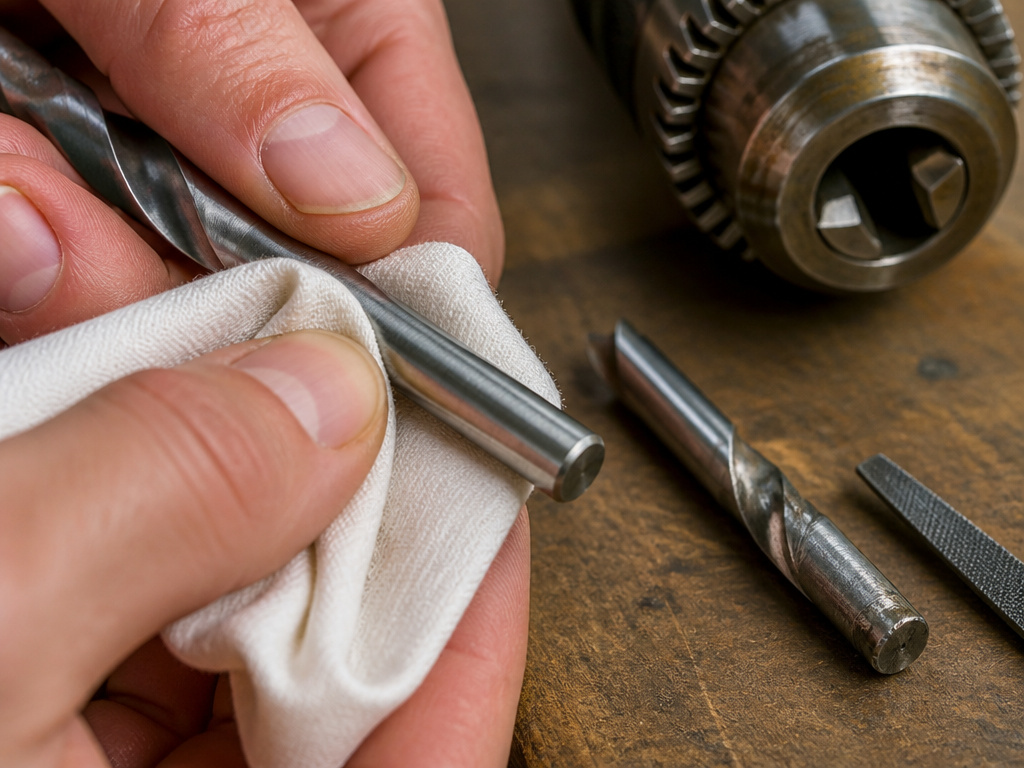
- Dirty Jaws: Blowing out the chuck with compressed air after use drives dust and metal chips into the jaw tracks, not out of them. Instead, open the jaws fully and wipe them with a dry cloth. If you’ve been drilling metal, a quick spray with a dedicated chuck cleaner (not WD-40) prevents chip welding.
- Damaged Bit Shank: A bit that’s been hammered on, dropped, or used in an off-center chuck will develop burrs or grooves on its smooth shank. These burrs act like tiny teeth, locking into the chuck jaws. Feel the shank before inserting a bit. If it’s not perfectly smooth, file the burrs off or retire the bit.
How to use a vice to hold a drill for more leverage
Securing the drill body is a critical step when applying significant force to loosen a stuck chuck or its internal screw. The soft jaws protect the tool’s housing from damage. With the drill held firmly, you can then apply steady, controlled force to your chosen tool, such as an Allen wrench inserted into the chuck. This setup prevents the drill from spinning or moving unpredictably, allowing you to focus all your effort on breaking the chuck or screw free. It is a necessary first step for methods that use a pipe or “cheater bar” to get more force.
Is your drill in reverse or is the clutch set wrong?
Before applying any force, verify your drill’s settings. A common point of confusion is the direction. According to YUKIWA SEIKO, the thread part of the drilling machine is right-handed, so the chuck can be loosened by turning it counterclockwise. However, many drills have a left-hand threaded screw inside the chuck that must be removed first by turning it clockwise. Ensure your drill’s directional switch is set to forward or the correct rotation for the task. For specific procedures, Milwaukee Tool instructs setting the speed selector to the #1 setting before attempting screw removal. Also, check if your drill has a clutch; if it’s set too low, it may slip before the chuck loosens. Setting it to the drill mode or its highest torque setting ensures full power is transferred.
Frequently Asked Questions
Why won’t my drill bit come out even in reverse?
If the reverse function doesn’t work, the chuck’s internal ratchet or clutch mechanism might be damaged, preventing torque from reaching the jaws. Alternatively, the bit shank could be physically deformed (twisted or burred) and mechanically locked. Move to Step 2 (locking pliers) to apply direct twisting force to the bit itself.
Can I use a pipe wrench to loosen a stuck chuck?
You can, but you will almost certainly destroy the chuck. The serrated jaws of a pipe wrench will crush and gouge the chuck body, making it impossible to grip by hand afterward. It is a last resort that guarantees a chuck replacement. A strap wrench is a far better tool for this, as it applies pressure without marring.
What’s the difference between a bit stuck in the chuck and a chuck stuck on the spindle?
Bit stuck in the chuck means the jaws won’t open to release the bit. The chuck itself may still spin freely on the spindle. A chuck stuck on the spindle means the entire chuck assembly is frozen to the drill’s drive shaft and cannot be unscrewed for removal. The fixes are different: the first focuses on the jaws; the second requires removing the retaining screw and applying force to the chuck body.
Is it worth repairing a chuck or should I just replace it?
For a drill under warranty, always seek service. For an older drill, replacement is often more economical than repair. A basic keyless chuck costs about the same as the labor to have a shop disassemble, clean, and reassemble your old one. Exceptions exist for high-end drills (like a Milwaukee Fuel) where the OEM chuck is a $50+ part, in that case, repair might save money.
How do I know if my chuck is keyed or keyless?
Keyed chuck has three or four square holes around its body for inserting a geared chuck key. A keyless chuck has a textured rubber or plastic sleeve that you grip and turn by hand to open and close the jaws. The removal procedures for each type are different, as shown in the table in section 3.
Before You Go
Start with oil and reverse. That’s the rule. It costs nothing, breaks nothing, and works more often than not. When it doesn’t, you’re not guessing, you’re following a ladder where each step has a known job.
The factory procedures from DEWALT and Milwaukee for how to remove a stuck drill bit from a chuck aren’t suggestions. They are the result of engineers knowing exactly how much force their chucks can take before the internal gears strip. If their guide says “wooden mallet,” using a steel hammer is a choice to break your tool.
One final note: if your chuck has ever been submerged or used in constant damp conditions, the corrosion inside can be terminal. No amount of oil or heat will free jaws that have rusted into a single mass. In that case, the escalation ladder ends at step zero, order a new chuck. Your time is worth more than the victory of beating a dead tool back to life.
