
How to Tell If a Saw Blade Is Dull: 5 Signs & Fixes
This post contains affiliate links. As an Amazon Associate, we earn from qualifying purchases.
To tell if a saw blade is dull, check for five things: a burning smell and scorch marks on the wood, the saw motor straining or bogging down, rough or torn cut edges, visible chipping on veneers or plastics, and a fine, bright “wear line” along the top edges of the carbide tips under a bright light. If you see any one of these signs, stop and address it before your next cut.
That last sign, the hair-thin wear line, is where most guides stop. They tell you to look for it. What they don’t tell you is the threshold: Oertli Werkzeuge AG’s manual says sharpening is due when that wear-out part exceeds 0.2 mm. On a 10-inch blade, Carbide.com notes that visible wobble to the naked eye means more than 0.007 inches of runout, and smooth cuts become impossible past 0.010 inches. A key part of how to tell if a saw blade is dull is that your eyes can see a problem long before your ears hear the motor scream.
What follows is a walk-through of those five signs, the blade-cleaning step that fixes half of “dull” complaints, and the clean-sharpen-replace decision that keeps your projects, and your fingers, safe.
Key Takeaways
- Look for a fine, bright line along the top of clean carbide teeth under bright light; if it’s visible, the blade needs attention per manufacturer specs.
- A burning smell and motor strain are late-stage warnings; address dullness before the saw labors to prevent kickback and motor damage.
- Clean the blade first with oven cleaner for resin or solvent for glue; many performance issues are just buildup, not dullness.
- One damaged or missing tooth ruins crosscuts on veneer and makes cutting plastics dangerous, inspect every tip.
- Test with a known-sharp blade if you’re unsure; if the cut improves with nothing else changed, your first blade is dull.
The 5 Signs Your Blade Is Dull (and What Each Means)
Forget vague feelings. These are the physical and performance flags that don’t lie, answering the question of how to tell if a saw blade is dull. If your saw shows one, it’s talking to you.
1. The Wood Burns, and the Motor Labors
This isn’t just a bad cut. It’s a system crying for help. The DeWalt DCS573 manual states it plainly: change blades when it’s no longer easy to push the saw, when the motor strains, or when excessive heat builds up in the blade.
The mechanism is simple friction. A sharp tooth slices wood fibers cleanly. A rounded, dull tooth mashes and rubs them, generating heat. That heat transfers into the wood (burn marks) and back into the blade body, which can warp over time. The motor strains because it’s working against that friction, not cutting through it.
Common mistake: Pushing harder when the saw bogs down. This increases loading, promotes blade twist in the kerf, and is a direct path to kickback, as noted in the DeWalt manual.
You’ll smell it before you see it, that acrid, sweet scent of scorching pine or oak. If your cut line has a blackened edge and your saw sounds angrier than usual, stop. The next sign is often a kickback event.
2. The Cut Quality Falls Off a Cliff
Splintering on the top surface of plywood. Ragged, torn fibers on the back side of a crosscut. A rough edge that needs sanding even on a finish cut. These are the visual hallmarks of a blade that can no longer shear wood cleanly.
Carbide-tipped blades are designed to score the wood fibers before the tooth body clears them out, like a sharp knife. A dull tip smashes through instead, lifting and tearing the grain. On materials like plastic laminate or veneered plywood, the result is catastrophic chipping along the cut edge.
This is where the “beauty is in the eye of the beholder” caveat from Carbide.com comes in, which is key when learning how to tell if a saw blade is dull. A blade that produces a cut acceptable for framing lumber is utterly dull for cabinet work. The standard is what you need for your project. If the edge looks torn and you’re doing finish work, the blade has failed its job.
3. You See the “Wear Line” on Clean Teeth
This is the most specific, technical sign, and it requires a bright light and a clean blade. Dulled carbide doesn’t look rounded to the casual glance. You need to look perpendicular to the top edge of the tooth, under direct sunlight or a strong workshop light.
The “wear line” is a fine, bright line along the very top edge of the carbide tip, or a shiny spot at the point of the bevel. Carbide.com describes it as “usually not much wider than a hair.” If you can see it, the blade needs sharpening. Running it further accelerates wear, meaning the sharpening service will have to grind off more material later, shortening the blade’s total life.
Here’s where sources provide guidance, though they differ: The Oertli Werkzeuge AG manual states that cutting edges must be sharpened or replaced if “the wear-out part of the cutting edges are greater than 0.2 mm,” while Carbide.com advises that if you can see the fine wear line at all, the blade needs sharpening.
4. The Blade Wobbles Visibly at Rest
Unplug the saw. Spin the blade slowly by hand. Watch the edge of the teeth relative to a fixed point, like the saw’s base plate. A tiny amount of runout is normal. A wobble you can clearly see with your naked eye is a problem.
For a 10-inch blade, Carbide.com provides the numbers: visible wobble indicates more than 0.007 inches of runout. If runout is “much over 0.010 inches,” it becomes impossible to get smooth cuts. This wobble can come from a bent blade, a damaged arbor, or a misaligned saw. It mimics dullness by making each tooth strike the wood at a slightly different point, creating a ragged, wider kerf.
Where this goes sideways: Assuming wobble means the blade is dull. A bent blade won’t be fixed by sharpening. You must identify the cause, blade, arbor, or saw, before proceeding.
5. Teeth Are Chipped, Broken, or Missing
Run your finger carefully along the tooth line (with the saw unplugged, obviously). Look at every single tip. One broken carbide tip might not affect a rip cut much, but it will ruin a crosscut on veneered plywood. The Craftsman 137.242750 manual lists “IMPROPER or dull saw blades” as a cause for “breakage, damage,” and missing teeth certainly qualify.
The risk escalates with material. As Carbide.com warns, plastic laminates will chip badly with any damaged tips. Cutting solid plastics or non-ferrous metals can become dangerous with missing teeth, as the blade can grab or shatter the material.
Small nicks might grind out in sharpening. But a missing tip requires brazing on a new one, a specialized repair. At that point, you’re into a cost-benefit analysis: is repairing this older blade worth more than a new one?
The Blade-Cleaning Fix That Comes First
Before you declare a blade dull, clean it. Resin buildup from pine, glue from plywood, or hardened sap can coat the teeth and sides, making them effectively dull. The Ozito CSW-7000U manual and others advise that properly maintained tools are less likely to bind.
Here’s the disagreement in methods, straight from the sources. The DeWalt manual says hardened gum can be removed with kerosene, turpentine, or oven cleaner. Carbide.com advises using oven cleaner or a dedicated blade cleaner for wood resin, and a solvent for glue buildup.
| Buildup Type | Recommended Cleaner | Source |
|---|---|---|
| Hardened Wood Resin/Gum | Oven Cleaner, Kerosene, Turpentine | DeWalt Manual |
| Wood Resin | Oven Cleaner or Blade Cleaning Product | Carbide.com |
| Glue | Solvent | Carbide.com |
The process is the same: remove the blade, apply the cleaner, let it sit, scrub with a brass brush (never steel, it can damage carbide), rinse thoroughly, and dry completely. A clean blade shows you the condition of the carbide itself, free from built-up residue. You’d be surprised how often a “dull” blade just needed a bath.
Sharpen, Replace, or Clean? Your Decision Tree
You’ve identified a problem. Is it dirt, damage, or wear? This flowchart cuts through the guesswork.
- Is the blade dirty? If there’s visible gunk on the teeth or sides, clean it first. Retest. Problem gone? It was buildup.
- Are teeth chipped, broken, or missing? If yes, and you cut veneer, laminate, plastic, or metal, the blade is unsafe. For a single small chip on a blade used for rough lumber, a sharpener might grind it out. For missing teeth, evaluate repair cost vs. New blade price.
- Is there visible wobble? If the blade is bent, sharpening won’t help. Try the blade on another saw to isolate the issue. If it’s still bent, replace it.
- Is the wear line visible? If you see that hair-thin bright line on clean teeth, the blade is dull and needs sharpening.
- Are you still unsure? Perform the Carbide.com test: make a cut with the suspect blade. Then, without changing anything else (feed speed, material, saw settings), make the same cut with a known-sharp, similar blade. If the second cut is noticeably better, your first blade is dull.
This logic prevents you from spending $20-$40 to sharpen a blade that just needed a $5 can of oven cleaner, or from ruining a project because you tried to force a damaged blade through veneer.
When Sharpening Makes Sense (and When It Doesn’t)
Sharpen if:
- The blade is high-quality (brands like Forrest, Freud, CMT).
- It’s a specialty blade (thin-kerf, fine-finish, dado set) that costs over $80 new.
- Only minor wear is present, with no major damage.
- You have a reliable, reputable sharpening service nearby.
Replace if:
- The blade is a basic, inexpensive commodity blade ($25-$40).
- There is significant damage (multiple missing teeth, large chips).
- The cost of sharpening approaches or exceeds the cost of a comparable new blade.
- It’s a steel-tipped blade.
The Ozito manual’s warning ties it all together: “Do not use dull or damaged blades. Blunt or improperly set blades produce narrow kerf causing excessive friction, blade binding and kickback.” A sharp blade is a safe blade. A decision delayed is a risk accepted.
How to Tell if a Diamond Blade is Dull
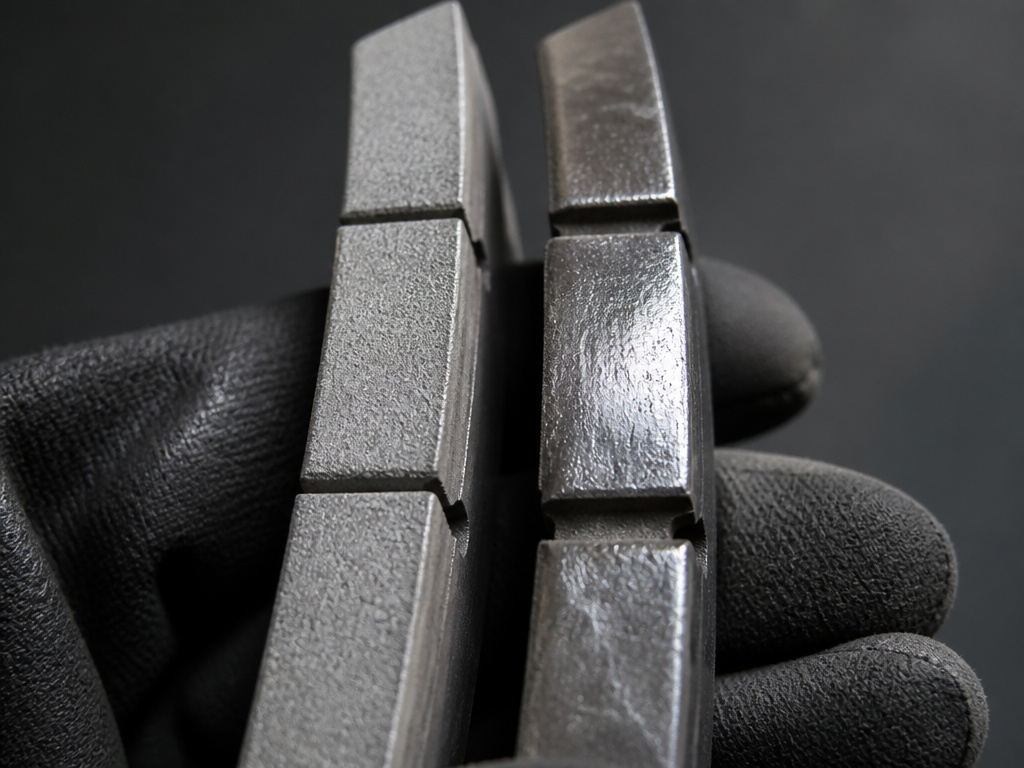
A diamond blade doesn’t have traditional teeth to inspect, so you check its cutting surface. A dull diamond blade will often develop a glazed, smooth, or shiny appearance on the segment edges that should be rough and exposed. This happens when the diamond grit wears down or becomes polished from friction, often due to improper use on the wrong material.
Frequently Asked Questions
How do I know when to replace a saw blade instead of sharpening it?
Replace a blade when the cost of sharpening is close to the price of a new one, when teeth are missing or badly damaged, or when the blade body is bent.
Does a dull blade cause more kickback?
Yes, absolutely. The DeWalt, Craftsman, and Ozito manuals all link dull blades to increased kickback risk. A dull blade binds in the kerf because it doesn’t cut efficiently, increasing the chance it will pinch and twist, launching the saw backward. Sharp blades cut cleanly and reduce binding.
Can I sharpen a circular saw blade myself?
You can, but it’s not recommended for carbide-tipped blades without a specialized grinder and fixture. Hand-filing only works on steel blades. For carbide, even light wear requires diamond grinding wheels to maintain the complex bevel angles correctly. For most DIYers, professional sharpening is the reliable choice.
Why does my new blade seem dull already?
Check three things: blade cleanliness (remove any factory coating), saw alignment (ensure the blade is parallel to the fence and miter slot), and that you’re using the correct blade type for the material. A crosscut blade will perform poorly ripping lumber, and vice-versa. Also, verify the blade is mounted correctly with all washers and nuts tight.
Before You Go
Here’s the one action to take this week: pull your most-used saw blade, clean it thoroughly with oven cleaner, and inspect every tooth under a bright light for that hairline wear mark. You’ll know in five minutes if it’s ready for work or ready for the sharpener.
This advice applies only to a blade that can still be sharpened. The Oertli manual states the definitive rule for blades with reversible or inserted knives: “Do not re-sharpen, but replace in time.” Some tools are designed to be consumables. Knowing when to sharpen and when to let go isn’t just about cut quality, it’s the difference between a controlled tool and a hazard waiting to happen.
