
How to Cut PVC Pipe With a Reciprocating Saw: Step-by-Step
This post contains affiliate links. As an Amazon Associate, we earn from qualifying purchases.
To cut PVC pipe with a reciprocating saw, you need a wood-cutting blade with around 10 teeth per inch, a way to clamp the pipe firmly, and a steady hand to follow a marked line all the way around the pipe’s circumference. The cut must be straight and perpendicular, and the outer edge must be beveled or chamfered to match the fitting you’re using.
This isn’t just about making two pieces out of one. A bad cut on a water line is a leak waiting to happen, and on a structural frame, it’s a weak joint. The difference between a job that holds and one that fails often comes down to the few minutes you spend at the saw, which is why knowing how to cut PVC pipe with a reciprocating saw matters.
What follows is the straight talk on making it work: the specific blade that won’t clog or shatter, the one clamping trick that stops vibration, and the post-cut step every pro does but most DIY guides skip.
Key Takeaways
- Sources offer different recommendations: Weekand.com recommends a wood-cutting blade with 10 teeth per inch, HomeFourExperts.com suggests a wood and metal blade with a 10/14 TPI design, and the Uni-Bell PVC Pipe Association advises using a saw blade intended for PVC pipe.
- Clamp the pipe on both sides of your cut line. A pipe that can wiggle will cause a wandering blade and an angled cut, guaranteed.
- Mark a guide line around the entire pipe circumference. A single mark on one side isn’t enough; you need a full ring to follow for a truly perpendicular cut.
- Bevel or chamfer the cut edge based on your fitting. For PVC-to-PVC joints, match the factory bevel; for PVC-to-iron, just remove the sharp outer edge.
- If cutting within 24 inches of a metallic joint restraint, loosen the device before you cut to avoid damaging its serrated teeth.
Is a Reciprocating Saw the Right Tool for PVC?
A reciprocating saw can absolutely cut PVC pipe, but whether it should is where sources disagree. The tool is powerful and fast, especially for large-diameter pipe or when you’re cutting in a tight space where a miter saw won’t fit. Formufit’s guide implicitly discourages it, cautioning against tools that cause bounce or are hard to control on curved surfaces. Weekand.com says it’s fine, and the Uni-Bell PVC Pipe Association simply states to use “a saw blade intended for PVC.”
It’s exceptional for cutting pipe that’s already installed in a wall or for quickly chopping up old lengths. The reciprocating saw is your option when precision is secondary to access and speed, a key point in any guide on how to cut pvc pipe with a reciprocating saw.
The 5-Step Process for a Straight Cut
Following a strict sequence turns a shaky, chattering mess into a controlled cut, which is the core of how to cut pvc pipe with a reciprocating saw. Miss a step, and you’ll spend more time fixing the joint than you saved with the power tool.
Step 1: Choose and Install the Blade
This is the single most important decision. Get it wrong, and nothing else will go right.
Common mistake: Using whatever blade is already in the saw. A metal-cutting blade packs too many fine teeth, they’ll clog with molten plastic almost immediately. A coarse demolition blade has too few teeth and will grab and shatter the PVC, especially if it’s old and brittle.
The consensus from multiple sources points to a wood-cutting blade with 10 teeth per inch (TPI). Weekand.com recommends a wood-cutting blade with 10 teeth per inch for PVC. HomeFourExperts.com notes that for thicker polymers, a 6-8 TPI blade can work. For a more versatile option, they suggest a wood and metal blade with a 10/14 TPI design. Some manufacturers produce bi-metal blades made specifically for PVC, ABS, and plastics.
Install the blade securely, following your saw’s tool-less mechanism or tightening the hex screw until it’s firm. A wobbly blade makes a ragged cut.
Step 2: Mark the Cut Line Precisely
Your cut is only as straight as your mark. A pencil line on one side of the pipe isn’t enough because as you cut and rotate the saw, you’ll lose your reference.
The Uni-Bell guide is adamant: “Draw a line all the way around the pipe circumference, making sure that the correct measurement is maintained.” This is essential for a perpendicular cut. Use a measuring tape and a pencil, then wrap a piece of masking tape around the pipe, aligning its edge with your line. The tape gives you a thick, visible guide to follow and helps minimize chipping.
Step 3: Secure the Pipe
If the pipe moves, the cut will be crooked. It’s that simple. The reciprocating saw’s aggressive action will walk the blade right off your line if the workpiece isn’t locked down.
Where this goes sideways: Setting the pipe on sawhorses and holding it with your knee. The first time the blade catches, the pipe will spin or kick, ruining the cut and risking injury.
You need to clamp the pipe on both sides of the cut line. A bench vise is ideal. If you’re using sawhorses, secure the pipe with two separate clamps, one on the left of your mark, one on the right. The goal is to eliminate all possible movement. For any pipe, the Uni-Bell guide emphasizes providing “adequate support to keep the pipe from moving during the cutting procedure” and mentions the need to prevent the saw kerf from closing and binding the blade.
Step 4: Make the Cut
With the right blade, a clear guide, and a secure workpiece, the actual cutting is straightforward. Position the saw so the blade guard (the shoe) is pressed firmly against the pipe. This contact point stabilizes the tool and dramatically reduces vibration.
Start the saw and let the blade reach full speed before contacting the PVC. Apply steady, moderate forward pressure, let the teeth do the work. Don’t force it. Follow your taped line, keeping the shoe flat against the pipe. The key is to keep the saw kerf open to prevent binding.
Step 5: Finish the Cut Edge
No power saw leaves a perfect edge on PVC. You will have burrs, small, sharp plastic fragments, on the inside and outside of the cut. If you don’t remove them, they can scratch the sealing gasket in a fitting, prevent the pipe from seating fully, and create a leak path.
| Fitting Type | Edge Preparation | Why It Matters |
|---|---|---|
| PVC Pipe into PVC Bell or Fitting | Bevel the edge to match the factory bevel’s length and angle. | Allows the spigot to correctly engage the sealing gasket without damaging it. |
| PVC Pipe into Iron Fitting | Chamfer the edge (remove the sharp outer edge only). Do not bevel. | Iron fitting bells are shallower; a bevel would prevent full engagement. |
Burrs should be removed using an appropriate tool, such as a file or sandpaper. For a bevel, careful work with a file or sandpaper will do. This one-minute finishing step is what separates a hack job from a professional one.
Blade Selection: The TPI Breakdown
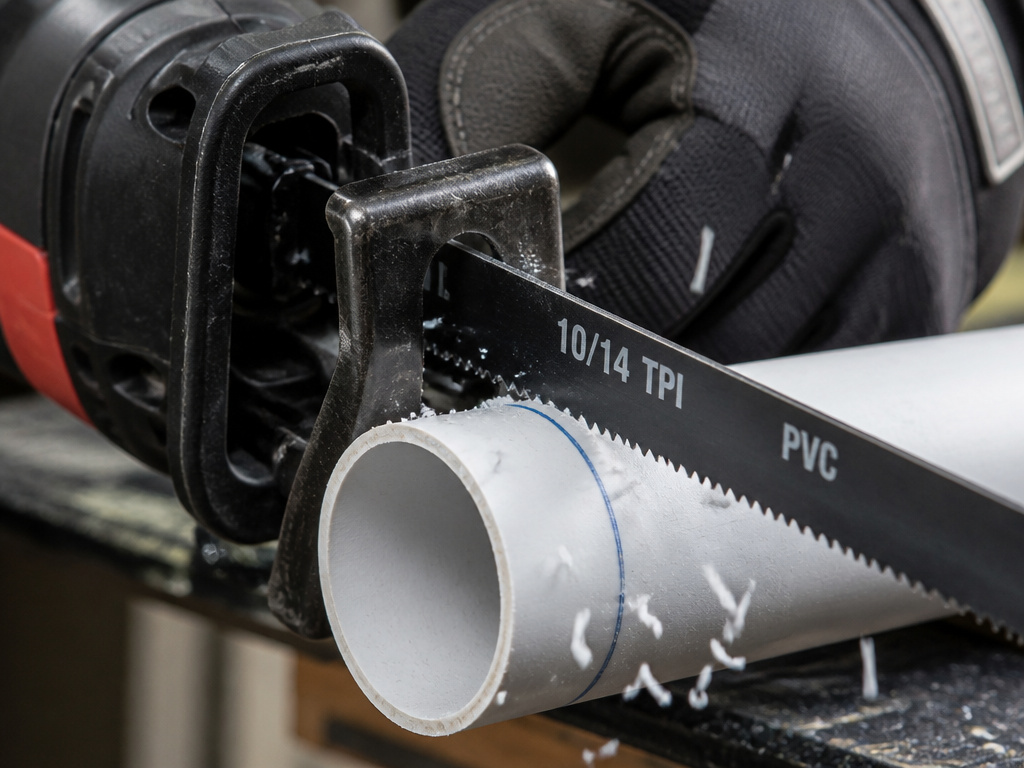
Choosing a blade isn’t about grabbing the first one in your kit. The teeth-per-inch (TPI) rating dictates how the blade interacts with the plastic.
| Blade Type / TPI | Best For | What Happens If Wrong |
|---|---|---|
| Metal-Cutting (18-24+ TPI) | Thin metal, conduit. | Teeth clog instantly with melted PVC, creating friction, heat, and a stalled cut. |
| 10-14 TPI (Wood-Cutting) | PVC Pipe, acrylic up to 1/4″. | Clean cut with efficient chip removal and minimal grabbing. |
| 6-8 TPI (Demolition) | Thick polymers, heavy-duty rough cuts. | Can chip or shatter brittle PVC; cut will be rougher. |
The 10 TPI sweet spot exists because the teeth are large enough to clear the plastic shavings without clogging, yet fine enough to cut without grabbing and cracking the material. Bi-metal blades are often recommended for their durability. For a deep dive on all the options, see our guide on reciprocating saw blade types, which breaks down the anatomy of a bi-metal blade.
Safety and Pro Tips

Power tools and plastic shavings demand respect. Beyond the standard eye and ear protection, a few PVC-specific hazards need addressing.
Before you start: Wear a dust mask or respirator. Cutting PVC creates fine plastic particulate you don’t want to inhale. Secure long hair and loose clothing. Ensure your work area is clear and your clamps are rated for the force they’ll handle.
Dealing with Heat: A reciprocating saw blade can generate significant friction heat. If the cut edges start to melt and fuse, you may be going too fast or using a dull blade. Slow down, let the blade cool, and ensure you’re using a sharp 10 TPI blade. Heat-welded plastic is hard to cut through and weakens the pipe.
Cutting In-Place Pipe: This is where the reciprocating saw shines. When cutting pipe already installed in a wall or ceiling, you often can’t get a full rotation around it. The key is to keep the cut as square as possible from both approaches.
The 24-Inch Rule: The Uni-Bell guide specifies a crucial edge case: If your cut is within 24 inches of a metallic joint restraint device (the kind with serrated teeth that grip the pipe), you must loosen the device before cutting. If you don’t, the vibration and force of the saw can damage the restraint’s gripping mechanism. Tighten the device again after the cut is made.
Reciprocating Saw vs. Other Tools
So when does it make sense to use the Sawzall instead of another tool? This comparison table lays out the trade-offs.
| Tool | Best For | Speed | Cut Quality | Control & Stability |
|---|---|---|---|---|
| Reciprocating Saw | Large pipe, in-place cuts, demolition, tight spaces. | Very Fast | Rough (requires deburring/beveling) | Low (high vibration) |
| Ratcheting Pipe Cutter | New pipe, clean plumbing joints. According to FORMUFIT, ratcheting cutters can handle up to 1-1/2″ pipe. | Fast | Excellent (clean, square compression cut) | High |
| Power Miter Saw | High-volume, repeat cuts to same length, furniture projects. | Fast | Rough (requires deburring) | High (when clamped) |
| Hacksaw/Backsaw | One-off cuts, any size, minimal tool investment. | Slow | Good (with fine-tooth blade) | Medium |
To see all your options, see our article comparing the best saws for PVC pipe. The reciprocating saw wins on accessibility and raw speed, but you pay for it in the extra finishing work required.
Fixing Common Mistakes
You rushed the mark, the pipe wasn’t clamped well, and now you’ve got an angled cut. Don’t trash the pipe yet.
Problem: Angled Cut. The pipe end is not perpendicular to its length.
Fix: You need to re-square the end. Re-mark the pipe, ensuring the line is perpendicular all the way around. Re-clamp securely. This time, cut slowly, using the existing angled face as a reference to ensure you’re removing material evenly. It’s tricky, but often salvageable.
Problem: Chipped or Shattered Edge. The PVC, especially if old, cracked during cutting.
Fix: If the damage is minor and near the very end, you can often cut off a small amount to get past the compromised material. If the crack runs lengthwise, the pipe is garbage. To prevent this next time, use a sharp 10-14 TPI blade, support the pipe fully to prevent flexing, and avoid using ratchet cutters on cold PVC, as HomeFourExperts.com notes they can compress and crack it.
Problem: Melted/Fused Cut. The plastic re-sealed behind the blade.
Fix: The heat was too high. Let the pipe cool completely. You’ll likely need to re-initiate the cut with a fresh, sharp blade, using slower strokes to reduce heat. Often, it’s faster to cut off the fused section entirely and start again.
How to elevate PVC pipe for a reciprocating saw cut
Proper support is required to keep the pipe from moving during the cut. Elevating the pipe off the ground provides essential clearance for the reciprocating saw blade to pass through completely without binding or striking the floor. Use stable blocks or supports on either side of your cut line to hold the pipe securely. This setup also helps you keep the saw kerf open, which prevents the blade from pinching. With the pipe elevated and firmly supported, you can focus on guiding the saw to make a straight, perpendicular cut all the way around the pipe’s circumference.
Frequently Asked Questions
Can you use a reciprocating saw to cut PVC pipe?
Yes, a reciprocating saw can cut PVC pipe effectively, particularly for large diameters or pipes already installed in tight spaces. Success hinges on using a blade with around 10 teeth per inch (TPI), clamping the pipe securely, and following a marked line around the entire circumference.
What is the best reciprocating saw blade for cutting PVC pipe?
The best blade is a wood-cutting or general-purpose blade with 10 to 14 teeth per inch (TPI). Blades specifically marketed for plastics, like the Diablo DS0611BPFG5, are excellent choices. Avoid fine-tooth metal blades (they clog) and very coarse demolition blades (they can chip the PVC).
What is the best tool to cut a PVC pipe?
For a single, clean cut on new pipe, a ratcheting PVC pipe cutter is the best tool. For cutting many pieces to the same length, a power miter saw is fastest. A reciprocating saw is best when you need to cut pipe that’s already installed in a wall or when working in a confined area.
How do you cut PVC pipe straight without a guide?
You don’t. Attempting a straight cut without a guide is a recipe for an angled, leaky joint. At minimum, mark a line around the entire pipe with a pencil and straight edge. Better yet, wrap masking tape at your cut line or use a hose clamp as a physical guide for the saw’s shoe.
Why is my PVC pipe melting when I cut it?
The blade is generating too much heat from friction. This is usually caused by using a dull blade, forcing the cut too fast, or using a blade with the wrong TPI (like a fine metal blade). Switch to a sharp 10-14 TPI blade, slow your cutting speed, and let the teeth do the work without excessive pressure.
The Bottom Line
A reciprocating saw will get through PVC, but it asks more of you than a dedicated cutter does. Your responsibility is to match it with the right 10 TPI blade, immobilize the workpiece like it’s going to fight back, and never skip the finishing work on the cut edge. That’s the difference between a joint that holds and one you’ll be fixing next weekend.
If your project involves more than a couple of cuts on new pipe, put the Sawzall down. Reach for a ratcheting cutter or a miter saw, they’re the right tools for that job. But when you’re up against an existing, hard-to-reach line, that’s when the reciprocating saw earns its keep. Just follow the steps, respect the heat, and always deburr. Your plumbing, or your project, will thank you.
