
How to Staple Carpet With a Staple Gun: Step-by-Step Guide
This post contains affiliate links. As an Amazon Associate, we earn from qualifying purchases.
To staple carpet correctly, you must follow three essential rules: staple only the carpet cushion (pad), never staple carpet to tack-strips, and use heavy-duty staples at least 1/2″ long. The official industry standard from the Carpet and Rug Institute prohibits stapling carpet directly to the floor or strips, but a common DIY guide contradicts this, which is where most projects go wrong.
That contradiction between the CRI’s “do not staple” and a generic guide’s “staple where needed” is the whole game. It’s not about finding a stronger staple gun; it’s about knowing which source governs your project. A professional installation follows the CRI standard. A temporary, DIY fix might follow the generic guide, but you accept the risk of premature failure and voided warranties. A generic guide might explain how to staple carpet with a staple gun.
What follows: a breakdown of the industry rule versus the DIY workaround, the precise steps for stapling carpet cushion (which is allowed), the tools and staple specs that actually work, and what happens when you get the gully, the gap between tack-strip and wall, wrong by even a quarter-inch.
Key Takeaways
- Never staple carpet to tack-strips, the Carpet and Rug Institute (CRI) and major manufacturers like Shaw Industries explicitly prohibit it to allow for proper stretching.
- Staple the carpet cushion (pad), not the carpet, secure it to a wood subfloor with staples spaced no more than eight inches apart around the perimeter and down the center.
- Use heavy-duty staples at least 1/2″ long for cushion installation; for stapling thin materials like underlayment, a narrower crown staple prevents splitting.
- Maintain indoor conditions of 65-95°F (18-35°C) with a maximum relative humidity of 65% for at least 48 hours before and during installation, and 72 hours after, per CRI 105 standards.
- The proper gully space is a point of variation: Shaw Industries states it should be approximately 2/3 of the carpet thickness, while the CRI/Shaw Industries guideline says it should be slightly less than the carpet thickness, with both agreeing it should not exceed 3/8″.
The Golden Rule: Stapling Carpet vs. Stapling Cushion
This is where every online tutorial either shines or fails. The official, citable standard from the Carpet and Rug Institute is unambiguous. Their CRI 105 residential carpet standard states: “Do not staple carpet to tack-strips.” Shaw Industries echoes this in their guidelines. The carpet must be stretched 1% to 1.5% and hooked onto pins.
Common mistake: Stapling carpet directly to the floor or over tack-strips. This prevents the necessary stretching, leading to ripples, buckling, and immediate failure underfoot. The carpet will look loose within weeks.
Yet, a widely circulated generic DIY PDF (KG-Staples.pdf) instructs: “Staple where needed” and “Staple to the floor, as close to the wall as possible.” This is the contradiction you’ll find. The professional standard forbids it; a DIY shortcut permits it. Your choice hinges on whether you need a permanent, warranty-compliant install or a quick, temporary fix after reading about how to staple carpet with a staple gun.
So, when can you use a staple gun? For securing the carpet cushion or pad. This is a mandatory and accepted step. Shaw Industries specifies staples can be used to fasten cushion to wood floors, placed no more than eight inches apart. You’ll also use a staple gun for attaching any moisture-retarder felt under hardwood flooring. The tool belongs in the process, just not on the final carpet layer.
| Material | Staple Allowed? | Professional Guideline Source | Purpose |
|---|---|---|---|
| Carpet (final layer) | No | CRI 105, Shaw Industries | Must be stretched and hooked on tack-strips. |
| Carpet Cushion (Pad) | Yes | Shaw Industries | Fasten to wood subfloor with staples ≤8″ apart. |
| Moisture Retarder (Felt) | Yes | Mullican Flooring | Secure underlayment for staple-down wood flooring. |
| Tack-Strips | No (on radiant heat) | CRI 105 | On radiant-heated floors, use adhesive, not nails/screws. |
Tools and Materials: Choosing the Right Staple Gun
Not all staple guns are equal for this job. You need a tool that can drive a heavy-duty staple at least 1/2″ long through a carpet cushion and into a plywood subfloor. A light-duty desktop stapler will buckle and jam.
For cushion installation, a manual heavy-duty staple gun or a pneumatic stapler are the right choices. Cordless electric models can work, but their bulk and battery life are frustrating for large areas. The key is power and reliability, not portability.
You’ll also need the right staples. The generic guide calls for “heavy-duty staples (minimum of 1/2” long).” For cushion, a wide-crown staple (often 1/2″ crown width) provides the holding surface. If you’re attaching a thin underlayment like 15lb. Felt, switch to a narrow-crown staple to avoid splitting the material. Always match the staple leg length to the combined thickness of your materials without piercing the underside of the subfloor.
Your toolkit checklist:
- Heavy-duty staple gun (manual or pneumatic)
- 1/2″ long, heavy-duty staples for cushion
- Utility knife with extra blades
- Knee kicker (for positioning carpet, not stretching)
- Power stretcher (for proper 1-1.5% carpet tension)
- Tack-strips and pins
- Measuring tape
- Safety glasses
Step-by-Step: How to Staple Carpet Cushion (Pad)
This is the core staple-gun work. The carpet itself gets stretched later. Follow these steps precisely to create a stable, wrinkle-free base.
1. Prepare the Subfloor.
The subfloor must be clean, dry, and structurally sound. For a wood subfloor under carpet cushion, ensure it is clean, dry, and structurally sound. (Note: The 5/8″ minimum plywood specification is from Mullican Flooring for staple-down wood flooring, not specifically for carpet.) Sweep and vacuum thoroughly. Any debris under the cushion will create a visible lump later. Check that the room’s temperature is at least 65°F, this isn’t just comfort; it’s a CRI 105 requirement for adhesive and material performance.
2. Lay and Trim the Cushion.
Roll out your carpet cushion, allowing it to extend a few inches up each wall. Trim it roughly to size with a utility knife, but don’t final-trim until it’s partially fastened. The goal is a single piece where possible. If seams are necessary, Shaw Industries says cushion seams should be installed at right angles to carpet seams or staggered at least six inches from carpet seams.
3. Staple the Cushion.
Start at one wall. Pull the cushion taut and drive your first staple in the center of that wall’s edge. Work your way outwards from that staple, following Shaw’s guideline: place staples no more than eight inches apart around the perimeter and down the center. Stagger staples along any seams to prevent a depressed line. The cushion should be smooth and tight, with no wrinkles or bubbles.
Where this goes sideways: Stapling through wrinkles. If you don’t smooth the cushion from the center outward as you work, you’ll lock in a permanent bulge. The carpet will mirror that imperfection.
4. Tape the Seams.
Once the cushion is secured, tape any seams with 2″ wide duct tape per Shaw’s instructions. This prevents the cushion sections from separating under the stress of carpet stretching.
5. Install Tack-Strips.
Now, install tack-strips around the perimeter. They should sit with the pins pointing toward the wall, leaving the critical gully space. On a wood subfloor, secure the tack-strips appropriately. On concrete, use adhesive. On radiant-heated floors, use only manufacturer-approved adhesive to secure tack-strips, nails or screws risk damaging the heating elements.
The Gully: Why That Tiny Gap Matters More Than Your Staple Gun
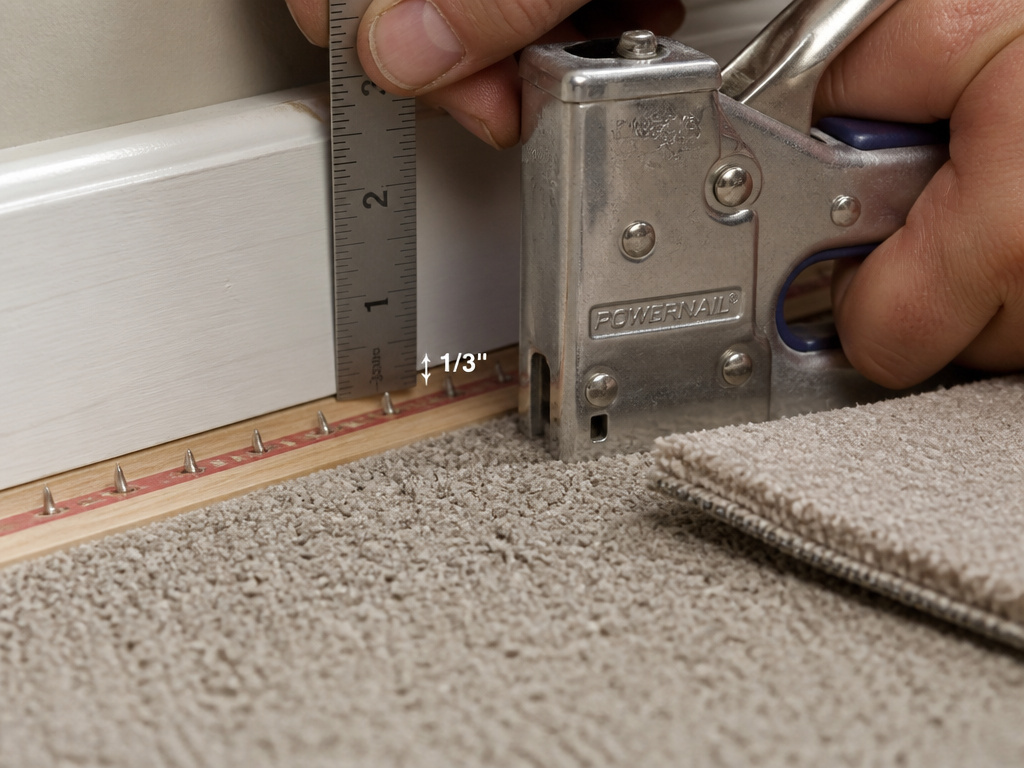
The gully is the space between the installed tack-strip and the wall. Get this wrong, and no amount of stapling or stretching will save the install, making it more critical than the how to staple carpet with a staple gun question. Shaw Industries states the proper gully is “approximately 2/3 of the thickness of the carpet and should not exceed 3/8″”, while the CRI/Shaw Industries guideline says it should be slightly less than the carpet thickness, also not exceeding 3/8 inch.” The CRI offers a similar spec: slightly less than carpet thickness, not exceeding 3/8 inch.
Why? The carpet edge gets tucked into this gap and hooked onto the pins. Too small a gap, and you can’t tuck the carpet deeply enough; it won’t grip the pins securely and will pull out. Too large a gap, and the carpet isn’t supported near the wall edge, leading to buckling and a visible dip along the baseboard.
How to measure: Know your carpet thickness (it’s on the spec sheet). Calculate 2/3 of that. If your carpet is 1/2″ (0.5″) thick, your gully should be about 0.33″, well under the 3/8″ (0.375″) max. Use a small spacer or simply eyeball it as you nail the strips down. That quarter-inch is the difference between a locked-in edge and a failing one.
Carpet Installation: Where Staples Are Not Used
With the cushion stapled down and tack-strips set with the correct gully, you now install the carpet itself. This is a stretch-and-hook process, not a staple-and-pray one.
1. Condition the Carpet.
Dry-lay the carpet in the room. Shaw Industries requires conditioning at a minimum temperature of 65°F and relative humidity between 10% and 65% for 24 hours before, during, and permanently after installation. The CRI 105 standard, however, requires maintaining conditions for 48 hours before and during, and 72 hours after installation. This allows the material to relax and expand or contract to room conditions, which prevents shrinkage or expansion after installation.
2. Position and Stretch.
Lay the carpet over the cushioned floor. Use a knee kicker to roughly position it against the wall. Then, use a power stretcher to achieve the 1% to 1.5% stretch in both directions as specified by Shaw Industries. This tension is what locks the carpet onto the tack-strip pins and eliminates future ripples. A knee kicker alone cannot provide adequate, even tension across a full room.
3. Hook and Trim.
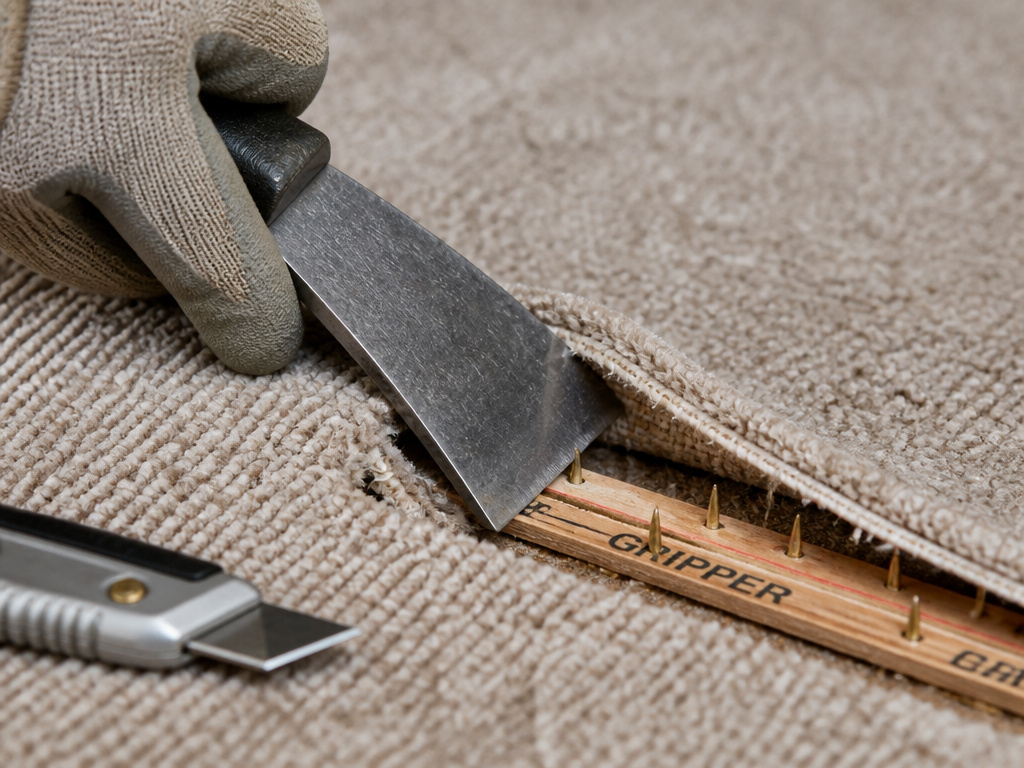
Force the carpet edge down into the gully and onto the tack-strip pins using a carpet chisel or stiff putty knife. You’ll hear a distinct thunk-thunk-thunk as the backing engages each pin. Once secured along a wall, use a utility knife held almost parallel to the floor to trim the excess carpet. A sharp blade is essential here; a dull blade will tear the backing instead of cutting it.
4. Seal Seams.
For seams, use seaming tape with thermoplastic adhesive, never staples. For seams, use seaming tape, never staples. Staples at a seam would create a hard, visible line and a weak point.
Troubleshooting Common Staple Gun Problems
Even when stapling the right material (cushion), you can hit snags.
- Staples not holding: The subfloor might be too hard or the staple legs too short. On hardwood, the generic guide notes “it may be necessary to tap the staple with a small hammer to drive it in fully.” For concrete subfloors, Shaw Industries recommends gluing the cushion using a 15″-18″ zig-zag line of adhesive.
- Jammed staple gun: This often happens from using the wrong staple size for your gun model or from driving at an angle. Clear the jam according to your tool’s manual, and always use manufacturer-specified staples.
- Carpet buckling after installation: This is almost never a staple issue. It’s a stretching issue. The carpet wasn’t tensioned to 1-1.5% with a power stretcher, or the gully space is incorrect. Stapling the carpet would only hide the symptom temporarily while creating a bigger problem.
Easy to miss: Traffic and moisture restrictions. Restrict carpet exposure to water for a minimum of 30 days after installation. Letting a pet or a spilled drink onto a fresh install during this period can cause adhesive failure.
How to Staple Carpet on Stairs
The process for stapling carpet on stairs focuses on the pad, not the carpet itself. You must fasten the carpet cushion to the wood subfloor. Use heavy-duty staples of sufficient length to penetrate the pad and grip the wood securely. Place staples no more than eight inches apart around the perimeter and down the center. Stagger staples along any cushion seams to prevent creating a depressed line that will show through the carpet. The carpet is then stretched and hooked onto tackless strips. Do not staple the carpet to these tack-strips.
When to Use Glue with Staples for Carpet
In high-traffic areas or on concrete subfloors, using adhesive in addition to staples provides extra security for the carpet cushion. For wood floors, you primarily staple the cushion, but adding a perimeter bead of glue can prevent shifting. On concrete, glue is necessary; apply it in a 15″-18″ zig-zag line around the perimeter where the tackless strip will sit, along any cushion seams, and in the center of the area. After the cushion is set, restrict traffic over the installation for a minimum of 24-48 hours to allow the adhesive to cure fully. This combined method helps lock the cushion in place, creating a more stable base for the stretched carpet and preventing wrinkles or movement where people walk most.
Frequently Asked Questions
Can you staple carpet with a regular staple gun?
You can, but you shouldn’t, at least not for a permanent, standard-compliant installation. A regular staple gun can be used for the carpet cushion (pad) if it can drive a 1/2″ heavy-duty staple. For the carpet itself, industry standards prohibit stapling in favor of stretch-and-hook methods. Using a staple gun on the carpet is a DIY shortcut that leads to buckling and is not recognized by the Carpet and Rug Institute.
What kind of staple gun do you use for carpet?
For stapling carpet cushion, use a manual heavy-duty staple gun or a pneumatic stapler. These provide the force needed to drive a long staple into a wood subfloor. For the final carpet layer, you do not use a staple gun; you use a power stretcher and knee kicker.
How do you use a staple gun on carpet padding?
Position the padding smoothly on the wood subfloor. Starting at a wall, pull it taut and drive a staple into the center of the edge. Continue placing staples no more than eight inches apart around the entire perimeter and in a line down the center. Stagger staples at seams. The goal is a flat, tight surface without wrinkles.
Can you just staple carpet down?
Officially, no. The CRI 105 and 104 standards for residential and commercial carpet, along with manufacturer guidelines like those from Shaw Industries, require carpet to be stretched and attached to tack-strips. However, a common DIY guide (KG-Staples.pdf) suggests “staple where needed” and “staple to the floor.” This is a direct contradiction. Choosing to staple the carpet down is a temporary method that voids warranties and will likely fail.
Before You Go
The line is clear. The professional standard, documented in the CRI 104 commercial carpet standard and CRI 105, defines a staple gun’s role: securing the underlayment, not the finished surface. If your project demands a permanent, warranty-backed result, follow that standard to the letter, stretch the carpet, hook it on strips, and keep the stapler for the cushion.
The reality is this. If you’re laying carpet in a low-traffic attic storage space or a temporary booth, and you understand the trade-offs, the DIY “staple it down” method exists. Just know you’re choosing a shortcut over longevity. The rule of thumb that decides it: if you need to ask “is this right?”, you’re better off renting a power stretcher and doing it the way the people who make the carpet say you should. That smell of fresh carpet shouldn’t be followed by the sound of ripping seams a month later.
