
Cutting Compound vs Polish for Car Paint: How to Choose
This post contains affiliate links. As an Amazon Associate, we earn from qualifying purchases.
Cutting compound and polish for car paint differ by abrasive size and job. A cutting compound uses coarser abrasives to remove deeper defects like scratches, oxidation, and sanding marks, with specific grit removal varying by product. A polish uses finer abrasives to refine the surface, remove light swirls, and bring up gloss after compounding or on its own for minor imperfections.
That difference is the line between fixing the problem and making it worse. Pick the wrong one and you either waste hours polishing a scratch that needs compound, or you burn through more clear coat than necessary and leave a hazy finish. Understanding cutting compound vs polish for car paint is therefore essential.
What follows: a simple test to decide, the specs that prove the difference, how to pair the pad, and the one mandatory step everyone tries to skip.
Key Takeaways
- Run the fingernail test on the worst scratch. If your nail catches, you need a compound, a polish won’t touch it.
- Match the pad to the product. A cutting compound belongs on a firmer foam or microfiber pad; a polish works on a softer foam finishing pad.
- Inspect after compounding. Sources disagree on this point: CarCareTruth states many modern compounds finish clean enough to skip the second polishing step, while others like Dr. Beasley’s and Adam’s Polishes suggest a polishing step is generally expected for finishing.
- Protect immediately after polishing. A polish leaves the paint surface exposed; apply a wax, sealant, or ceramic coating within 24 hours.
- Start with the least aggressive method. Always test a polish on a small area first. Move to a compound only if the polish fails.
The Fingernail Test (and Other Decision Rules)
You don’t need a lab. You need your fingernail and a bright light.
CarCareTruth states that if your fingernail catches on a scratch, it is too deep to simply polish out and the next step is careful wet-sanding followed by a compound. That’s the rule from CarCareTruth, and it’s the single fastest way to sort your paint’s problems. A polish has fine abrasives meant for light swirls and gloss. It cannot level a scratch that your nail can feel.
Common mistake: Skipping the fingernail test and going straight to compound. You’ll remove more clear coat than needed, and on modern thin paint, that’s a finite resource you can’t get back.
For everything else, let the defect type guide you. Light swirls, haze, or dull-but-smooth paint? Use a polish. Visible scratches, heavy swirls, oxidation, or etching? Start with a compound, then inspect. If the paint is already in good shape and you just want fast gloss and protection, use an all-in-one product, but don’t expect it to remove genuine scratches.
The Grit Scale: What Each Product Actually Removes
The names “compound” and “polish” are vague. The grit ratings on the technical data sheets are not. This is where manufacturers tell you exactly what their product is engineered to do in the cutting compound vs polish for car paint spectrum.
| Product Name | Removes Sanding Marks From Grit | Primary Use |
|---|---|---|
| U-POL 333 Cutting Compound | P1500 or finer | Heavy defect removal, restoring paintwork |
| Adam’s Compound | 1500-2000 Grit | Removing heavy oxidation, swirls, and stains |
| Mirka Polarshine Polishing Compounds | P2000 or finer (depending on surface and pad) | One-step correction on automotive paints |
| FEYNLAB A50 Super Heavy Cutting Compound | 1000-grit | Deep scratches, severe oxidation on hard clear coats |
| Menzerna One-Step Polish (OSP) 3in1 | P3000 and finer | Light correction, finishing, and wax in one step |
| Infinity Wax POLISH Medium Cut Compound | P2500 defects | Moderate defect removal with a 6/10 cut rating |
The spread is huge. FEYNLAB A50 tackles 1000-grit sanding marks, the kind from aggressive sanding. U-POL 333 starts at P1500. Menzerna’s OSP 3in1, labeled a polish, handles P3000 and finer marks, which is why it blurs the line.
The takeaway: read the spec sheet, not just the bottle label. A “medium cut compound” might be another brand’s “heavy polish.”
Pad Pairing: The Liquid is Only Half the Equation
An aggressive compound belongs on a cutting pad. A fine polish belongs on a softer polishing or finishing pad. Mismatching them wastes the product and can leave you under-correcting or hazing the paint.
Think of the pad and the liquid as one system. Move them up or down in aggressiveness together. Most pad lines use color as a rough guide, though the exact colors vary by brand.
- Cutting Pads (Orange/Yellow firm foam, Microfiber): Pair with cutting compounds. They provide the bite needed to level defects.
- Polishing Pads (White/Blue medium foam): Pair with polishes for refining and gloss enhancement.
- Finishing Pads (Black/Red soft foam): Used with very fine polishes or for applying protection products.
Menzerna is specific: their Heavy Cut Compound 1100 is optimized for use with lambswool polishing pads. Using it on a soft black pad would be slow and ineffective. Conversely, using a finishing polish on a microfiber pad would likely introduce micro-marring.
Where this goes sideways: Using a cutting compound on a soft finishing pad. You’ll work the product to death, generate heat, and likely not remove the defect, leaving you frustrated and the paint hot.
Your polishing pads choice is as critical as your product choice. For a deep dive on materials, our guide on foam vs wool pads breaks down when to use each.
The One-Step vs Two-Step Debate
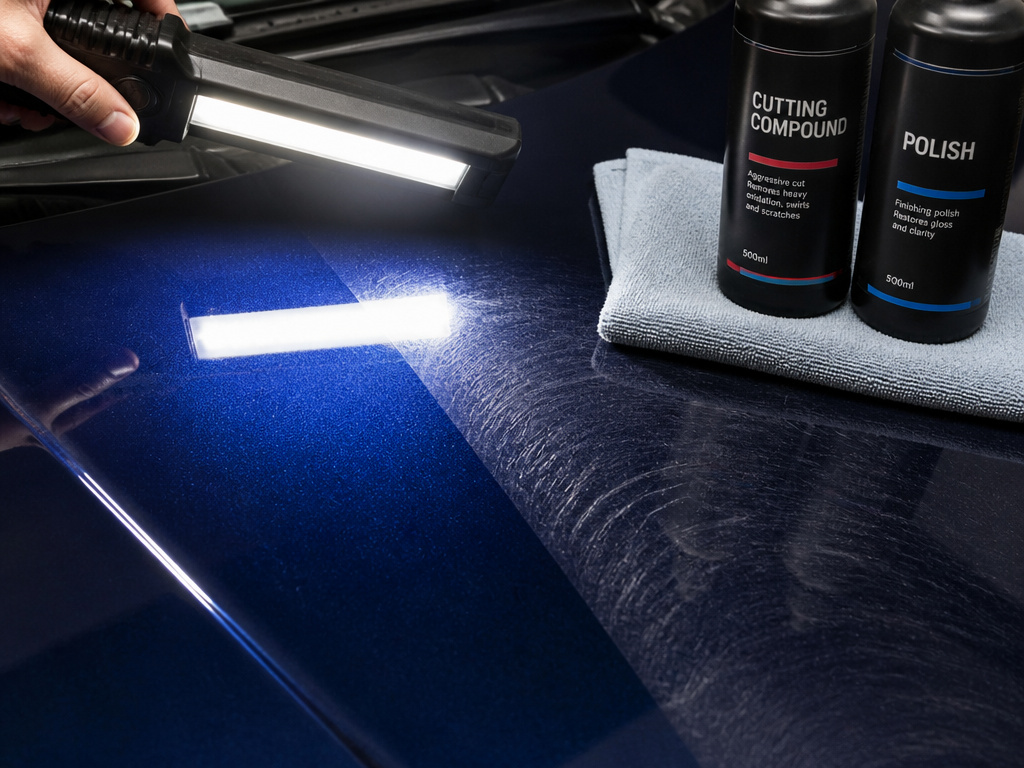
Do you always need to polish after compounding? The sources disagree on this cutting compound vs polish for car paint workflow, and that’s an honest reflection of how products have evolved.
The Two-Step Traditionalists: Brands like Menzerna and Adam’s Polishes outline a clear progression. Menzerna recommends for an exceptionally glossy finish after using Heavy Cut Compound, apply a Medium Cut polish and a Finish polish. Adam’s positions their compound as a step-one product creating a haze-free finish to easily move to step-two.
The One-Step Realists: CarCareTruth states that many modern compounds finish clean enough to skip the second polishing step. The honest test is to inspect, not to assume. If you see haze under bright light after wiping off the oils, polish it out. If it looks clean and glossy, you’re done.
This is a result you have to verify, not a rule you can follow blindly. After compounding a test section, wipe it clean and look at it from multiple angles under a bright LED work light or in direct sunlight. If you see fine holograms or a lack of deep clarity, that’s your signal to follow with a polish.
How Much Clear Coat Are You Removing?
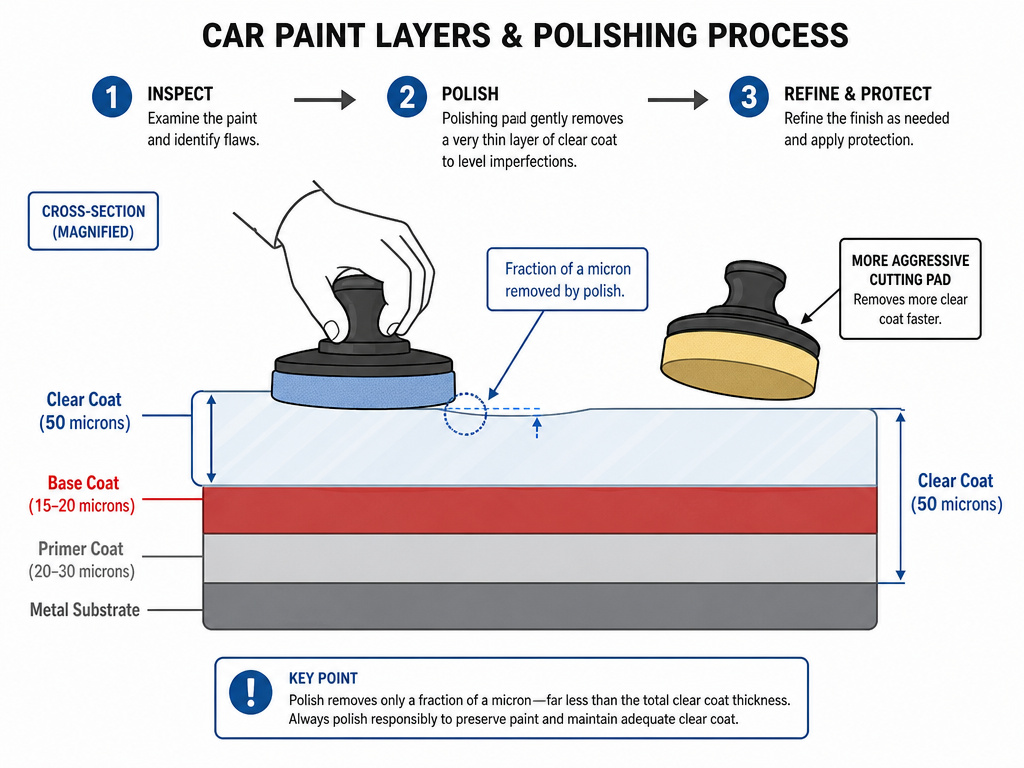
This is the scary part, and the data is thin. No manufacturer publishes micron removal rates because they vary wildly with paint hardness, pad, machine, and pressure.
One professional detailing blog, Equalle, offers an estimate, but manufacturers do not publish micron removal rates as they vary wildly with paint hardness, pad, machine, and pressure. Finishing polishes remove a fraction of a micron.
A factory clear coat has a finite thickness.
50 microns thick. You do the math. This is why the “least aggressive method” rule is essential for preservation. Always start with a polish and a soft pad. Move to a compound only when you must.
Safety, Storage, and the Fine Print
This is chemistry, not magic. The technical data sheets carry important warnings and specs that affect your results and safety.
- VOC Content: U-POL 333 has a VOC content of 133g/l. Mirka’s marine compounds range from 16.8% to 8.0% VOC. Work in a well-ventilated area.
- PPE: FEYNLAB encourages the use of gloves, an approved face mask, and eye protection. U-POL states appropriate personal protective equipment should always be used.
- Storage: U-POL 333 should be stored in a frost-free environment. Menzerna polishes have a shelf life of two years from production.
- Body-Shop Safe: Products like Adam’s Compound are formulated to be silicone-free and body shop safe, meaning they won’t interfere with subsequent painting or coating.
Ignoring these isn’t tough; it’s careless. The dust from some compounds isn’t just messy, you don’t want to breathe it in. Gloves keep the product off your skin, and safety glasses are cheap insurance.
Product Spotlights: What the Specs Tell You
We can see how specific products embody these principles. This list demonstrates how specs dictate use.
Menzerna One-Step Polish (OSP) 3in1
This product shows the blurry line. Its technical sheet says it removes P3000 and finer sanding marks and contains wax. For a 40cm x 40cm area, it recommends 3-4 pea-sized drops for a 95mm pad, 5 pea-sized drops for a 150mm pad, and 6-7 pea-sized drops for a 180mm pad. It should be used with a Menzerna Medium Cut Foam Pad for scratches, fresh paint sanding marks, washing, and usage marks, starting at medium speed and pressure, then reducing. You leave it to dry for 5 to 10 minutes before removal. It’s a polish, a finish, and a protectant in one.
Adam’s Compound
This 32oz bottle is a water-based formula with a Diminishing Abrasive Technology blend of alumina oxides. It’s VOC compliant, silicone-free, and body shop safe. Adam’s says it removes 1500-2000 grit sanding marks and should be used as a step-one compound, with the expectation of moving to a step-two polish for perfection.
U-POL 333 Cutting Compound Paste
Available in a 250g tube (paste) and 1L bottles (both liquid and paste formulations), this product is designed to remove abrasive marks P1500 grit or finer. The application guide says to begin compounding at a buffer speed of 1200-1500 RPM with medium pressure. U-POL then recommends following it with their 334, 335, and 336 products for further enhancement, a clear multi-step system.
Choosing between them starts with the grit of your problem, then your desired workflow. For a guided correction process, a system like U-POL’s is logical. For a quicker job on lighter defects, a one-step like Menzerna’s OSP might suffice.
Why You Must Do a Test Spot First
Never start by compounding or polishing an entire panel. Always do a test spot in an inconspicuous area. This shows you exactly how the product, pad, and machine work together on your specific paint. You can see the level of correction achieved and check for any hazing or micromarring left behind. This tells you if you need to adjust your technique, switch pads, or add a finishing polish step. It prevents you from making a mistake across the whole car and ensures you use the least aggressive method that gets the job done.
Frequently Asked Questions
Should I polish or compound my car?
Use the fingernail test. If your nail catches on scratches, or if you have heavy swirls or oxidation, start with a compound. If the defects are light swirls or haze, start with a polish. Always try the least aggressive method (polish) on a test spot first.
Is polish the same as cutting compound?
No. While terms are used loosely, a cutting compound uses larger, more aggressive abrasives to remove deeper defects and more clear coat. A polish uses finer abrasives to refine the surface and enhance gloss. Always check the product’s stated grit rating or cut level.
Do you use cutting compound before polishing?
Traditionally, yes, compound to remove defects, then polish to refine the finish and remove any haze. However, many modern compounds finish so cleanly that a polish may not be necessary. You must inspect the result after compounding to decide.
Can I use a polish to remove deep scratches?
No. A polish has fine abrasives meant for light swirls and gloss. Deeper scratches need a compound to level the clear coat below the scratch depth. If your fingernail catches in the scratch, it is too deep for polish alone.
Will compound or polish ruin my clear coat?
Both remove a microscopic layer of clear coat, which is how they work. The risk comes from overuse, using too aggressive a product, or improper technique. Used in moderation with the least aggressive product that does the job, they are safe. Always measure paint thickness if possible.
Before You Go
One rule most guides skip: if you polish or compound, you must protect the paint afterward. A polish leaves the surface clean and exposed. Without a wax, sealant, or ceramic coating, UV rays and contaminants attack that fresh surface immediately. That final step is essential, as it locks in your work.
The other essential step? The test spot. Before you cover a whole panel, work a 2×2 area. Dial in your product, pad, and machine speed there. It takes ten minutes and saves you from a whole-car correction that went wrong. Your orbital polisher is a powerful tool. Respect it, and it will respect your paint.
Everything above assumes you’re working on paint that still has clear coat to give. If your paint is already thin, the best compound in the world is the wrong choice. Sometimes, the right tool for the job is a professional’s touch.
