
Brad Nailer vs Pin Nailer: Which One Should You Buy First?
This post contains affiliate links. As an Amazon Associate, we earn from qualifying purchases.
A brad nailer drives 18-gauge headed nails for a strong, versatile hold on trim, cabinets, and light construction. A pin nailer shoots 23-gauge headless pins that leave near-invisible holes; its job is to act as a clamp while glue sets, not to hold weight on its own. For your first tool, buy the brad nailer, it handles the broad range of work a pin nailer cannot substitute for.
That 18-gauge versus 23-gauge spec isn’t a marketing footnote. It dictates the physical limit of what each tool can fasten. The thinner 23-gauge pin bends under lateral stress, which is why sources call it a clamping substitute. The 18-gauge brad, with its tiny head, resists that same stress enough to secure a face frame or a piece of trim without glue as a partner. The choice between them starts with a simple question: are you assembling or decorating? Understanding the core differences in a brad nailer vs pin nailer is essential.
What follows: a breakdown of the gauge system, the specific jobs each tool wins at, a frank look at where even pros disagree, and a direct recommendation based on common first projects.
Key Takeaways
- Buy the 18-gauge brad nailer first. It handles cabinet assembly, face frames, and most trim work where a pin nailer lacks holding power.
- A 23-gauge pin nailer’s best use is holding delicate trim or veneer while glue dries; never rely on pins alone to hold a structural joint.
- For baseboards, sources disagree: some state the 18-gauge brad nailer works on trim up to 1/2 inch thick, while others note it can be used for baseboards but lacks the holding power of a 16-gauge finish nailer, which is often considered the standard.
- Always match your nail length to the job. Using 1-inch brads for baseboards fails because they can’t reach the stud; 2-inch is the minimum.
- The longer 18-gauge brads can deflect and pop out the side of your material if you don’t keep the gun perpendicular, a 16-gauge nail is less prone to this.
The 18-Gauge vs. 23-Gauge Difference (And Why It Matters)
The numbers 18 and 23 refer to wire gauge, a system where a higher number means a thinner wire. This isn’t just about hole size. It’s about physics.
An 18-gauge brad nail has a shank diameter of 0.0475 inches. A 23-gauge pin is significantly thinner. Under lateral force, the kind created when you pick up a face-frame assembly, the pin will bend. The brad will resist. This is the core mechanical truth that separates a fastener from a temporary clamp. That thinness is also the pin’s superpower for delicate work, where a thicker nail’s wedging action would split the wood fibers apart.
The defining feature of a pin nailer is the near-invisibility of the hole. The nail is so thin it bends under lateral stress. Pin nails are a clamping substitute while glue cures, not an independent fastener. Glue is mandatory, every time.
This why-layer dictates every recommendation that follows. If your project can’t rely on glue alone for the final bond, the pin nailer isn’t the right tool.
Brad Nailer: The Workhorse You’ll Reach For
If you’re assembling cabinets, building furniture, or installing most types of interior trim, the 18-gauge brad nailer is your default. Its versatility comes from a balance: the nail is thin enough to minimize splitting in narrow stock, but stout enough to provide real holding power. Sources call it “very versatile” for finish carpentry, capable of handling most applications.
Sources cite different maximum lengths for brad nails, including ranges from ½ inch to 2 ½ inches, 5/8 to 2-1/2 inches, 1 1/4 to 2 inches, and approximately 10 mm to 50 mm. This disagreement matters less than the rule: use the longest nail your gun can shoot that the material can accept. For anchoring baseboard to a wall, you need at least 2 inches to penetrate the drywall and bite into the stud behind it. A 1-inch brad is too short for securing baseboards.
Where the brad nailer wins:
- Cabinet and furniture assembly: Attaching face frames, securing back panels.
- General trim work: Installing door and window casings, chair rails, picture frames.
- Light construction: Assembling jigs, small boxes, and shop projects.
Where it hits a limit:
- Thick baseboards: While you can use an 18-gauge brad nailer for baseboards, it doesn’t have the holding power of a 15 or 16-gauge nail. It’s best for trims up to 1/2 inch thick.
- End-grain and narrow stock: Nailing within 1 inch of the end of a piece of wood, especially if it’s under 3/4 inch wide, risks splitting it. This is where you’d switch to a pin nailer or pre-drill.
A common first-timer mistake is shooting those longer brads at a steep angle, trying to toenail a piece in place. The angle reduces penetration, can bend the nail, and often leads to a frustrating “pop-out” where the nail’s tip curves and exits the side of your workpiece. Keep the gun as perpendicular as the space allows.
Pin Nailer: When ‘Invisible’ Is the Whole Point
The 23-gauge pin nailer exists for one primary reason: to hold things together without leaving a mark. The pins are headless, leaving a hole so small it often disappears under a coat of paint or stain without filler. But that benefit comes with the strict limitation noted above, negligible holding power on its own.
Its job isn’t to bear load. It’s to maintain perfect alignment while your glue dries, or to attach a fragile decorative element that a brad nail would split. Think of the thinnest veneer, the most delicate crown molding detail, or a tiny bead molding on a jewelry box. This is where the pin nailer shines, and why many fine woodworkers consider it an essential second tool.
Common mistake: Relying on pin nails without glue. Any assembly held with pins alone will fail under normal handling stress. The pin’s job is to hold position while the glue cures, not to replace it.
Best uses for a pin nailer:
- Delicate decorative work: Attaching super-thin veneers, intricate moldings, inlay strips.
- Pre-glue clamping: Holding parts in precise alignment for glue-ups on furniture or cabinets.
- Temporary fastening: Tackling jig components or sacrificial fences in the shop.
- End-grain/edge nailing: Safely fastening near the end of thin stock where a brad nailer might split it, such as within 1 inch of the end of material under 3/4 inch wide.
There’s debate about maximum pin length. Some say most guns only take 1-inch pins, with high-end models handling 2-inch. Others state pins can go 1 or 2 inches into material. Longer pins may be more prone to deflection, as some user anecdotes note problems with longer pins coming out the side of the material. For delicate duties, shorter pins are commonly used.
The Head-to-Head: Which Tool for Which Job?
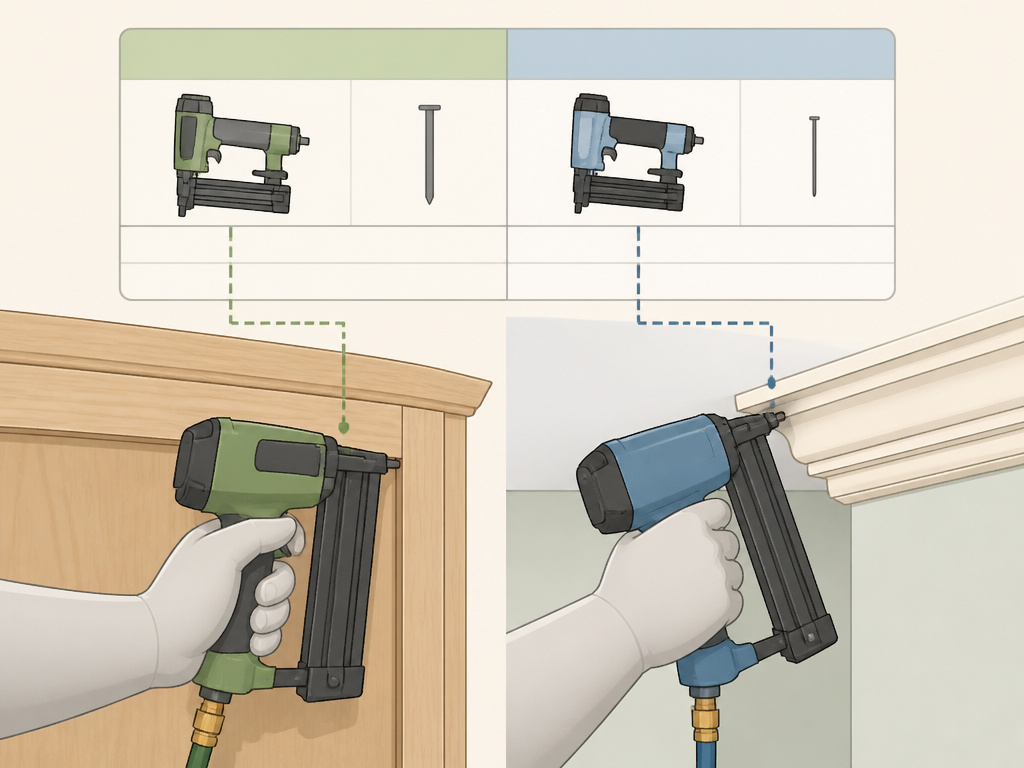
This isn’t about which tool is “better.” It’s about which tool is right for the task in front of you when you compare a brad nailer vs pin nailer. The following table cuts through the noise by matching common beginner and intermediate projects to the right tool.
| Project / Task | Brad Nailer (18-Gauge) | Pin Nailer (23-Gauge) | Why This Pairing Works |
|---|---|---|---|
| Building a face frame for a cabinet | Primary Tool | Not Suitable | The brad provides the necessary holding power during handling and before glue fully cures. |
| Attaching delicate crown molding detail | Risk of Splitting | Primary Tool | The pin’s thin gauge won’t split the fragile molding, and the hole will be nearly invisible. |
| Installing baseboard (1/2″ thick MDF) | Can Work | Not Suitable | The brad has enough hold for thin material, but a 16-gauge finish nailer would be stronger. |
| Holding a mitered picture frame during glue-up | Works, but holes visible | Better Choice | The pin acts as the perfect clamp without leaving holes that need filling on the show face. |
| Securing a 1/4″ thick plywood back panel | Works | Better Choice | The pin’s low splitting risk is ideal for thin material; holding power comes from the glue. |
For projects like a small bookshelf, you might use both: the brad nailer for the structural box assembly, and the pin nailer for attaching any thin decorative trim on the front.
Navigating the Disagreements: Baseboards and Lengths
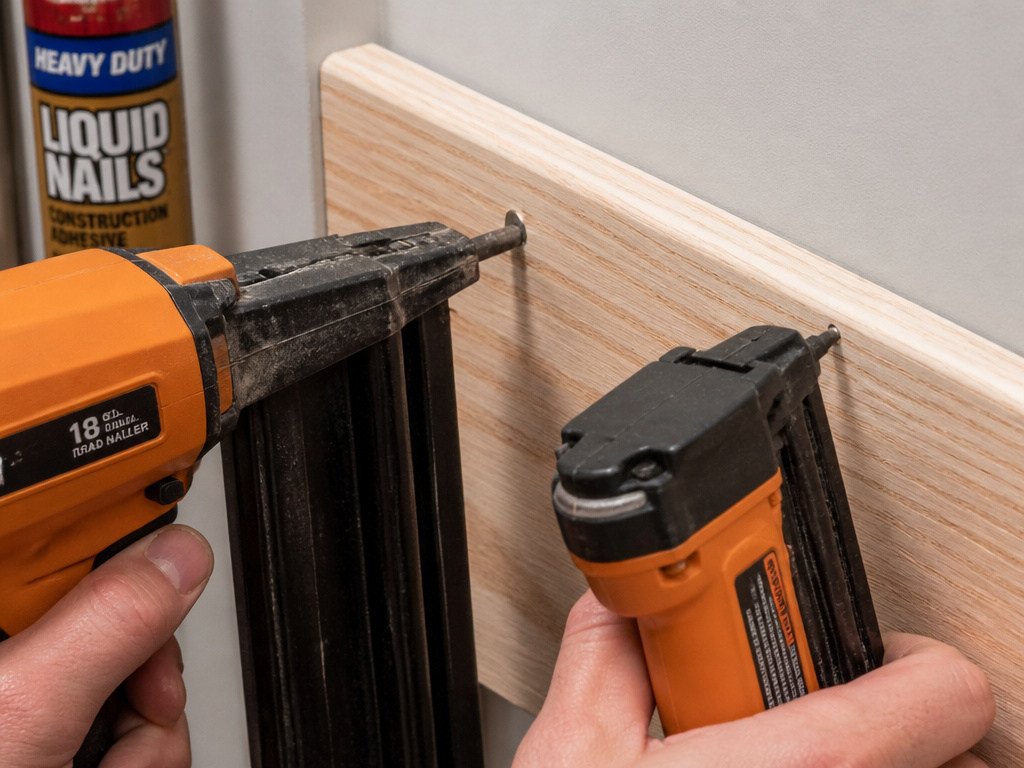
The woodworking community doesn’t always speak with one voice, especially on practical jobsite questions. Two areas of disagreement are worth your attention, as they affect a common first project: installing baseboards.
Can you use an 18-gauge brad nailer for baseboards?
Sources disagree. Some state a 16-gauge finish nailer is the standard, but an 18-gauge brad nailer with 2-inch nails could be used. Others are more cautious, noting that 18-gauge brads have much less holding power and work best for trims up to 1/2 inch thick, recommending a 16-gauge gun for anything thicker. The consensus from practical forums is that it’s a compromise. If you use an 18-gauge, use construction adhesive behind the board and shoot the longest nail your gun accepts.
How long can pins and brads actually be?
The data varies, which often reflects differences between low-cost and high-end gun models.
- Sources disagree on maximum pin length: The Saw Guy states most pin nailers only take up to 1” nails, with high-end models shooting 2”, while homenewtools.com states pin nailers use pins that can go 1 or 2 inches into the material.
The lesson here is to check your specific tool’s manual. Don’t assume the longest nail on the shelf will fit your gun. This kind of practical detail is often discussed in hands-on communities like the Sawmill Creek woodworking forum.
Pneumatic vs. Cordless: The Real-World Trade-Off
You’ll face this choice after picking your gauge. Pneumatic nailers are often cited as providing good control, light weight, and lower cost compared to cordless models.
A small, quiet pancake compressor can run a finish nailer all day. The tool itself is lighter and better balanced than a cordless model because it doesn’t house a battery and motor. It’s also cheaper upfront and has fewer electronic components to fail. The cordless argument is about pure convenience, no hose to drag. But for shop work or a contained job site, that’s a minor benefit weighed against the cost and heft penalty. When deciding on a nail gun power source, consider where you’ll use it most.
Are Brad Nailers and Pin Nailers Safe to Use
The primary safety consideration in the brad nailer vs pin nailer debate is not about a mechanical trigger lock, but about understanding each tool’s structural role. A brad nailer is a fastener; its thicker nail provides holding power. A pin nailer’s thin pin is correctly understood as a clamping substitute while glue cures, not as an independent fastener. You should never rely on pin nails alone to hold a joint. Glue is mandatory, every time. This distinction is critical for safety and project integrity. Using a pin nailer for a load-bearing joint a brad nailer should handle is a fundamental misuse of the tool.
Which Costs More, a Brad Nailer or Pin Nailer
Generally, a brad nailer represents a more versatile and essential first purchase for most woodworkers. If you’re only getting one gun, the consistent recommendation is to go with the brad nailer. This is because it handles the broad range of work most do, from cabinet assembly to trim attachment, where a pin nailer can’t substitute. Pin nailers serve a more specialized niche for delicate trim and veneers. Therefore, while initial tool prices may be comparable, the brad nailer delivers greater overall utility for the cost, making it the more practical investment for a primary tool.
Frequently Asked Questions
Can a brad nailer shoot pin nails?
No. The magazines and driving mechanisms are designed for specific nail collations. A brad nailer’s magazine is built for 18-gauge nails with small heads. Trying to load 23-gauge headless pins would cause constant jams and misfires. They are distinct tools for distinct fasteners.
What would you use a pin nailer for?
Its best uses are tasks where hole visibility or splitting risk are the primary concerns: attaching delicate trim or veneer, holding mitered corners in perfect alignment during a glue-up, or temporarily fastening jig components in the workshop. It’s a specialist, not a generalist.
Is a pin nailer better than a brad nailer?
“Better” is the wrong frame. A pin nailer is better at making invisible, split-free fastenings in fragile material. A brad nailer is better at providing versatile holding power for general construction and assembly. For your first and only tool, the brad nailer is objectively more useful.
Can I use a brad nailer for 2×4 framing?
Absolutely not. An 18-gauge brad nail is a light-duty fastener 0.0475 inches in diameter. It lacks the length, diameter, and head design to provide any structural strength in dimensional lumber. Use a framing nailer for framing. Using a brad nailer for framing will build a wobbly, dangerous structure.
Before You Go
Be honest about this. If your budget allows one tool, buy the 18-gauge brad nailer. A typical 18-gauge brad nailer will handle the broad range of finish work a DIYer or starting woodworker throws at it. You can build cabinets, install trim, and assemble furniture.
The 23-gauge pin nailer is a refinement tool. Buy it when you find yourself regularly splitting thin moldings with your brads, or when you start projects where unfilled holes in a clear finish bother you. That’s the threshold. Until then, your brad nailer, used correctly, is the only nail gun you need on your bench.
