
How to Clean Polishing Pads: Step-by-Step (Without Damage)
This post contains affiliate links. As an Amazon Associate, we earn from qualifying purchases.
To clean polishing pads, the method depends on the material: foam pads need a gentle hand wash with lukewarm water and pH-neutral cleaner, wool pads can be machine washed but will change performance, and microfiber pads are the only type where compressed air is generally safe, but never use high-pressure air or a pressure washer on foam. Each pad type has a specific set of dos and don’ts, and skipping them burns through your supply faster than you think.
That split in methods is a direct translation of what the pad makers themselves print. One says compressed air on foam is fine; another says it damages the pad’s longevity. One green-lights machine washing with a pad limit; another warns there’s no blanket approval. That’s where most weekend warriors get it wrong. They pick one method and run it on every pad in their kit, which works until it suddenly doesn’t. The best guide is always the manufacturer’s specific instructions on how to clean polishing pads.
What follows is a breakdown of the three main methods, with the actual numbers from the manufacturer spec sheets, when to hand wash, when a machine is okay, and what that weird limit of “no more than 10 pads” is about in the how to clean polishing pads guide. You’ll also get the real rundown on cleaning pads mid-job to keep them cutting, the one cleaner you should never use, and how to spot a pad that’s past saving.
Key Takeaways
- Always wear eye protection when cleaning pads, especially with compressed air or pad washer systems, safety sheets from Lake Country and Grit Guard mandate it.
- Wash foam pads by hand using lukewarm water and a mild, pH-neutral cleaner, which is recommended by Safe-Shield; solvents and strong degreasers break down the foam’s structure.
- For machine washing, never exceed 10 pads per load and remove them immediately after the spin cycle to avoid permanent deformation (Lake Country).
- Microfiber pads are the only type where compressed air is broadly recommended; using it on foam is contested, with Lake Country warning it can reduce lifespan while Safe-Shield says controlled use is okay.
- A pad that falls on the floor must be inspected and thoroughly cleaned before reuse, a single embedded grain of sand can ruin a paint finish (Safe-Shield).
The Core Goal: Why a Dirty Pad Costs You More
A polishing pad is a consumable interface between your polisher and the paint. When it’s clogged, it stops cutting evenly and starts grinding contaminants into the surface. You’ll feel the polisher bog down and hear the pitch change. The finish goes from a uniform haze to a patchy, streaky mess. That’s not just annoying. It’s a direct waste of time and product, forcing you to rework the panel.
A clean pad gives you consistent, reliable performance and a top-notch finished surface. Dirty or polish-saturated pads require more passes with your tool, which makes each project take longer. – Lake Country Manufacturing
The stakes are higher than you think. A heavily loaded pad also overheats, which can melt the adhesive holding the hook-and-loop backing. Once that fails, the pad spins independently of the backing plate. That sudden change in rotation is how you burn through clearcoat in half a second. Clean pads are a control measure, not just a maintenance chore.
The 5-Step Hand Wash Process (Do This First)
This is the baseline method, straight from the Safe-Shield blog. It’s designed for foam pads but sets the gold standard for gentle, effective cleaning. You’ll need a sink, lukewarm water, a mild pH-neutral cleaner, and a clean towel.
- Separate the pad from the backing plate. Gently peel it off close to the hook-and-loop interface. Don’t pull hard on the polishing face, that stresses the foam and adhesive.
- Dampen the pad with lukewarm water. Avoid hot water. It can shrink the hook-and-loop backing on the pad, according to Lake Country.
- Work in the cleaner. Use a mild, pH-neutral cleaner. Gently massage it in. Solvents or random strong degreasers are not suitable substitutes, they can break down the foam.
- Rinse thoroughly. Use clear water to flush out dissolved polish and cleaner. Don’t use stiff brushes or wring the pad.
- Gently press out water. Squeeze the pad; do not wring it or pull on the backing. A clean, absorbent towel can help. Then, air-dry it completely on a clean, ventilated surface, away from radiators or direct sun.
Where this goes sideways: Using a solvent or degreaser. It might look clean faster, but it attacks the foam’s chemical structure. The pad will feel harder, lose its suppleness, and stop absorbing polish correctly within a few more uses.
Why lukewarm water? Heat accelerates chemical reactions and physical changes. On foam, hot water can soften adhesives. On wool, Lake Country states directly that “hot water can shrink wool.” That slight alteration changes the pad’s cutting characteristics. You’re not just cleaning; you’re preserving the pad’s engineered performance.
Washing Machine: The 10-Pad Rule & Deformation Risk
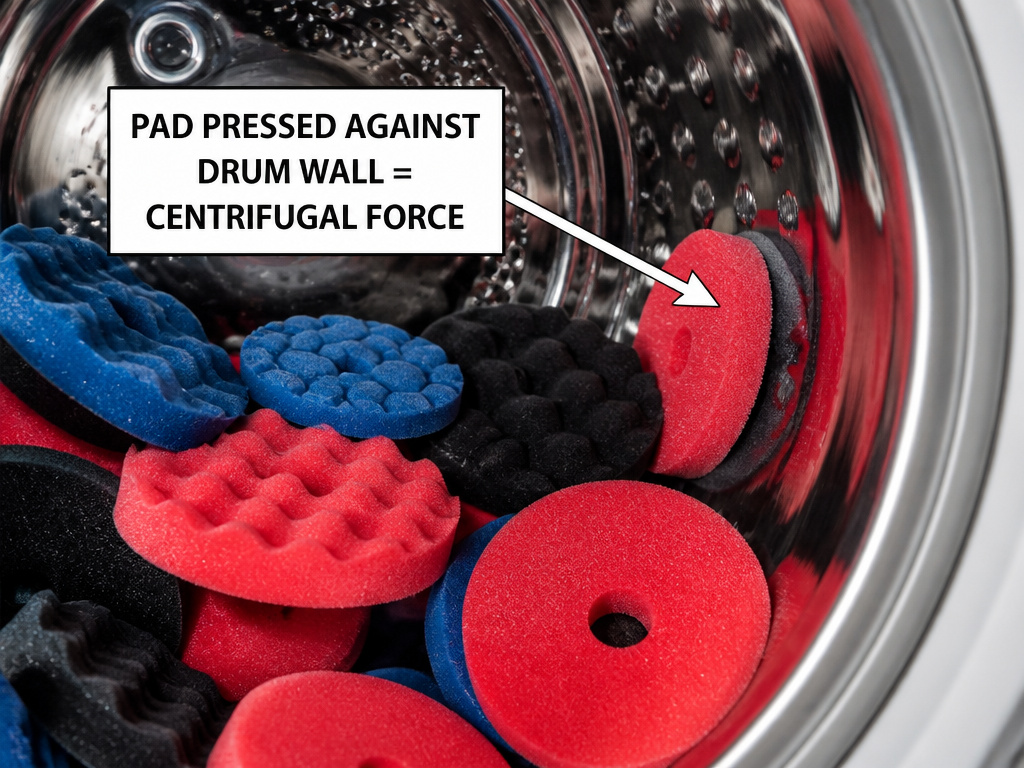
Can you throw pads in the washing machine? The answer is a firm “sometimes,” and the rules are specific. Lake Country provides instructions, but Safe-Shield cautions there’s “no blanket approval.” This is a primary source disagreement you need to know about.
If your pad’s manufacturer says it’s okay, follow Lake Country’s protocol to the letter:
- Load limit: Wash no more than 10 pads at a time.
- Cycle: Gentle cycle only.
- Water temperature: Cold or warm only. Hot water can shrink the hook-and-loop backing.
- Cleaner: Use a dedicated pad cleaner.
- Immediate removal: Take pads out promptly after the cycle ends. Pads left inside can be permanently deformed.
That deformation happens because a foam pad has a specific density and shape. A foam pad is a specific density and shape. The centrifugal force of a spin cycle, combined with the heat of friction and the weight of other pads, can crush its structure unevenly. A deformed pad won’t sit flat on your backing plate. It’ll create a wobble that translates into an uneven cut and, eventually, swirl marks you’ll spend hours removing. It’s why many detailers stick to hand washing for their premium foam pads.
For wool pads, machine washing has another catch. Lake Country notes that wool pads “can become slightly altered when washed or cleaned with water… Washing with water will not ‘damage’ the pad but can change the buffing performance.” If you need absolute consistency from one panel to the next, consider washing all your wool pads for a job at the same time, so they age together.
Cleaning Microfiber & Wool: The Compressed Air Divide
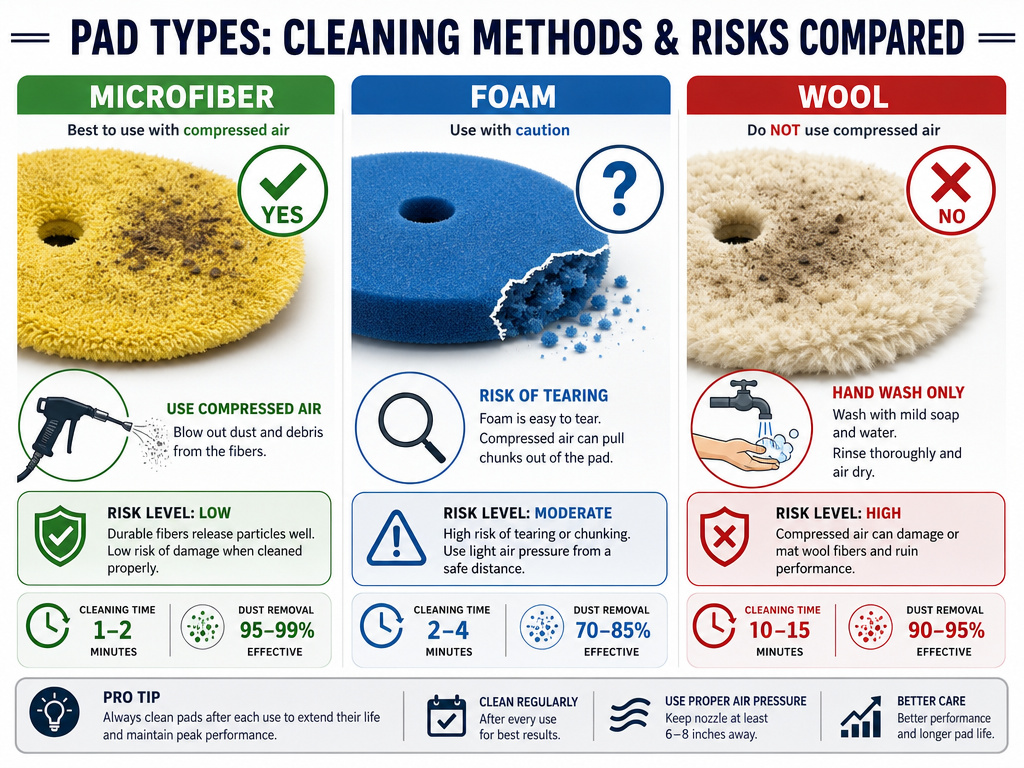
Here’s where the manufacturer guidance splits cleanly. For microfiber pads, both Lake Country and Safe-Shield approve compressed air. It’s the best way to fluff the fibers and blast out dried compound. However, Lake Country’s safety sheet adds a strict rule: you “must use a respirator or dust mask and eye protection.” The dust you’re blowing out is dried polish, adhesives, and clearcoat, you do not want to breathe it.
| Pad Type | Compressed Air? | Key Manufacturer Stance | Primary Risk |
|---|---|---|---|
| Microfiber | Yes, recommended | Lake Country & Safe-Shield approve | Inhalation hazard – PPE required |
| Foam | Contested | Lake Country: Not recommended. Safe-Shield: Controlled use okay. | Reduced pad longevity, foam damage |
| Wool | Not typically recommended | Use water washing per care guide | Fiber damage, performance alteration |
So what’s a weekend warrior to do when comparing a how to clean polishing pads method? The conservative take is to avoid compressed air on foam unless you’re ready to accept that it might shorten the pad’s life. For a quick clean between panels, a dedicated pad cleaning brush (like those covered in guides on how to clean power tools) is a safer bet. It dislodges residue without the high-pressure risk.
On-the-Fly Cleaning: The Universal Pad Washer Method
You don’t have to wait until the job is done. Cleaning a pad during the buffing session restores its cutting ability and leads to a more uniform finish. This is where a tool like the Grit Guard Universal Pad Washer shines. The Grit Guard manual provides exact specs for this process, which work with any rotary or orbital polisher.
Before you start: The manual mandates you “always wear eye protection.” Water and electricity don’t mix, so use a GFCI outlet if you’re using a corded polisher near the wash bucket.
Here’s the sequence from the Grit Guard manual:
- Fill the bucket so the water level is no more than ¼ inch above the Grit Guard Insert, with the springs fully compressed.
- Apply three to five sprays of their Pad Renewing Solution (PRS) to the pad.
- Start the polisher on the lowest speed setting for 10 to 20 seconds to work the cleaner in.
- For the main cleaning, limit the polisher to no more than 25% of its maximum speed while holding the pad against the insert.
- Raise the polisher and spin at a higher speed to fling off excess water before going back to work.
The manual includes a graph showing pad effectiveness declines over a session, but stays high if you use the washer several times during the job. It turns a single pad into a more durable multi-panel tool. This makes a big difference for larger projects like trucks or vans where you’d normally switch pads every panel or two.
When Cleaners and Chemicals Matter (And When They Don’t)
You don’t need a boutique $30 spray. What you need is a cleaner matched to the job. For a deep wash, a concentrated powder like Shurhold’s Serious Pad Cleaner is efficient. Their spec sheet is precise: mix 1 scoop or 1 tbsp per gallon of warm water, use it within 7 days, and soak items for up to 15 minutes. They also warn to wear gloves and safety glasses and not to mix it with bleach.
For a simpler hand wash, a few drops of a mild dish soap in lukewarm water works. It’s pH-neutral and designed to cut oils, which is exactly what polish residue is. The goal is to suspend the oils so water can rinse them away, not to dissolve the pad material. Avoid cleaners with citrus solvents or heavy degreasers labeled for automotive engines; they’re too aggressive.
A dedicated pad cleaner is formulated for this. It’s a bio-degradable powder that releases wax and polish with a short soak, and it rinses out easily without leaving a film. If you’re running a project following a car polishing guide with multiple types of pads, having one consistent cleaner simplifies your process.
Drying and Storage: The Mold Line in the Sand
This is the most skipped step, and it’s the one that ruins more pads than anything else. A damp pad sealed in a bag or box becomes a petri dish. You’ll open it a week later to a faint sour smell and visible mold spots. The pad is done.
Safe-Shield’s advice is blunt: “Only store completely dry and clean pads, protected from dust.” They add a critical warning: “A pad that feels dry on the outside can still be damp inside.” Your finger test is unreliable.
The right way:
- Air dry only, on a rack or clean towel.
- Never use a tumble dryer, radiator, or direct intense sunlight. Heat warps pads.
- Ensure airflow on all sides. Don’t stack them.
- Store in a breathable container or mesh bag, not a sealed plastic bin.
How can you be sure it’s dry? Leave it for 24 hours in a room-temperature shop. If you’re in a humid climate, point a fan at your drying rack. The small electricity cost beats replacing a $25 pad.
How to Clean Pads Used with Sealants or Waxes
Pads that have been used to apply waxes or sealants require a different approach than those used with compounds. These products are designed to bond and cure, so letting them dry on the pad can permanently clog the foam or fibers. Clean these pads immediately after use while the product is still wet. Use a mild, pH-neutral cleaner and lukewarm water, as solvents or strong degreasers can break down the pad material. Gently squeeze the pad to work the cleaner through it, but avoid wringing or pulling on the backing. Rinse thoroughly. Allowing a pad used with a sealant to air-dry completely is critical, as any leftover moisture can trap residues inside the pad, altering its performance for the next use.
FAQ: Can You Clean and Reuse Polishing Pads?
Can I use Dawn dish soap to clean buffing pads?
Yes, Dawn or another mild, pH-neutral dish soap is a safe and effective cleaner for foam and microfiber pads. It cuts the oil-based residues in polishes and compounds without harming the pad material. Avoid citrus-based or “heavy duty” degreasers.
How often can I reuse a polishing pad?
There is no set number of uses. Reuse a pad as long as it is clean, completely dry, dimensionally stable, and undamaged. A pad used for heavy compounding will wear out faster than one used for a light finishing polish. Inspect the hook-and-loop backing for wear and the face for tears or hardening.
Can you clean and reuse polishing pads?
Absolutely, that’s the entire point of cleaning them. Both foam and wool pads are designed for multiple uses if cleaned properly. The exception is fine grit polishing pads (like the black/dark gray pads from BASi), which are designated for single use only to prevent cross-contamination with embedded abrasive.
How do you clean a pad caked with dried polish?
Soak it in a solution of warm water and pad cleaner (like Serious Pad Cleaner) for the recommended time, up to 15 minutes. Gently agitate and massage the pad to loosen the cake. Do not scrub aggressively with a stiff brush, as this can tear the foam or mat fibers.
The Bottom Line
Here’s the one rule that reframes all the others: clean your pad before its performance drops, not after. The moment you feel the polisher working harder or see the finish becoming less consistent, stop and wash it. That’s true whether you’re using a bucket and brush, a pad washer, or swapping to a fresh pad.
The manufacturers don’t agree on everything. Lake Country says no high-pressure air on foam; Safe-Shield says controlled use is fine. Lake Country gives machine-wash instructions; Safe-Shield says only if approved. Your safest path is to follow the guidance for the specific brand of pad you own. When in doubt, default to the gentlest method: hand wash with lukewarm water and a mild cleaner.
A clean pad is predictable. It’s the difference between fighting your tool and having it work as an extension of your arm. And when you’re several hours into correcting paint, predictability is everything.
