
How to Cut Corrugated Metal Roofing: Step-by-Step
This post contains affiliate links. As an Amazon Associate, we earn from qualifying purchases.
While many manufacturers recommend cold-cutting tools like portable contour shears, electric nibblers, or aviation snips for the cleanest and safest cuts, sources disagree on the acceptability of other tools like circular saws with metal blades. Using heat-generating tools like circular saws or grinders risks burning the protective galvanizing or paint coating, which can void the material warranty and lead to premature corrosion at the cut edge.
That warranty clause isn’t just fine print. Burn the coating with an abrasive blade and you’re starting the clock on rust, right where water runs off. The rest of this guide walks the choice between shears, snips, and saws — with the specific warnings from six different manufacturer manuals that most DIY tutorials gloss over. It also explains how to cut corrugated metal roofing.
Key Takeaways
- Portable contour shears (like a Swenson Shear) are the manufacturer-preferred tool for a clean, burr-free cut across galvanized steel panels.
- ASC Building Products advises to never use a black lead pencil to mark cut lines, as the carbon promotes corrosion, and recommends using a felt-tip marker like a Sharpie.
- Sentrigard recommends cutting painted panels with the painted side facing down to prevent metal chips from embedding in the finish.
- The single biggest point of conflict among manufacturers is the use of circular saws. Some forbid them entirely, while one major guide lists a steel-cutting blade as an approved option.
- Extreme Metal Fabricators advises hiding field cuts under ridge or eave flashing whenever possible, with the field-cut end placed beneath the factory-cut end of the adjacent piece.
The Tool Disagreement You Need to Know About
You won’t find a consensus in the instruction booklets. Reading six different manufacturer guides for this article turned up a direct contradiction on the most common tool people reach for: the circular saw.
For steel panels, a portable contoured shear is especially recommended for across-the-profile cutting. When a shear is not available or the sheet is to be cut along a corrugation, the use of a nibbler or a steel-cutting blade is possible. Do not use self-consuming abrasive blades. — Sentrigard Technical Bulletin
That “steel-cutting blade” is a specific, non-abrasive metal-cutting blade. Sentrigard and Metallion Roofing and Siding permit such blades, while other manufacturers prohibit saws entirely. Other manufacturers draw a harder line. Union Corrugating’s installation manual states simply: “DO NOT cut panels with saws or grinders. Only use appropriate sheet metal cutting tools designed to ‘shear cut’ components with clean, burr free edges.” Extreme Metal Fabricators is equally blunt: “Circular saws, torches, and plasma cutters should not be used.” Yet another manual, from Metallion Roofing and Siding, includes “a circular saw with a steel-cutting blade” in its list of approved tools. So who’s right? The answer lives in the warranty document that came with your panels. If your specific brand’s manual prohibits saws, using one shifts liability for any future corrosion at that cut edge squarely onto you, which is a key part of the how to cut corrugated metal roofing question. This isn’t scare talk. It’s the predictable outcome of ignoring a documented installation requirement.
| Manufacturer | Circular Saw with Metal Blade? | Abrasive Blade/Grinder? | Primary Recommended Tool |
|---|---|---|---|
| ASC Building Products | Not recommended (heat-generating device) | Not recommended (produces ragged edge) | Swenson Shear guillotine-style shear |
| Union Corrugating | Not allowed | Not allowed (damages Galvalume) | Shear-cut tools only |
| Sentrigard | Possible for steel/aluminum | Not allowed | Portable contour shears |
| Metallion Roofing & Siding | Approved (with steel-cutting blade) | Not allowed (voids warranty) | Nibblers, snips, profile shear, circular saw |
| Extreme Metal Fabricators | Not allowed | Not allowed | Tin snips or electric nibbler |
How to Choose Your Cutting Method (Aluminum vs. Steel)
The metal type changes the game. Aluminum is softer and more forgiving. Steel is tougher and carries a protective coating you must preserve.
For aluminum panels, Sentrigard outlines a unique method for cuts running with the rib or corrugation: score the metal deeply with a sharp utility knife, then bend the sheet toward or away from the cut. It snaps cleanly along the score line. For cross-cutting aluminum, they note an electric saw with a metal blade works, and even suggest two alternative blades: a fine-tooth blade for hardwood, or a standard wood-cutting rip-blade reversed in the saw, which is a specific technique when you compare a how to cut corrugated metal roofing guide for aluminum versus steel. A little light oil or soap on the blade makes it easier. That reversed wood blade trick is a point of contention for steel. Metallion’s guide mentions homeowners do it but calls it “generally not recommended.” ASC Building Products lists reversed blades under “CIRCULAR SAW BLADES (not recommended)” because they produce extreme noise, heat, and a ragged edge.
For galvanized or painted steel, the gold standard is the portable contour shear. It’s a handheld guillotine that cleanly shears the metal without generating heat or sparks. Swenson Shear is the company several manufacturers name. The catch is specificity—if you’re using two different panel profiles on one job, you need a different shear for each profile. Its cut removes a strip about 1/8” wide. When you don’t have a several-hundred-dollar shear, the fallback is an electric nibbler or high-quality aviation snips. A nibbler punches out tiny crescent-shaped pieces, leaving a clean edge with minimal distortion. It’s slower but precise.
Common mistake: Using a grinder with an abrasive cut-off wheel. The shower of sparks is a safety concern. The extreme heat burns away the galvanizing (zinc) or paint at the cut edge, leaving bare steel exposed to rust. That damage voids the warranty on most panels.
Essential Safety Gear and Setup
Cutting metal is loud, sharp, and messy. Your ears, eyes, and hands need protection before you make the first cut. Every manufacturer guide we sourced mentions these points.
- Eye protection is essential. Flying metal fragments, swarf from a nibbler, or sparks from a saw can cause immediate, serious injury. Safety glasses are a minimum; a full face shield is better.
- Heavy gloves protect against the razor-sharp edges of cut metal. Leather palmed work gloves are the standard.
- Hearing protection is required when using any power tool. A circular saw or grinder on metal produces high noise levels, and hearing protection is recommended.
- Secure your workpiece. Use sawhorses with a sacrificial wood support across them. Clamp the panel down on both sides of your cut line. An unsecured sheet will vibrate, buckle, and try to grab the blade.
Step-by-Step Process for a Clean Field Cut
Follow this sequence to minimize errors and damage, whether you’re trimming a panel to length or cutting around a vent pipe.
-
Measure and Mark Precisely. Use a tape measure and a straightedge or chalk line. Mark your cut line clearly with a felt-tip marker. Double-check measurements, especially for cuts that will be visible.
-
Prepare the Work Area and Panel. Set up your sawhorses and clamping system outdoors or in a well-ventilated space. If cutting painted panels, flip the sheet so the painted side faces down. This way, metal chips land on the unfinished back side. You can protect that side with a scrap of plywood or plastic sheet. It prevents embedded chips that rust and stain the finish.
-
Don the Safety Gear. Gloves, glasses, and ear protection on. No exceptions.
-
Make the Cut. Align your tool with the mark. For snips or shears, start at the edge and work steadily. For a nibbler or saw, start the tool before contacting the metal, then feed it smoothly without forcing. Let the tool do the work.
-
Clean the Edge Immediately. As soon as the cut is complete, brush off all metal filings and slivers with a stiff brush. Metallion’s guide warns that filings left on the panel will rust and pit the surface. If you used a saw, the edge may have burrs. Deburr it with a metal file or sandpaper.
-
Install with the Cut Hidden. The best practice is to plan your cuts so they are concealed. Extreme Metal Fabricators advises: trim the top of a roof panel where the cut will be hidden under the ridge flashing. If cutting eave flashing, place the field-cut end beneath the factory-cut end of the adjacent section.
What happens if you skip the cleaning step? Those tiny steel filings get wet, rust, and create permanent pits in the surrounding galvanized or painted surface. You’ll see a line of red dots along your cut over time.
What to Do With the Swarf and Debris
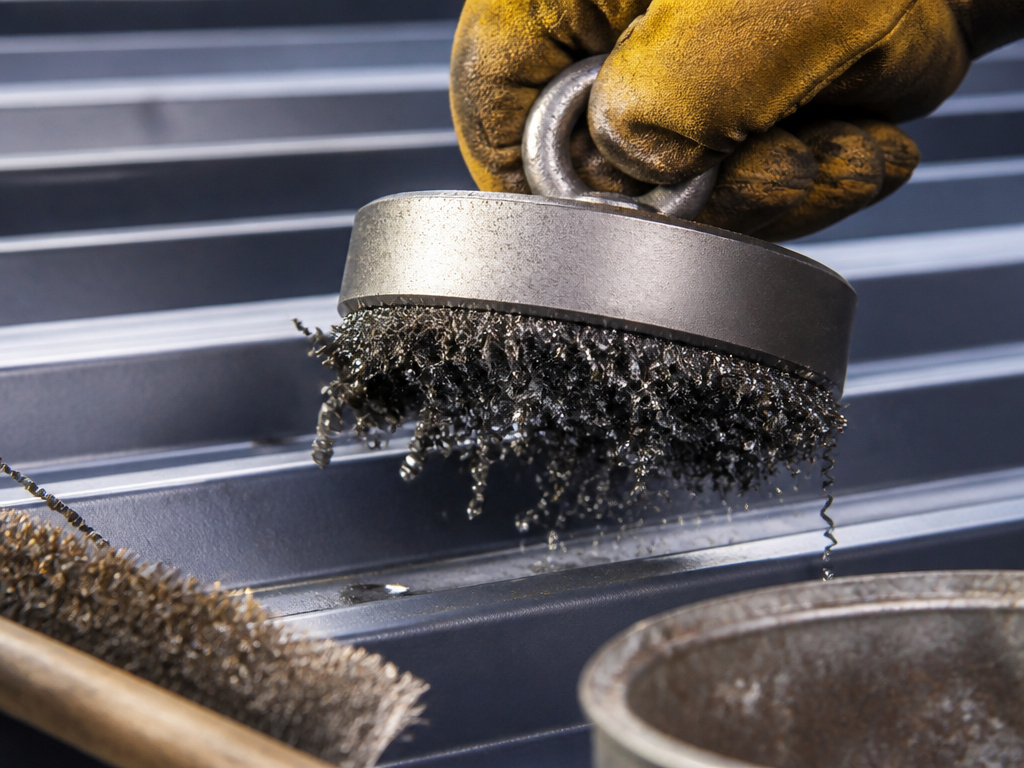
The waste from cutting metal—swarf, chips, filings—is more than just trash. It’s a hazard and a potential source of damage.
- Collect as you cut. Keep a magnet, a brush, and a bucket handy. Sweep debris off the panel and into the bucket frequently.
- Dispose of it safely. Metal chips are sharp. Don’t just sweep them onto the ground. Bag them and dispose of them safely.
- Inspect the finished panels. Before installation, run your gloved hand along the cut edge and nearby surface. Feel for any adhered chips or sharp burrs you missed.
Where this goes sideways: Letting chips accumulate on a painted panel. If a chip gets stepped on, it embeds into the soft paint film. When it rusts, the stain bleeds out, creating a rust spot larger than the original chip. The fix is to mechanically dislodge it with a stiff fiber brush as soon as you see it.
How to make a circular cut with nibblers or snips

When you need to cut a hole for a vent or pipe, a nibbler is one tool recommended by some manufacturers for the job. This electric tool punches out small, overlapping pieces of metal, letting you steer it along a curved line. It delivers clean cuts with minimal damage and leaves very little rough edge. If you’re using hand tools, aviation snips are the alternative. ASC Building Products notes the color coding for aviation snips: green handles for left-cutting curves, red for right-cutting curves, and yellow for straight cuts. Always wear safety glasses and heavy gloves for this work, as the process creates sharp edges and flying metal fragments.
Frequently Asked Questions
Can you cut corrugated metal roofing with a circular saw?
Maybe, but check your panel’s warranty and installation guide first. Some manufacturers explicitly prohibit it, others permit it only with a specific steel-cutting blade (not an abrasive blade), and a few forbid any heat-generating tool. If you proceed, use a non-abrasive metal-cutting blade, secure the panel, and wear full protective gear.
What is the best tool for cutting corrugated metal roofing?
According to multiple manufacturer guides, the best tool for a clean, warranty-safe cut is a portable contour shear (like a Swenson Shear). It cleanly shears the metal without heat, sparks, or ragged edges. For DIYers, a close second is an electric nibbler or high-quality aviation snips.
How do you cut corrugated metal around vents or pipes?
For complex cut-outs, an electric nibbler is the ideal tool. It allows for tight turns and detailed work. Mark the outline clearly, drill a starter hole inside the waste area if needed, and then carefully nibble up to your line. Aviation snips can also work but require more skill to avoid distorting the panel.
Is it okay to use an angle grinder?
No manufacturer guide we sourced recommends an angle grinder with an abrasive cut-off wheel; most explicitly advise against it, with some stating it is not allowed or will void the warranty. The reasons are consistent: extreme heat damages the protective coating, creating a future rust point; it leaves a ragged, serrated edge that may need to be trimmed back; and it produces a dangerous stream of high-velocity sparks.
How do you prevent rust on cut edges?
The primary prevention is using a cold-cutting tool that doesn’t compromise the galvanizing or paint. After cutting, you can apply a thin coat of a galvanizing repair paint or a color-matched touch-up paint to the bare edge for added protection, though this is rarely mentioned in installation guides.
The Bottom Line
Your goal isn’t just to separate the metal. It’s to preserve the factory coating that makes the panel last for decades. The loudest tool isn’t the right tool. For a one-time DIY project, a pair of straight-cut aviation snips or a cordless nibbler will get the job done without putting your warranty at risk. If you’re a contractor cutting panels daily, the investment in a Swenson Shear pays off in speed and perfect edges. Look at the installation guide for your specific panels. If it says “no saws,” put the circular saw away. That single sentence is the difference between a roof that weathers gracefully and one that starts to betray you at every cut line in five years.
