
How to Fix a Drill Chuck That Won’t Tighten: Step-by-Step
This post contains affiliate links. As an Amazon Associate, we earn from qualifying purchases.
To fix a drill chuck that won’t tighten, you must first diagnose whether it’s stuck closed, won’t grip the bit, or the jaws slip. For a chuck that spins but won’t grip, the internal securing screw is likely loose. On a Ryobi, tighten it with a PH3 or T30 bit, turning clockwise (as it has left-hand threads). For other brands, check the manual for the correct bit and thread direction. If the chuck is seized shut, apply penetrating oil, tap it with a hammer, and use an Allen key for force. Debris in the jaws is another common culprit, fixed with compressed air and a brush.
That distinction, stuck closed versus slipping on the bit, changes everything. Most online guides mash the solutions together, so you waste time trying to free a chuck that’s already loose. The real fix starts with knowing which failure you have, and knowing how to fix a drill chuck that won’t tighten.
What follows is a diagnostic path for how to fix a drill chuck that won’t tighten, then the specific fixes for each brand’s known quirks, pulled straight from the service manuals. You’ll also get the clear line on when a $30 replacement chuck beats three hours of your Saturday.
Key Takeaways
- Diagnose first: a chuck stuck closed needs penetrating oil and force; a chuck that spins but slips needs the internal screw tightened, often with a left-hand thread.
- The internal chuck screw on brands like Ryobi and Milwaukee has left-hand threads. For these left-hand threads, turning the screw clockwise loosens or removes it, and turning it counter-clockwise tightens or installs it, the opposite of standard screws.
- Debris is the silent killer; a few minutes of cleaning the jaws with compressed air and a pipe cleaner can restore grip without any disassembly.
- Apply heat before removal if the screw is seized; Milwaukee’s manual explicitly recommends a pencil-tip torch or heat gun on the screw head.
- Replacement is cheaper than repair when jaws are visibly worn, the chuck wobbles on the spindle, or the repair cost approaches half the price of a new drill.
The Diagnostic Flowchart: Stuck Closed vs. Won’t Grip
Your first move isn’t grabbing a tool. It’s figuring out which of these two problems you actually have. Getting this wrong means you’ll apply a “fix” that makes the real problem worse.
A chuck that is physically stuck and won’t open has a different root cause, often corrosion, a jumped jaw thread, or impacted debris, than a chuck that opens and closes but fails to grip a bit, which points to a loose internal screw or worn jaws. Apply the wrong solution and you risk breaking the chuck body or stripping the screw.
Symptom: The chuck won’t turn to open or close. You can’t insert or remove a bit. The mechanism is frozen.
- Likely Cause: Corrosion, a jammed jaw, or debris has locked the threads. This is a physical obstruction problem.
- Next Step: Go to the “Freeing a Seized or Stuck Chuck” section.
Symptom: The chuck turns and the jaws move, but they don’t grip the bit. The bit slips when pressure is applied, or the chuck spins freely on the bit.
- Likely Cause: The internal chuck screw is loose, or the jaws are glazed/worn. This is a gripping failure.
- Next Step: Go to the “Tightening the Internal Chuck Screw” section.
If you’re not sure, try this: remove any bit, open the jaws fully, and look deep inside with a flashlight. Can you see a screw head at the very bottom? If yes, you’re likely dealing with a gripping failure. If the jaws won’t open enough to see in, it’s seized.
Tools You’ll Need (And One You Definitely Shouldn’t Use)
Before you start, get these on your bench. Missing one item mid-repair is how projects get abandoned. I keep these in a dedicated “chuck repair” pouch.
- Penetrating Oil: WD-40 Specialist Penetrant or Liquid Wrench. The generic WD-40 is a water displacer, not a great penetrant.
- Allen Keys/Hex Keys: A 5/16” or larger hex key is specified for some models like Sears, while a 1/2” or 10mm Allen key is needed for Milwaukee keyless chuck removal.
- Screwdriver Bits: A PH3 Phillips bit and a T30 Torx bit. Ryobi specifies one or the other is typical.
- Torx Bit & Wrench: For Milwaukee chuck screws, you need a T40 1/4” Torx bit and a 1/4” boxed end wrench to apply force.
- Hammer & Mallet: A metal hammer for tapping, a rubber mallet for persuasion.
- Soft-Jaw Vise: Crucial for holding the drill without crushing the housing.
- Compressed Air & Small Brush: A can of air and a small cylindrical brush or pipe cleaner.
- Heat Source: A small pencil-tip butane torch or a heat gun with a focused nozzle. Milwaukee’s procedure recommends this for seized screws.
The tool to avoid: Adjustable pliers on the chuck body. You will score and crush the knurling, making it impossible to hand-tighten later. If you need more force, use a strap wrench or the approved Allen-key method.
Freeing a Seized or Stuck Chuck
When the chuck won’t budge, force is the enemy. You need a combination of lubrication, shock, and controlled force. Here’s the sequence that works without breaking things.
- Apply Penetrating Oil. Soak the area where the chuck jaws meet the body. Let it sit for at least 30 minutes, overnight is better. The goal is to wick into the microscopic gap between the threaded sleeve and the chuck body.
- Tap with a Hammer. Hold the drill firmly. Use a hammer to tap the side of the chuck body (not the jaws) squarely. You’re not trying to smash it; you’re delivering sharp, percussive shocks to break corrosion bonds. Rotate the drill and tap around the circumference.
- Use the Allen Key for Force. This is the classic move from the Sears 315.11485 manual. Insert a 5/16” or larger hex key into the chuck and tighten the jaws onto it as much as you can. Then, tap the hex key sharply with a mallet in a clockwise direction. This shock transfers directly to the internal screw, often breaking it loose.
- Apply Heat (The Professional Step). If it’s still stuck, you need heat. Per the Milwaukee service manual (55-06-2740), apply heat from a small pencil-tip torch or a focused heat gun nozzle directly to the head of the chuck screw (visible inside the chuck). Heat expands the screw slightly before the surrounding metal catches up, breaking the bond. Apply heat briefly, avoiding overheating the surrounding components.
- The Vise & Cheater Bar Last Resort. For a Milwaukee chuck, the manual says to place the tool in a soft-jaw vise (removing the belt clip may be required). Tighten a 1/2” or 10mm Allen key in the jaws. Slide a 12”-18” metal pipe over the Allen key to increase force and turn counter-clockwise. The long lever arm provides steady force without jerking.
Where this goes sideways: Cranking on a cheater bar before applying oil and heat. You’ll snap the screw head clean off, turning a simple repair into a full drill disassembly to extract the remnant. Patience pays in metal.
Tightening the Internal Chuck Screw
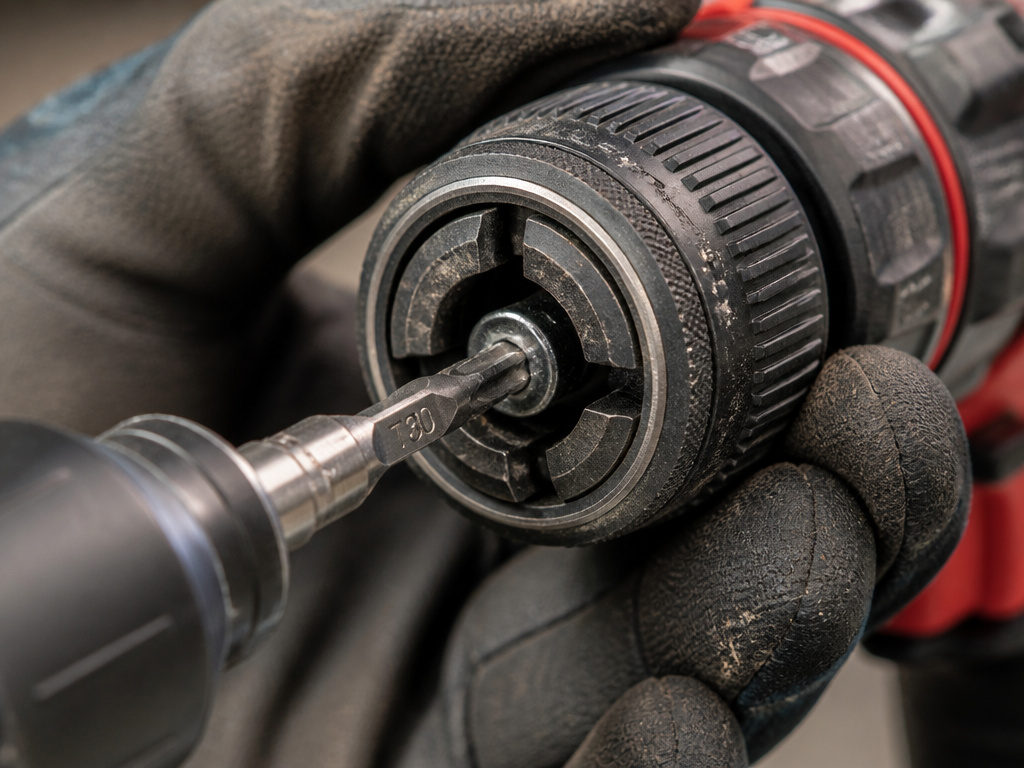
This is a common fix for a chuck that won’t tighten. The screw holds the chuck assembly onto the drill’s spindle. When it loosens, the whole chuck can develop play and lose grip. But there’s a catch.
The Left-Hand Thread Trap
Most chuck screws are left-hand threaded. This means the normal “righty-tighty, lefty-loosey” rule is reversed. The screw is designed this way so the normal clockwise rotation of the drill doesn’t unscrew it during use.
- Ryobi P211 manual states it clearly: “The chuck screw has left hand threads.” To remove it, you turn clockwise. To tighten it, you turn counter-clockwise.
- Milwaukee’s removal instructions also say to apply force in a clockwise direction to break the screw loose, confirming the left-hand thread.
| Action | Direction to Turn | Reason |
|---|---|---|
| Loosen/Remove Screw | Clockwise | Left-hand thread convention; turning clockwise unscrews it. |
| Tighten/Install Screw | Counter-Clockwise | The reverse of loosening; secures the screw against the drill’s rotation. |
The Step-by-Step Tightening Procedure:
- Secure the Drill. Lock the trigger or remove the battery. Place the drill in a soft-jaw vise or hold it firmly in your non-dominant hand.
- Open the Chuck. Expose the screw head at the base of the jaws.
- Select the Correct Bit. Use a PH3 Phillips or a T30 Torx bit, as specified by Ryobi. For Milwaukee, it’s a T40 Torx.
- Engage and Turn. Insert the bit firmly into the screw head. Applying firm pressure, turn the screw counter-clockwise to tighten it. You’re not aiming for impact-driver force, just firm, steady pressure.
- Test the Grip. Insert a known-good drill bit, tighten the chuck by hand, and give the bit a firm pull. It shouldn’t slip. If your drill has a clutch, set it to the drill icon and run it briefly; the bit shouldn’t spin independently.
If the screw just spins and won’t tighten, the threads in the spindle might be stripped. That’s a one-way ticket to chuck replacement.
Cleaning and Lubrication: The Preventative Fix
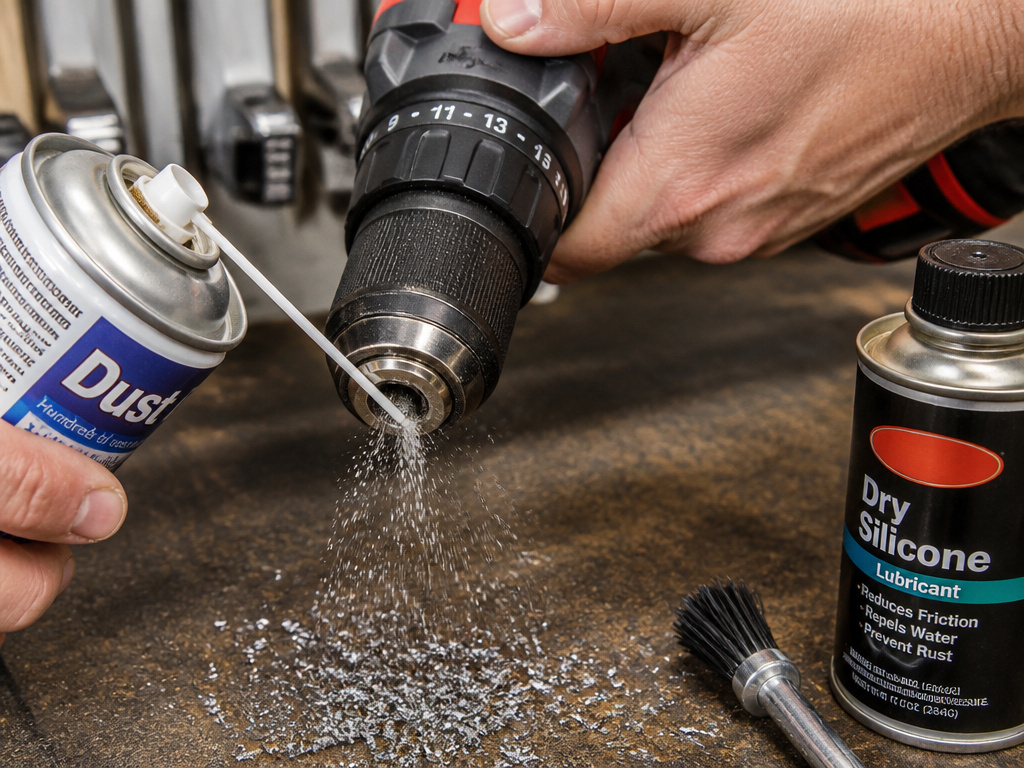
Often, the problem isn’t mechanical failure. It’s maintenance. Dirt, sawdust, and metal shavings get packed into the chuck jaws, preventing them from closing evenly. Ryobi’s support article calls this out directly: “Debris in the chuck jaws can make adjustment difficult or cause stiffness.”
Here’s how to clean it like a pro:
- Blast with Compressed Air. Hold the chuck open and use a can of compressed air to blow out the interior. Point the drill downward so debris falls out.
- Scrub the Jaws. Use a small cylindrical brush (a gun-cleaning brush works) or a pipe cleaner. Insert it into each jaw channel and scrub back and forth. You’ll be surprised at the black gunk that comes out.
- Cycle the Chuck. Open and close the chuck fully several times. Ryobi recommends this to “help dislodge any remaining debris.”
- Apply Dry Lubricant. A light silicone spray or dry graphite lubricant on the jaw tracks can help. Avoid wet oils or greases, they attract more debris.
A clean chuck should open and close with consistent, smooth resistance. If it still grinds or catches, a jaw might be bent or the internal thread damaged.
When Replacement Is the Only Answer
Fixing isn’t always the right call. You need to know when to stop. Here are the hard signs that it’s time for a new chuck.
- Visible Jaw Damage: Nicks, dents, or uneven wear on the jaw teeth. They should be sharp and uniform.
- Chuck Wobble: With a bit seated, the chuck (not the bit) has visible run-out. The whole assembly shakes. This means the chuck body is warped or the spindle is bent.
- Stripped Screw or Spindle Threads: The internal screw spins but never tightens, or you can pull the chuck straight off the spindle.
- Cost Proximity: A new ½” keyless chuck is often an affordable replacement part. If your drill is a budget model or older, a repair that consumes hours and special tools isn’t worth it.
Installing a new chuck reverses the removal process. For a Milwaukee, one service parts list (54-06-2995) specifies torquing a new 1/2″ keyless chuck to 350-375 kgf-cm (304-325 lb-in) and the screw to 104-115 kgf-cm (90-100 lb-in). However, another Milwaukee manual (55-06-2740) specifies a different chuck torque, so consult the specific manual for your tool. You’ll need a torque wrench for that spec, another reason DIY repair has limits.
Brand-Specific Quirks and Notes
Not all drills are the same. Manufacturers have their own designs, and knowing them saves headaches.
| Brand | Chuck Screw Type | Removal Direction | Key Tool for Removal | Special Note |
|---|---|---|---|---|
| Ryobi | PH3 or T30, Left-Hand | Clockwise to Loosen | PH3 or T30 bit | Manual explicitly states left-hand thread. Clean debris per support article. |
| Milwaukee | T40 Torx, Left-Hand | Clockwise to Loosen | T40 1/4” Torx bit, 1/4” box wrench, 12-18” pipe | Apply heat to screw head before removal. Use soft-jaw vise. |
| ** | ||||
| Sears/Craftsman | Hex Key Method | Varies | 5/16” or larger Hex Key, Mallet | Uses hammer-tap method on hex key for both screw loosening and chuck removal. |
The Big Takeaway: Always verify the thread direction for your specific model. When in doubt, assume left-hand thread for modern keyless chucks and proceed cautiously. Applying the wrong torque can ruin the threads in seconds.
How to Use a Strap Wrench on a Drill Chuck
A strap wrench provides a non-marring grip on the chuck body, which is essential when you need to hold it stationary. This is often necessary when breaking loose a tight chuck screw. Wrap the strap around the chuck’s metal body, not the plastic sleeve you turn with your hand. Ensure the tool is securely held, sometimes in a vise with soft jaws, and that any belt clip is removed to allow proper placement. Apply steady pressure with the wrench to prevent the chuck from spinning while you use another tool, like an Allen key or Torx bit, on the internal screw. This prevents damage to the chuck’s exterior and gives you the control needed for disassembly.
Fixing a Drill Chuck Jaw That Jumped Its Thread
When a single jaw feels loose, sticks out, or won’t move in sync with the others, it may have jumped its thread inside the chuck body. This is a mechanical failure where the jaw has disengaged from the spiral groove it rides in. The fix requires complete disassembly. First, you must remove the chuck from the drill. Then, carefully take the chuck apart, noting the order of components. Inspect the jaw and the internal threads for damage, burrs, or metal shavings. If the jaw and its track are intact, you can often re-engage it by aligning it perfectly and slowly threading it back into place. If the threads are stripped, the chuck needs replacement.
Frequently Asked Questions
Why is my drill chuck not tightening?
The most common reasons are a loose internal chuck screw (often with a left-hand thread), debris packed into the jaws preventing them from closing fully, or physically worn jaw teeth that can no longer grip. Diagnose by checking if the chuck opens and closes smoothly and if you can see and access the internal screw.
Why does my drill chuck keep loosening?
This is almost certainly due to an improperly tightened chuck screw. If the screw has a left-hand thread (common on Ryobi, Milwaukee) and you’ve tightened it the standard way (clockwise), you’ve actually been loosening it with every use. Tighten it counter-clockwise. Also, ensure you’re not using bits that exceed the chuck’s rated capacity, as this can strain the mechanism.
Can I use WD-40 to fix a stuck chuck?
You can use WD-40 Specialist Penetrant to help free a seized chuck, but the classic blue-can WD-40 is primarily a water displacer and light lubricant, not a powerful penetrant. For a truly stuck chuck, a dedicated penetrant like Liquid Wrench or PB Blaster, combined with the hammer-tap method, is more effective.
What are the signs I need to replace my drill chuck?
Replace the chuck if you see visible damage to the jaws, if the entire chuck wobbles on the spindle when a bit is seated, if the internal screw threads are stripped (the screw spins but doesn’t tighten), or if the cost and time of repair approach the value of the drill itself. A new quality chuck costs $20-$40.
Before You Go
One rule I enforce in my own shop: if the chuck repair requires buying a specialized tool you’ll never use again, like a specific torque wrench or a left-hand thread tap, just replace the chuck. The $40 is cheaper than the time and frustration. The procedures from Milwaukee and Ryobi are for technicians with full kits; your goal is a working drill, not a master’s degree in chuck mechanics.
For everyone else, start with the diagnostic flowchart. Is it stuck, or does it slip? That answer alone will save you an hour of wrong turns. Then, remember the left-hand thread. That’s the single piece of knowledge that turns a confusing problem into a five-minute fix with the right bit and a counter-clockwise turn. Everything else is just cleaning and knowing when to walk away.
