
How to Install Shoe Molding on Uneven Floors: Step-by-Step
This post contains affiliate links. As an Amazon Associate, we earn from qualifying purchases.
To install shoe molding on an uneven floor, you follow the same steps as a level floor, measure, cut, and fasten, but you add three core adaptations: you pre-finish the molding, you use its flexibility to follow minor dips, and for gaps larger than 1/8 inch, you either scribe the bottom edge, use shims behind it, or both. The goal is to fasten it to the wall or baseboard, not the floor, to allow for floor movement.
The key is matching the technique to the size of the gap you’re covering. A little floor warp is fine; shoe molding bends. A large, pronounced gap needs a different plan. The tools you pick, especially the saw blade and nail gun, decide whether the job looks pro or patched. This is a core principle for how to install shoe molding on uneven floors.
What follows: the three proven methods for uneven floors (flex, shim, scribe), the exact tool specs that matter, and the step-by-step walkthrough that ties them all together.
Key Takeaways
- Pre-finish your shoe molding before installation to avoid painting on your knees and getting paint on the floor.
- For minor gaps, rely on the molding’s natural flexibility to conform; for larger or more pronounced irregularities, scribe the bottom edge or use thin shims behind it.
- Always fasten shoe molding to the wall or baseboard, never into the subfloor, to preserve the floor’s expansion space.
- Use an 18 or 23 gauge brad nailer held vertically to nail into the baseboard cleanly, preventing nail deflection and damage.
- Cut shoe molding 1/16 to 1/8 inch longer than the measured baseboard length for inside corners, as its flexibility will allow it to compress into a tight joint.
The Core Challenge: Floor Gaps and Your Three Solutions
An uneven floor doesn’t mean a bad finish. It means you pick the right solution from a short menu. The choice hinges on the gap size and whether the irregularity is in the floor or the wall.
Think of it like choosing a wrench. A cheap one strips the bolt. The right tool fits the problem perfectly and transfers force cleanly. Your three wrenches here are flexibility, shims, and scribing.
Where this goes sideways: Fastening shoe molding directly into the subfloor. This locks the floor in place, preventing natural expansion and contraction from humidity and temperature changes. The Artistic Finishes molding guide is explicit: fasten to the wall or wall base, not the subfloor. Do it wrong, and you’ll hear cracking sounds with the seasons or see the floor buckle.
Method 1: Flexibility (For Gaps Under 1/8″)
This is shoe molding’s superpower. Its thin profile is meant to bend. According to the Floor Chem Depot guide, you should mark any spot where the wall-to-floor surface deviates more than 1/8 inch. For minor deviations, you can often use the molding’s flexibility by pushing it down as you nail.
Why it works: The molding acts as a spring. You nail the top edge securely to the baseboard, and the downward pressure against the floor holds the bottom edge tight. This is ideal for older homes with gentle floor sag or minor installation inconsistencies. For stain-grade trim, This Old House notes you should make the molding follow bends as much as possible, sometimes adding extra nails or cutting small kerfs in the back for tight curves.
Method 2: Shims (For Consistent Gaps or Wall Bows)
When the gap is consistent along a wall or the wall itself bows out, shims are your fix. They are thin, tapered pieces of wood or composite you slip behind the molding.
You don’t force the molding to bridge a huge empty space. You bring the mounting surface, the back of the molding, forward to meet the wall. The Floor Chem Depot guide calls for using thin shims behind the molding at the contact points to create a straight visual line.
| Shim Placement | Effect | Best For |
|---|---|---|
| Behind molding, low | Pushes bottom edge out to meet floor | Consistent floor dip along wall |
| Behind molding, mid-height | Corrects wall bow, keeps molding straight | Wall that isn’t flat |
| Behind molding, top | Tilts molding forward at top | Rare; only if baseboard is set back |
Nail through the molding and the shim into a stud. The shim remains hidden forever. It’s a simple, mechanical solution that doesn’t require complex cutting.
Method 3: Scribing (For Large, Irregular Gaps)
For a gap that’s large and varies, like a one-inch dip in one corner that tapers to nothing, scribing is the professional’s choice. You aren’t covering the gap; you’re custom-cutting the bottom of the molding to match the floor’s exact contour.
The process is straightforward but requires a steady hand:
- Position the molding exactly where it will be installed.
- Use a compass or scribing tool. Set the compass width to the largest part of the gap.
- Run the compass along the floor, letting the pencil leg trace the floor’s contour onto the face of the molding.
- Cut along that line with a jigsaw or coping saw.
The result is a piece that drops into place, hugging the floor perfectly. As one YouTube pro demonstrated, for a severe transition between two floor heights, scribing and ripping the baseboard itself on a table saw can create a seamless transition that shoe molding then follows.
Tools and Materials You Actually Need
You can’t cut precise scribe lines with a dull blade. You can’t hold molding flush with one hand while nailing with the other. Getting the right tools turns a fight into a straightforward afternoon project.
Here’s the non-negotiable list, with the specs that matter pulled straight from the sources:
- Miter Saw: A 10 or 12-inch model with a carbide-tipped blade or fine-tooth blade is recommended for clean cuts on hardwood moldings (Artistic Finishes, Floor Chem Depot). This isn’t the place for a basic DIY saw blade; splintered edges on thin molding look terrible.
- Brad Nailer: An 18 or 23 gauge nail gun is the preferred choice (YouTube anecdote). The thinner 23-gauge leaves almost invisible holes, but 18-gauge offers more holding power. Hold the gun vertically (up and down) to prevent the chisel-point nail from deflecting off the baseboard.
- Measuring & Marking: Tape measure, pencil, and a combination square or compass for scribing.
- Safety Gear: Safety glasses and hearing protection. A miter saw is loud.
- Shoe Molding: Calculate your total lineal feet, then add 10 percent for waste from cuts (This Old House). Add more than 10 percent if you have many corners or doorways. Quarter-round is typically 3/4 by 3/4 inches, while shoe molding has a flatter, less protruding profile.
- Fasteners: 1.5″ to 2″ brad nails. Length depends on your baseboard and wall material.
- Finishing Supplies: Wood filler, sandpaper, caulk, and your paint or stain.
A 10 or 12-inch motorized miter saw with a carbide-tipped blade is recommended for cutting hardwood moldings. Pre-drill the molding to avoid splitting. When used to transition other floors, such as vinyl or tile floors, fasten to the wall or toe plate.
The Step-by-Step Process for Uneven Floors
This process for how to install shoe molding on uneven floors assumes you’ve chosen your method, flex, shim, or scribe, based on the gaps you measured. The sequence is what saves time and prevents “I have to pull that all off” moments.
Step 1: Measure and Pre-Finish
Measure each wall. Cut your pieces to rough length, adding a few inches. Now, pre-paint or pre-stain every piece on a workbench. The YouTube transcript advice is golden: “definitely pre-paint your shoe molding before you install it.” Filling nail holes later is trivial. Cutting in along the floor with a brush is miserable. If staining, use a stain-grade wood like oak or poplar that matches your existing trim.
Step 2: Dry-Fit and Adapt
Place each piece against the wall without nails. This is where you identify the trouble spots.
- If flexing works, you’ll feel the bottom edge contact the floor as you press the top against the baseboard.
- If shimming is needed, slide your shims behind the molding until the piece sits straight and the bottom gap closes. Mark where the shims are.
- If scribing is needed, perform the scribe cut now (as described in Method 3).
For inside corners on an uneven floor, standard 45-degree miters often fail because the floor plane changes. The fix? Cut one piece square and butt it into the corner. Then cope the end of the adjoining piece to fit over the profile of the first. It’s more forgiving of floor height shifts.
Step 3: Cut and Test Corners
Cut your miters for outside corners. For outside corners, the standard is 45 degrees, but corners are rarely perfect. Test the fit. If there’s a gap, adjust your miter saw by half a degree and recut. A digital angle finder helps, but your eye is the final judge. When you’re happy with a corner, label the two pieces (e.g., “Wall A Left”) so you don’t mix them up.
Step 4: Fasten to the Wall, Not the Floor
Start with a long, straight wall. Apply a thin bead of construction adhesive to the back of the molding if you want extra hold, especially for MDF or on uneven walls. Position the piece, ensuring it follows the floor contour (flexed, shimmed, or scribed).
Now, nail it. According to both the Artistic Finishes guide and YouTube practitioners, you nail the shoe molding into the baseboard. Aim for the thickest part of the baseboard, not up near the top edge. Use the nail spacing from This Old House as a guide: brad nails can typically be spaced 12 to 18 inches apart, with closer spacing needed for dips. Drive nails at a slight angle (toe-nailing) for better grip.
Hold that brad nailer vertically. Holding it sideways increases the chance of deflection, sending a nail into your finger, the floor, or on a wild path behind the molding.
Step 5: Work Around the Room
Continue around the room, fitting corners as you go. When installing multiple small pieces around several turns in a small space, This Old House recommends keeping two or more pieces loose until they are all fitted. This allows you to test the fit of all the pieces before nailing them down.
Finishing Touches: From Good to Invisible
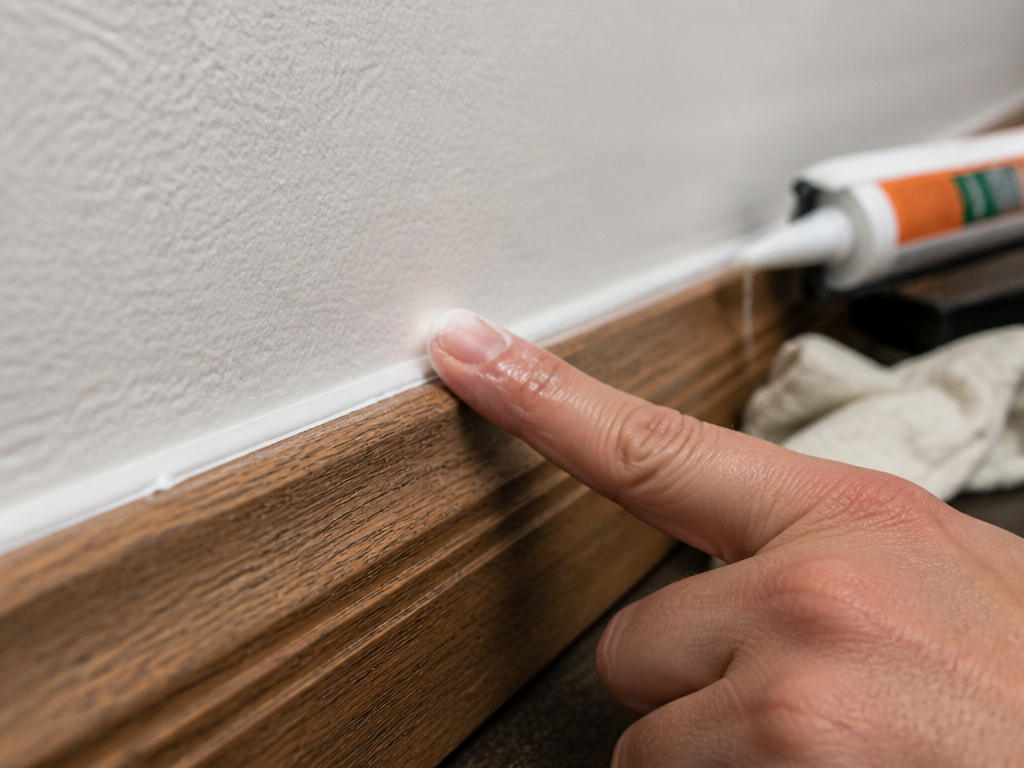
The installation is only half the job. The finishing work is what makes trim look built-in, not tacked on.
- Fill the Holes: Use a wood filler that matches your paint or stain. Press it into the nail holes, let it dry, and sand it flush. For stained work, use a stainable filler and test on a scrap first.
- Caulk the Top Seam: Run a thin, paintable latex caulk bead along the top seam where the shoe molding meets the baseboard. This seals the gap and creates a clean, continuous line. Use a damp finger or caulk tool to smooth it.
- Touch-Up Paint/Stain: Touch up over your filled nail holes and the caulk line. If you pre-finished, this is a two-minute job. If you didn’t, you’re now cutting in along the floor and baseboard, which is why the pre-finish step is required.
- Address Floor Gaps: For the tiny, unavoidable gap between the bottom of the shoe molding and the uneven floor, a flexible, paintable acrylic caulk can be used. However, know the trade-off. As one YouTube carpenter noted, caulk is fine for a few small gaps, but for gaps “all over the place,” shoe molding is the proper solution. Caulk can discolor or crack over time if the floor moves significantly.
Some professionals, like one YouTube source, avoid quarter-round for uneven floor jobs, arguing its protrusion sticks out too far and looks clunky, preferring a thinner shoe molding or flat stock. Other sources list quarter-round as a common choice. A thinner, flat-profile shoe molding or ripped flat stock looks more integrated and handles the transition more gracefully.
How to Choose Shoe Molding Material for Uneven Floors
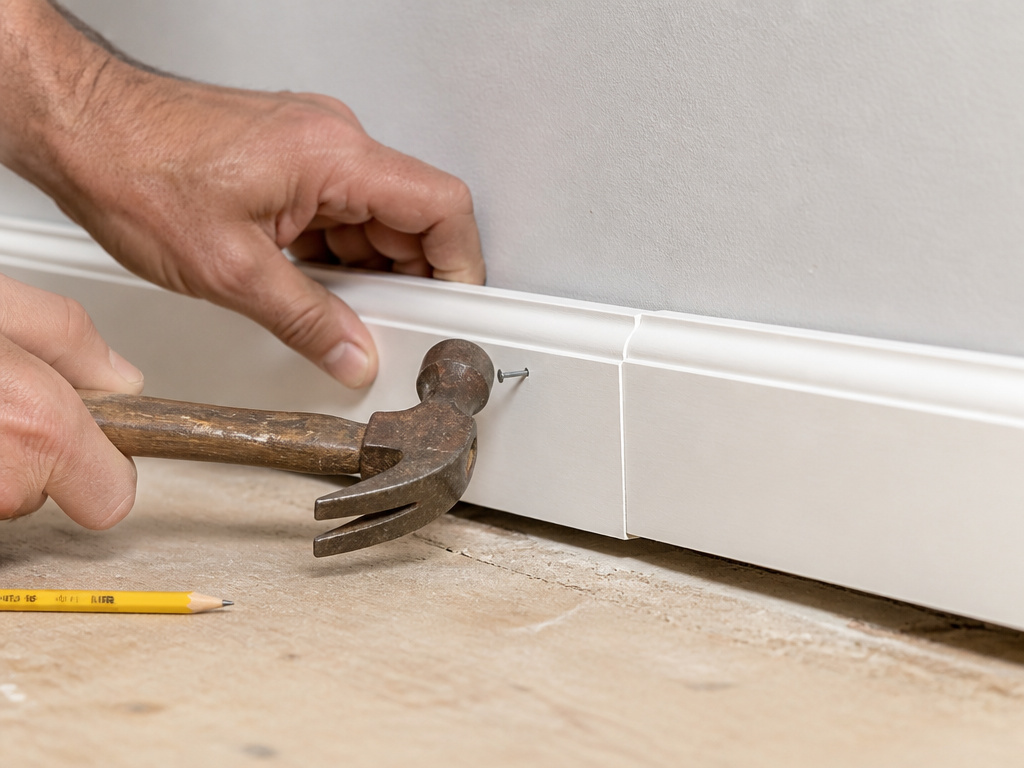
Your material choice affects how well the molding handles floor irregularities. For stain-grade wood trim, you need the molding to follow bends in the wall and floor as closely as possible. This may require adding more nails or cutting small kerfs in the back of the shoe molding to achieve tight bends. In wet areas, consider materials that resist moisture. Regardless of material, always fasten the molding to the wall or baseboard, not the subfloor, to allow for proper floor expansion. For painted finishes, pre-painting the molding before installation can save time and give a cleaner result.
Frequently Asked Questions
Should you caulk between shoe molding and floor?
You can, but it’s a situational fix, not a standard practice. Use a flexible, paintable acrylic caulk only for small, stable gaps (less than 1/8 inch) that are few and far between. For large or numerous gaps, or floors that move (like floating floors), caulk will crack and look terrible. The proper solution is to correctly install the shoe molding using scribing or shimming to minimize the bottom gap in the first place.
What’s the difference between quarter round and shoe molding?
The difference is in profile and protrusion. Quarter round is a perfect quarter-circle, typically 3/4 inch by 3/4 inch. Shoe molding has a flatter, more elongated profile with a curved nose. Shoe molding protrudes less from the wall, giving a lower, subtler look that many find more finished. For uneven floors, the flexibility of both is similar, but shoe molding’s lower profile is often easier to fit tightly against varying floor heights.
Can you install shoe molding on concrete floors?
Yes, but the fastening method changes. You cannot nail into concrete without a powder-actuated tool. The technique from the Artistic Finishes guide applies: when transitioning to floors like vinyl or tile, fasten to the wall or toe plate. For concrete, this means using a high-quality construction adhesive (like Liquid Nails Fuze*It) rated for masonry and wood. Glue the molding to the baseboard and the wall, not the concrete floor, to allow for differential movement.
What size nails should I use for shoe molding?
Use 1.5-inch to 2-inch brad nails. The length must be sufficient to pass through the shoe molding (typically 1/2″ to 3/4″ thick) and penetrate well into the baseboard and wall stud behind it. An 18-gauge nail offers good holding power, while a 23-gauge nail leaves a smaller hole. For MDF or soft pine, pre-drilling is wise to prevent splitting.
How do you handle inside corners on an uneven floor?
Standard miters often fail because the floor height differs on each wall, throwing the joint out of alignment. The professional solution is to cope the joint. Cut one piece square and butt it tight into the corner. Then, cut the adjoining piece at a 45-degree angle and use a coping saw to cut along the profile line, removing the material behind the face. This creates a piece that fits over the profile of the first, locking into place neatly regardless of minor floor height differences.
Before You Go
Installing shoe molding on an uneven floor isn’t about brute force or hiding mistakes with gallons of caulk. It’s about picking the right mechanical solution for the gap in front of you. Flexibility for the small stuff. Shims for the consistent gaps. Scribing for the big, ugly transitions.
The one rule that overrides all others in the how to install shoe molding on uneven floors question? Fasten to the wall or baseboard, not the subfloor. This is critical to preserve the floor’s expansion space, as emphasized by manufacturer guides. It protects your floor and guarantees the trim won’t be the reason you hear popping sounds next winter.
Take the time to pre-finish. The process might feel slow, but you only do it once. A clean, tight shoe molding job doesn’t just cover a gap; it makes the whole room look intentional and complete.
