
How to Polish Metal With a Rotary Tool: Step-by-Step
This post contains affiliate links. As an Amazon Associate, we earn from qualifying purchases.
Polishing metal with a rotary tool requires matching three things: the correct accessory, the right speed, and the proper compound. Start with a coarse accessory and compound to remove scratches, then work through progressively finer grades with lighter pressure, staying below 15,000 RPM to avoid overheating the metal and ruining the finish.
That 15,000 RPM ceiling comes straight from Dremel’s own project guide. It’s a spec, not a suggestion. Ignore it and you’ll burn through compounds, glaze your wheel, and end up with a surface that looks worse than when you started. This is especially true when learning how to polish metal with a rotary tool. The process isn’t about spinning fast; it’s about controlled abrasion.
What follows is the shop method, pulled from manufacturer manuals and lab protocols. You’ll get the step-by-step, the specs that matter, and the fixes for when your finish looks cloudy, streaky, or just plain wrong. By the end, you’ll be able to read any accessory’s maximum RPM label and know exactly which compound to pair with it.
Key Takeaways
- Always start with the coarsest compound and accessory needed to remove the deepest scratch, then work up to finer grades.
- Recommended speeds vary by source: Dremel advises staying below 15,000 RPM for best results, while Enkaytool recommends 3,000 RPM or less, and Harbor Freight’s rotary polisher has a no-load speed range of 1500–3500 RPM.
- Sources disagree on this practice: Enkaytool and the Harbor Freight kit advise using a different buff for each compound, while Dremel’s general advice is to use polishing compound with cloth or felt accessories and nylon brushes without specifying separate wheels.
- Let the tool do the work, applying too much pressure flattens the accessory, reduces its cutting action, and creates friction heat.
- If your fingernail catches on a scratch, sand the metal first with wet/dry paper up to at least 1000 grit before you even touch the rotary tool.
The RPM Debate: What Speed Actually Works?
You’ll find three different numbers if you read the manuals. Dremel says start at 5,000 RPM for a soft polish and stay below 15,000 RPM for best results. Enkaytool, a compound manufacturer, insists best results happen at 3,000 RPM or less, warning that higher rates overheat the work surface. Meanwhile, the Harbor Freight 14-piece aluminum polishing kit lists maximum RPMs of 2,800 for its buffing wheels and 20,000 for its felt bobs.
Start at 5,000 RPM for a soft polish, and then turn it up slowly as needed. For the best results, we recommended staying below 15,000 RPM.. Dremel Project Guide
So who’s right? They all are, for their specific context. The Enkaytool advice assumes you’re using a large, dedicated buffing wheel on a bench grinder or polisher, more surface area means more heat generation. The Harbor Freight limits are safety ratings for those specific, often budget, accessories. Dremel’s range is the practical sweet spot for their high-speed rotary tools and smaller accessories.
The real rule is printed on the accessory itself or its packaging. Never exceed the stated maximum RPM. For a generic guideline with a standard rotary tool and common felt or cloth wheels, start at 5,000 RPM. If the finish isn’t cutting, move up in small increments, but treat 15,000 RPM as a hard ceiling. You’ll hear the difference, a healthy polish has a consistent, medium-pitched whir. Push into the high teens and the pitch rises sharply, and the metal will become too hot to touch very quickly.
How Wheel Size Changes the Game (SFPM)
Speed isn’t just about the motor’s RPM. The diameter of your polishing wheel dramatically changes the surface speed, which is what does the actual work. A larger wheel at the same motor RPM is moving much faster at its outer edge.
Foredom’s buffing guide provides the formula: Surface Feet Per Minute (SFPM) = diameter of the wheel (in inches) x RPM of motor x 0.262. A 4-inch muslin wheel at 7,000 RPM yields 1,834 SFPM, which they note is ideal for buffing. This is why a big bench polisher can run at lower RPMs than a rotary tool, it’s achieving the necessary surface speed with a larger diameter.
| Accessory Type | Typical Diameter | Recommended RPM Range | Notes |
|---|---|---|---|
| Felt Bobs/Cones | 1/4″ – 1″ | 5,000 – 20,000 | Check individual max rating; Harbor Freight felt bobs are rated for 20,000 RPM. |
| Cloth Polishing Wheels | 2″ – 3″ | 5,000 – 15,000 | Larger wheels need lower RPMs to stay within safe SFPM; never exceed the accessory’s printed max. |
| Radial Bristle Discs | 2″ – 3″ | 5,000 – 18,000 | Foredom states 30,000 RPM max for 2″ discs, 20,000 RPM max for 3″ discs. |
For your tool’s rotary tool speed settings, this means if you’re using a tiny 1/4-inch felt bob, you can safely run near your tool’s top speed. Swap to a 3-inch cloth wheel, and you must dial the speed way down to avoid throwing the wheel apart or burning the material.
Choosing Your Weapons: Accessories and Compounds
This is where most guides list every accessory Dremel makes. To be honest. You need three types, matched to the three stages of polishing: cutting down, polishing, and coloring.
- For Cutting Down (Removing Scratches): Start with a stiff brush or a hard felt wheel paired with a coarse compound. Dremel specifically calls out their brass brush (part #535 or #536) for scratch removal on softer metals. For deeper scratches, you’re still in sandpaper territory.
- For Polishing: This is the workhorse stage. Use cloth polishing wheels or felt wheels. The University of Puerto Rico Mayagüez lab uses the Dremel 461 1/4-inch Rubber Polishing Cylinder Point for a strong polish on steel and aluminum. Felt wheels (like the Dremel 414 series) are excellent all-rounders.
- For Final Coloring/Mirror Finish: Use a soft, loose cotton buffing wheel with the finest compound you have (like a white rouge). This stage adds luster, not abrasion.
The compound is essential. It’s the abrasive. The accessory just holds it against the work. Harbor Freight’s 14-piece kit is a perfect case study: it includes Black Emery (coarse), Brown Tripoli (medium), and White Aluminum Oxide (fine). You must progress through them in that order.
Common mistake: Mixing compounds on the same accessory. Coarser compounds mixed with finer compounds will scratch the surface when polishing.. Harbor Freight 14 pc. Aluminum Polishing Kit Manual
If you can’t have a dedicated wheel for each compound, and most DIYers can’t, you must “rake” the wheel clean between grades. Spin the used wheel against a metal rake or a sharp screwdriver shank to scrape out the embedded old compound. A visual check isn’t enough; residue remains.
The 5-Step Process for a Mirror Finish
Follow this sequence. Skipping a step because the metal “looks pretty good” after stage two is how you end up with a shiny surface that still shows every deep scratch under certain light.
Step 1: Clean and Inspect
Degrease the metal completely. Any oil or grease will load your wheel instantly and create a gummy, ineffective mess. Then, run your fingernail across the surface. If it catches on any scratch, you must sand first. As Enkaytool puts it, sand until you achieve a uniform satin finish, with 1000-grit wet/dry paper being the stopping point before polishing.
Step 2: Load the Accessory
Attach your chosen coarse accessory, say, a hard felt wheel. Turn the tool on to a low speed (around 5,000 RPM). Gently touch the compound bar or stick to the spinning wheel briefly. You only need a small amount; the compound will melt and spread. Dremel advises using compounds sparingly – a little goes a long way.
Step 3: Cut and Polish
Work the loaded wheel over the metal in steady, overlapping passes. Keep the tool moving to avoid creating grooves or dips. Use light pressure. The UPRM Dremel polishing standard procedure specifies polishing for 5-10 minutes per step. You’ll see a black residue (metal soot) building up. That’s the sign the compound is cutting.
Step 4: Clean and Change
Wipe the workpiece thoroughly with a clean cloth. If you’re switching to a finer compound, you must either switch to a clean accessory or thoroughly rake the old one. Any contamination ruins the next stage.
Step 5: Final Buff
For the mirror finish, use your softest wheel and finest compound (like a white rouge). This time, use even lighter pressure and a slightly higher speed if your setup allows it, but stay within the safe RPM for that accessory. This stage should feel like you’re barely touching the surface. Buff until the visible scratches are gone and the desired luster appears.
Troubleshooting Common Polishing Problems
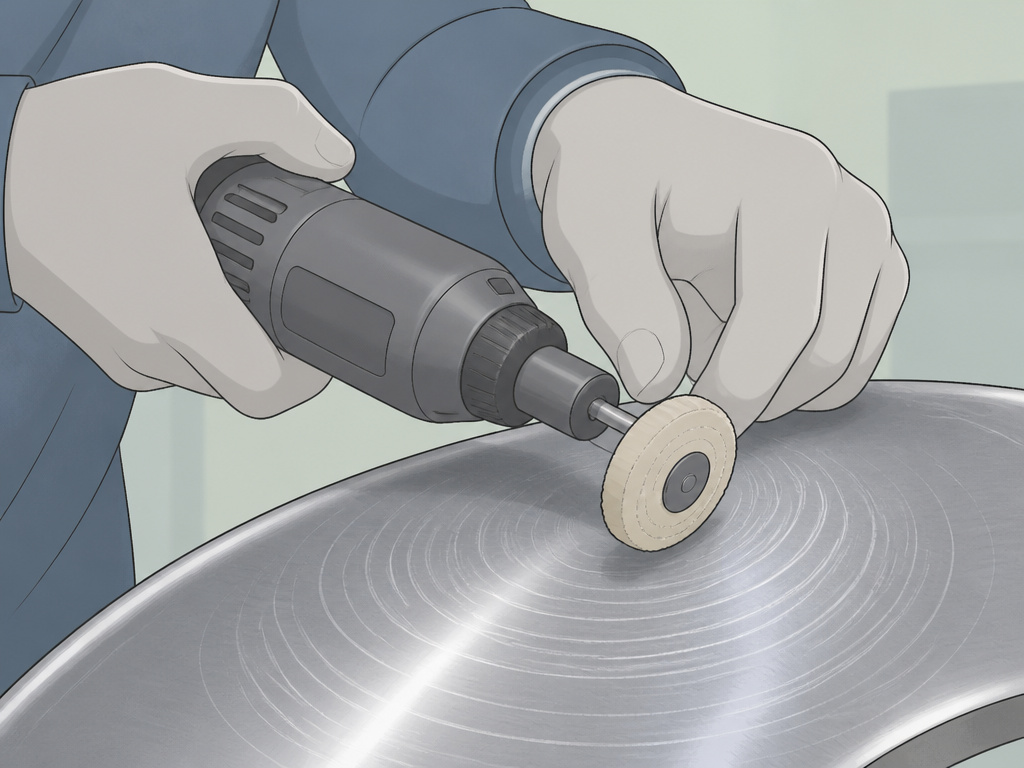
Your finish looks cloudy, streaky, or scratched. Here’s why, and how to fix it.
Problem: Cloudy or Dull Finish
- Likely Cause: Skipped grits. You jumped from a coarse compound to a fine one without using the intermediate grades. Or, you didn’t sand out deep scratches before starting.
- The Fix: Go back to the previous, coarser stage and work through the sequence again, ensuring each step fully removes the scratches from the stage before it.
Problem: Streaks or Swirl Marks
- Likely Cause: Uneven pressure or a contaminated wheel. You might have pressed harder in some areas, or your wheel has a mix of coarse and fine compound.
- The Fix: Rake your wheel clean, re-apply fresh compound, and practice using consistent, light, sweeping motions. Let the wheel do the cutting.
Problem: The Compound Dries Out or Doesn’t Cut
- Likely Cause: Excessive speed and heat. Running too fast, especially with a large wheel, dries out the compound before it can do its job. The Harbor Freight Rotary Polisher/Sander manual lists “too high an RPM setting” as a direct cause of ineffective polishing.
- The Fix: Drop your speed. Significantly. Refer to the RPM table in section one and start at the low end of the range for your accessory.
Problem: The Accessory Wears Out Too Fast
- Likely Cause: Too much pressure. Forcing the accessory flattens it, generates extreme heat, and melts or shreds the material.
- The Fix: This is the hardest habit to break. Consciously remind yourself to use barely any pressure. A properly loaded wheel needs only to kiss the surface.
For intricate work or hard-to-reach areas, a flex shaft attachment for a rotary tool provides much better control than holding the entire tool.
Polishing Different Metals: A Quick Guide
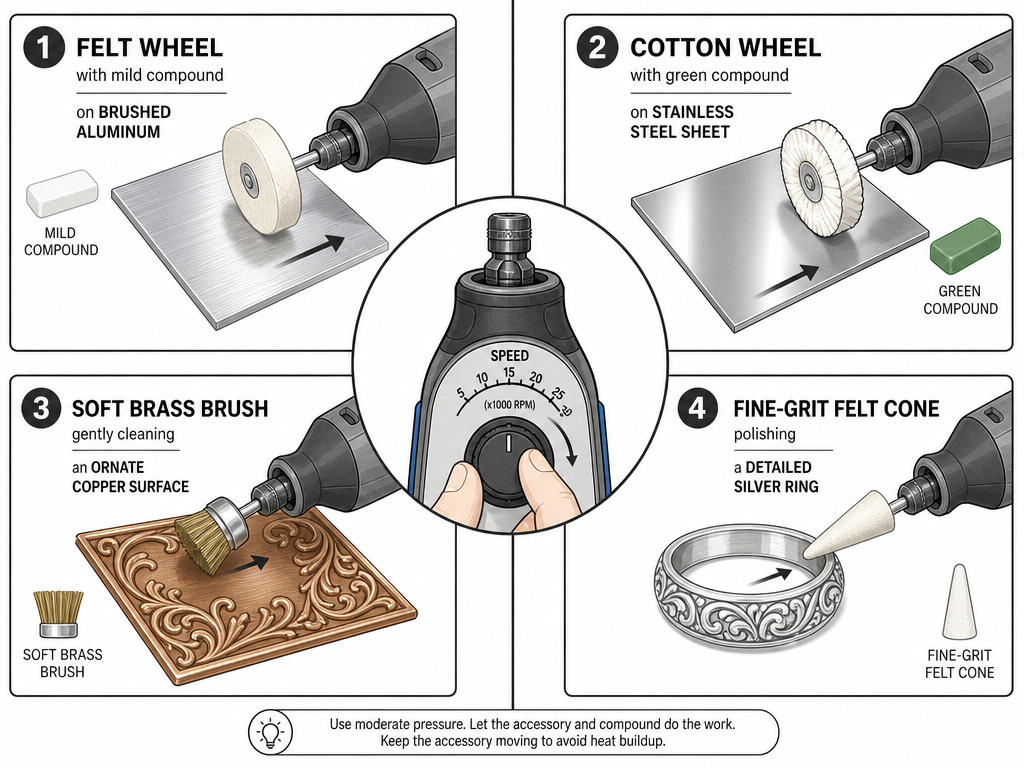
While the process is similar, the compound and accessory choice can shift.
- Aluminum & Soft Metals: Use less aggressive compounds and lighter pressures. Aluminum clogs wheels quickly, so clean them often. The Harbor Freight aluminum kit is specifically formulated for this.
- Steel & Stainless Steel: You can use more aggressive compounds (like emery) initially. The Dremel 461 accessory is noted for steel. Stainless requires patience to avoid overheating, which can cause discoloration (bluing).
- Brass, Copper, & Silver: Use softer accessories like brass brushes (Dremel 535/536) for scratch removal to avoid marring the soft surface. Proceed with finer compounds quickly.
- Jewelry: For detailed jewelry making, swap to smaller accessories like felt cones and bobs. Control is everything, so consider a tool with variable speed.
Remember, if you ever need to remove material more aggressively, like before polishing, that’s a job for dedicated grinding bits, not polishing wheels.
Safety: The Non-Negotiable Setup
This generates fine particulates and debris. Every single source. Dremel, Enkaytool, Harbor Freight, mandates the same protections.
- Eye Protection: ANSI-approved safety goggles are the bare minimum. A full face shield is better, as it also protects from a shattered wheel.
- Respiratory Protection: A dust mask is essential. Polishing metal, especially with dry compounds, creates airborne fine particles you do not want to inhale.
- Secure Your Workpiece: Use clamps. “Whenever practical” means always. A rotating tool can grab and throw a small piece of metal with surprising force.
- Gloves and Apron: Wear them. The black polishing residue is difficult to wash off skin and will stain clothing.
This isn’t scare talk. It’s the predictable outcome of skipping these steps. A flying metal fragment or a loaded wheel coming apart at 15,000 RPM is a serious event.
How to attach accessories to a rotary tool
Secure the accessory into the collet or chuck according to your tool’s manual. Ensure it is centered and tightened firmly to prevent wobbling, which can cause uneven polishing or damage. Always check the accessory’s maximum RPM rating before use; for example, some felt bobs are rated for up to 20,000 RPM while many buffing wheels have a much lower maximum, like 2,800 RPM. Never exceed this stated maximum. Use clamps to support your workpiece whenever practical. Before starting the polish, give the tool a brief test run while holding it safely away from the work surface to confirm the accessory is secure and running true.
How to clean and remove rust before polishing
A clean, scratch-free surface is required before applying polish. For rust and deep scratches, start with a brass brush or appropriate abrasive accessory to remove the bulk of the corrosion. If your fingernail can catch the edge of a scratch, it needs to be sanded before polishing. Continue sanding through progressively finer grits until no scratches are visible and a uniform satin finish is achieved. Always wear eye and respiratory protection during this process to guard against debris. After sanding, thoroughly clean the metal to remove all dust and abrasive particles before moving on to polishing compounds.
Frequently Asked Questions
What Dremel bit is best for polishing metal?
For general polishing, start with a cloth or felt polishing wheel (like the Dremel 414 or 422 series). For removing fine scratches on softer metals without damaging the surface, use a brass brush (Dremel 535 or 536). For a final mirror finish, a soft cotton buffing wheel with a fine rouge compound is ideal.
Can I use a rotary tool to polish a large surface area?
Yes, but it’s inefficient. A rotary tool excels at detail work, edges, and small to medium-sized objects. For polishing large, flat surfaces like car body panels or table tops, a dedicated rotary polisher/sander (like the Harbor Freight model that runs 1500-3500 RPM) or a bench polisher is the right tool for the job.
Why does my polished metal have a rainbow discoloration?
That’s heat-induced oxidation, often called “bluing.” You ran the tool too fast or used too much pressure, overheating the metal. On steel, it can sometimes be polished out with a finer compound at a lower speed. On some metals, it may require re-sanding to remove the affected layer.
Do I need to use different polishing compounds?
Absolutely. Polishing is a progression, like sanding. You start with a coarse compound (like emery) to cut out scratches, move to a medium (tripoli) to refine, and finish with a fine compound (white rouge) for luster. Using just one compound will leave scratches or produce a lackluster finish.
Is a rotary tool or a die grinder better for polishing?
For high-detail, controlled polishing, a rotary tool is superior to a die grinder due to its higher speed range and smaller, more precise accessories. A die grinder is more powerful and better for heavy material removal (like with carbide burrs) but typically runs at a fixed, lower speed that isn’t ideal for fine polishing.
Before You Go
One rule cuts through all the conflicting advice: let the accessory’s maximum RPM rating and the compound’s job dictate your speed, not the other way around. If your finish is flawed, 90% of the time the fix is to slow down, clean your workpiece and wheel thoroughly, and move back one step in the grit progression.
The Harbor Freight 14-piece aluminum polishing kit includes a logical progression of accessories and compounds. For those using a standard Dremel, the path is clear: a 414 felt wheel, a 422 felt cone, a brass brush, and a three-stage compound kit will handle 95% of projects. Now you know not just the steps, but the why behind every choice, from the SFPM math to the raking of a wheel. That’s what separates a shiny result from a professional one.
