
How to Remove Staples From Wood: A Safe Sequence
This post contains affiliate links. As an Amazon Associate, we earn from qualifying purchases.
To remove staples from wood without damage, lift the staple crown first with a flat-head screwdriver or dedicated remover, then pull the staple straight out along its entry angle with pliers. The point you apply force to must be the staple itself, not the surrounding wood. For a 100-square-foot hardwood floor, this takes 2-3 hours; for an old sofa, plan for 45-90 minutes.
That lift-then-pull sequence is the whole game. Prying straight up without lifting first is the single most common cause of splintered wood. If you skip the lift, you’re using the wood as the fulcrum, and the staple legs act like levers to tear the fibers apart. This is the core principle of how to remove staples from wood.
What follows is a tool-by-tool breakdown for how to remove staples from wood, from the screwdriver in your drawer to the specialty puller you might need to buy. We’ll cover furniture, floors, and the stubborn staples that break off flush with the surface.
Key Takeaways
- Always lift the staple crown first with a flat tool before pulling, prying up directly splinters the wood.
- For broken staple legs flush with the surface, woodworkingadvisor.com recommends end-nipping pliers as the tool that grips them cleanly.
- Removing staples from engineered wood like MDF carries a high risk of tear-out; work slowly or consider covering them.
- A floor scraper (dull side down) at a 15-20 degree angle removes 90% of floor staples in minutes, but wear safety glasses.
- Budget 45-90 minutes for a sofa and 2-3 hours per 100 sq ft for a hardwood floor; the fact sheet notes difficult rooms can take 4-5 hours, while fresh removal can take under 2 hours.
The Prying & Pulling Sequence That Avoids Splinters
You have two goals: get the staple out and leave the wood intact. Most methods fail at the second part because they treat the staple like a nail. A staple is two thin legs connected by a crown, and yanking on that crown without first breaking its grip is a recipe for splinters.
Never yank a staple straight up; that torque splinters the wood fiber around the staple legs. The proper sequence is lift, then pull along the angle of entry.
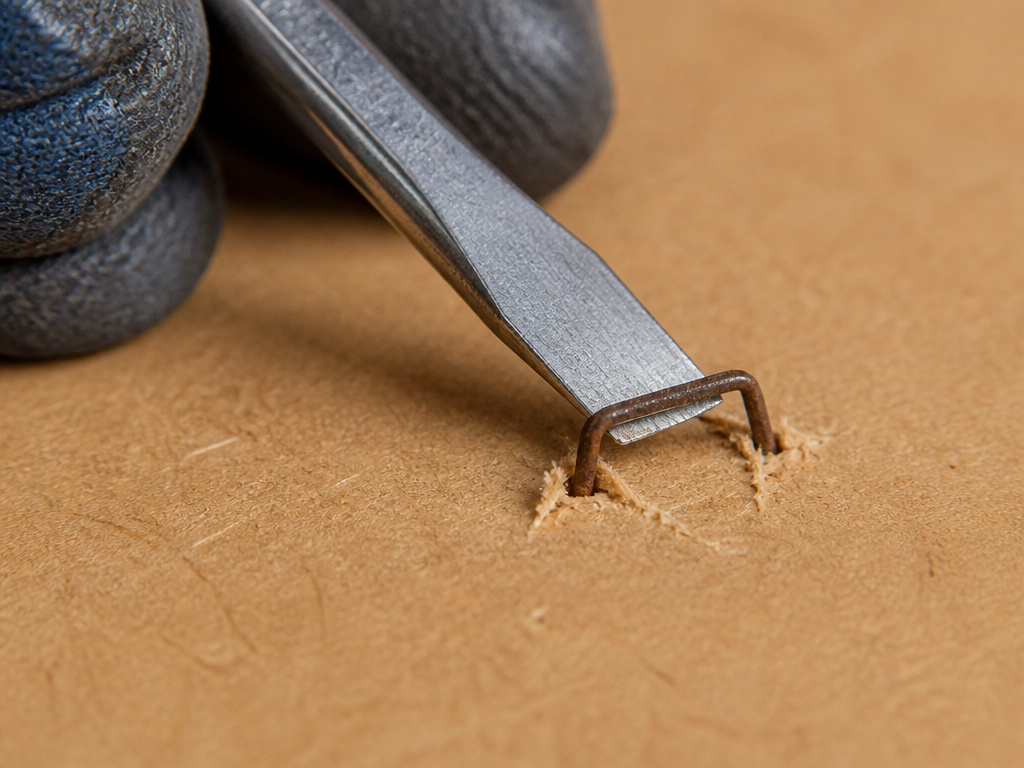
Start with a standard flat-head screwdriver with a 3/16″ or 1/4″ blade. A larger blade is too wide for the job and will gouge the frame. Slide the tip under the center of the staple’s crown, the horizontal bar. Apply force to the staple itself, not the wood surface. If the tool is digging into the frame, you’re using too much force or the wrong angle.
Once the crown is lifted slightly, switch to needle-nose pliers. Grip the crown as close to the wood as possible. Now, pull the staple straight out along the angle it went in. You’ll feel the legs release. If you meet solid resistance, rock the pliers gently side-to-side to break the remaining grip. Rushing this step risks damaging the staple or the wood.
Where this goes sideways: Prying up without the initial lift. The crown acts as a lever, and the wood becomes the fulcrum. The result is a visible, splintered divot around the staple hole that no amount of sanding will fully hide.
Your Tool Kit: What Works and When It Fails
Not all staples are created equal, and neither are the tools to remove them. The right tool changes with the staple’s size, age, and how badly it’s stuck.
| Tool | Best For | Risk If Used Wrong |
|---|---|---|
| Flat-Head Screwdriver | Initial prying on furniture staples, lifting crowns. | Gouging the wood frame if the blade is too wide or used for prying. |
| Needle-Nose Pliers | Gripping and pulling staples after the crown is lifted. | Bending staple legs if you grip too far from the wood surface. |
| End-Nipping Pliers | Broken staple legs flush with or below the surface. | Crushing the leg if jaws aren’t aligned; can mar surface if slipped. |
| Floor Scraper | Bulk removal of staples from subfloors or hardwood. | Sending staples flying as shrapnel (safety glasses are non-negotiable). |
| Upholstery Staple Remover | Well-seated staples in furniture frames. | Slipping and scratching the wood if not hooked squarely under the crown. |
The research shows a clear split on staple removers. Woodhappen.com notes a staple remover is not always the best tool and can damage the surface if used incorrectly, generally reserving it for smaller staples. Family Handyman finds multi-toothed pullers with a curved tip effective, depending on the staple type and visibility. According to stitchdesk.com, a dedicated upholstery remover (a V-tipped or curved tool) paired with needle-nose pliers is the most effective combination for furniture when learning how to remove staples from wood. It costs $10-20 and hooks under low-profile crowns better than a screwdriver.
For floor staples, the game changes. A floor scraper, with the blade flipped so the dull side is down, pushed at a 15-20 degree angle, will pop out many staples in a pass. It’s messy and loud. Staples fly. Follow up with pliers for the stubborn few. This method works best right after carpet removal when staples are slightly loose.
Staple Removal on Different Surfaces
The wood you’re working on dictates your caution level. A solid oak floor can handle more than a piece of furniture made from medium-density fiberboard.
Furniture & Upholstery Frames
Staple crowns here are oriented parallel to the edge of the fabric they once secured. Pry in line with the crown, not perpendicular to it. Prying across it bends the crown and makes removal harder. Full staple removal from an old sofa can take 45-90 minutes, especially with multiple layers of staples. For very old staples over dried-out wood, a trick is to add a small amount of moisture to the wood around the staple, wait 5 minutes, and try again. The slight swelling can loosen the grip.
Hardwood Floors & Subfloors
The discrepancy likely comes from installation methods, hand-tacked carpet versus machine-stapled padding. In any case, work in 4×4-foot grid sections, clearing each completely before moving on. For shallow subfloor staples you’re covering with new underlayment, one controversial shortcut is to snip them flush with wire cutters or hammer them flat. Check by hand for sharp edges. It’s faster, but only do this if you’re sure the new layer will cover them completely.
Engineered Wood (MDF, Particle Board)
This is the high-risk category. Removing staples from engineered wood like MDF is riskier than solid wood. The material is made of fibers and adhesive, so prying can easily tear out a chunk. If you must remove them, proceed with extreme care. The fact sheet advises avoiding using a utility knife as a prying tool, as it’s easy to gouge the frame. Sometimes, it’s better to drive the staple in deeper and fill over it.
Dealing With Broken, Rusted, and Stubborn Staples
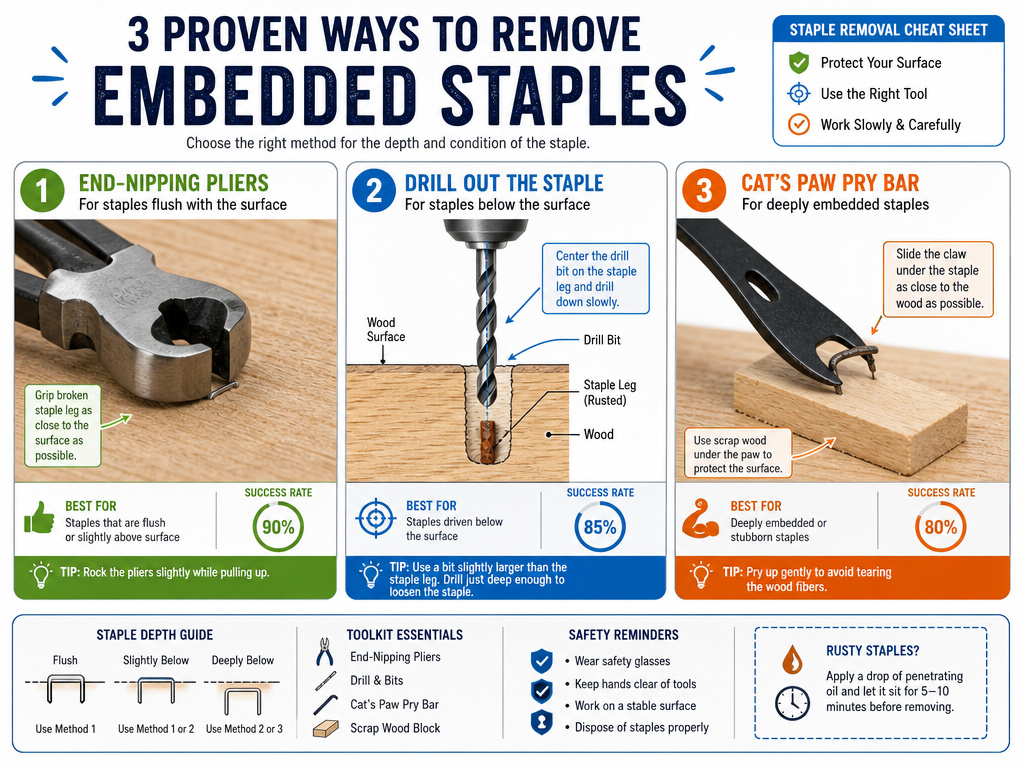
Staples break. They rust. They fuse to the wood. Your first-line tools often fail here, and that’s when you need the right second-line tool.
- Broken Staple Crowns: When the crown snaps off, leaving the legs flush or below the surface, needle-nose pliers are useless. You need end-nipping pliers (also called end-cutting pliers). Their rounded, flat jaws are designed to grip right at the surface. Position the jaws on either side of the staple leg and squeeze. This pulls the leg straight up.
- Rusted or Corroded Staples: These are brittle. Work slowly and anticipate breakage. If a rusted leg is corroded in place and won’t pull, a last resort is to use a small drill bit (slightly larger than the leg diameter) to drill it out. For staples stuck with old adhesive, a heat gun can soften the glue. Keep it moving to avoid scorching the wood.
- Deeply Embedded Staples: For subfloors, a tiny pry bar like a cat’s paw works. Slide it under, rock gently, and lift. Always place a thin scrap of wood under the tool to avoid denting the subfloor. For a truly stubborn field of staples, a metal-cutting blade on an oscillating multi-tool can shear the tops off. Hearing and eye protection are mandatory with this method.
Broken legs are not optional to remove. They create bumps under new fabric or flooring and can snag or slice material. The repair for a gouged frame from aggressive removal starts at $50-200. A few minutes of patience is cheaper.
Safety and Clean-Up You Can’t Skip
This isn’t complicated work, but it has specific hazards. You must wear safety glasses and work gloves. Staples, especially when scraped from a floor, fly with surprising speed and can easily hit an eye. Gloves protect against slips with tools and the sharp edges of broken staples.
Knee pads are a luxury that becomes a necessity after fifteen minutes on a hardwood floor. You’ll be glad you did.
Clean-up is part of the job. Never toss loose staples into a trash bag, they will puncture it. Collect them in a small, sealed box or tin as you go. Once you’re done, you can take them to a scrap metal yard for recycling. It’s a minor step that keeps your workspace and the trash crew safe.
How to Cut Staple Legs for Easier Removal
When a staple crown breaks off, leaving the legs embedded flush or below the wood surface, cutting them is a practical first step. Use end-nipping pliers with a rounded jaw face to grip and shear the metal leg. For deeply embedded staples, a metal cutting blade on an oscillating multi-tool can quickly shear the tops off. Always wear safety glasses for this work, as cut metal can fly. This approach weakens the staple’s hold, making the remaining piece easier to pry out without putting excessive torque on the surrounding wood.
Hammering Staples Out from the Back
For staples in accessible locations, driving them out from the back can be effective. Use a nail set or a similar punch to tap the staple leg back through the wood it entered. Place the tip of the tool directly on the staple leg and tap gently with a hammer. This method pushes the staple out in the direction it went in, which minimizes tear-out and splintering on the visible surface. It works well for furniture frames or subfloors where you can reach the reverse side, avoiding the need for prying from the front.
Frequently Asked Questions
How do you easily get staples out of wood?
The easiest method is the lift-then-pull sequence. Lift the staple crown with a flat-head screwdriver or staple remover, then pull it out with pliers along its entry angle. For floors, a floor scraper (dull side down) at a low angle removes most staples in one pass.
What is a good heavy-duty staple remover for wood?
For furniture, a dedicated upholstery staple remover with a V-tip or curved end gives you the most effective grip. Brands like Arrow or generic models from hardware stores work. For flooring, a heavy-duty staple puller with angled double prongs, often priced under $5, is effective for bulk work.
What can I use as a staple remover if I don’t have one?
Flat-head screwdriver (3/16″ or 1/4″ blade) is the best substitute. Use it to lift the crown, then use needle-nose pliers, locking pliers (Vise-Grip), or even a sturdy pair of tweezers to pull the staple out. Avoid using a utility knife as a prying tool, it’s easy to slip and gouge the wood.
Can you hammer staples into the wood instead of removing them?
For subfloors that will be covered, yes. If a staple is shallow and stubborn, you can tap it flush with a hammer or use an oscillating tool to cut it off. This is a last-resort speed tactic, not a best practice for visible furniture or finished floors, where removal is necessary for a smooth surface.
The Bottom Line
Staple removal is more about technique than tools. The lift-then-pull rule prevents most wood damage. Match your tool to the problem: screwdriver and pliers for furniture, a floor scraper for bulk floor work, and end-nipping pliers for the broken ones. Remember the time estimates, a small room takes a couple of hours, an old piece of furniture can take over an hour. Rushing is what turns a simple task into a repair project. If you find yourself forcing it, stop. Reposition the tool. That’s the difference between a clean removal and a splintered mess.
