
How to Turn a Pen on a Wood Lathe: The 7-Step Process
This post contains affiliate links. As an Amazon Associate, we earn from qualifying purchases.
Turning a pen on a wood lathe is a 7-step process: prepare and drill the blank, glue in the brass tube, square the ends, mount it on the lathe, turn it to shape, sand and finish, then press the components together. The core tools are a lathe, a pen mandrel, bushings, a drill, and a barrel trimmer. Lathe speed is critical: drill at ~1000 RPM, turn at 1000-1500 RPM, and finish at ~2000 RPM.
That speed progression is essential for keeping a small, fragile blank from shattering on the tool rest. A pen blank turned to final thickness is only about 1/32″ of wood over the brass tube. Go too fast on an out-of-round blank, and you get chatter; go too slow while sanding, and you’ll never build the heat needed for a glassy CA glue finish. The fundamentals of how to turn a pen on a wood lathe are built on this control.
What follows is the full walkthrough, from choosing your first kit to the final press fit. The mandatory safety steps the manuals emphasize, the two schools of thought on sanding grits, and why aligning your lathe’s centers matters ten times more for pen turning than for a table leg will be explained.
Key Takeaways
- Start with a Slimline pen kit; the 7mm tube is standard and the parts are forgiving for a first assembly.
- Match lathe speed to the task: Sources like the Penn State Industries guide recommend ~1000 RPM for drilling, 1000-1500 RPM for shaping, and ~2000 RPM for finishing, while other approaches emphasize starting at the lowest speed and adjusting based on workpiece size.
- A barrel trimmer is essential for squaring blanks; the wrong cut leaves a visible gap between the wood and the pen’s metal components.
- CA (cyanoacrylate) glue is the default for bonding tubes and for finishing, but it demands excellent ventilation and a dust mask.
- Always unplug the lathe before installing or removing centers or adjusting lock handles, the switch isn’t a safety.
The 7-Step Process for Turning a Pen
Forget the vague tutorials on how to turn a pen on a wood lathe. Here is the sequence that actually works, grounded in the manuals from Penn State Industries and others. Each step has a consequence if you skip it.
Start drilling at the lathe’s slowest speed, around the recommended ~1000 RPM. A blank that isn’t perfectly square will wobble violently at high speed, and the drill bit can grab and split the wood along the grain.
Step 1: Prepare and Drill the Blank
Cut your wood blank to length, slightly longer than the brass tube. Find the center of each end. This is where most first pens fail. If your hole isn’t centered, the wall of wood will be thinner on one side. When you turn it down, you’ll blow through to the tube or have an ugly, asymmetrical pen.
Use a drill press if you have one. If you’re drilling on the lathe itself, mount the blank in a chuck or a dedicated pen drilling vise. The Penn State Industries Pen Maker Starter Set recommends a speed of ~1000 RPM for this. The goal is a clean, straight hole for the 7mm (for Slimline kits) or 3/8″ (for Bolt Action kits) brass tube.
Step 2: Glue the Tube into the Blank
Scuff the brass tube with sandpaper so the glue has something to bite. Mix a slow-set epoxy or use thick CA glue. Spread it evenly over the tube and insert it into the blank. You must press the tube fully in and ensure it’s not protruding.
Where this goes sideways: Using too little glue. A void between the tube and wood creates a weak spot. When you turn the blank, the unsupported wood can crack or “blow out.” The Penn State Industries manual notes an edge case: you can spray accelerator inside the drilled blank before inserting the glue-covered tube to speed drying, but you have to work fast.
Step 3: Square the Ends with a Barrel Trimmer
After the glue cures, you’ll have squeeze-out and the blank ends won’t be perfectly square to the tube. This is why you need a barrel trimmer. It’s a cutter that mounts in a drill chuck and files the end of the blank down flush with the brass tube.
The specific trimmer size matters: 7mm for Slimline tubes, 3/8″ for Bolt Action. Forcing the wrong size will damage the cutter or the tube. This step eliminates gaps in the final assembly. Skip it, and you’ll see a sliver of brass between the wood and the pen’s tip, a sure sign of a beginner.
Step 4: Mount the Blank on the Lathe
This is where you choose your setup: a traditional pen mandrel or a “mandrel saver” system. The traditional mandrel threads into the headstock, and you tighten a nut against the bushings at the tailstock end. This can flex if overtightened, leading to a barrel that’s thicker in the middle.
A mandrel saver uses a live center in the tailstock to press directly on the end of the mandrel, reducing flex. Whichever you use, the order is: bushing, blank, center bushing, blank, bushing, then nut or tailstock pressure. The bushings act as your diameter gauge.
Step 5: Turn the Blank to Shape
Now for the fun part. With the lathe at the recommended 1000-1500 RPM, use a roughing gouge to turn the square blank into a round cylinder. Then switch to a skew chisel or spindle gouge for finer shaping. Your goal is to turn the wood down until it is just flush with the brass bushings on either side.
Keep your tools sharp. A dull tool tears grain instead of cutting it, creating more sanding work. The wood is now incredibly thin. You’ll feel the difference when cutting, there’s almost no resistance once you’re at the bushing diameter. Stop immediately if you see brass.
Step 6: Sand and Apply a Finish
Stop the lathe and sand through the grits by hand. There are two schools of thought here, even within the same manufacturer’s guide. The simplified approach is 150 grit to 600 grit. The nuanced approach depends on your wood:
- 80-100 grit: For rough shaping if the blank is still thick.
- 120-150 grit: If the blank is already fairly smooth.
- 220-240 grit: Final sanding for most domestic woods like maple or cherry.
- 320-400 grit: Necessary for dense, oily exotics like cocobolo or ebony.
After sanding, apply your finish. For a classic look, use a friction polish like Mylands at ~2000 RPM. For a super-glossy, durable finish, apply thin CA glue while the blank spins at the same high speed. It cures instantly from the friction heat.
Step 7: Assemble the Pen
Remove the finished barrels from the mandrel, keeping them in order. Use a pen press or a bench vise to press the components together. Press the tip into one barrel, then the transmission mechanism into the other. The final step is pressing the two halves together over the center band.
The grain alignment you marked earlier matters now. If the lines don’t match, you can twist the upper barrel slightly until they do. A pen that looks like one continuous piece of wood is the mark of careful work.
Tools and Materials You Absolutely Need
You can’t substitute your way around a few core items. This table separates the essentials from the “nice-to-haves.”
| Tool / Material | Purpose | What Happens If You Skip It |
|---|---|---|
| Wood Lathe | Spins the workpiece for cutting & sanding. | The project doesn’t happen. |
| Pen Mandrel & Bushings | Holds the blank at the correct diameter for turning. | Cannot accurately turn a round, sized pen barrel. |
| Barrel Trimmer | Squares blank ends to the brass tube. | Visible gaps between wood and metal pen parts. |
| Drill & Correct Bit (7mm or 3/8″) | Creates hole for the brass tube. | No place for the tube; pen kit won’t assemble. |
| CA Glue or Epoxy | Bonds tube to wood; can also be the finish. | Tube slips or spins during turning, ruining blank. |
| Turning Tools (Gouge, Skew) | Cuts and shapes the wood. | Can’t remove material; will sand for hours instead. |
Beyond this core list, you need sandpaper, a finish, and safety gear: a face shield and a dust mask. CA glue fumes are no joke.
Lathe Speed Settings: Drilling, Turning, and Finishing
Lathe speed is a variable you control for safety and finish quality. Small diameter work like pens requires higher speeds than big bowls to maintain proper cutting surface speed.
Here’s how to interpret that: the specific numbers are less important than the principle. Start slow for safety, especially with an unbalanced blank. Increase speed as the workpiece becomes round and your confidence grows. Use higher speeds for finishing to generate the friction needed for polish or CA glue curing.
Common mistake: Leaving the lathe on high speed when you stop to check your work. When you restart, the sudden jerk can cause the tool to dig in and ruin your piece. Always return to a low speed before switching off, and start at that low speed every time.
Choosing Your First Pen Kit and Blank
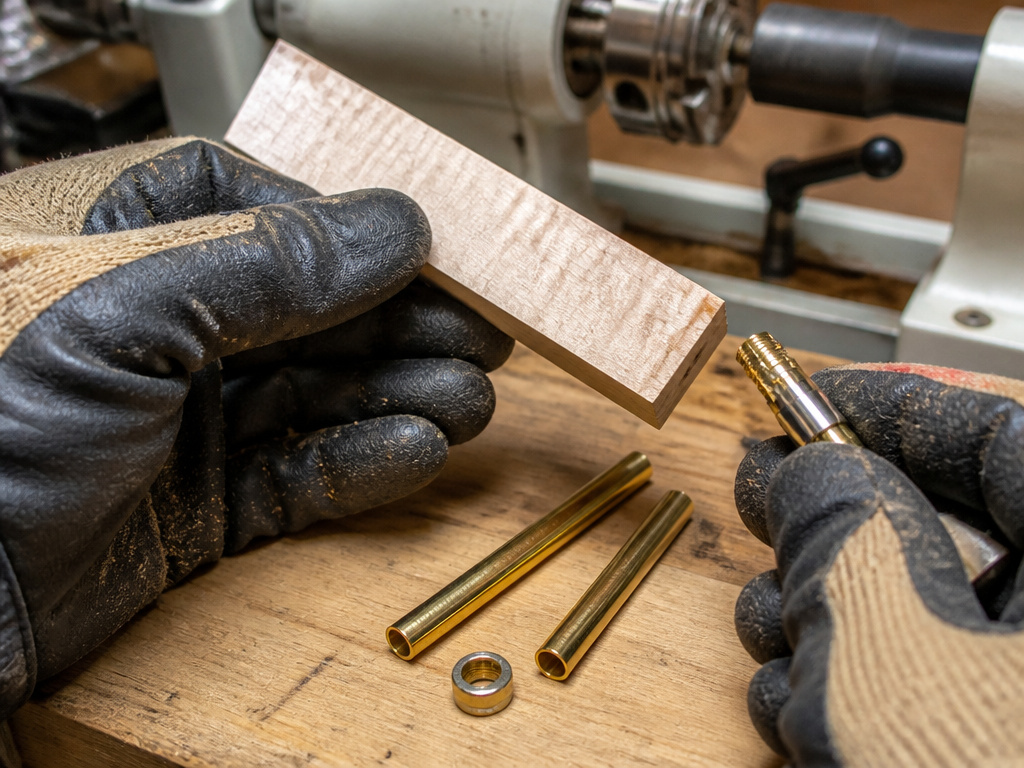
Walk into a woodworking store, and the wall of pen kits is overwhelming. Start simple.
Slimline kits are the universal first project. They are inexpensive, have few parts, and the 7mm tube is the standard everything is built around. A “Bolt Action” or “Cigar” pen looks fantastic but has more components and tighter tolerances.
For wood blanks, avoid the exotic, oily woods for your first try. They can be difficult to glue and finish. Pick a stable, forgiving domestic wood like maple, walnut, or cherry. These sand predictably and take a finish beautifully. The fancy burls and acrylics can come later.
| Kit Type | Best For | Challenge for Beginners |
|---|---|---|
| Slimline / Twist Pen | First project, low cost, gift sets. | Getting a smooth transition at the center band. |
| Bolt Action | Tactile feel, “macho” gifts. | Aligning the bolt mechanism during assembly. |
| Cigar Pen | Substantial feel, showpiece. | Larger blank size requires more careful turning. |
| Acrylic / Hybrid Blank | Vibrant colors, no grain. | Brittle material can crack; generates heat when turning. |
Mandrel vs. Mandrel Saver: Which Setup is Better?

This is a real debate in the pen turning community. Your choice affects accuracy.
A traditional pen mandrel screws into the headstock. You slide on the blanks and bushings, then thread a nut at the tailstock end to tighten everything. The problem is tailstock pressure. Too much, and the slender rod bends, giving you a pen barrel that’s fatter in the middle. You have to develop a feel for the right tightness.
A mandrel saver system uses a special live center with a recess. The mandrel rod butts up against the inside of this center, so the tailstock force is applied directly along the axis of the rod, eliminating the bending moment. It’s objectively more accurate for consistent diameters.
For your first dozen pens, a standard mandrel is fine. You’ll learn the feel. But if you find your barrels are never quite cylindrical, the upgrade to a mandrel saver is the single best fix.
Troubleshooting Common Pen Turning Problems
You will encounter these. Everyone does.
- Blowout: The wood cracks or splinters off during turning.
- Cause: Dull tool, digging in too deep, or a glue void around the tube.
- Fix: Use sharp tools, take light passes, and ensure full glue coverage.
- Gaps at the Components: You see a hairline of brass between the wood and the pen tip or center band.
- Cause: Blank ends were not squared perfectly with the barrel trimmer.
- Fix: Re-trim the end carefully, ensuring the cutter is sharp and square.
- Cloudy or Blotchy CA Finish:
- Cause: Sanding dust trapped under the finish, or moisture in the wood.
- Fix: Clean the blank thoroughly with denatured alcohol after sanding and before applying CA glue.
- Pen Mechanism Feels Gritty or Doesn’t Twist Smoothly:
- Cause: CA glue or finish seeped into the tube during application.
- Fix: Use a 7mm reamer or sandpaper wrapped around a dowel to clean the inside of the tube before assembly.
Safety and Setup Are Not Optional
The manuals are unambiguous on a few points. The CWI-WL125 manual states you must always turn the variable speed dial to the lowest setting before starting the lathe. The same manual, and every other, screams one rule in all caps: UNPLUG THE LATHE BEFORE INSTALLING CENTERS.
Your workspace matters. The Hope Woodturning Statos XL manual specifies the lathe spindle center should be at elbow height, with at least 80 cm of free space around it. It also calls for a bright light, at least 300-500 LUX at the cutting edge. You can’t steer a tool you can’t see.
Wear a face shield. A pen blank is small, but if it comes loose, it’s a high-speed projectile. Wear a dust mask, especially when sanding or using CA glue. This safety advice is the baseline for keeping your eyes and lungs functional.
What lathe specs matter for pen turning?
Your lathe needs to fit the small parts. The swing over bed, or maximum diameter it can turn, must be greater than your pen blank. The distance between centers must be long enough for your mandrel. The headstock and tailstock tapers, often a #1 Morse taper, must match your accessories like live centers and mandrel shafts. The headstock spindle thread size dictates which faceplates or chucks will screw on directly. Always start at the lowest speed when beginning a new workpiece, and adjust speed based on the workpiece size and the stage you’re in, from roughing to finishing.
Carbide or HSS tools for pens?
You have two main choices. High-speed steel (HSS) tools are traditional and require regular sharpening on a grinder, but a sharp edge can produce a fine finish. Carbide insert tools use replaceable, pre-sharpened tips. They stay sharp longer and are often easier for beginners, as you skip the learning curve of sharpening. For the fine, detailed work of pen turning, a sharp tool of either type is essential. A dull tool will tear the wood, especially on the final passes where the wood can be very thin, forcing you to sand away more material than you should.
Frequently Asked Questions
What is the best lathe for pen turning?
For a dedicated pen turner, a mini-lathe like the General 25-010 M1 (with 12″ between centers) or a variable-speed benchtop model like the CWI-WL125 (with 12″ between centers) are common choices. They feature a #1 Morse Taper and speeds that reach the 2000+ RPM range needed for finishing. For general workshop use, a lathe like the Turncrafter™ Commander™ with a 10″ swing over bed can also be used for pen turning.
Can you turn pens on a large lathe?
Absolutely. A large lathe is overkill, but it works. The challenge is ensuring the lathe’s lowest speed is appropriate for safely starting an unbalanced pen blank. You also need to ensure you have the correct adapters (a #2 Morse Taper to #1 reducer, and a 1″-8TPI to 3/4″-16TPI spindle adapter) to use standard pen mandrels.
What RPM should I use for pen turning? Sources like the Penn State Industries Pen Maker Starter Set recommend ~1000 RPM for drilling, 1000-1500 RPM for turning down to shape, and ~2000 RPM for sanding and finishing. In contrast, the General 25-010 M1 manual advises starting at the lowest speed and adjusting based on size. The key principle is to start slow for safety and increase speed as the workpiece becomes round and for finishing.
How do I keep my pen barrels from cracking?
Cracking usually happens from internal stress, heat, or poor gluing. Use stable, dry wood. Ensure the brass tube is fully and evenly glued into the blank with no voids. When turning, use sharp tools and take light passes to avoid generating excessive heat that can stress the thin wood.
Before You Go
Your first pen won’t be perfect. It might have a small gap, or the finish might be a little cloudy. That’s fine. The second one will be better. The goal is to complete the process from block of wood to functional writing instrument.
The one rule I wish I’d known from the start: never assume the blank is square or the hole is centered. Check both, twice. Everything that comes after depends on that foundation being true. Everything else, the choice of finish, the kit style, the mandrel type, is a refinement you can explore once the basics are muscle memory.
Now, go make some sawdust.
