
How to Use a Drill Press Vise: Step-by-Step Guide
This post contains affiliate links. As an Amazon Associate, we earn from qualifying purchases.
To use a drill press vise, you must mount it securely to the table, align your workpiece under the drill bit, and clamp it with enough force to prevent spinning but not so much that you damage the vise or the part. The Harbor Freight 4″ model may not bolt directly to the table if the drill press has less than a 12-inch swing; in those cases, secure the vise with two C-clamps.
That 12-inch swing rule is where a lot of home shop setups hit a wall. You can follow every mounting step perfectly, but if your drill press table is too small, the vise hangs over the edge and you can’t get bolts into the T-slots. The manual’s solution, two C-clamps, works, but it changes how you think about stability for the whole operation. This is a key consideration for how to use a drill press vise.
What follows is the full walkthrough on how to use a drill press vise: how to choose between bolting and clamping, the one alignment trick that stops drill bits from wandering, and how to handle the two most common problems, a spinning workpiece and a vise that slowly works itself loose. We’ll also sort out the conflicting advice from different manufacturers on how many bolts you actually need.
Key Takeaways
- Mount the vise to a flat, solid surface using bolts; sources disagree on the number of mounting points, with Harbor Freight specifying four holes and Palmgren stating at least two locations are sufficient. Use C-clamps if your drill press has less than a 12-inch swing.
- Always wear ANSI-approved safety goggles and heavy-duty work gloves during setup and use to protect against metal chips and pinch points.
- Do not overtighten the vise handle; excessive force can damage the vise mechanism or distort your workpiece.
- For round or slippery material, use a dedicated stop or, if your vise has them, jaw features like V-grooves to prevent the piece from rotating under drill pressure.
- Keep the vise’s lead screw and machined surfaces lubricated with medium weight machine oil and clean off the factory protective coating before first use.
What a Drill Press Vise Actually Does
A drill press vise isn’t just a clamp. It’s a precision positioning device. Its entire job is to turn the three-dimensional challenge of drilling a straight hole into a simple, repeatable two-axis movement: you move the table up/down and in/out, and the vise holds everything else rock-steady.
A loose workpiece doesn’t just make an ugly hole; it can grab the drill bit, especially in metal, and spin violently. I’ve seen a small aluminum block become a projectile because the operator didn’t understand how to use a drill press vise and clamped it on a smooth surface without a stop. The vise held, but the part didn’t.
A drill press vise provides a rigid, parallel clamping surface that transfers the drill’s torque and thrust directly into the drill press table, preventing workpiece rotation and ensuring the drill bit enters the material perpendicularly.
That’s the theory. In practice, you’re working with cast iron, steel screws, and maybe a few aluminum chips. The process breaks into three concrete actions: mounting the vise, securing the workpiece, and drilling. Fail any one, and the others don’t matter.
The 4-Step Mounting Process (Bolt vs. Clamp)
This is the foundation. A vise that can shift on the table is worse than no vise at all, it gives a false sense of security. The manuals from Harbor Freight and Palmgren agree on core safety and mounting steps but disagree on the number of mounting points required.
First, the universal rules. The Harbor Freight manual states you must place the vise on a flat, solid surface capable of supporting its weight plus the workpiece. Before you drill any holes, verify there are no hidden utility lines in your workbench or drill press table. Then, use the vise as a template to mark your mounting holes.
Here’s where the paths diverge. Some manufacturers specify a number, others give a minimum.
| Manufacturer / Model | Mounting Instruction | Key Takeaway |
|---|---|---|
| Harbor Freight 4″ Vise (Item 58779) | Mark and use four mounting holes for bolts. | Designed for maximum stability; assumes your table has the space. |
| Palmgren Low-Profile Vises | Bolt or clamp in at least two locations using mounting flanges. | Two points are sufficient for rigidity; offers flexibility for odd setups. |
| Harbor Freight (Small Swing) | If drill press has <12″ swing, secure with two C-Clamps. | A physical limit, not a recommendation. Clamping is the only option. |
The “at least two” rule from Palmgren offers flexibility for setups where space is limited, while Harbor Freight’s four-hole instruction is designed for maximum stability. It means you can solidly mount a vise even if your drill press table only has two T-slots in line, or if you’re temporarily clamping it to a benchtop. The four-hole ideal is for permanent, ultra-rigid mounting on a full-size table.
Common mistake: Drilling holes that are too small for your bolts. If the bolts bind, you’ll strip the threads in your table or bend the bolt, compromising the entire connection. Drill the appropriate size hole for the bolts you’re using, they’re almost always sold separately.
The process is simple:
- Position the vise where you need it on the table.
- Mark through the mounting slots or holes.
- Drill the correct size clearance holes.
- Secure with bolts, washers, and nuts, or with C-clamps if you’re under the 12-inch swing.
Tighten the bolts evenly and firmly. You shouldn’t see any gap between the vise base and the table. A quick test: try to wiggle the vise by hand. There should be zero play.
Aligning the Vise Under the Drill Bit
With the vise mounted, the next job is to get your workpiece directly under the drill bit. This is where having an aligned drill press table pays off. If your table is square to the spindle, aligning the vise is straightforward.
The goal is to make the vise’s fixed jaw parallel to the drill press table’s front edge (or perpendicular to the spindle, depending on your frame of reference). Here’s a shop trick: use a machinist’s square against the fixed jaw and the table edge. Adjust the vise’s position on the table until the square is true along its entire length.
Once the vise is aligned, lock the drill press table’s rotation if it has a lock. This prevents it from accidentally swiveling. Now, position your workpiece in the jaws. Crank the handle counterclockwise to open them wide enough for easy placement. You want the spot you’re drilling to be as close to centered under the bit as possible.
Lower the drill bit (with the power off) until it just touches the workpiece. This is your final check. Look from the front and side. Is the bit centered on your mark? If not, nudge the workpiece, or the entire vise, until it is. This two-axis alignment is critical for clean holes, especially when drilling at an angle, or any operation where precision matters more than speed.
Clamping the Workpiece: How Tight is Right?
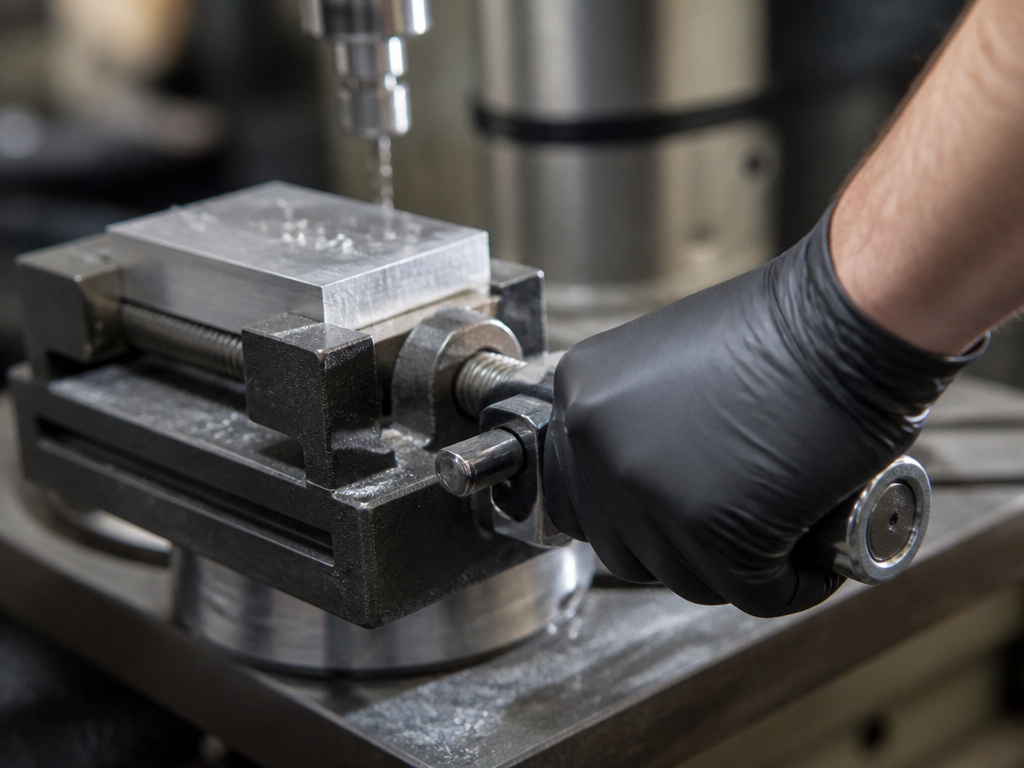
You have the vise mounted and aligned. Now you need to grip the workpiece. The instinct is to crank the handle until your forearm trembles. Don’t.
The Palmgren manual warns directly: “Do not over tighten, vise can develop a large clamping force. Use only force which is needed.” Harbor Freight echoes this: “Damage could occur to your vise and/or workpiece if you overtighten the Handle.”
So what’s the right force? It’s the minimum force that prevents movement. For a light drilling operation in wood, snug is enough. For a 1/2″ hole in steel, you’ll need to lean into it. The feedback is in the handle. When you feel consistent, firm resistance and the workpiece absolutely will not shift when you try to rotate it by hand, you’re there. Any further tightening risks distorting soft metals, crushing thin-walled stock, or straining the vise’s lead screw.
Keep fingers away from Jaws while tightening them.
This warning is in every manual for a reason. The final quarter-turn of the handle brings the jaws together with enough force to crush a fingertip. Use the full length of the handle to apply force, and keep your hands clear of the pinch point.
Troubleshooting a Spinning Workpiece
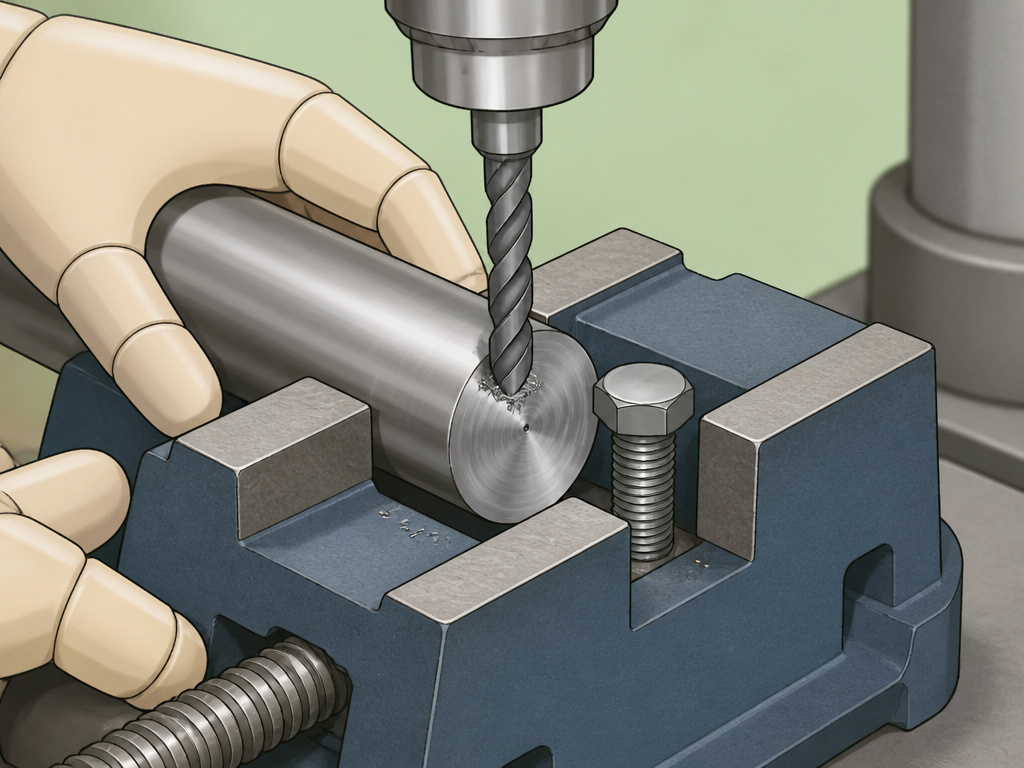
Even with a well-clamped block, a drill bit can grab and spin it. This is the most common operational headache, especially with round stock or slippery metals like aluminum. The fix isn’t more clamping force; it’s smarter clamping geometry.
First, check your drill press speed settings. Drilling too fast can cause the bit to grab rather than cut. If the speed is right, look at the jaws. Some vises, like certain Palmgren models, have a cross-pattern groove in the stationary jaw specifically for clamping round stock. Use it.
If your vise has smooth jaws, you need a mechanical stop. The simplest is a short length of bolt or round stock placed in the vise behind the workpiece, perpendicular to it. When the drill tries to spin the part, it immediately contacts this stop. For a more permanent solution, you can purchase jaw inserts with V-grooves or machine a step into a soft jaw.
Another culprit is chatter. If the workpiece is too tall and not supported close to the drilling point, it can vibrate and start to walk. Support it with parallels or blocks underneath to bring the clamping pressure closer to the action.
When to Bolt, When to Clamp, When to Use a Stop
Your workflow isn’t always a permanent, bolted-down setup. Sometimes you need to move the vise between holes quickly, or your drill press table is too small. The manuals give you three clear modes of operation, each with a purpose.
Fully Bolted: This is for production work or any job requiring multiple precise holes. The vise does not move. You find your reference edge, bolt it down, and that’s your origin for the session. This is the method assumed for most operations on a drill press.
Clamped (C-Clamps): This is the solution for small drill presses (under 12-inch swing) or for temporary setups. The Harbor Freight manual mandates it when you can’t bolt directly. The stability is good, but not as rigid as bolting. Check the clamps periodically during a long job, as vibration can loosen them.
Using a Stop: This isn’t a mounting method for the vise, but a way to semi-secure a workpiece without fully clamping the vise itself. You bolt a stop (like a length of angle iron) to the table. Then, you push your workpiece against this stop and lightly clamp it in the vise, just enough to hold position, but not fully locked. It allows for very rapid repositioning for multiple holes along an edge. It’s less secure than a full clamp, but faster.
Essential Maintenance: It’s Not Just Cleaning
A drill press vise is a simple machine, but it’s a machine. Ignoring it leads to stiff operation, rust, and eventually, a stuck lead screw that won’t open or close. The manuals are specific about two things you must do, and one thing you must not skip.
First, remove the protective coating. The Palmgren manual states: “The vise is shipped with a protective coating. This coating should be removed before operation. Use penetrating oil to remove protective coating.” This waxy or oily film traps grit and sawdust. Wipe it off with a rag and penetrant, then clean all surfaces with a degreaser before applying your chosen lubricant.
Second, lubrication. The rule is simple: “Keep machined surfaces and lead screws lubricated with medium weight machine oil.” Wipe off excess oil from the handle and jaws after applying. This prevents the bare cast iron from rusting and keeps the action smooth. Do this every few months of regular use, or anytime the vise starts to feel gritty or noisy.
Third, check the mounting hardware. “Periodically, check and tighten mounting hardware.” Vibration from drilling, especially if you’re changing the belt speed on your drill press for different materials, works bolts loose. A quick check with a wrench every so often prevents a catastrophic shift mid-operation.
Types of Drill Press Vises
The two main types you’ll encounter are standard fixed vises and low-profile models. Standard vises are common and hold workpieces between parallel jaws. Low-profile vises have a reduced overall height, which is useful when you need to drill close to the drill press table or have limited vertical clearance. Some specialized vises feature a cradle design to hold round stock securely, and they may include a stop bolt assembly to ensure the vise stops at a specific angle. When selecting a vise, consider the maximum jaw opening and the overall size to ensure it fits your drill press table and can accommodate your typical workpieces.
Frequently Asked Questions
How do I mount a vise to a drill press table?
You mount a vise by positioning it on the table, marking through its mounting slots, drilling clearance holes, and securing it with bolts, washers, and nuts. If your drill press has a swing under 12 inches, you must use two C-clamps instead of bolts, as the vise will overhang the table.
What is the best vise for a drill press?
Consider a cross-slide vise if you need to make precise, multi-hole patterns without remounting the workpiece.
Can I use my drill press vise for other tools?
While a drill press vise is designed for the vertical thrust of drilling, its rigid construction makes it suitable for light milling or filing operations on a stable bench. However, do not use it as a bench vise for pounding or heavy hammering, as it is not built for sidelong impact forces.
Why does my workpiece keep spinning in the vise?
Spinning workpiece is usually caused by insufficient grip on smooth or round material, or drilling at too high a speed. Use the V-groove in the jaw if available, add a mechanical stop behind the part, ensure you are using the correct RPM for the material, and clamp with firm, even pressure.
How do I prevent my vise from rusting?
After removing the factory protective coating, keep the machined surfaces lightly coated with medium weight machine oil. Wipe the vise down after use in a humid environment, and avoid leaving wet or corrosive materials clamped in it for extended periods. For long-term storage, apply a heavier rust-preventative grease.
Before You Go
The one rule that reframes all the others: a drill press vise is a system. The table, the bolts, the jaws, and the lead screw all have to work together. If any one part is loose, dirty, or misaligned, the whole system fails.
So your first step after reading this shouldn’t be to run out and buy a new vise. It should be to walk to your drill press and check the one you have. Are the mounting bolts tight? Is the lead screw dry? Do the jaws close parallel? Fix what’s in front of you first. That habit, regular, simple maintenance, is what turns a generic tool into a precision instrument you can trust for years.
Everything else, from choosing the right table for your drill press to mastering advanced attachments, builds from this foundation of a vise that is mounted solidly, aligned correctly, and cared for consistently. Start there.
