
How to Use a Metal Nibbler: Step-by-Step (With Specs)
This post contains affiliate links. As an Amazon Associate, we earn from qualifying purchases.
To use a metal nibbler, match the tool to your material, secure the workpiece, and follow the direction arrow on the head. For drill-attachment models like the DHC-2, use a drill rated for 1500-3000 RPM. Dedicated electric models like the Makita JN3201 can cut up to 3.2 mm steel with a tensile strength of 400 N/mm² at 1,300 strokes per minute. The cut starts with a pre-drilled hole for internal shapes, but the required diameter varies by model: the DHC-2 requires a 10 mm hole, while the Princess Auto model requires a 21 mm hole.
That gap between the spec sheet and the first cut is where projects get messy. A nibbler doesn’t just shear metal; it punches a series of tiny, overlapping holes. Understanding how to use a metal nibbler correctly is key. The machine’s rated capacity tells you what it can cut, but the minimum radius and required hole size tell you what it can’t do without binding or breaking the punch.
What follows: the five essential setup steps every manual assumes you’ll skip, the sensory cues that tell you the cut is right before you see it, and the model-specific numbers that decide whether your curve is possible.
Key Takeaways
- Wear gloves and impact-rated goggles, the manual for the Princess Auto cordless nibbler specifies CSA Z94.3-07 or ANSI Z87.1 standards because the ejected metal chips are sharp and travel fast.
- Match the punch seat angle to corrugated metal when using a tool like the Princess Auto model; forcing a flat die into a rib binds the tool and snaps the punch.
- Lubricate aluminum continuously with light oil or kerosene per the Makita JN3201 manual; dry cutting makes chips stick, which dulls the die and strains the motor within minutes.
- Internal cuts always need a starter hole, but its diameter varies wildly: the DHC-2 requires 10 mm, while the Princess Auto model needs 21 mm (27/32 in.).
- Charge cordless nibbler batteries between 50–86°F (10–30°C); the Princess Auto manual warns that charging outside 32–104°F (0–40°C) damages the battery pack.
What a Nibbler Is and How the Punch-and-Die Works
A nibbler is a punch press in your hand. It doesn’t shear or tear metal. On the upstroke, a hardened steel punch drives through the sheet into a matching die, punching out a small, crescent-shaped slug. The tool then advances, and the next punch overlaps the previous one by about a third, creating a continuous kerf.
The cutting action is a rapid up-and-down punching motion, driven by either an electric motor’s eccentric shaft or a drill’s rotary motion converted to linear movement. This creates a burr-free edge with no distortion to the surrounding material.
That mechanical truth explains its limits. The minimum cutting radius, how tight a circle you can cut, isn’t about skill. It’s the physical limit of how much the tool’s head or guide can pivot between punches before the sheet metal binds. This is why specs disagree so completely: for the minimum cutting radius on an outer edge, the DHC-2 manual states 12 mm, the Makita JN3201 manual states 128 mm, and the DRÄCO 1216 manual states 35 mm. They’re different machines.
The waste, a stream of small chips, is a signature. It’s also a hazard you’ll clean up later. Compared to the curled, distorted waste from shears, it’s clean. But it means a power nibbler is a messy tool. You need a clear path for those chips to fly.
The 5-Step Setup for Any Nibbler
The first minute with the tool decides the next hour of cutting. Rushing this is how you jam a punch or ruin a sheet.
1. Verify Material Thickness and Type. This isn’t a guess. Check the manual’s capacity table. The Makita JN3201 cuts 3.2 mm steel with a tensile strength up to 400 N/mm² but only 1.0 mm of harder 800 N/mm² steel. The DHC-2 handles 2 mm aluminum or copper. Exceed these, and the motor stalls or the punch snaps. Use a caliper.
2. Mount the Tool Correctly. For a drill-attachment nibbler, like the DHC-2, insert the drive spindle fully into your drill chuck and tighten securely. The manual specifies a 1500-3000 RPM drill. A slower drill won’t generate enough punch speed; a faster one risks overheating. For a dedicated electric power nibbler, ensure the cord or battery is secure.
3. Set the Cutter Guide. This little ring around the punch controls the cut’s path. For straight cuts, lock it. For curves, loosen the locking bolt just enough to let it rotate freely. The DHC-2 manual has the clearest warning: “Only loosen the cutter guide locking bolt enough to allow the cutter guide to rotate freely. If you loosen it too much the cutter guide will fall off.” A lost guide mid-cut ruins your line.
4. Apply Lubrication (If Required). This is material-specific. The Makita manual is explicit: “Light oil or kerosene should be used to keep aluminum continuously lubricated during cutting.” Steel can often be cut dry, but a drop of oil reduces wear and keeps chips flowing. The DRÄCO manual simply advises to “Oil the die and punch at regular intervals.”
5. Secure the Workpiece and Don PPE. Clamp the sheet. Hand-holding it guarantees a jagged cut and a high chance of injury. Now put on your gear: gloves and those impact-rated goggles. The Princess Auto manual doesn’t suggest, it mandates goggles that meet CSA Z94.3-07 or ANSI Z87.1 because of the sharp, ejected fragments.
Starting the Cut: Edges vs. Internal Shapes
Where you begin changes the process. An edge cut is simple: position the tool so the punch is just over the edge, align the guide with your marked line, and squeeze the trigger. The tool will pull itself along. Your job is to steer.
Common mistake: Starting an internal cut without the right-sized hole. A hole that’s too small traps the punch, and forcing it will break the tip. A hole that’s too large gives the tool nothing to bite, causing it to chatter and deform the edge.
Internal cuts need a starter hole. This is a major point of disagreement between models, and ignoring it breaks tools.
| Nibbler Model | Hole Diameter for Internal Cuts | Minimum Internal Radius |
|---|---|---|
| DHC-2 | 10 mm | 12 mm |
| Makita JN3201 | Not specified (use min. Radius rule) | 120 mm |
| Princess Auto Cordless | 21 mm (27/32 in.) | 45 mm |
Drill the hole on your marked line. Insert the punch into the hole, position the die underneath the sheet, and start cutting. Let the tool establish a rhythm before you begin steering.
Cutting Straight Lines, Curves, and Corrugated Metal
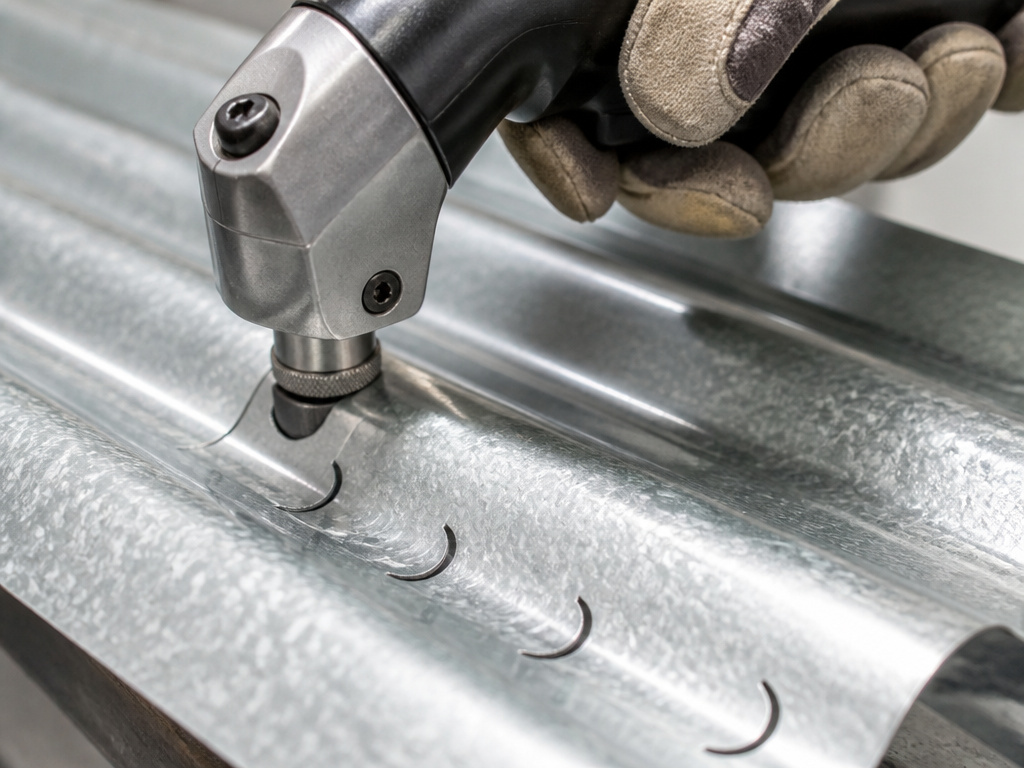
The technique shifts with the path. For straight lines, lock the guide and focus on feeding the tool at a consistent pace. A good pace matches the tool’s natural feed rate; for example, the DRÄCO 1216 manual lists a working speed of 1.9 m/min. Go slower and you’ll overheat the punch; go faster and the cuts won’t overlap, leaving a ragged, jagged edge you’ll have to file.
For curves, that’s where the free-rotating guide earns its keep. The tool can’t pivot on a dime. For a tight radius, you must use a series of short, straight segments, pivoting the tool slightly after each punch. Trying to force a smooth, continuous turn on a radius smaller than your tool’s minimum will bind the head and snap the punch. It’s the number one cause of punch failure I see.
Cutting corrugated metal adds a third variable: angle. The Princess Auto manual spells it out: “When cutting corrugated metal, match the punch seat angle with the metal’s angle.” Most dedicated nibblers have an adjustable die holder or a swiveling head. The DRÄCO 1216, for instance, can handle profile depths up to 160 mm. If you don’t match the angle, the punch strikes the rib sideways and shears off.
Nibbler vs. Shears: Which Tool for Your Cut?
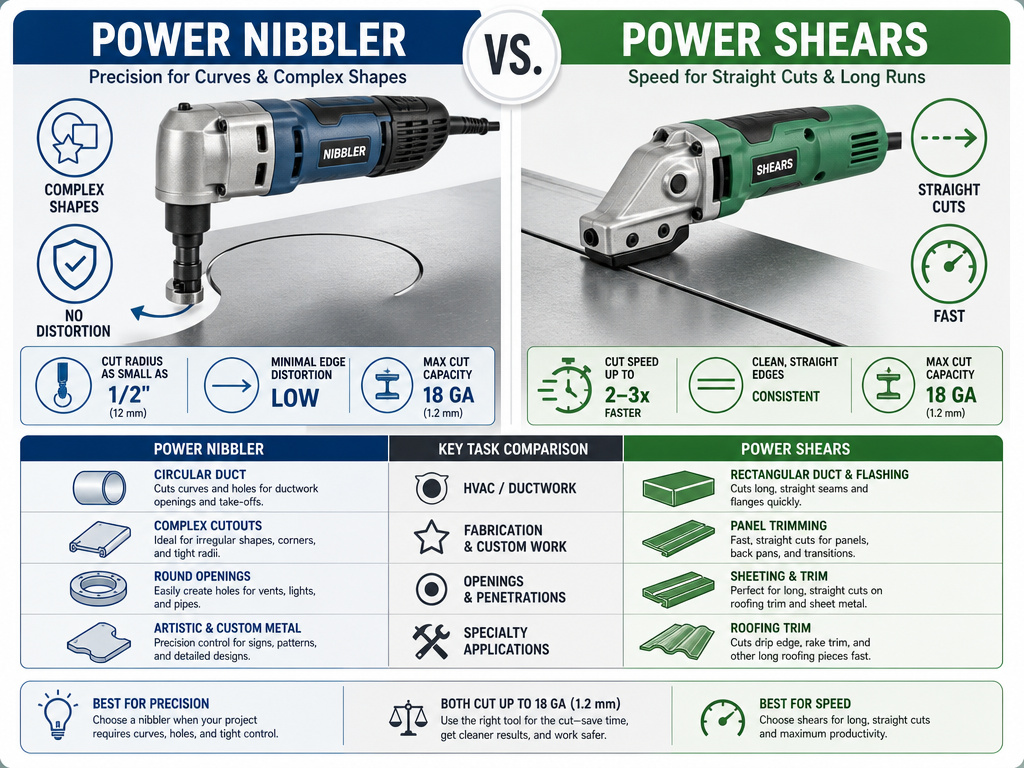
You need to know when to switch tools. A power nibbler excels at curves, complex shapes, and thicker sheets where clean edges matter. It leaves no distortion. But it’s slower, noisier, and produces chips.
Power shears work like scissors, slicing the metal. They’re faster for long straight lines and leave a continuous curl of waste. But they distort the edge of the sheet, making it harder to join pieces flush, and they struggle with tight curves.
| Task | Better Tool | Reason |
|---|---|---|
| Cutting a circular duct opening | Nibbler | Handles the tight radius without distorting the panel. |
| Trimming a long, straight edge on roofing sheet | Shears | Faster feed rate, less mess. |
| Cutting corrugated panels | Nibbler (with angled die) | Matches the profile without crushing ribs. |
| Cutting aluminum soffit | Shears | Thinner material, straight cuts—shears are more efficient. |
| Making an intricate scrollwork design | Nibbler | Only tool that can navigate complex internal shapes. |
For most shop work, having both is ideal. Start with shears for rough sizing, then switch to a nibbler for the final, precise trim. This is why understanding the difference between shears and a nibbler is a practical skill, not just theory, and why knowing how to use a metal nibbler is essential.
Troubleshooting Common Problems
You’ll know something’s wrong by sound and feel before you see it.
The motor strains or stalls. You’re either cutting material that’s too thick or the punch is dull. Check your material against the capacity chart first. If that’s correct, inspect the punch. A dull punch has a rounded, shiny edge instead of a sharp corner.
The cut edge is jagged or has “steps.” You’re feeding the tool too fast. The punches aren’t overlapping. Slow down. Let the tool’s stroke rate set the pace. The strokes per minute (SPM) rating is 1,300 for the Makita JN3201 and 1,900 for the Princess Auto cordless nibbler.
Chips are welding to the punch or die. This is almost exclusive to aluminum and means you forgot the lubricant. Stop. Clean off the adhered chips with a brush and apply light oil or kerosene as the Makita manual directs. Continuing will ruin the die’s sharp edge.
The tool is walking or drifting off the line. The cutter guide isn’t aligned with your mark, or it’s loose. For a straight line, ensure it’s locked. For a curve, make sure it’s free but still offering gentle resistance to keep you on track.
Tool Maintenance and Consumable Parts
A nibbler is a wear-item tool. The punch and die are consumables. Ignoring this turns a precision cutter into a metal masher.
The Makita JN3201 manual gives exact service life metrics. The punch should be replaced after 150 meters of cutting 3.2 mm steel. The die can be sharpened after 300 meters of the same work. Sharpening involves grinding down the dull edge by 0.3 to 0.4 mm to restore the sharp corner. After a few sharpenings, the die must be replaced.
For storage, the Princess Auto manual has specific advice that applies to all steel tools: “When not in use for an extended period, apply a thin coat of lubricant to steel parts to avoid rust. Remove lubricant before using the tool again.” This is especially important for the punch and die, which are made of high-speed steel and will rust.
Keep spare parts. For the DRÄCO 1216, ensure you have spare punches and dies on hand, as they are consumable parts. For a drill-powered nibbler like the DHC-2, keep an extra cutter guide on hand, it’s the part most likely to get lost.
Frequently Asked Questions
How do you use a nibbler to cut metal?
You use a nibbler by first verifying your material is within its capacity, securing the workpiece, and donning safety gear. For an edge cut, align the tool’s guide with your line and start cutting. For an internal shape, you must drill a starter hole of the specified diameter (e.g., 10 mm for the DHC-2, 21 mm for the Princess Auto), insert the punch, and begin cutting from there.
Do metal nibblers leave a clean edge?
Yes, a properly operated nibbler leaves a clean, burr-free edge with minimal distortion to the surrounding sheet. This is because it removes a narrow kerf of material via punching, rather than shearing or tearing. The edge often requires no additional filing.
Do nibblers cut straight lines?
Nibblers can cut perfectly straight lines, but a locked cutter guide is essential for this. The guide runs along the edge of the material or a straightedge, keeping the tool on path. They are, however, slower on long straight runs than power shears.
What’s better, shears or nibblers?
Neither is universally better. Use shears for fast, long straight cuts where edge distortion is acceptable. Use a nibbler for curves, complex shapes, internal cutouts, or when you need a pristine, undistorted edge ready for joining. Many workshops use both as part of their methods for cutting sheet metal.
How thick of metal can a nibbler cut?
It depends entirely on the model and material strength. For common mild steel (400 N/mm²), capacities range from 1.6 mm (DRÄCO 1216) to 3.2 mm (Makita JN3201). The Toolex 596702 has a maximum cutting thickness of 4.0 mm for most forms of metal sheeting. Always consult your specific tool’s manual before cutting.
Before You Go
One rule that reframes everything: the rated capacity is for new, sharp consumables on ideal material. In the real world, if you’re cutting painted, rusty, or work-hardened metal, drop down one gauge size from the manual’s maximum. That margin keeps the motor happy and the punch intact.
Your first step this week shouldn’t be a cut. It should be to find and read the manual for your specific nibbler. Note its minimum radius and required hole size, those two numbers will save you more frustration than any technique tip. Then make a test cut on a scrap piece of the same material you plan to use. Listen to the sound. Feel the feed pressure. That baseline tells you more than any spec sheet ever will.
