
How to Use a Trim Router: Step-by-Step
This post contains affiliate links. As an Amazon Associate, we earn from qualifying purchases.
A trim router is a handheld power tool that shapes, trims, and cuts precise profiles into wood, plastic, and drywall using a spinning bit. The first four steps are always the same: install a 1/4-inch shank bit, set the depth so no more than half the cutter is exposed, secure your workpiece, and feed the tool against the bit’s rotation. For most beginners, a flush trim bit and a roundover bit handle 80% of common projects.
That “half the cutter” depth rule is the single most important safety guard for a new user. Expose more, and the router becomes unstable, the cut gets rough, and the risk of kickback jumps. The trim router’s compact size makes it feel manageable, but its high-speed motor demands the same respect as a full-size model.
What follows is the core manual procedure for how to use a trim router, the three techniques you’ll use most, and the specific mistakes that cost wood. This section explains setting up an edge guide, cutting a clean hinge mortise, and the one maintenance check you cannot skip.
Key Takeaways
- Always match your router bit’s 1/4-inch shank to the tool’s collet; using a smaller bit shank can launch the bit as a projectile.
- For edge profiles, never cut the full depth in one pass; make multiple shallow passes to avoid burning the wood and overloading the motor.
- Feed the router against the rotation of the bit; feeding with the rotation can cause the tool to lurch forward and ruin your cut.
- The best trim routers balance power and ergonomics, but a basic corded model like the WEN RT1460 is more than enough to learn on.
- If your cuts are burning, the problem is almost always speed or feed rate; test your settings on scrap until the cut is smooth and silent.
Your First Trim Router Setup
The manual for the Bosch GLF55-25 states its intended use clearly: edge trimming, edge forming, and routing grooves in wood, plastic, and drywall. It also states what it’s not for: metals and router tables. That’s your boundary. Within it, your first job is getting the bit seated correctly.
Insert the shank of the Router Bit into the Collet as far as it will go, then back the shank out until the cutters are approximately 1/8” to 1/4” away from the Collet Nut face.. Bosch GLF55-25 Manual
That 1/8 to 1/4-inch gap is critical. It ensures the collet grips the smooth, cylindrical part of the shank, not the fluted cutting section. A bit gripped on the flutes will slip, and at 30,000 RPM, a slipping bit is a broken bit.
Here is the universal bit installation sequence, pulled from multiple OEM manuals:
- Unplug or remove the battery. This is the only step you can skip if you want a trip to the emergency room. For cordless models like the Bosch GLF18V-25, pull the battery pack.
- Depress the spindle lock. This is a small button or lever, usually near the collet, that locks the motor shaft so it can’t spin.
- Loosen the collet nut. Use the supplied wrench (often two wrenches, one to hold the nut, one to turn it) in a counter-clockwise direction. Don’t force it.
- Insert the bit shank fully, then back it out. Seat the 1/4-inch shank all the way in, then pull it back out about 1/8 inch. You should see a clean ring of shank between the collet nut and the bit’s cutting flutes.
- Tighten the collet nut firmly. Hold the spindle lock and tighten the nut clockwise. Do not overtighten with a cheater bar, snug is sufficient. A loose bit is dangerous, but a stripped collet is a $50 repair.
The part nobody mentions: If you don’t hear or feel a distinct click when you engage the spindle lock, it’s not locked. Forcing the wrench will round off the collet nut. Wiggle the shaft slightly as you press the lock; it will drop into place.
The Essential Pre-Cut Checklist
You have the bit in. Now, before you touch the power switch, run through this list. Missing one item here is how projects get damaged and fingers get nicked.
| Check | Why It Matters | What Happens If You Skip It |
|---|---|---|
| Workpiece Clamped | Prevents movement during cut. | The router jerks, following the grain instead of your guide, and gouges the piece. |
| Cord/Battery Path Clear | Eliminates tripping or snagging. | You get pulled off-balance mid-cut. On a cordless model, a snagged hose does the same thing. |
| Depth of Cut Set | Limits cutter exposure for control. | Full-depth cuts overload the motor, cause burning, and dramatically increase kickback risk. |
| Bit & Collet Clean | Ensures maximum gripping force. | Sawdust in the collet acts as a lubricant; the bit slips lower during the cut, altering your profile. |
| Safety Gear On | ANSI goggles and a NIOSH dust mask. | A single carbide tooth fragment travels fast enough to embed in an eyeball. Sawdust is a carcinogen. |
The Harbor Freight Model 62659 manual adds two critical items: work in a clean, well-lit area and verify there are no hidden utility lines (nails, screws, staples) in your wood. Hitting a nail with a carbide router bit sounds like a gunshot and usually shatters the bit.
Before you start: Wear ANSI-approved safety goggles and NIOSH-approved breathing protection. Secure loose workpieces with clamps. Ensure there are no metal objects in the wood that could contact the bit.
Your first sensory cue that something is wrong will be sound. A properly tuned trim router cutting pine has a steady, high-pitched whine. If that whine dips and strains, you’re feeding too fast or cutting too deep. If it screams and you smell burning maple, your bit is dull or your speed is too high.
Mastering the 3 Core Techniques
Most trim router work falls into three categories: trimming something flush, shaping an edge, and cutting a recess. You can build entire projects with just these skills.
How to Flush Trim Perfectly Every Time
Flush trimming is using a router bit with a pilot bearing to copy the shape of a template onto your workpiece. It’s how you make perfect curved tabletops or duplicate parts. The Kreg PRS1000 manual specifies the material must be at least 1/2 inch thick and 3 1/2 inches wide for their jig to work, a useful specification for any stable flush trim.
The trick is managing pressure and direction.
- Set the bit depth. Lower the bit until the pilot bearing rides flush against the template or the piece you’re copying. The cutter should only protrude enough to cleanly slice through your workpiece material.
- Start the router away from the edge. Let the motor reach full speed (you’ll hear the pitch stabilize) before you touch bit to wood.
- Move counter-clockwise around outside edges, clockwise inside holes. This keeps the bearing pressed against the template. For outside edges, feed left to right.
- Keep the base flat. If you tilt the router, the bearing loses contact and you’ll cut a taper. This feels like the router suddenly gets easier to push, that’s your warning.
For laminated or veneered edges, the WEN RT1460 manual advises running masking tape along the bearing path. The bearing rides on the tape, not the delicate veneer, preventing chip-out.
Edge Profiling: Roundovers, Chamfers, and More
This is where a round over edges bit turns a sharp corner into a smooth, finished curve. The universal mistake is trying to cut the full profile in one pass.
Don’t. Here’s why:
- Tear-out: The bit’s wings can grab and splinter the wood grain, especially on cross-grain ends.
- Burning: A deep cut creates more friction, overheating the bit and scorching the wood.
- Motor Strain: It forces the motor to work harder, which on a compact trim router can lead to premature brush wear.
Instead, use the depth adjustment to take three or four progressively deeper passes. The first pass should just kiss the corner, removing a whisper of material. Each subsequent pass deepens the profile smoothly. You’ll hear the difference, a clean, crisp cut sound versus a labored groan.
How to Cut a Door Hinge Mortise
This is a classic trim router application that feels advanced but is straightforward with a simple shop-made template. You’ll need a straight bit and a piece of 1/4-inch plywood or MDF.
- Make a template. Cut a rectangle in your plywood that matches the exact length and width of your hinge leaf, minus the thickness of your router’s base. If your router base is 4 inches across, make the template hole 4 inches smaller than your hinge.
- Clamp the template to the door edge in the exact hinge location.
- Set the depth. Hinge leaves are typically 1/8 inch thick. Set your router to cut just under that depth, about 3/32 inch, for your first pass.
- Rout out the waste. With the router base against the template, turn on and slowly lower the bit into the wood. Move around the inside of the template to clear the area. Make multiple passes to reach full depth.
- Square the corners. A router bit leaves rounded corners. Use a sharp chisel to square them up so the hinge sits flush.
This method, using an edge guide or template, is repeatable and precise. It beats chiseling by hand for consistency.
Trim Router vs. Full-Size vs. Plunge Router
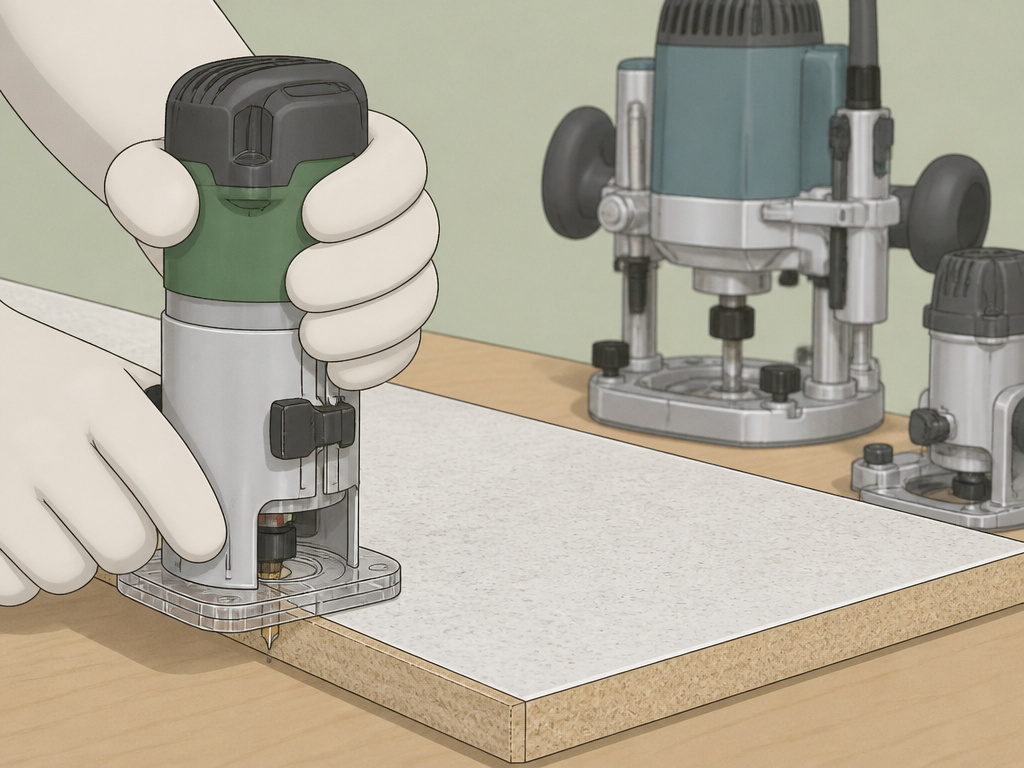
This is the “which tool when” question that clogs forum threads, a key part of learning how to use a trim router. They are not interchangeable.
| Router Type | Best For | Power & Bit Size | Limitations |
|---|---|---|---|
| Trim/Palm Router | Edge work, flush trimming, small profiles, laminate. | Lower power. Max bit size 1-1/8″. Typically uses a 1/4″ collet. | Cannot make deep cuts in one pass. Not for router tables (per Bosch manual). |
| Full-Size Fixed Base | Heavier profiling, dadoes, repeated edge work. | High power (10-15A). Handles 1/2″ collets & larger bits. | Big, heavy, cumbersome for small, detailed work. |
| Plunge Router | Interior cuts (like mortises), inlays, stopped grooves. | High power with a spring-loaded base for vertical plunging. | Poor for edge guidance; requires fences or templates for straight edges. |
For a beginner or someone focused on finish work and small projects, a trim router is the right first buy. Its limitation, such as the Bosch GLF55-25’s 1-1/8 inch maximum bit size, is actually a safety feature. It physically prevents you from using large, aggressive bits that a compact motor can’t safely drive.
Solving Common Problems (Burning, Tear-Out, Chatter)
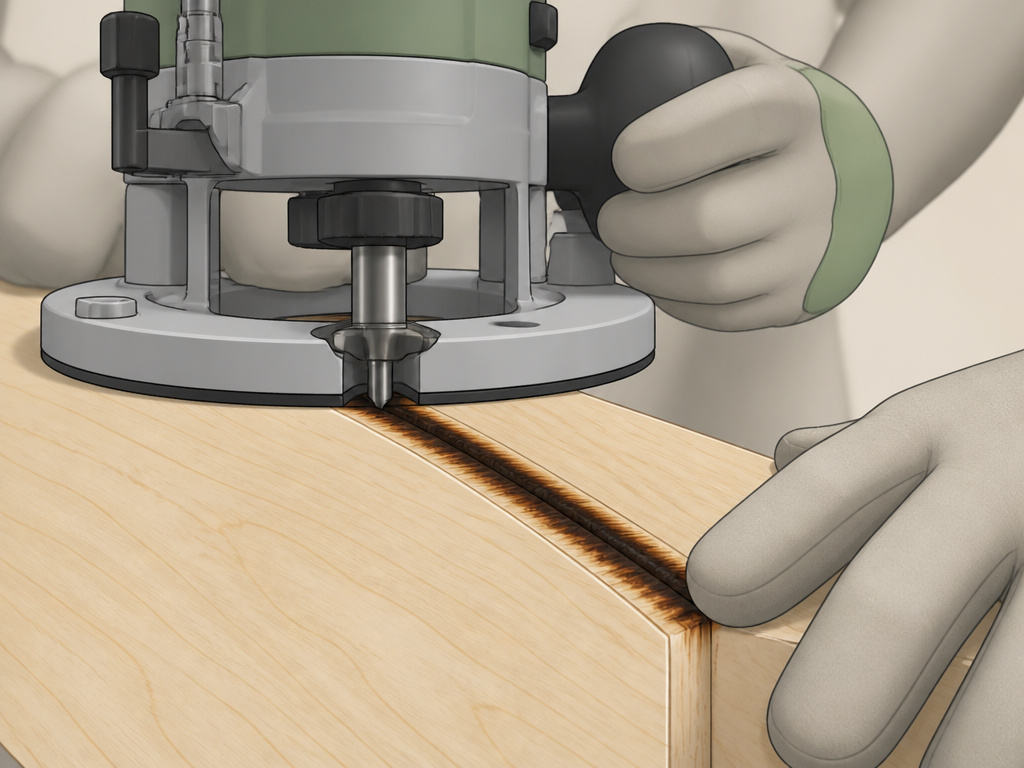
When your cut isn’t clean, the cause is usually one of three things. Here’s how to diagnose it.
Problem: Burn marks along the cut.
- Cause: Dull bit, too-slow feed rate, or too-high RPM.
- Fix: First, try pushing the router a little faster. Let the bit cut, don’t let it rub. If that doesn’t work, check your bit. Carbide should feel sharp, not rounded. Finally, adjust speed. Softer woods like pine can handle higher RPM; hardwoods like maple need a slower speed to avoid friction heat.
Problem: Ragged, torn grain (tear-out).
- Cause: Bit is dull, or you’re routing against the grain.
- Fix: For cross-grain cuts on the end of a board, use a backer board clamped to the exit side. The router bit will tear the backer, not your project piece. Also, ensure you’re using a sharp, high-quality bit. Cheap bits tear; they don’t cut.
Problem: Router vibrates or “chatters” leaving ripples.
- Cause: Loose bit, excessive depth of cut, or a bent bit shank.
- Fix: Stop immediately. Unplug the router and check that the bit is tight in the collet. If it is, reduce your depth of cut by half and try again. A bent shank is rare, but if you drop a bit, it’s possible. Visually roll the bit on a flat surface to check.
Sources offer different guidance: Harbor Freight manuals recommend determining optimum speed by testing on scrap until a smooth cut with no burnishing or burn marks is produced, while the WEN RT1460 manual states that if router speed is too high, friction will generate excessive heat and burn the workpiece; if too low, the bit will tear the material.
Maintenance You Can’t Ignore
A trim router is a simple tool, but it has two consumable parts that will fail: the carbon brushes and the collet. Ignoring them turns a $10 fix into a $100 paperweight.
Worn brushes cause intermittent power, sparking inside the motor, and eventually a dead tool. You’ll hear it as a weak, sputtering sound under load before it fails.
The collet needs a different kind of care. After every few uses, blow it out with dry compressed air (while wearing your goggles and mask). Periodically, wipe the collet and your router bits with a light machine oil to prevent rust, as the Harbor Freight manual recommends. A rusty collet will never grip properly.
The most common electronic fault is battery-related. Don’t blame the tool, blame the chemistry.
The Beginner’s Starter Bit Kit
You don’t need a 50-piece set. You need three bits that cover 90% of introductory trim router work. Buy these individually for better quality.
- 1/2-inch Diameter Flush Trim Bit: The workhorse. Get one with a top and bottom bearing. You can trim laminate from the top or follow a template from the bottom. These are the flush trim bits you’ll reach for constantly.
- 1/4-inch Radius Roundover Bit: Softens edges on shelves, tables, and frames. The 1/4-inch radius is a friendly, versatile size.
- 1/4-inch Straight Bit: For mortising, dadoes, and inlays. A solid carbide, two-flute design is best for clean cuts.
Store them in a simple block of wood with drilled holes. Throwing them loose in a drawer will chip the carbide edges, and a chipped edge cannot be sharpened.
How to use a trim router for inlays
Inlay work requires precise depth control and a steady hand. Start by securing your workpiece firmly to a stable surface using clamps. Use a straight bit or a specialized inlay bit, ensuring the shank diameter matches your router’s collet. Set the depth of cut carefully; for deep inlays, make multiple shallow passes instead of one deep cut to prevent burning and ensure a clean pocket. Rout the cavity first, then use it as a template to create the matching inlay piece. Always test your setup on scrap material of the same thickness to verify the fit before routing your final workpiece.
How to do template routing with a trim router
Template routing creates identical parts by guiding the router’s base or a guide bushing along a pre-made template. Secure the template to your workpiece with clamps or double-sided tape. Use a router bit with a guide bearing or a straight bit with a guide bushing. The bearing or bushing rides against the template edge, transferring its shape to the workpiece. Move the router against the direction of the bit’s rotation for control. For cuts wider than half the bit’s diameter, make multiple passes to avoid overloading the tool and achieve a smoother finish.
Frequently Asked Questions
What do you use a trim router for?
You use a trim router for detailed finish work where a full-size router is too bulky. This includes trimming laminate countertops, flushing up veneered plywood edges, routing hinge mortises on doors, shaping small moldings, and following templates to create duplicate parts. It’s not for heavy stock removal or large panel raising.
Which way do you move a trim router?
You almost always move a trim router against the direction of the bit’s rotation. For a standard bit spinning clockwise (viewed from above), you feed the tool from left to right. This is called a “conventional cut.” It keeps the tool pulled against your guide or workpiece. Feeding the other way (a “climb cut”) can cause the router to lunge forward and is only used for specific finishing passes by experienced users.
Is there a difference between a router and a trim router?
Yes. A standard “full-size” router is more powerful, uses both 1/4-inch and 1/2-inch collets, and is designed for heavier work. A trim router (or palm router) is a compact, lighter-weight version designed for one-handed operation on smaller bits (max 1-1/8 inch) and finer detail work. Think of a full-size router as a table saw and a trim router as a jigsaw.
Can you use a trim router to cut molding?
You can, but carefully. A trim router can shape the edge of a board to create a molding profile using bits like roman ogee, cove, or bead. However, it cannot safely cut a long, thin molding strip from a wider board, that’s a job for a table saw with a molding head or a dedicated shaper. The trim router excels at putting the profile on a board that’s already the correct width.
Before You Go
Here’s the one rule that reframes all the others: a trim router is a finishing tool, not a rough-cutting tool. Its job is to make the last, perfect pass. If you find yourself forcing it, fighting vibration, or making multiple full-depth cuts to hog out material, you are using the wrong tool. Step back and make the rough cut with a saw or a full-size router first.
Your first project should be something simple, rounding over the edges of a pine shelf or trimming a laminate countertop scrap. The goal isn’t a perfect piece of furniture. The goal is to learn the sound of a clean cut and the feel of the tool when it’s working right. That instinct is what separates a controlled cut from a costly mistake. Everything else is just practice.
