
How to Use an Air Hammer Chisel: Step-by-Step Guide
This post contains affiliate links. As an Amazon Associate, we earn from qualifying purchases.
To use an air hammer chisel, you match three things: the correct air supply (90 PSI at the tool), the proper chisel installation for your specific model, and a controlled technique that keeps the chisel engaged with the workpiece. Most electric hammers and rotary hammers run on a different principle; an air hammer’s power comes from compressed air driving a piston at thousands of blows per minute, which demands precise setup to avoid damaging the tool or your work.
The 90 PSI figure is the target operating pressure at the tool. Exceed it and you risk blowing out seals or breaking the piston. But getting a true 90 PSI at the hammer’s inlet requires more than just setting your compressor, it demands checking for pressure drop across your hose and fittings. A core part of how to use an air hammer chisel is ensuring the tool receives its rated air pressure.
What follows is the manual-backed procedure most YouTube tutorials gloss over when explaining how to use an air hammer chisel: the model-specific chisel lock, the regular oiling ritual that keeps the hammer from seizing, and the exact mistakes that burn out a $150 tool in two weekends. We’ll start with what you absolutely need on the bench before you even plug in the air line.
Key Takeaways
- Set your compressor to deliver 90 PSI at the tool inlet; for hoses over 8 meters, you may need to raise compressor pressure to 100 PSI to compensate for drop.
- Install the chisel using your model’s specific retention method, common designs use a clockwise-wound spring retainer, but some require you to unscrew the spring first.
- Lubricate regularly if your system lacks an in-line oiler; sources differ on frequency, with Sealey recommending daily lubrication and Professional Parts recommending a few drops after each hour of continual use.
- Never let the hammer free-run (operate without the chisel touching work) for more than a few seconds; it accelerates wear and can damage the piston mechanism.
The Non-Negotiable Safety Setup
Before you hear the first percussive blast, your personal protective equipment is not optional. An air hammer like the Sealey SA12/S.V3 generates a sound power level of 95.37 dB(A). You need approved safety glasses or a full face shield, and you must wear ear defenders. If you’re chipping concrete or rust, a respirator is also essential to avoid inhaling fine particulate.
Secure your workpiece in a vise or with clamps. Never try to hold it by hand. The hammer’s vibration, rated at 13.4 m/s² for the Sealey model, will quickly fatigue your grip, and a slipping workpiece is a direct path to injury.
Before you start: The trigger is a direct valve. Squeezing it sends full air pressure to the piston. Ensure the chisel is not contacting anything when you first pull the trigger to start the hammer, as most manuals warn against starting under load. However, once running, some sources (like The Home Depot Air Hammer) advise keeping the chisel engaged with the work surface, while others (like Sealey SA12/S.V3) warn against starting the hammer while the chisel is in contact.
Your air supply integrity is your next checkpoint. Inspect hoses for cracks or wear, and use a leader hose between the hammer and any quick-change coupling to prevent vibration-induced failure at the connection.
Air Supply and Setup: It’s Not Just 90 PSI
A common operating pressure for many air hammers is 90 PSI. The Sealey SA12/S.V3, Professional Parts M550DB, and The Home Depot air hammer all state it. But here’s where new users get stuck: your compressor gauge reads 90 PSI, but the tool bogs down. The problem is pressure drop.
The air pressure at the compressor tank is not the pressure at the tool. Friction in the hose, restrictions in fittings, and length all steal pressure. For hoses longer than 8 meters, the Sealey manual explicitly says to increase line pressure to compensate. The Professional Parts manual is more direct: to ensure 90 PSI at the tool, you may need to set your compressor to 100 PSI.
| Setup Component | Specification | Consequence If Wrong |
|---|---|---|
| Operating Pressure | 90 PSI at tool inlet | Under-power or tool stall; over 90 PSI risks seal/blowout damage |
| Minimum Hose I.D. | 10mm (approx. 3/8″) | Restricted airflow reduces blows-per-minute and power |
| Air Consumption | 4 CFM (Sealey SA12) to 7.8 CFM (Sealey SA614) | Compressor must meet CFM demand or tool will cycle poorly |
| Fittings & Seals | Use PTFE tape on threads | Air leaks drain power and overwork compressor |
Connect an in-line filter and regulator as close to the tool as possible. This strips moisture and particulates from the air, unclean air is a cited cause of excessive wear. Drain your compressor tank daily. Water traveling down the air line is a sure way to corrode the hammer’s internal valves.
The 4-Step Chisel Installation (and Where Manuals Disagree)
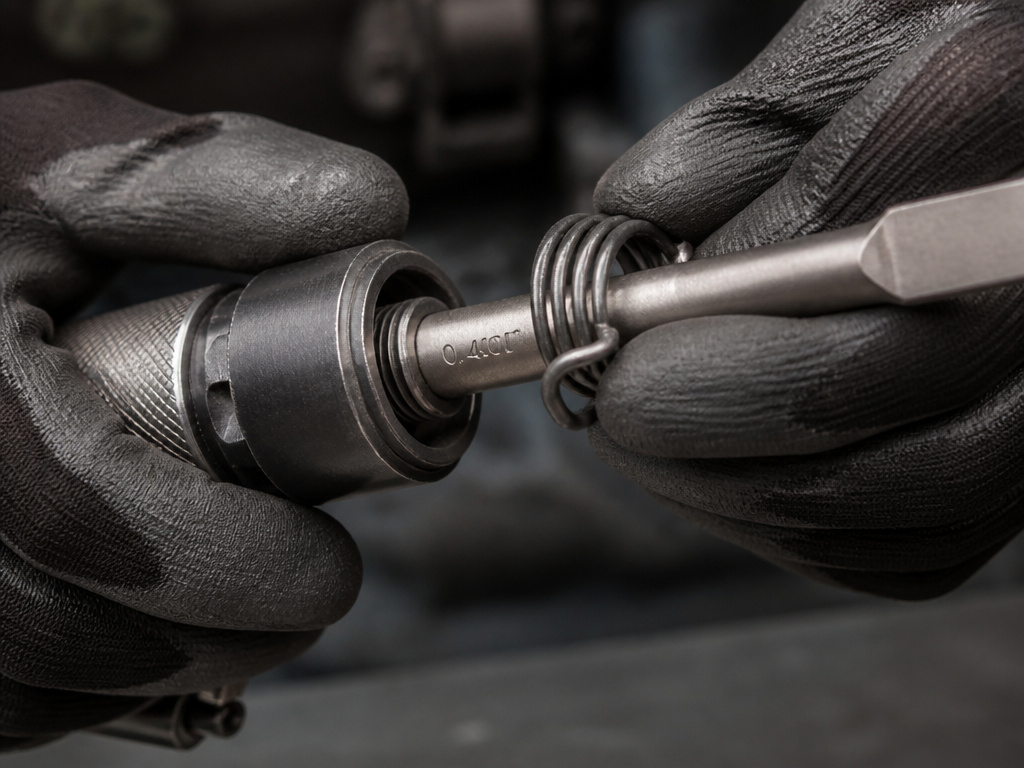
This is the first real test of whether you’ve read your manual. There is no single “right” way. I learned this the hard way trying to force a chisel into a Sealey SA613 using a method meant for a different brand. The chisel jammed, and I spent an hour dismantling the retainer.
The core principle is that the chisel shank, almost always a 0.401” Parker Taper, must seat fully in the barrel and be secured by a spring retainer. How you get there varies.
The part nobody mentions: The retainer spring isn’t just a lock; its tension is what allows the chisel to “float” slightly, absorbing recoil and preventing the shank from galling the barrel. Forcing it on wrong damages that tension.
Here are the conflicting methods straight from the OEM manuals:
- Sealey SA12/S.V3: Insert the chisel, then use the hooked end of the spring to hold it in place.
- Professional Parts M550DB: Unscrew the retainer spring completely, insert the chisel shank, then screw the spring back on. Pull the chisel hard to confirm lock.
- Sealey SA613.V2/SA614.V2: Insert chisel, place retainer ring over it, lower onto the cylinder thread, then wind the spring on clockwise until fully located.
- The Home Depot Air Hammer: Insert chisel into barrel, then thread the spring retainer clockwise to the end of the barrel.
Your job when learning how to use an air hammer chisel is to find your model’s method and follow it exactly. The common thread is a final clockwise tightening of the retainer. Before connecting air, give the chisel a firm pull to ensure it’s locked. A loose chisel won’t transfer energy efficiently and can become a projectile.
Operating Technique: Let the Tool Do the Work
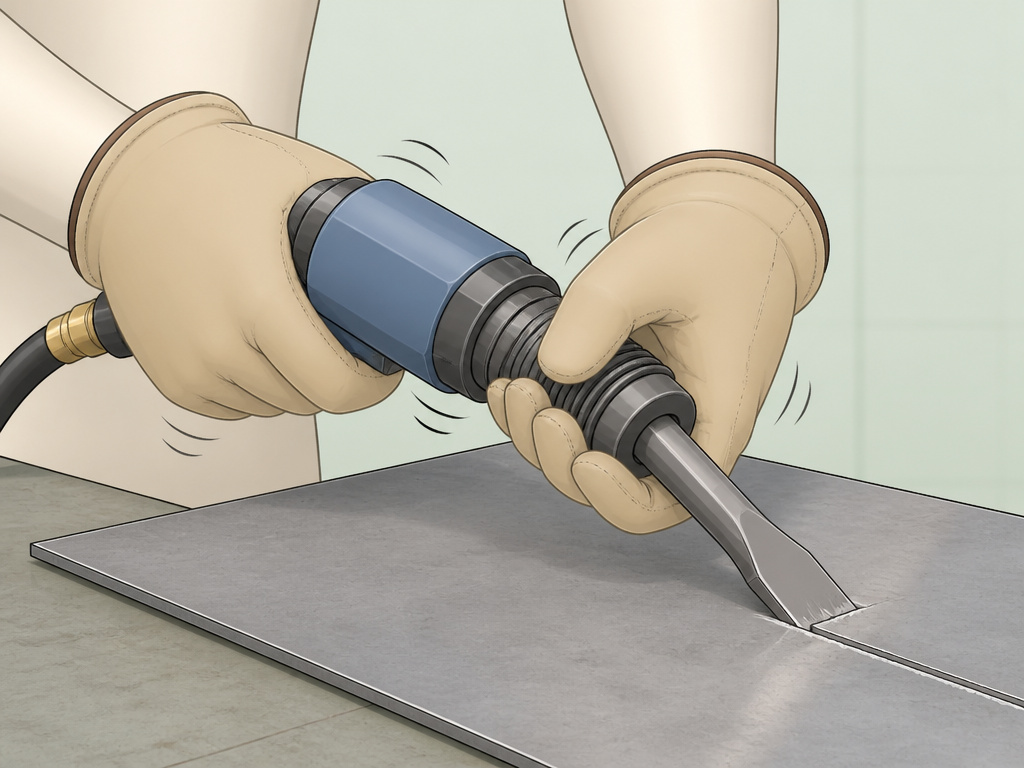
With safety gear on, air connected, and chisel locked, you’re ready. Hold the hammer firmly with both hands if possible. Place the chisel tip on your workpiece. Now, squeeze the trigger.
Don’t fight it. Your job is to guide the tool, not push it. The hammer delivers its force along the axis of the chisel, trying to angle it or lever it will bind the bit and stall the tool. For controlled work, use short, repeated bursts of the trigger. For heavy demolition, you can hold the trigger open.
The hammer’s performance is defined by its blows per minute (BPM) and stroke length. A Sealey SA12 hits 4500 BPM with a 32mm stroke, ideal for rapid cutting in metal or driving out pins. A Sealey SA614 hits 3000 BPM with a 71mm stroke, trading speed for a heavier, deeper impact perfect for breaking or splitting.
| Application | Recommended Chisel Type | Technique Tip |
|---|---|---|
| Cutting Sheet Metal | Flat or panel cutter | Use steady, light pressure; let the rapid blows “walk” the cut line. |
| Removing Rusted Bolts/Nuts | Pointed or punch chisel | Aim directly at the fastener’s head; the vibration breaks corrosion bond. |
| Light Concrete Demolition | Flat or blunt chisel | Use a chipping motion, not a prying one. Work from edges. |
| Seam Splitting (e.g., spot welds) | Wedge or chisel designed for splitting | Align precisely with the seam; the hammer does the separating. |
If the tool seems to lose power, don’t just squeeze harder. Stop. The issue is likely upstream.
Troubleshooting Low Power and Other Common Problems
When your air hammer starts feeling weak, the cause is almost always air supply or internal condition. Here’s a diagnostic table based on the Professional Parts M550DB and Sealey troubleshooting guides.
| Symptom | Probable Cause | Fix (Source-Verified) |
|---|---|---|
| Loss of power, weak blows | Insufficient air supply / pressure drop | Increase line pressure. Check compressor CFM meets tool demand (e.g., 4 CFM for SA12). |
| Erratic action, sputtering | Moisture in air line or gum deposits in tool | Drain air tank daily. Flush tool with gum solvent or SAE10 oil/paraffin mix (per Sealey). |
| Air leaking from connections | Worn fittings or missing PTFE tape | Use PTFE tape on all threads. Replace worn O-rings. |
| Chisel won’t stay locked | Wrong installation method or worn retainer spring | Follow your model’s specific installation steps. Replace spring if stretched or damaged. |
| Tool runs but doesn’t hit | Chisel not seated against piston | Disconnect air, remove chisel, clean barrel and shank, reinstall per manual. |
The most common beginner mistake is blaming the tool when the compressor is at fault. A small compressor may not sustain the 4-8 CFM an air hammer consumes. It will cycle on and off, causing a pulsing, weak action. Match your air source to the tool’s consumption rating.
Daily and Weekly Maintenance: The Lifespan Deciders
An air hammer is a simple, rebuildable tool, if you maintain it. Neglect turns it into a disposable paperweight. The maintenance schedule isn’t vague; it’s specific and must be followed.
First, lubrication. Sources disagree on frequency because it depends on your setup. If your air system has an in-line oiler, it’s handled automatically. If not, the Sealey SA613.V2 manual says lubricate daily with a few drops of Sealey air tool oil in the air inlet. The Professional Parts M550DB manual says a few drops after each hour of continual use. The takeaway: if you’re running the tool dry, oil it often. I keep a small bottle of pneumatic tool oil on the bench for this exact reason.
Second, cleanliness. After each use, wipe down the tool. Weekly, clean the air inlet filter screen (per the Sealey SA12 manual). This prevents grit from entering the mechanism.
Third, storage. Always disconnect from the air supply. Store the hammer in a dry place. Before long-term storage, add a few extra drops of oil to the inlet and cycle the trigger briefly (with no chisel installed) to coat the internal parts.
Where this goes sideways: Letting the hammer free-run for an extended period. The Sealey SA613.V2 manual states plainly this will shorten its life. Without the resistance of a workpiece, the piston slams to the end of its stroke with excessive force, causing premature wear on the cylinder and bearings. A few seconds is fine; minutes will cost you.
How an Air Hammer’s Internal Parts Work
The core of an air hammer is a piston driven by compressed air. When you press the trigger, air pressure forces this piston back and forth inside the barrel. The piston strikes the end of the chisel shank repeatedly, delivering the hammering blows. The speed of these blows can be very high. The spring, often called a retainer spring, has two jobs. Its main function is to lock the chisel in place using a hooked end or by threading onto the barrel. It also helps to push the piston back after each strike, keeping the cycle going. This simple but violent internal action is what generates the tool’s power.
Frequently Asked Questions
What would you use an air hammer chisel for?
Air hammer chisels are versatile for metalwork and light demolition. Common uses include cutting and shaping sheet metal, splitting seams, removing rusted or seized bolts and nuts, driving out pins and bushings, chipping away light concrete or masonry, and breaking up spot welds in automotive repair. They excel at jobs where rapid, concentrated impact is needed.
How do I install a chisel on my air hammer?
Disconnect the air supply first. Then, consult your specific model’s manual. Most involve inserting the Parker Taper shank into the barrel and then securing it with a spring retainer screwed on clockwise. However, some models (like the Professional Parts M550DB) require you to unscrew the retainer completely first. Always pull firmly on the installed chisel to confirm it’s locked before use.
Will an air chisel break concrete?
It can chip and break up thin concrete slabs, tiles, or masonry, but it is not the optimal tool for heavy concrete demolition. For that, you’d use a dedicated demolition hammer or a rotary hammer in hammer-only mode. An air hammer’s shorter stroke and higher BPM are better suited for metal. Using it on thick concrete is inefficient and can damage the chisel tips.
Why is my air hammer losing power?
Check three things in order: 1) Air Supply: Ensure you have 90 PSI at the tool and that your compressor meets the CFM requirement (e.g., 4 CFM for a Sealey SA12). Increase pressure for long hoses. 2) Lubrication: Add a few drops of pneumatic tool oil to the air inlet. Gummed-up internals are a common cause. 3) Condition: Check for air leaks at fittings and inspect the chisel installation. A loose chisel or restricted airflow will drastically reduce performance.
Before You Go
The real secret to air hammer mastery isn’t in the trigger pull. It’s in the minutes before you pull it. Getting the pressure right, locking the chisel per your manual’s specific diagram, and putting that single drop of oil in the port, that’s what separates a tool that lasts for years from one that’s back on the shelf labeled “underpowered junk” in six months.
If you only remember one thing, let it be this: these tools are brutally simple. They fail for brutally simple reasons, dirt, dryness, and disregard. Treat the air supply like a surgical IV line, treat the oil like daily medicine, and you’ll have a tool that refuses to quit.
For heavier jobs that exceed an air hammer’s capacity, the principles of controlled demolition you’ve learned here translate directly to larger equipment like a demolition hammer or a pneumatic jackhammer. The core ideas of secure workholding, proper tool selection, and letting the tool’s impact do the work remain the same, just on a bigger scale.
