
Why Is My Air Compressor Leaking Air? Causes and Fixes
This post contains affiliate links. As an Amazon Associate, we earn from qualifying purchases.
An air compressor leaking air has one of five common causes: a loose hose fitting, a faulty check valve, a worn drain valve, a leaking pressure relief valve, or a failing pressure switch. The fix depends on the location: tighten or reseal fittings with thread tape, replace the check valve, or install a new valve. A constant leak when the compressor is off usually points to the check valve or drain valve.
You can hear it. A faint hiss from the corner of the garage, or the compressor kicking on at 3 a.m. To top up a tank that should hold pressure for days. That leak is more than an annoyance, it’s wasting energy and straining your pump. A common question is: why is my air compressor leaking air?
What follows is a map to answer why is my air compressor leaking air, pulled straight from service manuals. This guide explains the soap-and-water trick, the one valve that fails silently, and when a leak means the tank itself is done. By the end, you’ll know whether to reach for a wrench or call it a loss.
Key Takeaways
- A constant hiss when the compressor is off points directly to a failed check valve or a stuck-open drain valve.
- Use the soapy water test to find leaks, bubbles don’t lie, and the GAST manual describes a test where a pressure drop of more than 0.5 bar (7.5 psi) within five minutes indicates leaks are present.
- Never modify or repair an air tank, the Sears manual is explicit that drilling or welding weakens it, and a leaking tank must be replaced.
- Leak check frequency is all over the map: Sears says weekly, Ingersoll Rand says every 90 days, and DTM says daily for vehicle-mounted units. Match the schedule to your compressor’s job.
- For threaded fittings, Teflon tape (PTFE) is the right sealant; pipe dope can break down and get sucked into your tools.
The 5 Most Common Leak Sources and How to Fix Them
Leaks cluster in a handful of spots where metal meets rubber, or where a moving part has worn out. Start your search here.
1. Hose Fittings and Quick-Connects
These are the easiest wins. Over time, vibration works fittings loose. The seal fails, and air whispers out. You’ll often find this leak right at the compressor’s outlet or where the hose connects to a tool.
The fix is straightforward: tighten the fitting with a wrench. If it’s still leaking, you need to reseal it. This is where knowing how to use thread tape correctly matters. Wrap PTFE tape clockwise around the male threads, two or three layers, keeping it clear of the first thread to avoid shreds getting into your air line. Over-tightening fittings can damage them, so snug is enough.
Common mistake: Using pipe dope (thread sealant compound) on air compressor fittings. Pipe dope (thread sealant compound) can break down over time, potentially sending debris into your air line. PTFE tape is inert and doesn’t degrade.
2. The Drain Valve
The tank’s drain valve sits at the lowest point to let water out. It’s a simple petcock or a lever-operated valve. Debris can interfere with the seal, or the valve can be left partway open.
A leak here is a steady hiss from the bottom of the tank. Try opening and closing the valve fully a few times, sometimes debris dislodges. If it persists, the valve needs replacing. It’s an replaceable part; just make sure the new one matches the thread size and pressure rating of your tank. Shut off the compressor, bleed all pressure, and swap it out.
3. Pressure Relief (Safety) Valve
This valve is your tank’s last-ditch protection against over-pressurization. It’s supposed to stay sealed until pressure exceeds its set point (like 150 psi on a DTM unit or 135 psi on a GAST system). If it’s leaking at normal operating pressure, the valve is likely failing and needs replacement.
You’ll hear the leak right at the valve, usually a steady stream. Never plug or adjust this valve. The manuals are unanimous on that. Replace it with an identical valve rated for your tank’s maximum pressure. The DTM manual even lists it as a consumable, requiring replacement every 400 hours or one year.
4. The Check Valve
This is the sneaky one. The check valve sits between the pump and the tank, acting as a one-way gate. Its job is to let air into the tank and then close when the pump stops, keeping the air trapped. The Ingersoll Rand manual spells out the symptom: if air continues to escape through the pressure release valve (the unloader) after the compressor stops, the check valve is leaking.
When the check valve fails, tank pressure flows back into the pump head. This backflow of tank pressure into the pump head can make the compressor hard to start. You can’t fix it; you must replace the check valve. It’s a critical safety and function component.
5. Pressure Switch and Unloader Valve
The pressure switch turns the motor on and off at set pressures. Some pressure switches incorporate an unloader valve that bleeds pressure from the pump head after shutdown. A leak here can be a bad diaphragm inside the switch or a clogged unloader port.
Air will leak from the switch body or a small brass nipple. Sometimes the unloader port can be cleaned, but often the whole pressure switch assembly needs replacement. More often, the whole pressure switch assembly needs replacement. Replacing the pressure switch assembly is a more involved fix.
| Leak Location | What It Sounds/Looks Like | DIY Fix? | Urgency |
|---|---|---|---|
| Hose Fitting / Quick-Connect | Hiss at connection points; bubbles with soap test. | Yes—Tighten or apply thread tape. | Low |
| Tank Drain Valve | Constant hiss from tank bottom; may seep water. | Yes—Replace valve. | Medium |
| Pressure Relief Valve | Hiss or whistle from valve at tank pressure. | Yes—Replace with identical valve. | High (safety item) |
| Check Valve | Hiss from unloader after shutdown; motor hard-starts. | Yes—Replace valve. | High |
| Pressure Switch | Hiss from switch body; compressor cycles erratically. | Maybe—Cleaning possible; often requires replacement. | Medium |
How to Find the Leak (Soapy Water Test)
You need to see the leak to fix it. Your ears are a start, but air can travel and sound deceptive. The shop-standard method is the soapy water test, listed in the Sears 919.167700 manual as the way to check for air leaks weekly.
Mix a few drops of dish soap in a spray bottle with water. With the tank pressurized, spray the solution over every fitting, valve, hose, and connection. Pay special attention to:
- Threaded connections into the tank
- The drain valve stem
- The safety valve
- The pressure switch and its unloader nipple
- All hose barbs and quick-disconnects
Watch for bubbles forming, which indicate a leak. Mark the spot with a piece of tape or a marker.
The pressure release valve is designed to unload air from the compressor head automatically at unit shut off. This protects the motor from starting against air pressure remaining in the compressor head and tubing. When the motor stops running, air will be heard escaping from the valve for a few seconds. When the motor is running, no air should be leaking from the pressure release valve.
That’s the one normal leak, a brief blast from the unloader when the motor shuts off. Any other bubble is a problem.
The Shut-Off Valve Pressure Test
For a whole-system check, the GAST 87R-4P manual gives a precise procedure. Close the main shut-off valve after your tank and tools. Let the compressor pump up to its cut-out pressure and shut off. Start a timer.
According to the GAST manual, a pressure drop of more than 0.5 bar (7.5 psi) within five minutes after turning the system off indicates leaks are present. This test can help identify leaks in the system.
Is It an Air Leak or Just Condensate?
This trips up a lot of people. You see a puddle or a drip and assume it’s an air leak. Usually, it’s just water, condensate.
When air is compressed, moisture in the air turns to liquid water inside the tank. The Sears manual instructs users to drain the air tank daily or after each use. Liquid from the drain valve is normal condensate. It means you’re draining properly.
An air leak is a sound, not a liquid. If you hear hissing with a puddle, you might have two separate issues: a wet tank and a leaking fitting. Fix the air leak, but keep draining the tank.
When a Leak Means the Tank is Bad
This is the worst-case scenario. If you find air bubbling from a weld seam or a pinhole in the tank wall itself, stop using the compressor immediately.
The warning in the Sears manual is absolute: Never drill into, weld, or make any modifications to the air tank. Attempting to patch a pressure vessel is dangerously stupid. The tank is fatigued and must be replaced. The only fix is to replace the entire tank or the whole compressor. The risk of tank rupture isn’t worth the savings.
Tools You’ll Need for DIY Leak Repairs
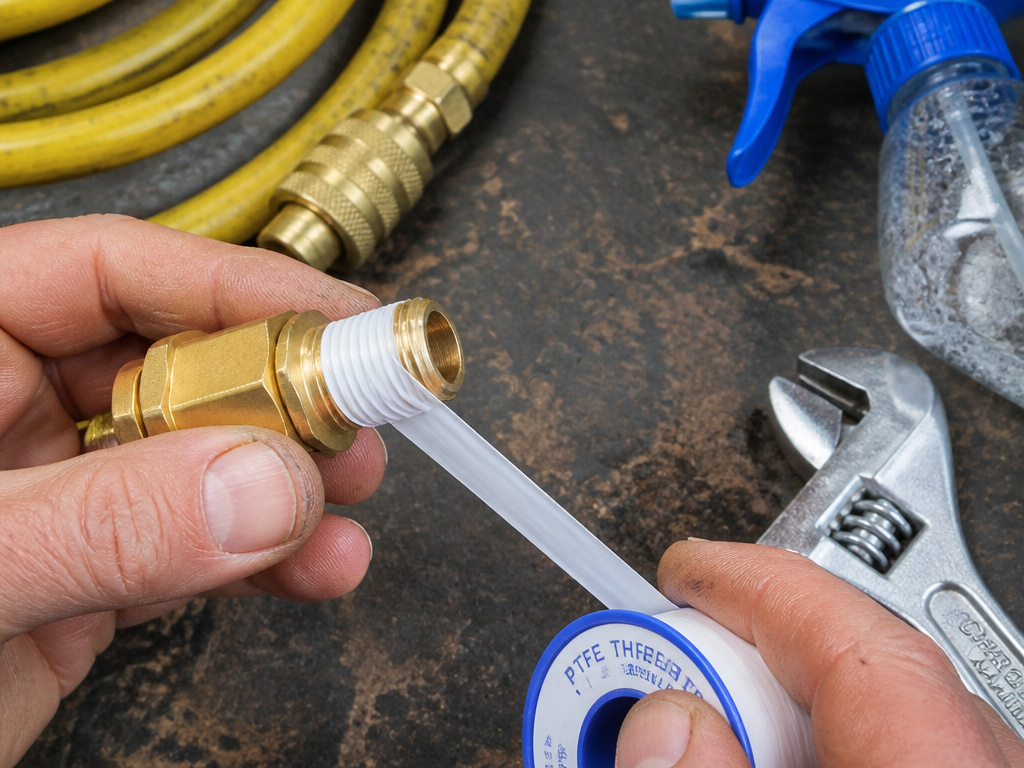
You don’t need a specialty kit. Most fixes require basic tools you likely own:
- Adjustable wrenches or a set of combination wrenches
- Thread tape (PTFE/Teflon tape) for resealing fittings
- Screwdrivers
- Pipe wrench (for stubborn drain valves)
- Soapy water in a spray bottle
For a check valve or pressure switch replacement, you may need additional tools. Always consult your compressor’s manual for the specific part number before ordering.
Why You Should Fix Leaks Immediately
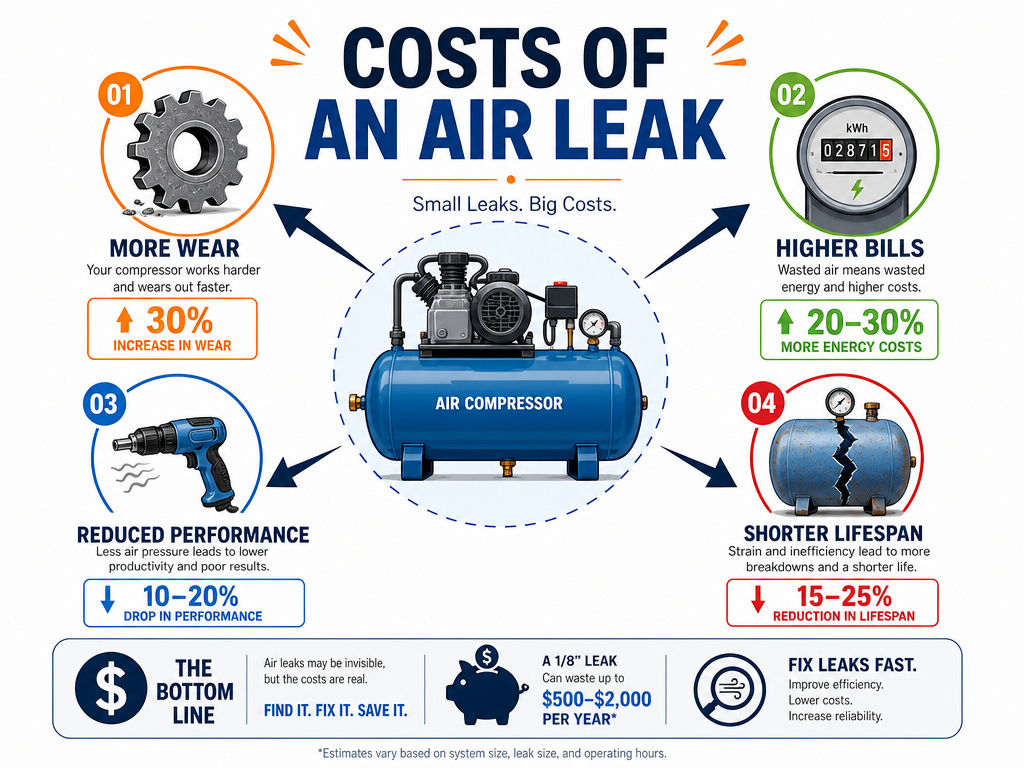
It’s not just about the noise. The GAST manual states plainly that air leaks are the primary cause of premature system failures. A leak causes the compressor to work harder to maintain pressure. That means:
- More wear on the pump and motor
- Higher electricity bills
- Reduced air tool performance
- Shorter compressor lifespan
Fixing a small leak today can prevent more serious damage later.
Manufacturer Schedules: How Often to Check?
Here’s where the manuals disagree, and it shows how use-case changes everything. You can’t follow one universal rule.
| Manufacturer / Model | Recommended Leak Check Frequency | Best For |
|---|---|---|
| DTM Transmission Mounted | Daily | Vehicle-mounted systems in daily commercial use. |
| Sears 919.167700 | Weekly | Home workshop compressors in regular use. |
| Ingersoll Rand | Every 90 days or 500 hours | Industrial stationary compressors. |
| GAST 87R-4P | Annually | Precision compressed air systems in controlled environments. |
Why is my air compressor regulator leaking air
A constant air leak from the regulator area when the compressor is off often points to a bad check valve. This valve’s job is to close and trap air in the tank when the pump stops. If it’s defective or dirty, air can flow backwards and escape through the pressure release valve or other components. This is a common failure. You can confirm a check valve issue by listening for air escaping after the compressor stops. According to the Ingersoll Rand manual, a leaking check valve can be corrected by removing the check valve and cleaning the disc and seat; if badly worn, it should be replaced.
How to find and fix an air compressor leak step by step
First, shut off the compressor and release all pressure. Mix soapy water. With the tank pressurized, brush the solution over every fitting, connection, gasket, and valve. Look for bubbles forming, which pinpoint the leak. For a system check, the GAST manual advises closing the valve to facility plumbing, running to maximum pressure, then turning off the system. Monitor the tank gauge; a significant pressure drop over a few minutes confirms a leak. Tighten any loose fittings found during the soap test. For a leaking check valve, you must disassemble it to clean the seat and disc. If components are corroded or badly worn, replace them. Never modify the tank or adjust factory-set safety valves.
Frequently Asked Questions
Why does my air compressor leak air only when it’s running?
Leak that only happens under pressure usually points to the pump itself, worn piston rings, a damaged head gasket, or a valve plate issue. Air is leaking internally during the compression stroke. This is a more serious repair that often requires disassembling the pump.
Can I use thread locker instead of Teflon tape on air fittings?
No. Thread locker (like Loctite) is designed to lock and seal metal-to-metal threads that don’t move. Air fittings are meant to be disconnected. PTFE tape is the correct sealant because it lubricates for assembly, seals, and allows for future disassembly without damaging threads.
What does it mean if my safety valve is leaking?
It means the valve is failing to seal at its set pressure. It could be worn, corroded, or have debris on the sealing surface. Replace it immediately with a valve of the same pressure rating. Do not try to clean it or adjust the spring, tampering with a safety valve is a major risk.
Why did my compressor start leaking air after I moved it?
You probably jostled a connection loose. Check every hose fitting, the connection at the tank, and the drain valve. The vibration from moving can work fittings loose that seemed fine before. Go over everything with a wrench and re-do the soapy water test.
Is a slow leak okay if I don’t use my compressor often?
No. A slow leak still means moisture-laden air is constantly entering the tank as pressure drops, accelerating internal rust. It also means the compressor will start unexpectedly to recharge, which is a waste of energy and adds wear. Find and fix it.
The Bottom Line
Track down that hiss. Start with the soapy water spray bottle and methodically cover every joint and valve. Nine times out of ten, you’ll find a loose fitting or a worn check valve, both cheap and simple fixes.
The one rule with no wiggle room: if the tank itself is leaking, retire the compressor. No patch, no weld, no debate. Every manual from Sears to DTM says the same thing because the alternative is a bomb sitting in your garage.
For everything else, a roll of thread tape, a wrench, and an hour of patience will get you back to a quiet, efficient shop. Then make a note to drain the tank after your next project. That’s the habit that keeps the tank solid for the long haul.
