
How to Tighten Lug Nuts With an Impact Wrench
This post contains affiliate links. As an Amazon Associate, we earn from qualifying purchases.
Sources disagree on the final tightening tool: Ingersoll Rand advises snugging with an impact and finishing with a hand torque wrench, while Nord-Lock states to fit and tighten the nuts using a calibrated torque wrench. The tool is for speed, not for final torque; Ingersoll Rand’s Engineering Director states an impact can unknowingly apply 300–400 ft-lbs on lugs that need only 80 ft-lbs, a mismatch that snaps wheel studs. For safety, it’s critical to know how to tighten lug nuts with an impact wrench correctly. Ford’s manual requires a star-pattern sequence and re-torquing within 100 miles (160 km).
The step most people skip is the re-torque. The metal surfaces under the wheel settle after the first drive. If you don’t re-tighten, the clamp load drops and the lug nuts work loose. For vehicles equipped with dual rear wheels, Ford specifies a second check at 500 miles (800 km). That’s the kind of spec that separates a quick tire change from a job that holds.
Here’s what you need to know: the impact wrench is your helper, the torque wrench is your final authority, and your vehicle’s manual is the only source for the correct number.
Key Takeaways
- Always finish with a calibrated torque wrench. An impact wrench alone cannot measure clamping force; final tightening to the vehicle’s exact spec is the only safe method.
- Follow the star-pattern tightening sequence. Tighten in at least two passes to pull the wheel flat against the hub and prevent warping.
- Re-torque lug nuts after 100 miles (160 km). This is mandatory after any wheel removal or tire rotation to account for surface settlement.
- Use your impact on its lowest setting for snugging. This prevents over-torquing during the initial phase and leaves room for the precision of the hand wrench.
- Clean all mounting surfaces before installing the wheel. Ford and Nord-Lock warn that dirt, corrosion, or debris between the wheel and hub is a primary cause of loosening.
The 100-Mile Rule That Prevents Wheels Coming Off
Ford’s owner manual puts it bluntly: installing a wheel without correct metal-to-metal contact can cause it to come off while driving. Their prescribed fix is to retighten the lug nuts to the specified torque within 100 miles (160 kilometers) after any wheel disturbance. That’s tire rotation, a flat change, or any time the wheel comes off.
The logic is physical, not procedural, especially when you consider the how to tighten lug nuts with an impact wrench process. The wheel, hub, and lug nut faces are never perfectly flat at a microscopic level. The first few miles of driving press these surfaces together, a process called settlement. This microscopic settling reduces the initial clamping force you applied with your torque wrench. Re-torquing restores that force to the correct, safe level.
This is a direct warning from a manufacturer whose engineers have traced field failures back to this single skipped step. The manual lists “loss of vehicle control, personal injury or death” as the potential outcome.
WARNING: When you install a wheel, always remove any corrosion, dirt or foreign materials present on the mounting surfaces of the wheel or the surface of the wheel hub, brake drum or brake disc that contacts the wheel. Installing wheels without correct metal-to-metal contact at the wheel mounting surfaces can cause the wheel nuts to loosen and the wheel to come off while your vehicle is in motion. Source: Ford Owner Manual
Here’s the edge case most guides miss. Ford specifies that for vehicles equipped with dual rear wheels, you re-torque at 100 miles (160 km) and again at 500 miles (800 km) after a new vehicle’s first operation or any wheel disturbance. The added load and surface area on a dually require that second check. If you drive a one-ton truck, your procedure is different.
The Step-by-Step Process for a Safe Lug Nut Tightening
Getting this right is a sequence, not a single action. Break it into three distinct phases: preparation, initial tightening, and final torquing. Rushing any one phase risks a loose wheel or a broken stud.
Phase 1: Preparation
- Find your torque specification. This number is in your vehicle’s owner’s manual or sometimes on a sticker in the door jamb or glove box. Do not guess. A Ford with M14 x 1.5 studs and a 2020 Chevy Silverado 2500 HD each have specific torque requirements; consult your vehicle’s manual for the exact specification. Ingersoll Rand’s general guide of 100–140 ft-lb for light trucks is just a guide, your manual is law.
- Gather your tools. You need your impact wrench, the correct impact-rated socket, a calibrated click-type torque wrench set to your spec, and a wire brush. A set of impact sockets is mandatory; regular sockets can shatter under the impulse force.
- Clean the mounting surfaces. Scrub the wheel hub center and the back of the wheel where it contacts the hub with a wire brush. Remove all dirt, rust, or old brake dust. Nord-Lock’s manual states this step is critical “to avoid compromising the grip of the serrations and to minimize settlements.” This is the most skipped step with the highest consequence.
Phase 2: Initial Tightening with the Impact Wrench
- Hand-start every lug nut. Thread each nut by hand until it’s finger-tight. This cross-checks for damaged threads before you apply power.
- Lower the vehicle so the tire is firmly on the ground. This stabilizes the wheel and prevents it from spinning when you apply torque.
- Snug the nuts in a star pattern using the impact on its lowest setting. This is where most over-torquing happens. Set your cordless impact wrench to its lowest speed/torque setting. If it has a “fasten” or “1” setting, use that. The goal is to pull the wheel evenly against the hub, not to reach final torque. Follow a star or crisscross pattern, moving to the nut opposite the last one you tightened.
Phase 3: Final Torquing with the Hand Wrench
- Finish with your calibrated torque wrench. This step is essential. Set your click-type torque wrench to the specification from your manual. In the same star pattern, tighten each lug nut until the wrench clicks. Do not re-click it. The click means the exact required torque has been reached.
- Mark the lug nuts. Use a dab of paint or a torque stripe across the nut and wheel. This gives you a visual check later to see if anything has moved or loosened.
- Drive 100 miles, then re-torque. After your first drive, re-check every lug nut with the torque wrench, again following the star pattern. This finalizes the job.
What Happens If You Skip the Torque Wrench?
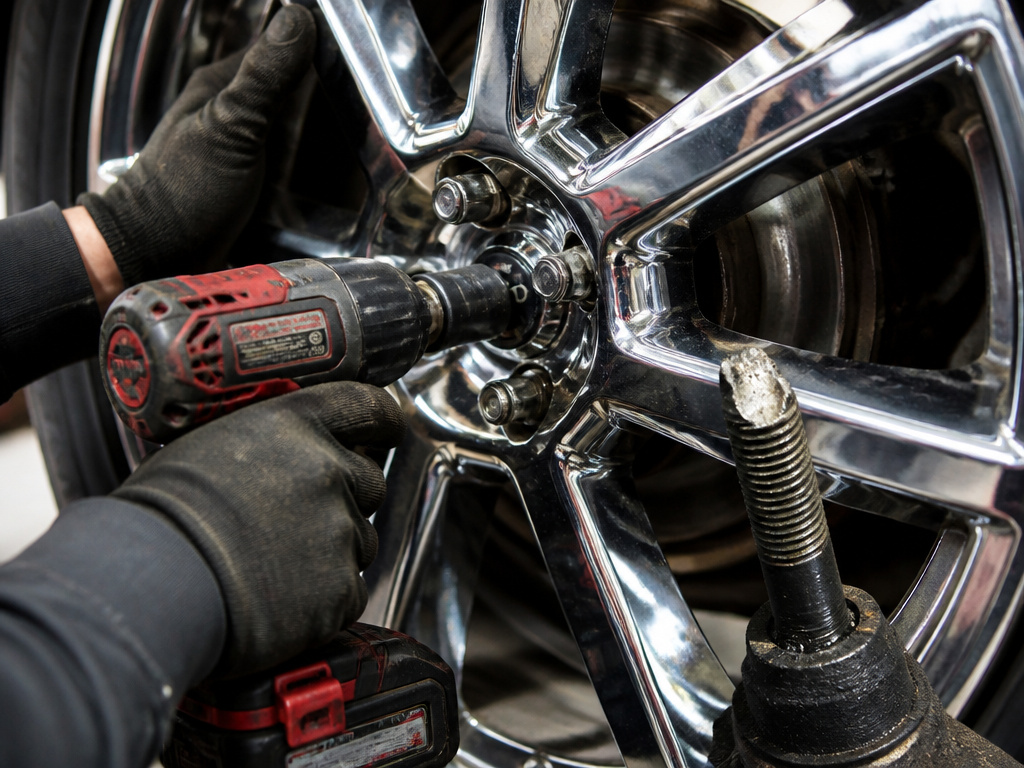
You’re trusting a hammering mechanism to measure a precise clamping force when you skip learning how to tighten lug nuts with an impact wrench correctly. It can’t. Joshua Johnson, Ingersoll Rand’s Engineering Director, notes that while lug nuts may only need 80 ft-lbs, an impact can “unknowingly apply 300-400 ft-lbs.” The consequences aren’t theoretical.
| If You Over-Torque… | If You Under-Torque… |
|---|---|
| Wheel studs stretch and snap, often under hard cornering or impact. | Lug nuts work loose from vibration, leading to a wobble and eventual separation. |
| The wheel hub or brake rotor warps from uneven, excessive force, causing a vibration when driving. | The wheel shifts on the hub, elongating the lug holes and ruining an expensive aluminum wheel. |
| The threads in the hub or on the stud strip, requiring a full hub assembly replacement. | Uneven clamp load causes the wheel to crack around the lug holes after repeated stress cycles. |
The sound of a wheel stud snapping is a sharp, metallic ping. By then, the hub is already damaged. Under-torquing is quieter; you’ll feel a steering wobble first, followed by a rhythmic knocking as the loose wheel pounds against the studs. Neither is a repair you want to make.
We should clear something up right now. Some mechanics use torque sticks with their impacts. These are vibration-dampening sleeves designed to limit torque. I don’t keep them in my shop. Their accuracy depends on tool RPM, air pressure, and condition, variables I don’t want between me and a safe wheel. A torque wrench for final tightening removes all the variables.
The Tools You Actually Need for the Job
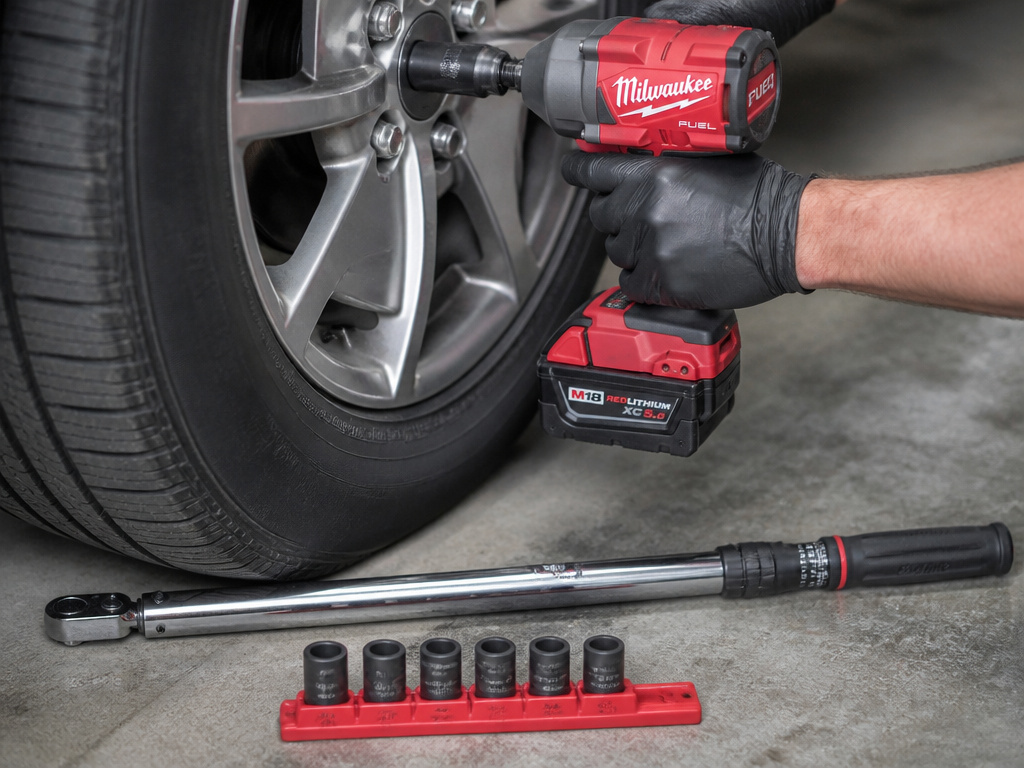
Your tool choices here define the outcome. This isn’t about buying the most powerful gun; it’s about matching the right tool to each phase of the task.
The Impact Wrench: Your Snugging Tool
For passenger cars and light trucks, a 1/2-inch drive cordless impact wrench is commonly used. Look for a model like the W7252-TL with an auto-stop tightening mode. The Ingersoll Rand W7153 is a capable option, and the W7252-TL Forward Torque Limited model has an auto-stop tightening mode. It has an auto-stop tightening mode designed for passenger tire installation. Even with such a tool, the final step remains the same: verify with a hand wrench.
The Torque Wrench: Your Measuring Tool
This is your final authority. A 1/2-inch drive click-type torque wrench is the standard for lug nuts. Before use, ensure it’s calibrated. Store it at its lowest setting to preserve the spring tension. This isn’t the tool to cheap out on, a wrench that doesn’t click accurately is worse than none at all.
Sockets and Adapters
Use only impact-rated sockets. They are made from a tougher, more ductile steel (usually chrome-molybdenum) to handle the shock load without cracking. A black oxide finish is common. Never use a chrome-vanadium regular socket on an impact wrench; it’s a safety hazard.
Aluminum Wheels vs. Steel: The One Difference That Matters
The procedure is identical, but the stakes are higher with aluminum. Aluminum is softer than steel. Over-torquing doesn’t just risk a broken stud; it can permanently deform the wheel’s mounting flange, creating a surface that will never clamp evenly again.
The telltale sign is a vibration that gets worse after a tire rotation, even though the wheel was balanced. The wheel is no longer flat. There’s no fix besides machining the mounting surface, if there’s enough material left.
Steel wheels are more forgiving of error, but the same rules apply. The material might be tougher, but the studs and hubs are the same. The best impact wrenches for lug nuts have the control features to prevent damage to both.
The Great Lubrication Debate and Other Edge Cases
Sources disagree sharply here, so you need to know both sides. The TEPA Torque Chart is absolute: “Do not lubricate the THREADS. Torque guidelines are based on DRY/CLEAN THREADS only.” Standard automotive practice echoes this, lubrication drastically changes the torque-tension relationship, leading to over-stretching of the studs.
Conversely, Nord-Lock, which makes specialized wheel nuts, states their products are pre-lubricated and that “during reuse it is recommended to re-lubricate the threads as well as under the flange.”
Other edge cases:
- Anti-seize on alloy wheels: A thin smear only on the hub center pilot area where the alloy wheel contacts it can prevent galvanic corrosion and seizing. Never get it on the lug threads or the wheel’s mounting face.
- Reusing old lug nuts: Inspect the threads and the conical seat for cracks, stretching, or rounding. If in doubt, replace them. They’re cheaper than a wheel.
- Aftermarket wheels: Ensure the lug nut seat style (conical, spherical, flat) matches the wheel. Using the wrong type concentrates stress on a small area of the wheel.
Frequently Asked Questions
Is it okay to tighten lug nuts with just an impact wrench?
No. An impact wrench is for initial snugging and removal only. Final tightening must be done with a calibrated torque wrench to the exact specification in your vehicle’s owner’s manual to ensure safe, even clamping force and prevent damage.
What if I’ve already over-tightened my lug nuts with an impact?
First, try to loosen them with the same impact wrench. If they won’t budge, do not apply more force, you risk snapping the stud. Apply a penetrating lubricant to the threads from behind the wheel hub if possible, let it soak, and try again. If they remain stuck, a professional mechanic may need to drill out the stud, a job that requires pressing in a new one.
What’s the best tool for tightening lug nuts?
The best tool combination is a cordless impact wrench used on a low setting for snugging, followed immediately by a calibrated click-type torque wrench for the final precise torque. For most DIYers, a mid-tier cordless impact wrenches for automotive tasks paired with a 1/2-inch torque wrench is the ideal setup.
Can I use a torque stick instead of a torque wrench?
Torque sticks can be a useful secondary check, but they should not replace a torque wrench. Their accuracy can vary with tool RPM, air pressure, and condition. A hand torque wrench provides a direct, reliable measurement and is the only method recommended by vehicle manufacturers.
Do I need a special impact wrench for lug nuts?
You need an impact wrench with sufficient power for removal (high breakaway torque) but, more importantly, with control features for tightening. Models with a dedicated low-torque setting or forward torque limiting, like the Ingersoll Rand W7252-TL, are excellent because they help prevent over-torquing during the snugging phase.
Before You Go
The right sequence beats raw power every time. Hand-start, impact-snug on low, torque-wrench to spec, and re-check after 100 miles. That’s the recipe.
If you remember one thing, let it be the re-torque. It’s the difference between a job that’s done and a job that’s done right. The click of that torque wrench confirms that your wheel is secured exactly as the engineers who built your vehicle intended. Everything else is a guess.
But for lug nuts, control always wins.
