
How to Use a Concrete Grinder: The 8-Step Procedure
This post contains affiliate links. As an Amazon Associate, we earn from qualifying purchases.
To use a concrete grinder, you match three things: the diamond segment to the concrete’s surface condition, the machine’s RPM to the material’s hardness, and a dust control system (vacuum or water) to every pass. For a walk-behind grinder, start at 300–500 RPM, push down on the handle to engage, and walk at 1–2 feet per second in overlapping passes. The machine is for professional use on concrete and other hard floors only, and dry operation requires a dust mask rated for microscopic silica particles per OSHA 29 CFR 1926.1153.
This isn’t a weekend DIY tool. The manuals from Husqvarna, Makinex, and Kellshire are unanimous: these are commercial-grade machines for professional operators. That changes how you approach the job, including how to use a concrete grinder. Your margin for error is smaller, and the consequences, from a tripped breaker to a cloud of carcinogenic silica dust, are immediate.
What follows is the procedure the manuals assume you know, broken into the gear you need, the diamond you choose, the walk you take, and the fixes for when the machine tells you it’s unhappy, which is the core of how to use a concrete grinder.
Key Takeaways
- Use appropriate respiratory protection such as a dust mask designed to filter out microscopic particles. The OSHA standard referenced by Husqvarna mandates protection against microscopic silica particles; a basic paper mask won’t cut it.
- Match diamond bond to surface finish, not just concrete strength. A smooth, troweled floor needs a soft-bond segment, while a coarse, scarified surface needs a hard bond.
- Walk at 1–2 feet per second. The Simiron guide specifies this pace; slower risks burning the diamonds, faster leaves an inconsistent profile.
- Let the machine cool for 60 seconds after an overload trip. The Kellshire manual notes the thermal overload protection on models like the PG 280 resets after about a minute.
- An edge grinder is mandatory. A 25-inch planetary head cannot reach within 3–4 inches of a wall; you need a 5 or 7-inch angle grinder with a cup wheel for the perimeter.
Before You Start: The Non-Negotiable Safety Protocol
This isn’t optional decoration. It’s the barrier between you and a hospital visit or a long-term respiratory disease. The manufacturer instructions are exceptionally clear on this point.
You need the full kit: protective helmet, hearing protection, a visor or goggles, heavy-duty gloves, steel-toe boots, and tight-fitting clothing.
The respiratory part is specific. Husqvarna’s manual directs you to OSHA 29 CFR Part 1926.1153, the regulation for respirable crystalline silica. You need a respirator with filters rated for this hazard, a simple nuisance dust mask is a violation of the rule and a gamble with your lungs. If you’re dry grinding, you must use that respirator.
Before you start: Silica dust from concrete is hazardous. You must wear a respirator with filters for microscopic particles. A tripped thermal overload resets in about 60 seconds when the motor cools.
The electrical side has hard rules, too. The Makinex CG-2050 manual states you must use a dedicated mains power supply with an extension lead not exceeding 10 metres (11 yards). The Kellshire PG 400 requires a 16-amp, 400-volt circuit.
The Tools and Systems You Can’t Grind Without
A grinder is just the centerpiece. The job fails without the supporting gear.
First, dust control. You have two sanctioned paths, both from the Husqvarna manual: use water to bind the dust, or use an appropriate dust extractor. For indoor work, a dust vacuum with a HEPA filter is the only sane choice. It must be connected before you start, another Kellshire mandate. This isn’t just for air quality; a cloud of dust will hide your grind pattern and you’ll miss spots.
Second, the grinder itself. You’re likely dealing with one of two types: a handheld unit like the Makinex CG-2050 (compatible with standard 180mm diamond discs) or a walk-behind model like the Husqvarna PG 280 or Kellshire PG 400. The walk-behinds are beasts. The PG 280’s weight and electrical specs vary by source: the Husqvarna PG 280 (230V) weighs 73 kg and draws 13.4 A, while the Kellshire PG 280 weighs 70 kg and draws 12.9 A. The PG 400 jumps to 115 kg (254 lbs) and requires 3-phase power. You don’t just lift these; you maneuver them.
| Grinder Model | Type | Weight | Power Requirement | Best For |
|---|---|---|---|---|
| Makinex CG-2050 | Handheld | Compatible with standard 180mm diamond discs | Edges, small patches, detail work | |
| Husqvarna PG 280 | Walk-behind | 73–75 kg (161–165 lbs) | 230V, 13–14A, Single-phase | Main floor grinding, surface prep |
| Kellshire PG 400 | Walk-behind | 115 kg (254 lbs) | 400V, 16A, 3-phase | Large commercial floors, heavy removal |
The Simiron guide is blunt: its 25-inch planetary head can’t reach within 3–4 inches of a wall, a key limitation in how to use a concrete grinder. The fix is a 5-inch or 7-inch angle grinder with a matching diamond cup wheel to grind within 1–2 inches of all walls.
Choosing the Right Diamond Segment
This is where most guides oversimplify. They tell you to match the diamond bond to the concrete’s compressive strength. The Kellshire manual says that’s often wrong.
Often the way the concrete floor has been finished or the condition of the surface will have a greater bearing on what type of diamond to select, rather than the compressive strength rating of the concrete.
The surface condition overrides the lab strength number. Here’s the decision matrix straight from the manual:
| Surface Condition | Behaves Like | Required Diamond Bond |
|---|---|---|
| Very smooth, heavily troweled, helicopter-finished | High-strength concrete | Soft Bond |
| Coarse, rain-damaged, shot-blasted, scarified, exposed aggregate | Low-strength concrete | Hard Bond |
| Coated with epoxy, tile adhesive, leveling compound | Variable (coatings dictate) | Start with Hard Bond |
The rule when unsure is to start hard. A hard bond on soft concrete grinds slowly but wears the diamond slowly. A soft bond on soft concrete wears out in minutes, turning your expensive segment into a smooth, glazed plate that just burns the surface.
If you’re grinding a thick coating or a soft material and the machine bogs down, the manual has a direct fix: increase the number of diamonds under the machine. Too few segments concentrating the load will overheat the motor and exhaust you.
The 8-Step Grinding Procedure
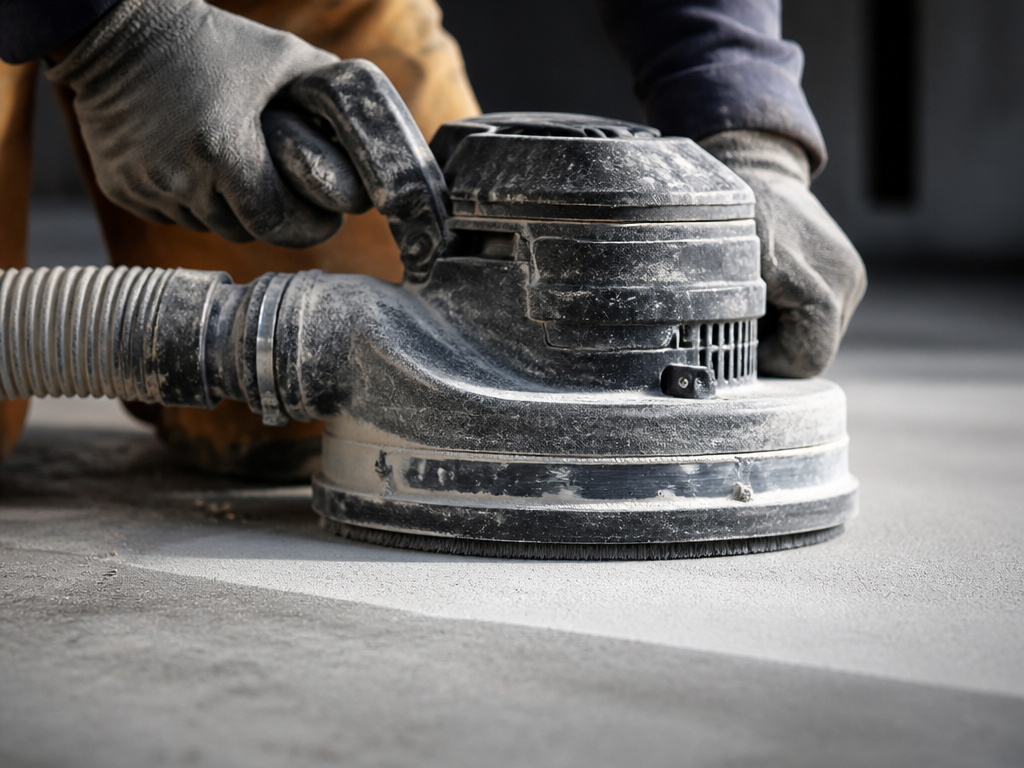
We will now go through the sequence. Miss a step, and you’ll hear about it, usually from the sound of a straining motor or the sight of a tripped breaker.
- Prep the Floor and Machine. Clear the area completely. Sweep and vacuum any loose debris. Fit the correct diamond segments to the grinder head, ensuring they’re tight and even. Connect your dust vacuum hose to the machine’s shroud port.
- Set the Handle and Power Up. Adjust the handle to a comfortable height and lock it. Plug the grinder into its dedicated circuit. For a planetary grinder like the Simiron SG600, set the RPM control to a low setting (300–500 RPM) for startup.
- Start the Machine. Here’s the tactile part most people get wrong. Don’t just hit the button. As the Kellshire manual states, reduce the pressure between the grinding disc and the floor by pushing down on the handle without lifting the unit off the ground. Then press the start button. You’ll feel the machine settle as the head engages.
- Establish Your Working RPM. Once moving, increase the speed. Match the RPM to your concrete type using the guide from the Simiron operating manual:
- New, soft concrete: 600–900 RPM
- New, hard concrete: 1,000–1,400 RPM
- Previously coated floor: 500–800 RPM with PCD or coarse tooling
- Make Your First Pass. Walk at a steady 1–2 feet per second. Move too slow and you’ll burnish or gouge the floor; too fast and you’ll leave untouched strips. Keep the head level for an even grind.
- Overlap and Pattern. Overlap each subsequent pass by 2–3 inches. Work in a systematic grid pattern, grinding the main field first. Never stop the machine with the head spinning in one spot, that creates a circular divot.
- Stop Correctly. Hit the stop button, but keep the grinding segments in contact with the floor. This drag helps bring the 1400 RPM head to a quick stop. Lifting it creates a final dust cloud.
- Inspect and Adjust. After a pass, look at the concrete. It should be a uniform matte finish. Shiny spots mean the diamond isn’t cutting, check the bond hardness. Deep chatter marks mean a segment is loose or you’re walking unevenly.
That’s the core cycle. Now for the parts that usually go sideways.
Where This Goes Sideways: Troubleshooting Common Problems
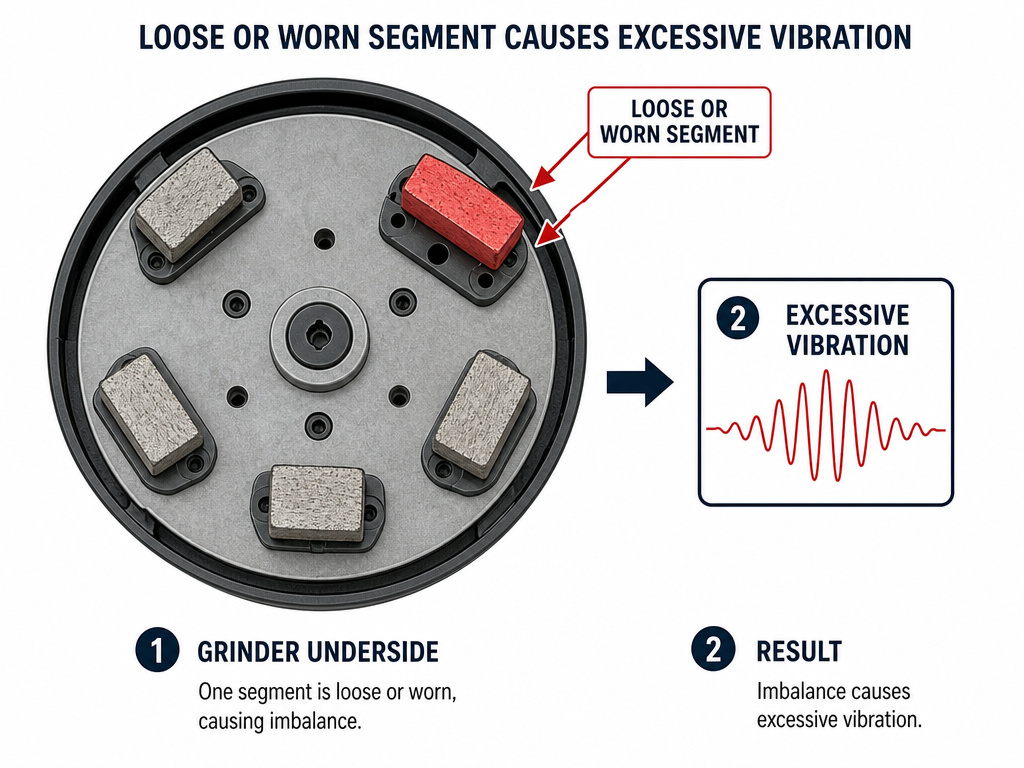
The machine will talk to you. A healthy grind has a consistent, loaded sound. Problems have their own signatures.
Here’s a quick-reference table for the noises and stops you don’t want:
| Symptom | Likely Cause | Immediate Fix |
|---|---|---|
| Machine stops after a while during grinding | Thermal overload protection activated. | Wait 60 seconds for the motor to cool. It should restart. Reduce pressure or check diamond selection. |
| Machine stops during start-up | Electric motor overloaded or missing phase (on 3-phase models). | Wait 1–2 minutes. If it persists, check the circuit and contact service. |
| Diamond not cutting, glazed surface | Diamond bond is too hard for the concrete. | Switch to a softer bond segment. |
| Uneven grinding pattern, chatter | One diamond segment is loose or more worn than the others. | Power down, inspect, and tighten or replace segments to ensure even contact. |
| Excessive vibration | A diamond segment is missing, broken, or the head isn’t seated. | Power off immediately and inspect the grinding head assembly. |
If you’re grinding a thick glue bed or soft material and the machine labors, remember the Kellshire tip: you might not have enough diamonds under the machine. Adding more segments spreads the load and allows the motor to work efficiently.
Handling Edges, Corners, and Cleanup
The main grinder does the field. The edges are a separate job with a separate tool. That angle grinder you set aside earlier is now your most important tool.
Grind the perimeter either before or after the main field. Most pros do edges first so the walk-behind can overlap and blend the transition. Use a diamond cup wheel on your angle grinder and work methodically, keeping it flat to avoid creating a lip.
Cleanup is a two-phase operation. First, the slurry. If you used a wet system, you’re now pushing around a gritty, cement-heavy sludge. A wet vacuum is the only practical tool. For dry grinding with a vacuum, once you’re done, you’ll still have a fine layer of dust. Vacuum the entire area thoroughly, then damp-mop. Do not dry-sweep, you’ll just put silica dust back into the air.
Finally, maintain your tools. Inspect your diamond segments. The Simiron guide says to replace them when the segment height falls below 2mm. A worn segment is an inefficient one.
How Much Material Does a Concrete Grinder Remove Per Pass?
The amount of material removed in a single pass depends on your machine’s power, the diamond tooling, and the concrete’s condition. For efficient surface removal, walk at a steady, consistent pace. Overlap each pass by several inches to avoid leaving unground strips. If you’re removing a thick coating or grinding a soft floor, increasing the number of diamonds under the machine can improve the rate and reduce strain on the equipment. Always start with a harder bond diamond segment if you are unsure of the concrete’s hardness to minimize premature wear. The key is a consistent, controlled pace without forcing the machine.
Frequently Asked Questions
Should I use water or a vacuum for dust control?
Use a HEPA-filter dust vacuum for indoor work. It’s mandated for dry grinding by the OSHA standard that manufacturers cite. Wet grinding is effective but creates slurry that requires separate cleanup and isn’t always feasible indoors. The choice is often made for you by the job site.
Can I use a concrete grinder on wood or asphalt?
No. The Makinex manual states the grinder is for concrete floors only, while Husqvarna says it is for concrete and other hard floors. Using them on other materials violates their intended use, voids warranties, and is dangerous.
What’s the most common mistake beginners make?
Walking too slowly. It feels counterintuitive, shouldn’t slower be more thorough? Actually, it overheats the diamonds, glazes the concrete surface, and can over-stress the motor. The 1–2 feet per second pace is a physical target. Practice without power to get the rhythm.
How do I know when to change the diamond segments?
Visually inspect them after each job. Look for significant wear or missing diamonds. The hard rule from the Simiron guide is to replace them when the segment height is under 2mm. Also, if the floor develops consistent shiny patches your vacuum can’t explain, the segments are likely glazed or worn out.
The Bottom Line
Using a concrete grinder is a system, not just a tool operation. The system starts with the right respirator, runs on a dedicated circuit, and moves at a pace of 1–2 feet per second. It matches a soft-bond diamond to a smooth floor and a hard-bond diamond to a coarse one. When the machine trips off, you wait 60 seconds, not 30.
For the edges, you accept that the main grinder fails 4 inches from the wall and you pick up an angle grinder. That’s the job. Getting it right means you leave a floor that’s ready for coating, not a cloud of dust and a burned-out motor. It’s commercial equipment. Operate it like a pro, even if it’s your first time.
