
How to Use a Band Saw: Step-by-Step (Safety & Setup)
This post contains affiliate links. As an Amazon Associate, we earn from qualifying purchases.
To use a band saw, first verify it is unplugged, then set the blade tension, tracking, and upper guide height for your material. Always wear ANSI Z87.1 safety goggles, hold the workpiece flat, and feed it into the blade at a moderate, steady speed. Sources disagree on what materials a band saw can cut: RIDGID states to NEVER use it to cut metals, while the Rikon 10-326 manual includes non-ferrous metals.
That sequence, safety, setup, then cut, is the only order that works. Miss a step, and the tool fights you. It jams, wanders, or worse. This is the core of how to use a band saw.
What follows is the real-world procedure for how to use a band saw, pulled directly from the manufacturer manuals for the RIDGID, Rikon, and Delta ShopMaster models. We’ll walk through the essential safety rules, the precise adjustments that make or break a cut, and how to handle the moments when the manual’s advice actually conflicts.
Key Takeaways
- Always wear ANSI Z87.1 safety goggles and, for dusty work, a dust mask, everyday glasses aren’t enough.
- Sources disagree on the exact height: RIDGID advises adjusting the guide to just clear the workpiece, Rikon suggests about 1/8” to 1/4” above, and Delta recommends no more than 1/8″ above or as close as possible.
- Tension the blade with the quick-release lever engaged (if your saw has one); failure to do so can cause tension failure mid-cut.
- Make relief cuts on tight curves to prevent the blade from binding and kicking back the workpiece.
- Let the blade come to a complete stop before removing cut-offs or clearing a jam; reaching into a spinning blade is how most injuries happen.
The Core Safety Rules (That Actually Matter)
Forget the generic warnings. These are the specific, manual-mandated rules that prevent the most common shop accidents. They aren’t suggestions.
Before you start: Turn the switch off, unplug the saw, and remove the switch key before changing the setup, removing covers, guards, or the blade. This is the RIDGID rule, and it’s the only way to guarantee the saw won’t start while your hands are inside it.
Your eyes are the first line of defense. The RIDGID manual is explicit: “Always wear safety goggles complying with ANSI Z87.1 (or in Canada CSA Z94.3-M88). Everyday eyeglasses have only impact resistant lenses. They are not safety glasses.” For dusty operations, you need a dust mask on top of that. Sawdust isn’t just messy; in some states, it’s a known carcinogen.
The workpiece itself is a hazard if it’s the wrong shape or size. The Rikon manual has a clear rule for small pieces: “When cutting small work pieces, always use a push stick, holding jig or other device to keep your hands safely away from the blade.” Your fingers have no business being near that blade. For round stock like dowels, always use a V-block or clamp it to the miter gauge, it will roll and pinch the blade.
And when things go wrong, the procedure is strict. “Do not remove jammed pieces from the saw until the machine and blade has stopped,” states the Rikon manual. “Unplug the bandsaw from the power source, and then remove the jammed work piece.” Impatience here costs fingertips.
The 7-Step Setup & Adjustment Sequence
A band saw that isn’t set up correctly is a noisy, frustrating paperweight. This isn’t about tweaking for perfection; it’s about getting three things right so the tool does what you ask.
1. Install and Tension the Blade
First, ensure the saw is unplugged. Open the door and loop the new blade over the wheels, teeth pointing downward toward the table. Here’s where manuals diverge on the first critical step: blade tension.
For a model like the Delta ShopMaster BS100, the process is numeric. After the spring begins to compress, you turn the tension knob an additional “2-1/2 turns for 1/8″ wide blades; 3 turns for 1/4″ wide blades; and 4 turns for 3/8″ wide blades.”
On a saw like the Rikon 10-326 with a quick-release lever, there’s a crucial warning: “Always tension the blade with the Quick Release Lever in the ‘ON’ position. Failure to do so could result in lack of blade tension or tension failure.” I’ve seen a blade go slack on a heavy cut because this was missed, the lever was off, the scale read fine, but the mechanism wasn’t engaged. The cut stalled and the blade jumped off the wheels.
The blade tension scale may read differently due to different blade specifications from manufacturers – steel thickness, material, or variations in the welded blade length. It may be necessary to adjust the tension arrow up/down one size on blade tension scale to match your blade. Rikon 10-326 Manual
That note is vital. The printed scale is a guide, not a gospel. A stiff, heavy-duty blade might need more tension than the scale indicates for its width. You tune it by feel and by watching the blade track.
2. Track the Blade
With the blade guides and support bearings backed clear of the blade, rotate the upper wheel by hand. The blade should run centered on the crown of both wheels. If it drifts forward or back, use the tracking knob, usually on the upper wheel housing, to adjust it. The Delta manual advises: “Turn the blade tracking knob in small intervals.” A quarter-turn is often too much. You want it centered, not dancing.
3. Set the Upper Blade Guide Height
This is the most debated setting. How high should the guide be?
| Manufacturer | Recommended Height |
|---|---|
| RIDGID | “just clear the workpiece” |
| Rikon | “about 1/8” to 1/4” above” |
| Delta ShopMaster BS100 | “no more than 1/8″ above or as close as possible” |
The principle is the same: maximum support, minimum gap. The guide assembly (including the side bearings and rear thrust bearing) keeps the blade from twisting or deflecting backwards under pressure. A gap that is too large gives the blade too much unsupported length to flex, leading to wandering cuts and potential breakage. I set mine at 1/8″ for everything. It’s the safest compromise.
4. Adjust the Blade Guides
The side guides (often little bearings or blocks) should not touch the blade when it’s stationary. They should be set so they just contact the sides of the blade when you push it backwards lightly with a finger. You should feel the blade touch the thrust bearing at the back. If they’re too tight, they create friction and heat. Too loose, and the blade can twist.
5. Check the Table and Fence
Ensure the table is square to the blade for a 90-degree cut. Use a reliable square against the blade (not the teeth). If you’re using the fence for a rip cut, lock it parallel to the blade. A fence that toes in or out will induce blade drift and bind the cut.
6. Plan Your Support
For any workpiece large enough to tip, the Rikon manual says to use “extra supports (roller stands, saw horses, tables etc.).” This isn’t optional. A falling board can pull your hand into the blade.
7. The Final Safety Check
Plug the saw in. Make sure the switch is off. Look around the table, are there any loose wrenches, off-cuts, or obstructions? Clear them. Now you can turn it on.
What Can You Actually Cut? (The Manufacturer Split)
Here’s a real conflict the generic guides gloss over. Can you cut metal on a band saw?
The RIDGID manual is absolute: “Use this band saw to cut only wood, wood like products and plastics. NEVER use this band saw to cut metals.” Their warning cites risks of blade breakage and fire.
The Rikon 10-326 manual, however, states: “This machine is intended for the cutting of natural, solid woods, composite materials, plastics and non-ferrous metals.“
The difference is in the motor, gearbox, and blade speed. A wood-cutting band saw typically runs too fast for steel and lacks the torque for it. Cutting steel on one will overheat and ruin the blade, likely damage the tires on the wheels, and could stall the motor. The Rikon 10-326 manual states it is intended for cutting non-ferrous metals.
The rule of thumb for how to use a band saw: if your saw is designed for metal cutting and you have the correct blade, you can cut aluminum, brass, and other soft metals. If it’s a single-speed saw sold for woodworking, the RIDGID rule is law. Stick to wood, plywood, MDF, and plastics.
Basic Cutting Techniques & Managing Blade Drift
The saw is on. The blade is a humming vertical line. Now what?
Making a Straight Cut
Hold the workpiece flat on the table with both hands, fingers well clear. Feed the material into the blade at a moderate, consistent speed. Don’t push. Let the teeth do the work. If you force it, the blade deflects, the cut bows, and you get burn marks. You should hear a steady cutting sound, not a straining whine.
If the cut starts to curve (blade drift), don’t muscle the wood back. Stop the cut, turn off the saw. The problem is almost always setup: insufficient blade tension, dull blade, or misaligned fence. A well-tuned saw with a sharp blade cuts straight.
Cutting Curves and Making Relief Cuts
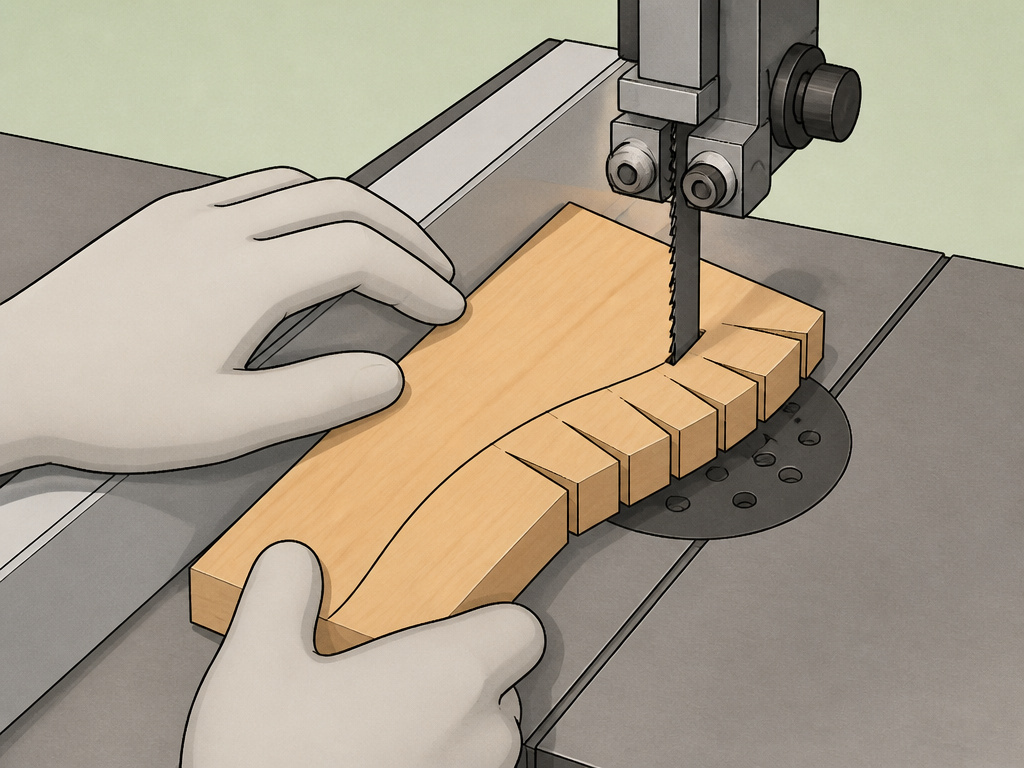
This is where the band saw shines. For a tight curve, the Rikon manual’s rule is golden: “Make ‘relief’ cuts before cutting curves to eliminate blade binding.”
Cut straight into the waste material up to your curve line, then make a series of relief cuts from the edge back to this line, like peeling a banana. This allows the waste pieces to fall away as you cut the curve, so the blade isn’t pinched. For internal cuts, drill a starter hole, thread the blade through, re-connect it (tension it!), and cut from the inside out.
Resawing: Splitting Thick Stock
Resawing, slicing a thick board into thinner slabs, is a band saw specialty. It demands a wide blade (1/2″ or 3/4″), high tension, a perfectly aligned fence, and a slow, steady feed rate. A resawing blade with a low TPI clears chips efficiently. Use a tall auxiliary fence for support and consider a featherboard to keep the stock tight against the fence. This is an advanced technique that tests your setup’s limits.
Troubleshooting Common Problems
Even with perfect setup, things go wrong. Here’s how to read the symptoms.
| Problem | Likely Cause | Fix |
|---|---|---|
| Blade wanders, won’t cut straight | Dull blade, insufficient tension, or blade guides too high/loose. | Check tension, lower upper guide, adjust side guides, install a sharp blade. |
| Burn marks on workpiece | Dull blade or feed rate too slow. | Increase feed pressure slightly or replace blade. |
| Blade breaks suddenly | Over-tensioning, forcing a cut, or cutting too tight a curve without relief cuts. | Use proper tension, make relief cuts, let the blade cut. |
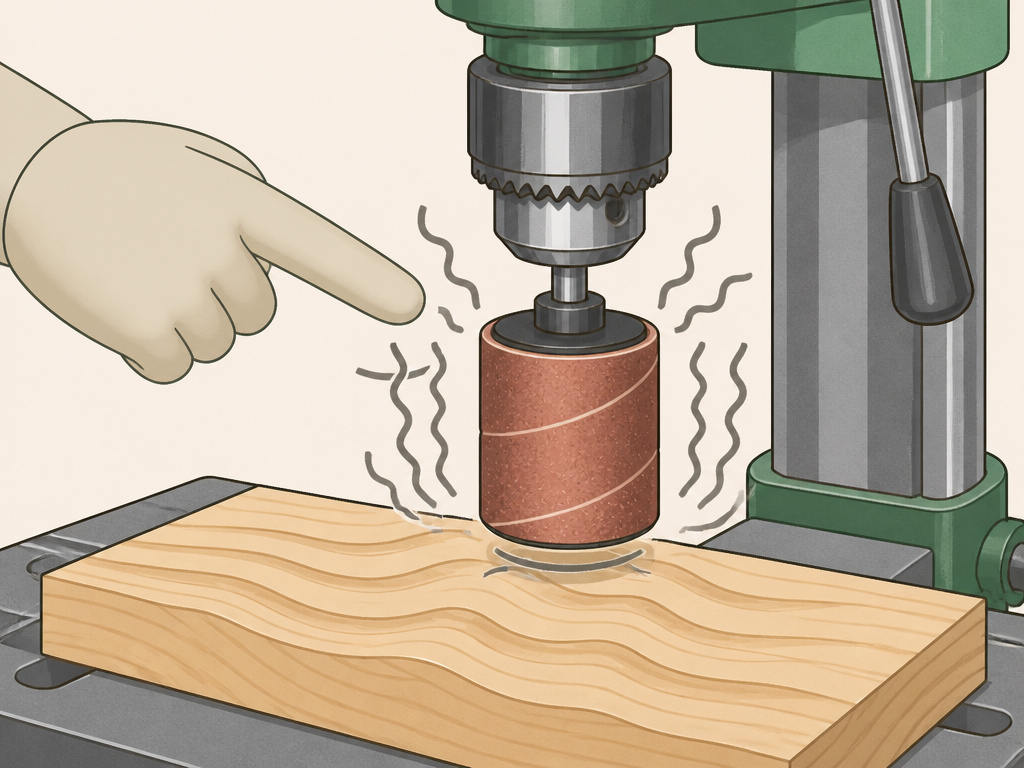
| Excessive vibration | Unbalanced wheel, damaged tire, or poor blade weld. | Check blade weld, inspect rubber tires on wheels, ensure saw is bolted to stand. |
| Motor stalls in thick stock | Blade too fine (high TPI), insufficient tension, or motor underpowered for the task. | Use a coarser blade, increase tension, or take lighter passes. |
The most common issue I see is blade drift with a new blade. Often, it’s not the saw, it’s the blade itself. Cheap blades can have a slight set or weld imperfection that makes them track off. Try a different, higher-quality blade before you spend an hour realigning your entire saw.
Band Saw Maintenance You Can’t Skip
A band saw is simple, which means neglect shows up fast in poor cuts.
After each use, brush off the table and the lower wheel area. Sawdust packed against the lower guides will grind away at the bearings. Periodically check the tires on the wheels for cracks or glaze, and clean them. Inspect the guide bearings for smooth rotation; a seized bearing will heat up and score your blade.
And that tension question for storage? The sources disagree. The Rikon 10-3061 manual says to “Release blade tension when the saw will not be used for a long period of time.” The Rikon 10-326 manual says to release it “to prolong the life of the blade when the saw is not in use for extended periods.” The Delta manual doesn’t mention storage release.
Sources disagree on blade tension release for storage: Rikon manuals advise releasing tension for extended periods, while the Delta manual does not mention it.
Freehand cutting vs. Using a fence or miter gauge
Choosing between freehand cutting and using a guide depends on the cut you need. Freehand cutting is essential for curves and irregular shapes. When cutting curves, make relief cuts first to eliminate blade binding. Always hold the material firmly, resting flat on the table, and feed it at a moderate speed. For straight, repeatable cuts, use a fence. It ensures parallel edges. For angled cuts, use a miter gauge. These guides provide control and keep your hands at a safe distance. When cutting small work pieces, always use a push stick or holding jig with any method to keep your hands safely away from the blade.
Frequently Asked Questions
Which way do the teeth go on a band saw?
The teeth must point downward, toward the table. This ensures the cutting action pulls the workpiece down against the table, providing stability and control. If the teeth point up, the blade will try to lift the workpiece, creating a dangerous and uncontrollable situation.
How do you cut a straight line using a bandsaw?
Straight cut requires a sharp blade, correct tension, and proper feed technique. Use the fence for repeatable rip cuts. For freehand straight cuts, focus on a steady, moderate feed rate and use a marked line as a guide. If the blade drifts, the issue is setup, not your hands, check tension and guide alignment.
Can you cut metal with any band saw?
No. You must use a band saw designed for metal or a wood-cutting model with a variable speed control set to an appropriate speed for metal. You also need the correct blade (a bi-metal or carbide-tooth blade for metal). Using a wood-cutting band saw to cut metals is not recommended by all manufacturers.
Why does my new band saw blade drift?
New blade drift is often caused by the blade itself, not your saw’s alignment. Inexpensive blades can have inconsistent tooth set or a poor weld. It can also be due to insufficient tension. Ensure the blade is tensioned properly for its width, and if the problem persists, try a different, higher-quality blade brand.
The Bottom Line
Using a band saw well isn’t about strength or daring. It’s about respecting a simple sequence: unplug and set up, tension and guide, then cut with patience. The manuals give you the rules, but they leave the judgment calls up to you, like setting that upper guide height or deciding when to release tension.
One final rule that overrides all others: if a cut feels wrong, it is. Turn off the saw, unplug it, and figure out why. The band saw rewards a methodical approach and punishes haste every single time. Get those three initial adjustments right, and the tool will handle the rest.
