
How to Nail Baseboards Without a Nail Gun: Step-by-Step
This post contains affiliate links. As an Amazon Associate, we earn from qualifying purchases.
To nail baseboards without a nail gun, you have three proven methods: hand-driving finish nails with a hammer and nail set, bonding trim with fast-grab construction adhesive, or combining adhesive with a few strategic nails. Sources recommend different nail types: woodworkingadvisor.com suggests 2-inch finish nails, thisoldhouse.com recommends 8d finish nails, and microworkshandyman.com advises using finish nails usually 2″ to 2 ½”. The adhesive-only method requires a continuous 1/4-inch bead for narrow trim or a zig-zag pattern for wider boards, and it needs 20 minutes for initial grab and 24-72 hours for a full cure.
That “20-minute grab” window is the whole game with adhesive. It’s not a suggestion; it’s the countdown you have to get the board taped, braced, and perfectly aligned before the glue skins over and your chance to adjust disappears. This is a key difference from how to nail baseboards without a nail gun.
What follows is a breakdown of when to use each method, the exact tools and specs you need for how to nail baseboards without a nail gun, and the step-by-step walkthroughs that separate a clean, permanent install from a weekend of frustration and patched holes. This section explains hand-nailing technique, adhesive selection, and the hybrid approach for uneven walls and high-traffic areas.
Key Takeaways
- Use 2-inch finish nails for casing and baseboard, and 1-1/4 inch brads for thinner molding to prevent splitting or blow-through.
- Sources disagree on nail spacing: woodworkingadvisor.com suggests spacing every 12 to 16 inches, while microworkshandyman.com says one nail every 16″–24″ works well for most homes.
- Fast-grab construction adhesive achieves initial hold in about 20 minutes but needs 24-72 hours for full cure; brace the trim during this time.
- For areas with vibration or humidity, combine adhesive with nails, the glue fills gaps from uneven walls, and the nails provide long-term security.
- Always pre-drill pilot holes when hand-nailing MDF or hardwood baseboards to prevent splintering, especially at an angle.
The Three Methods Explained: Hand-Nail, Glue, or Both?
You have three legitimate paths, not two. Hand-nailing is the traditional, mechanical method. Adhesive-only skips fasteners entirely. The combination approach uses glue for instant hold and gap-filling, plus nails for permanent load-bearing. Your room’s conditions, humidity, wall flatness, material type, dictate the winner.
The technical snippet: For hand-nailing baseboards, 2-inch finish nails (equivalent to a 15-gauge nailer’s output) provide sufficient penetration into studs or the bottom plate without splitting standard trim stock. Thinner cap and shoe molding requires 1-1/4 inch wire brads to avoid blowing through the face. Adhesive application varies by width: a continuous 1/4-inch bead for narrow trim, a zig-zag bead staying 1/2-inch from the edges for wider casing and baseboard.
The hybrid method isn’t a compromise. It’s what most pros use when a nail gun isn’t on the cart, and it’s a core part of how to nail baseboards without a nail gun. The glue holds the piece steady the second you let go, which is a lifesaver when you’re trying to hold a board level and drive a nail one-handed. Meanwhile, the adhesive fills any tiny gap between the trim and an uneven wall that a nail alone would leave as a visible shadow line.
Which method is right for you? Here are the specifics.
| Method | Best For | Biggest Risk |
|---|---|---|
| Hand-Nailing | Small projects, solid wood trim, areas where future removal is likely. | Hammer marks on trim, nail heads not fully set, splitting MDF. |
| Adhesive-Only | Lightweight trim, masonry/tile walls, situations where hammer noise is an issue. | Glue softening in high humidity, difficult removal damaging drywall. |
| Combination (Adhesive + Nails) | High-traffic areas, uneven walls, rooms with humidity swings or vibration. | Squeeze-out of adhesive if not cleaned immediately, over-reliance on glue in load-bearing spots. |
The Hammer-and-Nail Method: A Step-by-Step Walkthrough
Ever wondered why your granddad’s baseboards are still tight after fifty years? He hand-nailed them, one 8d finish nail at a time. The process is slower than a nail gun, but the result is just as permanent if you follow the technique.
First, the nail choice matters. Sources disagree on the exact terminology, some say “8d finish nails,” others specify “2-inch finish nails” or “2” to 2 ½” finish nails.” For most baseboards, a 2-inch finish nail is commonly recommended. If you’re using a thinner, more decorative cap molding, step down to 1-1/4 inch wire brads. The goal is to avoid the nail point blowing out the front face of your trim, a mistake that’s impossible to hide.
Here is the sequence that avoids smashed fingers and dented wood.
- Find and mark your studs. Use a stud finder. The goal is to drive nails into the wall’s bottom plate or a vertical stud. If your nails don’t bite and the trim pulls away easily, you’re likely hitting empty drywall.
- Pre-drill pilot holes. This step is essential for MDF and highly recommended for hardwood. Drill a small, angled pilot hole through the thickest part of the baseboard at each nail location. The angle should mimic the nail’s final direction, slightly downward. This prevents the nail from wandering and splintering the trim.
- Position and hold. Set the baseboard tight against the floor. Use a level along the top edge to ensure it’s straight, even if the floor isn’t.
- Start the nail. Place a finish nail on your mark and give it two light taps with the hammer to set it into the wood. This keeps it from jumping when you swing.
- Drive with control. Use controlled, medium-force swings to drive the nail until the head is just proud of the wood surface. This is where most people mess up. A wild swing glances off the nail head and leaves a half-moon dent in your primed board.
- Countersink with a nail set. Switch tools. Place the tip of the nail set on the nail head and drive it flush, or just below, the wood surface. The nail set’s small, flat face won’t mar the surrounding area.
Spacing is your next decision. Sources disagree: woodworkingadvisor.com suggests every 12 to 16 inches, while microworkshandyman.com says 16″–24″ works well for most homes. Double up within a few inches of each corner or joint. That spacing provides enough hold without turning your trim into a pincushion.
Common mistake: Driving nails flush with the hammer alone. The hammer face is too large and will always dent the surrounding wood. You’ll spend more time filling those dents than you saved by skipping the nail set.
Going Glue-Only: When and How to Make It Stick
Adhesive-only installation is a different animal. It’s clean, quiet, and leaves no nail holes to fill. It’s also the most permanent method, for better or worse. In bathrooms, mudrooms, or any space with significant humidity swings, glue can soften over years and lose its grip. One manufacturer blog explicitly warns against adhesive-only methods in these areas for that reason.
If you proceed, the adhesive choice is critical. Don’t use a generic all-purpose glue. You need a construction adhesive rated for paneling and molding, like Liquid Nails Paneling & Molding or PL Premium. These are formulated for faster initial grab, about 20 minutes, and a full cure in 24 to 72 hours.
Application pattern changes with trim width. For narrow shoe or cap molding, apply a continuous 1/4-inch bead down the center of the back. For wider casing and baseboard, use a zig-zag (serpentine) bead, staying about 1/2 inch in from each edge. This prevents excess adhesive from squeezing out the sides when you press the board home.
The real trick is temporary support. You have a 20-minute window before the glue starts to set.
- Painter’s tape: For lightweight trim, run long strips of strong painter’s tape from the trim, across its face, and onto the wall. Apply firm pressure.
- Mechanical bracing: For longer baseboard runs, use a long, straight board placed against the trim’s face, with shims tapped between the brace and the opposite wall to apply even pressure along the entire length.
- Pin nails: Some pros use 23-gauge pin nails just to brace the board while the glue cures. The holes are microscopic and easy to fill.
Where this goes sideways: Applying adhesive and then fumbling with alignment for five minutes. By the time you get the board positioned, the glue has skinned over and won’t bond properly. Have your tape or braces ready before you squeeze the trigger on the caulk gun.
Removal is the final, sobering fact. A glued baseboard doesn’t come off cleanly. It will almost certainly tear the paper face of the drywall, leaving you with a patching job that’s more work than the original installation. Consider that future cost before you commit to glue on every wall.
The Pro Hybrid: Combining Adhesive and Hand-Nailing

This is the method that gets less press but delivers the most reliable results, especially for a DIYer working alone. You use adhesive for its instant grab and gap-filling properties, then drive a few finish nails for permanent, structural security. It’s the best of both worlds.
The process starts like the glue-only method: apply your zig-zag bead of construction adhesive to the back of the baseboard. Immediately press the board into position and check for level. The adhesive now acts as a helper, holding the trim in place so you don’t have to.
Now, instead of reaching for tape, you pick up your hammer and nails. Drive finish nails at your marked stud locations. Spacing recommendations vary, with some sources suggesting every 12 to 16 inches and others suggesting 16″–24″. The adhesive fills any minor gaps caused by wall unevenness, creating a seamless look, while the nails guarantee the trim won’t sag or pull away over the next decade.
This combination is particularly valuable on wavy walls, which are more common than not in older homes. A nail alone pulls the baseboard tight to the wall at one point, but the surrounding area may bow out, creating a shadow. The adhesive bed supports the entire back surface, eliminating those gaps.
Tools and Materials: What You Actually Need
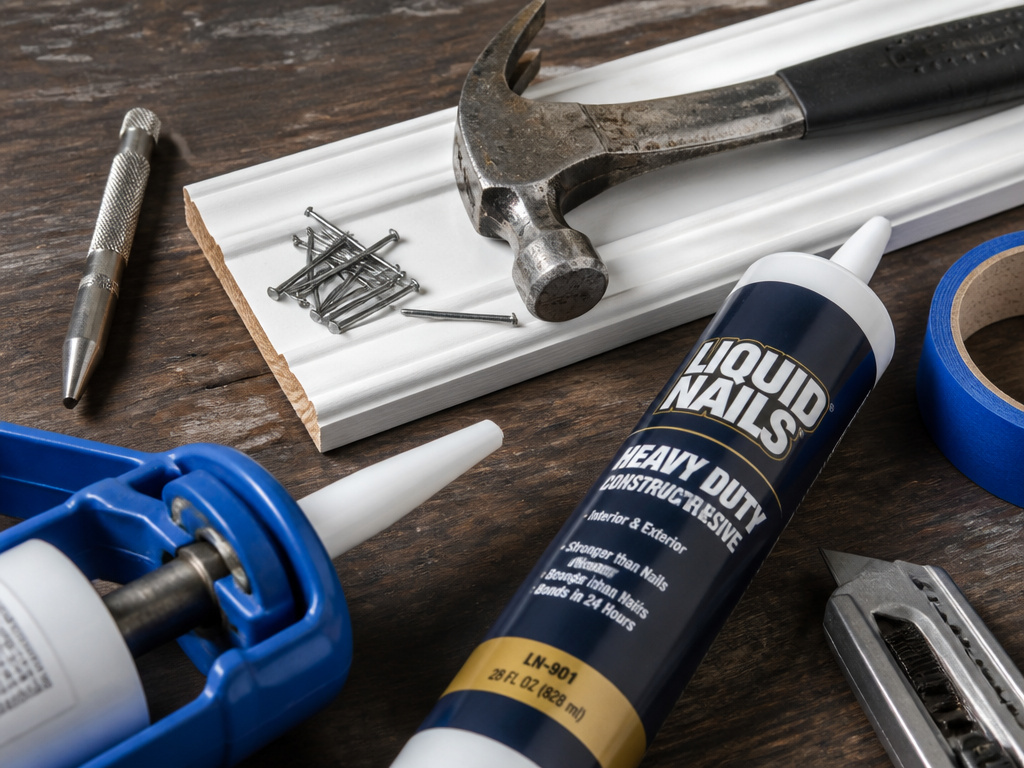
Skip the fancy, single-use gadgets. A clean install comes from a handful of core tools used correctly.
For Hand-Nailing:
- Hammer: A claw hammer gives a balance of control and driving force.
- Finish Nails: Have both 2-inch finish nails for baseboard and 1-1/4 inch wire brads for thinner moldings.
- Nail Set: A nail set allows you to match the punch to the nail head size.
- Drill & Bits: For pre-drilling pilot holes. Pre-drill pilot holes to reduce splintering.
- Stud Finder: Critical for finding solid framing behind the drywall.
For Adhesive Methods:
- Caulking Gun: A standard drip-free gun.
- Construction Adhesive: One tube of fast-grab adhesive like Liquid Nails Paneling & Molding is needed for adhesive installation.
- Painter’s Tape & Shims: For bracing. Have more than you think you’ll need.
- Utility Knife & Damp Rag: For cutting adhesive tubes and cleaning squeeze-out immediately.
Worth knowing before you start: That “fast-grab” adhesive label isn’t marketing. It’s a chemical formulation that achieves initial bond strength within about 20 minutes under ideal conditions. In a cold garage, it could take twice as long. Plan your bracing accordingly.
Navigating Corners, Joints, and Uneven Floors
The straight runs are easy. The project is made or broken at the corners and transitions. For a tight fit, you need to cut precise angles, which is a topic we cover in depth in our guide on cutting baseboard corners. The principle is universal: inside corners are best handled with a coped joint, while outside corners get a 45-degree miter.
Uneven floors are the other common headache. If your floor dips or waves, the baseboard will gap at the bottom. The solution is scribing: hold the board in place, trace the floor’s contour onto its back edge with a pencil held level, then cut along that line. For severe discrepancies, installing shoe molding on uneven floors can hide a multitude of sins, as the flexible quarter-round can bend to follow the floor while the baseboard above stays straight and level.
When you need to join two pieces of baseboard on a long wall, use a scarf joint. Cut the ends of both boards at opposing 45-degree angles so they overlap. This hides the seam better than a straight butt joint and provides more gluing surface if you’re using adhesive.
How to Use a Nail Spinner for Baseboards
A nail spinner is a manual drill attachment designed to drive finish nails. It’s a niche tool that can speed up hand-nailing by spinning the nail to drive it flush. To use it, you must first drill pilot holes. Pre-drill angled pilot holes through the thick part of the baseboard at the stud locations to reduce splintering. This step is crucial for hardwoods or brittle materials like MDF. The nail spinner then threads onto the nail’s shank; as you crank the drill, it pulls the nail head down. Remember to drive nails at a steep angle, aiming for the wall framing behind. While it eliminates hammer swings, it still requires the same foundational steps: finding studs, using the correct nail length, and setting the nail head properly.
Frequently Asked Questions
Can you really install baseboards without a nail gun?
Absolutely. Hand-driving finish nails with a hammer and nail set, or bonding trim with construction adhesive, are both standard installation methods. A nail gun only speeds up the fastening step; it isn’t required for the trim to hold securely.
What size nails should I use for baseboards by hand?
For most baseboards, use 2-inch finish nails. This length ensures about an inch of penetration into the wall’s framing. For thinner cap or shoe molding, switch to 1-1/4 inch wire brads to prevent the nail point from blowing through the front face of the trim.
Is glue stronger than nails for baseboards?
In the short term on a perfectly flat wall, a strong construction adhesive can provide a formidable bond. However, nails provide a mechanical lock that isn’t affected by humidity or temperature changes over decades. In areas prone to moisture or vibration, nails, or a combination of adhesive and nails, are the more reliable long-term choice.
How do you hide nail holes when hand-nailing?
You don’t hide the nail; you hide the hole. After countersinking the nail head with a nail set, fill the small depression with a paintable wood filler or spackling compound. Once dry, sand it smooth and apply paint. The process is identical to finishing nail gun holes.
How long does construction adhesive take to dry on baseboards?
Fast-grab molding adhesives achieve initial grab, enough to hold the trim without bracing, in about 20 minutes. However, a full cure, where the adhesive reaches its maximum strength, takes 24 to 72 hours, depending on temperature and humidity. Avoid stressing the joint during this cure time.
Before You Go
The right method isn’t about the tool you own; it’s about the walls you’re working on. On flat, stable walls in a dry room, adhesive-only is a clean, fast option. On wavy plaster or in a busy hallway, the hybrid method with adhesive and a few well-placed nails is your safest bet. And if you ever think you’ll want to change the trim, default to hand-nailing, it comes off as cleanly as it goes on.
One final, physical tip: the sound of a properly set nail is a soft tap, not a loud bang. If you’re swinging hard enough to make noise, you’re risking damage. Let the nail set do the final work. That quiet, controlled finish is what separates a DIY job from a pro result, with or without a nail gun.
