
Types of Staple Guns Explained: How to Choose
This post contains affiliate links. As an Amazon Associate, we earn from qualifying purchases.
A staple gun drives a fastener through one material and into another, most commonly wood or drywall. The tool’s power comes from your hand, an electric motor, or compressed air. The three main types are manual, electric, and pneumatic, defined by their power source, and this guide covers the types of staple guns explained. Hammer tackers are a specialized manual variant. Your choice depends on project frequency, material thickness, budget, and access to power.
Most buyers choose based on a simple trade-off: convenience versus force. A manual gun costs the least and fits any job site, but needs significant hand strength. A pneumatic gun delivers the most power and speed for a pro, but requires an air compressor. The cordless electric model splits the difference, portable power, but with a battery that dies.
What follows is a breakdown of each type, the critical specs you’ll find on any model’s label, and the one decision that matters more than the brand name in the types of staple guns explained: matching the staple size to your work.
Key Takeaways
- For one-off projects on softwoods or fabrics, a manual gun is sufficient; for high-volume work like flooring or roofing, you need pneumatic power.
- The staple size code (like T50 or T25) defines the staple’s crown width and wire gauge, not just its length, use the wrong one and the gun will jam.
- Cordless electric models are a compromise; they’re heavier than manual guns and slower than pneumatics, and the battery life dictates your work pace.
- Hammer tackers are for speed, not precision, they’re the right tool for stapling insulation or roofing felt overhead, where you can swing the tool.
- Pneumatic guns have specific maximum pressure ratings (often 100 psi, but some like the Senco PS15XP allow up to 120 psi); exceeding the tool’s specified maximum, or using bottled gas, voids the warranty and risks a burst tool.
The Core Decision: Manual, Electric, or Pneumatic?
You have three paths in the types of staple guns explained, each with a distinct power source, cost, and best-use scenario. Think of it like kitchen knives: a manual gun is your paring knife, good for detail work you do occasionally. A pneumatic gun is the cleaver, built for heavy, repetitive jobs. The cordless electric is the all-purpose chef’s knife, it can do many things, but not as well as the specialized tools.
A manual staple gun uses the leverage of a squeeze handle to compress a heavy spring, which then releases to drive the staple. An electric gun uses a battery-powered motor to do the same job, while a pneumatic gun relies on compressed air fed from a separate compressor tank.
| Type | Power Source | Best For | Limitations |
|---|---|---|---|
| Manual | Hand pressure / spring | Occasional use, upholstery, crafts, light-duty repairs | High hand strength required, slow for big jobs |
| Electric (Cordless) | Rechargeable battery | DIYers without a compressor, indoor projects, moderate frequency | Battery life, slower firing rate than pneumatic, heavier |
| Electric (Corded) | Wall outlet | Workshops with accessible power, extended use like furniture building | Cord restricts mobility, risk of tripping |
| Pneumatic | Air compressor (60–120 psi) | Professional use, flooring, roofing, high-volume stapling | Requires compressor investment, not portable |
Manual guns have a particular characteristic. The effort to fire one isn’t consistent. I’ve picked up cheap models that felt like I was trying to crush a brick, and better ones with a smooth, predictable squeeze. The RAPID ALU940, for example, claims to be up to 65% easier to fire than conventional models. That matters if you have a lot of staples to drive or weaker hands.
For most DIYers tackling a weekend project, a manual gun is the right tool. It’s simple, reliable, and you’ll never wait for a battery to charge. But if you’re stapling a whole attic’s worth of insulation, your hand will cramp by the second bundle. That’s when you step up to pneumatic.
Electric Staple Guns: Corded vs. Cordless
Electric staple guns plug the gap between manual effort and pro-level air power. They use an electric motor to drive the piston, so you just pull a trigger. The core split here is between corded and cordless models.
Corded tools give you unlimited runtime, which is perfect for a long session rebuilding a cabinet back or assembling furniture.
Where this goes sideways: Assuming a cordless model is just as powerful as a pneumatic one. It isn’t.
My stance on cordless electrics is pragmatic. They are excellent for a specific user: someone who does a moderate amount of stapling but doesn’t own, or want to deal with, an air compressor. For attaching trim, building small boxes, or light upholstery, they’re a solid choice. For stapling subfloor or roofing, they’re the wrong tool.
Pneumatic Staple Guns: Pro Power and Precision
When you need speed, consistency, and raw driving force, you go pneumatic. These tools connect to an air compressor via a hose. It’s why flooring installers, roofers, and cabinet shops use them.
The specs from manufacturer manuals tell the real story. The Senco PS15XP runs at 70–120 psi and fires up to 10 cycles per second. The Arrow PT50 operates between 60 and 100 psi, holds 100 staples, and its air supply components must be rated at 150 psi, or 150% of the maximum compressor potential, whichever is higher. These aren’t marketing numbers. They’re the boundaries the tool is engineered to work within.
The critical requirement for pneumatics is air quality. Moisture or dirt in the line will wreck the tool’s internal seals and valves.
Lubrication is another critical, and oddly contentious, point. The manuals don’t agree. The Fasco operating manual says 2-3 drops of pneumatic oil every 4 hours. The PowerStapler Model 445FS manual says 2-4 drops every 8 hours. The Arrow PT50 manual says 5-6 drops at the start of each work day if you don’t have an automatic oiler.
| Tool Model | Recommended Lubrication (if no automatic oiler) | Source |
|---|---|---|
| Fasco (General) | 2-3 drops every 4 hours | Fasco Operating Manual |
| PowerStapler 445FS | 2-4 drops every 8 hours | PowerStapler Manual |
| Arrow PT50 | 5-6 drops at start of work day | Arrow PT50 Manual |
| 20-Gauge Stapler | Few drops before use, more each hour | THD Product Data Sheet |
So which is right? They all are, for their specific tool’s design. The rule of thumb: if your tool starts sounding sluggish or weak, a couple of drops of pneumatic oil in the air inlet often fixes it. Using anything else. WD-40, 3-in-1 oil, motor oil, can froth and damage the O-rings.
Hammer Tackers: The Speed Demon
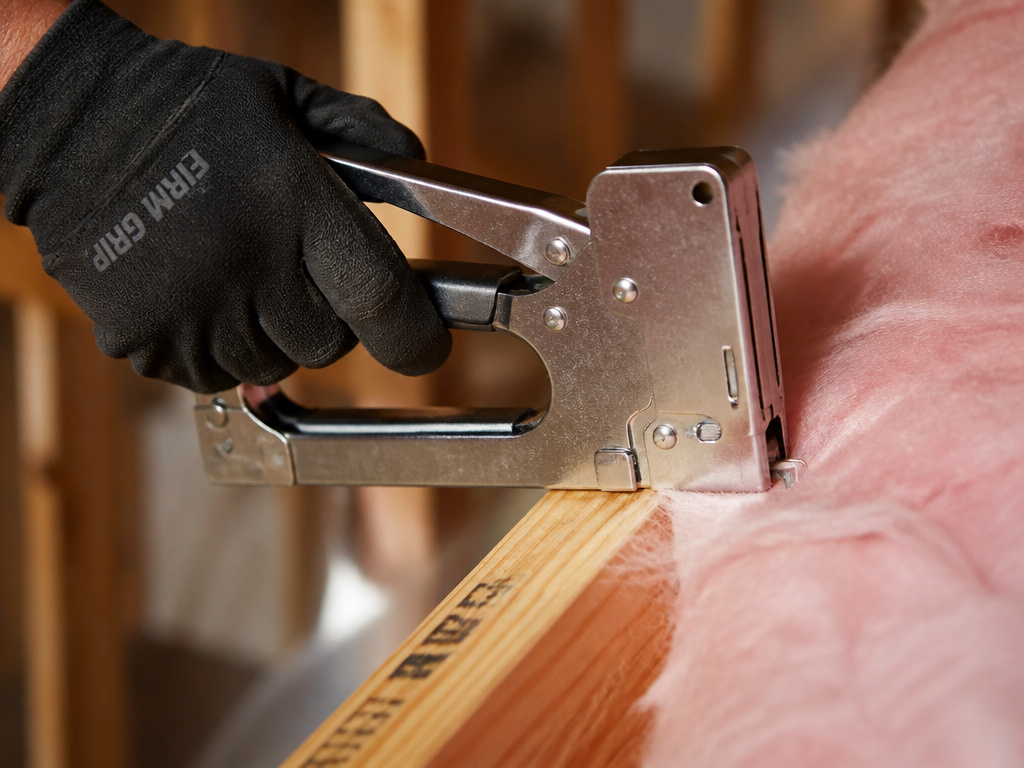
A hammer tacker doesn’t look like other staple guns. You load it like one, but you use it like a hammer. Swing it against the workpiece and the impact drives the staple. It’s a one-handed operation.
This is pure efficiency for overhead or large-area work. Imagine stapling insulation batting to rafters. With a manual gun, you’d have to press the nose firmly against the material and squeeze for each staple, your arm would tire quickly. With a hammer tacker, you just swing in a rhythmic motion, tacking as you go.
The trade-off is control. You can’t easily place a single staple with surgical precision. It’s a tool for covering ground, not detail work. It’s also loud, and if you miss-hit, you can damage the workpiece or the tool. But for its intended job, stapling house wrap, roofing felt, or insulation, nothing is faster.
Upholstery Staplers: Precision for Fabric and Foam
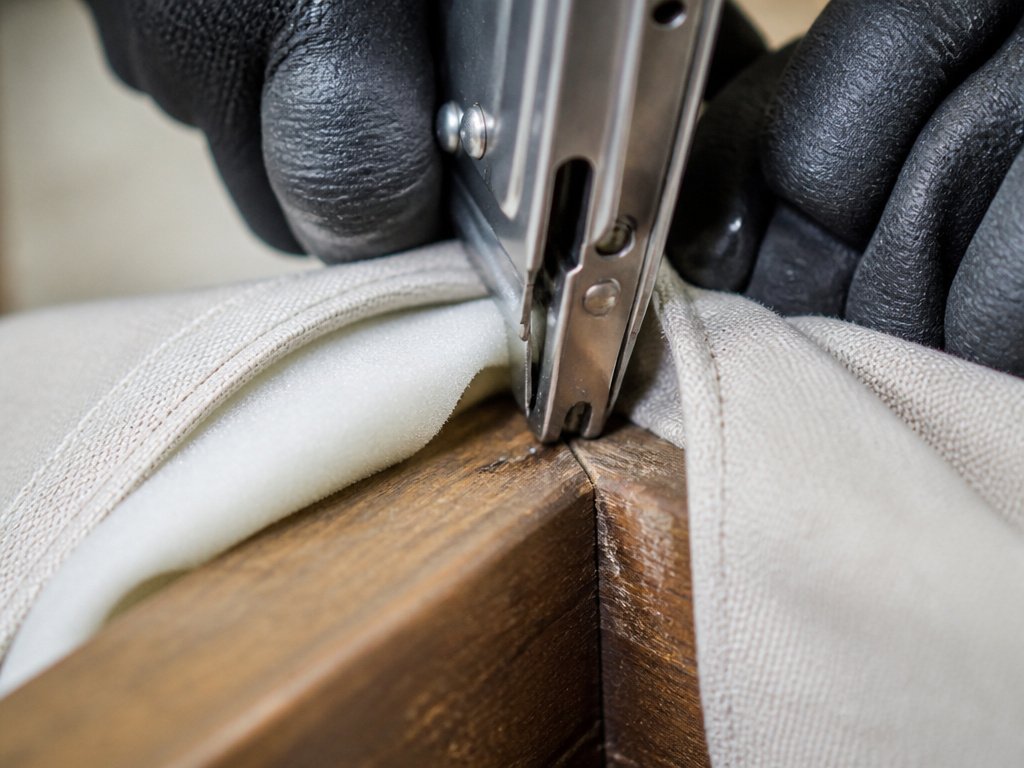
While any staple gun can attach fabric, upholstery work demands a specific tool. An upholstery stapler, often pneumatic, has a long, narrow nose. This design allows you to reach into tight corners of a chair frame or sofa deck without your hand blocking the view. Precision is everything, a staple half an inch off can create a wrinkle or a lump in the finished fabric.
These tools typically use fine-wire, narrow-crown staples (often 3/8″ or 1/2″ leg length) that bury themselves in the wood without splitting it. The crown is narrow so it doesn’t show through the final fabric layer. For a professional result, this is a dedicated tool category. Our guide on the best staple guns for upholstery dives into the specific models that excel at this craft.
Staple Sizes and Compatibility Demystified
The “T50” stamped on a staple strip isn’t a random code. It’s a system. The “T” often denotes a heavy-duty, wide-crown staple. The number can refer to wire gauge or a series. T50 staples are typically 20-gauge wire with a wide crown. They fit a huge range of manual and pneumatic guns, like the Arrow PT50 and the Stanley TR250.
Lighter-duty staples, such as those with a narrower crown, are often used in lighter-duty electric guns or for trim work where visibility matters. Using T50 staples in a gun designed for T25 will jam it instantly. Using T25 staples in a T50 gun might feed, but they won’t have the holding power for the job.
Common mistake: Buying staples solely by length. You must match the crown width and wire gauge printed on your gun’s specification plate. The Arrow PT50 manual lists six compatible lengths (1/4” to 9/16”), but they are all T50 style.
Your gun’s manual is the final authority. The 20-Gauge 1/4-inch Stapler (Model 61705) specifically uses “20 Gauge Crown 3/8″ staples from 1/4″ to 9/16” long. The Surebonder T-50 9600B uses “20 gauge, narrow crown, heavy-duty wire staples” in the same length range. If the specs don’t mention your staple box, don’t risk it. Our staple size guide breaks this down in more detail.
Staple Gun vs. Nail Gun: What’s the Difference?
This trips up a lot of new DIYers. Both are fastening tools, but they’re built for different connections.
A staple gun drives staples, which have two legs connected by a crown. This creates a wide, shallow grip. It’s perfect for holding down sheathing, attaching fabric, securing wire, or fastening thin material where a nail might pull through or split the wood. The crown provides lateral stability.
A nail gun drives nails, single shafts with a head. Nails have much greater withdrawal strength (resistance to being pulled straight out). They’re for framing, trim, decking, and any joint that needs deep, direct holding power. Using a staple where you need a nail is like using tape instead of glue; it might hold for a while, but it will fail under stress. For a full rundown on the other side of the fastening world, see our article on types of nail guns.
Safety: The Non-Negotiables
Staple guns drive sharp metal objects at high speed. Respect them.
First, eye protection is mandatory, though specific requirements vary. For example, Senco and Surebonder require safety glasses with side shields, while the 20-Gauge Stapler manual also requires hearing protection and a dust mask. Staples can ricochet off hard surfaces or a knot in the wood. Flying debris is a real risk.
Second, never use bottled gases (oxygen, CO2) to power a pneumatic tool. The Senco manual states it clearly: “Explosion may occur.” These tools are designed for compressed air only.
Third, mind the trigger discipline. Especially with pneumatic guns that can “bump fire” (fire repeatedly while the trigger is held). The Arrow PT50 has this feature. Always disconnect the air hose before clearing a jam, loading staples, or handing the tool to someone else. The Surebonder manual warns that connecting a loaded gun to air can cause an immediate, accidental discharge.
If you’re learning how to use a staple gun for the first time, start slow. Practice on scrap wood. Get a feel for the recoil and the sound of a properly driven staple before you work on your project.
Choosing Your Staple Gun: A Quick Decision Guide
Cut through the noise. Your project dictates your tool.
- For Crafts, Picture Framing, Occasional Repairs: Get a quality manual staple gun. Look for an all-metal drive channel and a comfortable grip. Don’t overthink it.
- For Upholstery or Furniture Refinishing: Consider a dedicated long-nose upholstery stapler, often pneumatic. The precision is worth the investment if you do more than one chair.
- For Attic Insulation, Roofing Felt, House Wrap: Choose a hammer tacker for speed or a pneumatic stapler for control. A manual gun will wear you out.
- For Flooring, Sheathing, High-Volume Carpentry: You need pneumatic. Match the staple crown and length to your material thickness, and invest in a compressor and filter.
- For the DIYer Who Hates Cords and Doesn’t Own a Compressor: A cordless electric model is your best bet. Just buy a second battery.
Remember, the tool is only half the equation. Knowing how to load a staple gun correctly prevents 90% of jams. And when a jam does happen, and it will, our guide on fixing a jammed staple gun will walk you through the safe clearance steps.
Frequently Asked Questions
What are the different types of staple guns?
The three primary types are manual (powered by hand force), electric (powered by a corded motor or battery), and pneumatic (powered by compressed air). Hammer tackers are a specialized manual type for overhead swing-action stapling.
What does T50 mean for staples?
T50 is a common designation for heavy-duty staples with a wide crown (typically 3/8″ or 1/2″). It generally indicates the staple’s crown width and wire gauge (often 20-gauge). These staples are compatible with many heavy-duty manual and pneumatic guns, like the Arrow PT50 series.
Which staple gun is considered the best quality?
Quality depends on use. For professional, high-volume work, brands like Senco and Duo-Fast set the standard for pneumatic tools. For manual guns, Arrow and Stanley offer reliable, durable models. The “best” is the one that matches your project’s demands for power, precision, and speed.
What are the key differences between T25 and T50 staples?
T25 staples are lighter-duty with a narrower crown, designed for trim work, crafts, and lighter-duty electric guns. T50 staples are heavier-duty with a wider crown, meant for construction, fencing, and heavier fastening. They are not interchangeable; using the wrong type will jam your gun.
Can I use any staples in my staple gun?
No. You must use the exact staple size, crown width, and wire gauge specified in your tool’s manual. Using incorrect staples is the leading cause of jams, misfires, and tool damage. Always match the manufacturer’s specifications.
The Bottom Line
Don’t buy a staple gun for a one-time job you can rent for less. But if you see yourself tackling several projects, the right tool pays for itself in saved time and frustration.
For the majority of homeowners, a solid manual heavy-duty staple gun is the default pick. It lives in a drawer, works every time you pull it out, and handles 80% of common tasks. Stepping up to a cordless electric model makes sense if you value portability and do enough work to justify the battery cost.
Reserve the pneumatic investment for when you’re committing to a trade or a major, repetitive project like finishing a basement or building a shed. And whatever you choose, read the manual, especially the part about staple gun loading and pressure ratings. That’s where most first-time mistakes happen, and they’re easily avoided.
