
Belt Sander vs Planer: Which Tool for Which Job?
This post contains affiliate links. As an Amazon Associate, we earn from qualifying purchases.
A belt sander and a planer are not rivals, they’re different tools for different stages of a project. A belt sander is a hand-guided abrasive tool for smoothing, shaping, and stripping surfaces, while a planer is a fixed-feed machine that cuts wood to achieve a precise, consistent thickness with parallel faces. Use a planer when the board’s exact dimension matters; use a belt sander when the surface condition is the priority.
That difference in function changes everything, the projects each tool can handle, the skill required, and the results you get. Picking the wrong one means hours of wasted effort or a ruined workpiece.
What follows is a breakdown of how each tool physically works, the specific jobs they were built for, and the numbers that prove why one can’t substitute for the other in the belt sander vs planer debate. By the end, you’ll know exactly which tool to reach for, and when investing in both makes sense.
Key Takeaways
- Use a belt sander for surface work: stripping paint, leveling glue-ups, or smoothing large areas where hand control is an asset, not a liability.
- Use a planer for dimensioning: bringing rough lumber to a uniform thickness or matching multiple boards for a seamless glue-up.
- A planer removes material 25 times faster than a drum sander, but leaves blade marks. They are sequential tools, not substitutes.
- The most common mistake is trying to flatten a twisted board with a planer. It mirrors whatever’s underneath, so a warped board in gives you a warped board out.
- For more than 1/16 inch off a door edge, a power planer is faster and straighter than a belt sander.
How a Belt Sander Actually Works (And Where It Shines)
A belt sander is a brute with finesse. It spins a loop of abrasive-coated fabric around two drums at high speed. You guide it by hand, and that moving belt grinds material away through friction. The hand-guidance is the whole point, it gives you the versatility to work on assembled pieces, curved edges, and odd shapes a fixed machine can’t touch.
It’s also the source of its greatest risk. A belt sander is unforgiving. Tip it, linger a second too long in one spot, or apply uneven pressure, and you’ll dig a visible low spot just as fast as you can smooth one out. You’re not just sanding; you’re constantly managing the tool’s weight and momentum.
Common mistake: Stopping a belt sander in one spot. The belt removes wood so quickly that a two-second pause leaves a dip you’ll see through the final finish. Always keep it moving.
So where does that hand-guided power earn its keep? Reach for a belt sander when the job is about surface condition on something that’s already roughly the right size and shape.
- Stripping old finish, paint, or varnish. A belt sander with a 40 or 60-grit belt does this in a fraction of the time hand-sanding would take. Clean the belt often, melted paint clogs the abrasive.
- Leveling proud glue lines on a panel glue-up. It’s the fastest way to bring uneven boards flush before your final sanding passes.
- Smoothing large, flat surfaces like tabletops or doors that are too big or fixed to run through a stationary machine.
- Shaping curves, chamfers, or easing edges. This is where hand control becomes a true advantage over a machine with a fixed bed.
For paint removal, a critical safety note: in a home built before 1978, test for lead before you sand. A belt sander turns lead paint into dangerous fine dust faster than any other tool.
Belt Sander Grit and Technique: Flattening Without the Dips
Consider the feel. A new belt sander often vibrates excessively right out of the box. This is often because the belt wasn’t properly tracked and centered during setup. You’ll hear a rhythmic thumping and feel a gritty shudder through the handle. Fix that first.
The technique for flattening is simple in theory, demanding in practice. You must work with the grain in long, steady, overlapping passes, letting the sander’s own weight do the cutting. Never press down. Shift sideways by about half the belt’s width on each pass to avoid creating ridges.
| Grit Range | Best For | Risk If Skipped |
|---|---|---|
| 40-60 Grit | Aggressive paint/stain removal, rapid stock leveling. | Clogged belt, burned wood, uneven surface from forcing a dull belt. |
| 80-100 Grit | Initial smoothing after coarse work, removing mill marks. | Deep scratches from the previous grit remain, requiring more work later. |
| 120-150 Grit | Final smoothing before switching to a random orbital sander. | Visible straight-line scratches from the belt remain in the finish. |
Start the sander off the wood, set it down flat, and begin moving. When you’re done, lift the sander off before you switch it off. A coasting belt left on the surface will dig in and leave a mark. Finally, you must follow a belt sander with a random orbital sander using 120 or 150-grit paper. Belt scratches are straight and deep; the random orbit pattern is the only efficient way to erase them. For a deeper dive on this two-step process, see our guide comparing the belt sander vs orbital sander.
What Does a Planer Do That a Sander Can’t?
If a belt sander is about the surface, a planer is about the dimension. Its job is to make the top face of a board parallel to the bottom face and to make every board you run through it the exact same thickness. This is essential for furniture building.
Feed rollers pull the board across the bed, and the knives shave the top face down to the precise height you’ve dialed in. Because the bed is the reference, you get parallel faces and repeatable thickness.
A planer does not flatten a board on its own; it mirrors whatever’s already underneath it. Feed in a twisted board, and you’ll get a thinner, twisted board out. It makes faces parallel, not flat.
This is the single most important concept in using an electric hand planer or a benchtop model. The planer cannot correct a warp or a twist, it can only copy it. For true flattening, you need a jointer first, or a clever sled jig.
So when is the planer the clear choice?
- Dimensioning rough-sawn lumber. Bringing a stack of rough boards from the sawmill down to a consistent, workable thickness.
- Matching multiple boards for a glue-up. Ensuring all your tabletop boards are identical so the panel has no visible steps between them.
- Milling precise furniture parts. When a leg needs to be exactly 1.5 inches thick, a planer delivers that in a way hand tools or sanders simply can’t.
It’s also brutally efficient. Sources disagree on the maximum cut depth for a benchtop planer: one states up to about 1/8 inch (0.125″), while another states 0.125 to 0.25 inches per pass. Compare that to a drum sander, which removes a delicate 0.005 to 0.007 inches per pass. For rapid thickness reduction, the planer is the only sensible choice.
Handheld vs. Benchtop: Two Different Kinds of Planer
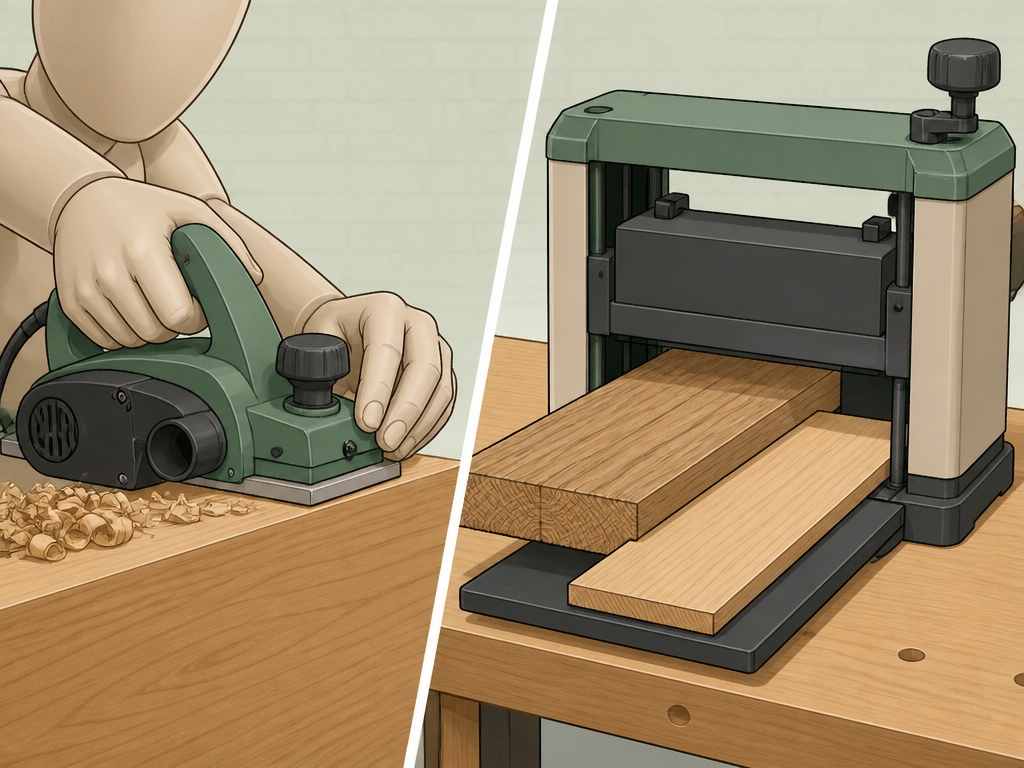
This is where confusion often sets in. A handheld electric planer and a benchtop thickness planer share a name but solve different problems.
A handheld planer is a tool you push across the wood, like a very aggressive sander. It’s about trimming, fitting, and shaping. Shaving a door so it closes, cutting a rabbet, or easing an edge. Its soles ride on the face of the board you’re working on, so it follows that face’s contours, it doesn’t create a parallel face on the other side.
A benchtop planer references its own flat bed, guaranteeing parallelism. This distinction dictates the purchase.
| Tool Type | Primary Function | Ideal User |
|---|---|---|
| Handheld Electric Planer | Trimming, fitting, shaping on-site or on installed work. | DIYer tackling home renovations, door installations, deck building. |
| Benchtop Thickness Planer | Dimensioning lumber to a precise, consistent thickness. | Woodworker using rough or reclaimed lumber, building furniture. |
Buy a benchtop planer if you need boards to come out at one exact thickness. Buy a handheld planer if you’re mostly doing carpentry adjustments. If you only buy pre-surfaced lumber from a home center, you might not need either. For specific model recommendations, our guide to the best electric hand planers breaks down the top choices.
Belt Sander vs. Planer: The Direct Comparison
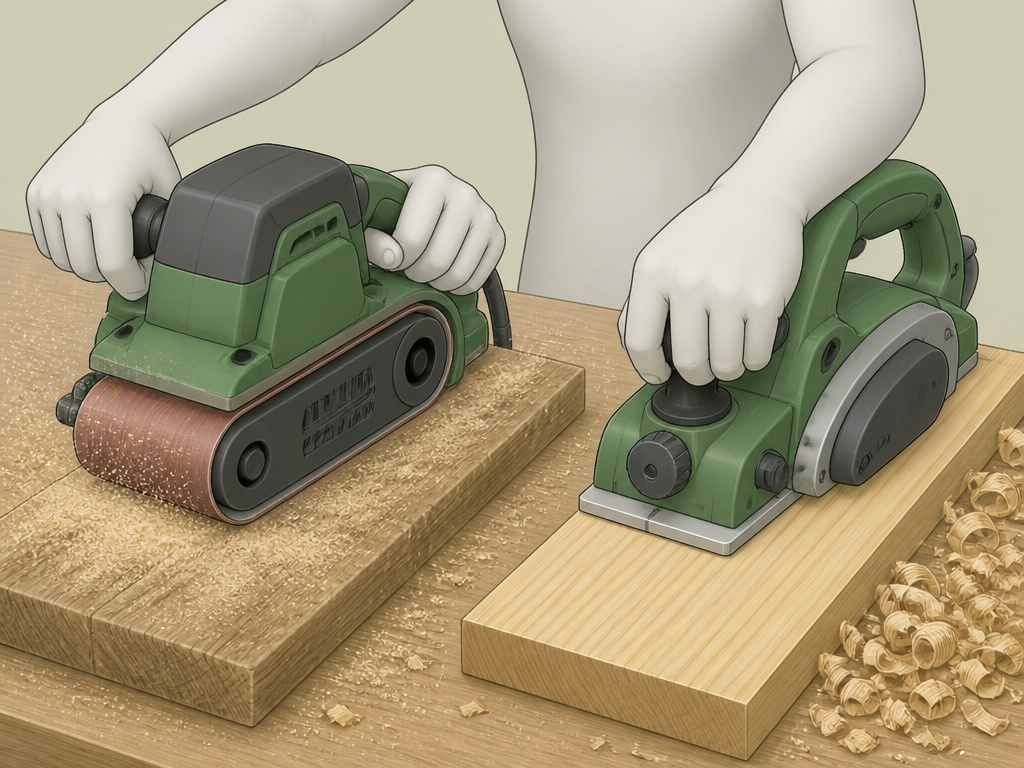
Compare them directly on the key questions a shop faces.
Which tool is better for flattening a large surface, like a slab?
Trick question. Neither is ideal on its own. A planer can’t flatten without a reference, and a belt sander is too risky for large-scale flattening. For true flattening of slabs, a router sled is the common solution. A belt sander can then be used for final smoothing.
Which removes material faster?
For substantial thickness reduction, the planer wins overwhelmingly. It cuts wood. The belt sander abrades it. Taking off 1/4 inch with a belt sander is a long, dusty, and physically demanding chore. The planer does it in one or two passes.
Which is easier to use without damaging the workpiece?
The planer is more forgiving for dimensioning. Set the depth, feed the board, and the machine ensures consistency. The belt sander requires constant vigilance to avoid dips and unevenness. Your skill is the limiting factor.
Can one substitute for the other?
No. They are for different stages. You dimension with a planer, then smooth with a sander. Running a board through a planer does not produce a sanded finish, it leaves visible knife marks that must be sanded out. Trying to thickness a stack of lumber with a belt sander is impractical.
What about noise and dust?
Both are loud and messy, but belt sanders are often cited as particularly aggressive dust generators. Sources disagree on noise levels, with some stating belt sanders produce less noise than planers and others noting they are loud. Always wear hearing protection and a dust mask or respirator with either tool.
When to Consider a Third Option: The Drum Sander
This comparison often leads to a third question: what about a drum sander? It looks like a hybrid but serves a unique niche.
A drum sander uses a rotating drum wrapped in sandpaper to finish surfaces. Sources disagree on its primary function: some describe it as a finishing tool too slow for dimensioning, while others suggest it can be used for quickly removing significant material. Its superpower is handling figured woods like curly maple or quilted grain that would tear out under a planer’s knives. It also excels at final surface preparation on delicate veneers or tabletop glue-ups where a flawless, scratch-free surface is critical.
A drum sander provides a finer finish and can handle delicate surface smoothing, while a planer is better suited for rapid thickness reduction.
Think of them as a sequence: Planer (for thickness) -> Drum Sander (for finish). For most hobbyists, a planer is the first major purchase because a drum sander is too slow for dimensioning. You add the drum sander later when your projects demand that next level of surface perfection. For more on that specific matchup, see our breakdown comparing a thickness planer vs jointer, which covers the flattening sequence.
Belt Sander vs Planer Cost and Blades vs Sandpaper
Initial cost is just the start. A benchtop planer is a significant investment compared to a handheld belt sander. The real difference is in the consumables. Planers use hardened steel knives that stay sharp for a long time but are expensive to replace or sharpen. A belt sander runs on abrasive sandpaper belts. These belts wear out faster, especially when removing material aggressively, but they are relatively inexpensive. You replace the sanding belt once it stops cutting efficiently. For ongoing, low-cost use on smoothing and finish removal, the belt sander wins. For heavy, repeated thicknessing of rough lumber, the planer’s durability, despite costly blade changes, becomes more economical.
Frequently Asked Questions
Is a planer or belt sander better for a beginner?
For a complete beginner buying their first tools, a belt sander is often the more practical and affordable first purchase. It covers a wider range of common DIY tasks like refinishing furniture, smoothing cuts, and light shaping. A planer is a more specialized, significant investment that you grow into when you start milling your own lumber.
What are the downsides of using a belt sander?
The main downsides are its reliance on user skill and its tendency to create dips or an uneven surface if used incorrectly. It’s also loud, generates immense dust, and is inefficient for removing large amounts of material evenly. It’s a finishing and shaping tool, not a precision dimensioning tool.
Can you use a planer as a sander?
No. A planer cuts with knives to change thickness; it is not designed to sand. The surface it leaves will have tiny, regular blade marks that must be sanded smooth. Using a planer on already-thin stock to “smooth” it is a way to snap the board or create dangerous kickback.
Can I plane a door with a sander?
You can sand a door edge with a belt sander, working from each end toward the middle to prevent splintering. But for removing more than about 1/16 of an inch, a handheld power planer is faster, straighter, and gives you more control over the final fit.
The Right Tool in Your Hand
The belt sander vs planer debate isn’t about which tool is better. It’s about which tool is right for the job in front of you.
If you’re smoothing, stripping, or shaping a surface, the belt sander is your go-to. Its hand-guided versatility is its strength. If you’re making a board a specific thickness or matching a set of parts, the planer is the only tool that delivers machine precision.
Most serious shops end up with both. They’re partners, not competitors. Start with the tool that matches the work you do most. For many, that’s a reliable belt sander and learning proper belt sander technique. When you find yourself staring at a pile of rough lumber dreaming of a table, you’ll know it’s time for the planer.
And remember, no matter which tool you’re using, the first step is always the same: make sure the wood is free of nails, screws, or debris. A single hidden fastener can ruin a sanding belt or chip a planer knife in an instant. That’s a mistake you only make once.
