
Can You Use a Nail Gun on Concrete?
This post contains affiliate links. As an Amazon Associate, we earn from qualifying purchases.
You can use a nail gun on concrete, but you cannot use a standard framing, brad, or finish nailer. The tools that work are either dedicated cordless concrete nailers, like the DeWALT DCN890 or Bosch GNB18V-12, or powder-actuated (PA) tools from brands like Hilti or Ramset. These tools fire hardened steel pins, not ordinary nails, and the process requires matching the pin length and tool setting to your concrete’s hardness and the material you’re attaching.
That’s the direct answer, and it’s the one that keeps you from ruining a tool or creating a dangerous situation. A framing nailer will dull its driver, bend a nail, and likely kick back, which is why you might ask, can you use a nail gun on concrete? A concrete nailer, on the other hand, uses a specific mechanical action to drive a pin in milliseconds.
What follows is the decision framework: when to rent versus buy, the exact OSHA-backed safety steps most guides skip, and the head-to-head comparison of all the methods, pins, screws, and adhesive, so you know which one actually wins for your project. By the end, you’ll know how to read a concrete nailer’s speed settings and select a pin length that holds.
Key Takeaways
- A standard framing or finish nail gun will not work on concrete and can cause dangerous tool failure.
- Specialized concrete nailers and powder-actuated tools drive hardened steel pins, with holding power defined by concrete strength and embedment depth.
- Always match the pin length to your material thickness plus the required embedment (typically 3/4″ for 2500 psi concrete).
- Safety glasses are essential, and for powder-actuated tools, you must follow the manufacturer’s load and firing procedure to the letter.
- For a one-time job, renting a professional-grade powder-actuated tool is often more cost-effective than buying a mid-range cordless concrete nailer.
Why Your Standard Nail Gun Fails on Concrete
Grab your finish nailer. Look at the tip of a brad. It’s sharp, but it’s designed to push between wood fibers. Concrete doesn’t have fibers; it has aggregate, rocks, held together by a cement matrix. That brad tip hits the surface and either mushrooms flat or deflects sideways.
The mechanism inside a wood nail gun relies on relatively low resistance. A piston slams a nail from a strip or coil into pine or oak. When it meets concrete, the resistance skyrockets. The piston tries to complete its cycle anyway. You get one of three outcomes: the nail bends inside the magazine, the driver blade (the part that hits the nail) chips or cracks, or the tool jams solid.
The sound changes, too. A healthy nail gun driving into wood has a solid thwump-thwump rhythm. On concrete, it’s a sharp, high-pitched crack or a strained whirr as the motor stalls, which is why the can you use a nail gun on concrete question has a definitive answer. That’s the sound of internal parts taking damage they weren’t designed for.
Common mistake: Trying to use “hardened” nails in a framing gun. Some forum posts suggest this works. It doesn’t. While the nail is harder, the tool’s driving mechanism isn’t. You’re just sending a more expensive projectile to its doom, and you risk the nail ricocheting.
This difference marks a public health line. OSHA’s nail gun safety manual explicitly separates standard pneumatic nailers from powder-actuated tools because the power sources, projectiles, and risks are in different categories, a key distinction when you compare a can you use a nail gun on concrete scenario. Using the wrong category invites the injuries that manual documents.
The Tools That Actually Work: Concrete Nailers vs. Powder-Actuated
You have two main paths, each with its own ecosystem of tools and fasteners. Your choice isn’t about brand loyalty; it’s about access to power, project scale, and how often you’ll do this.
Cordless Concrete Nailers (DeWALT, Bosch, Makita)
These are the evolution of the powder-actuated tool, designed for electricians, HVAC installers, and drywallers who need to hang conduit or metal track daily. They run on 18V or 20V MAX battery platforms.
| Feature | DeWALT DCN890 | Bosch GNB18V-12 | Makita AN250HC (Pneumatic) |
|---|---|---|---|
| Power Source | 18V Battery | 18V Battery | Compressed Air (11.8-22.6 bar) |
| Magazine Capacity | 33 pins | 22 nails | 100 pins |
| Pin/Nail Length Range | 13–57 mm | 13–38 mm | 19–25 mm |
| Key Setting | 3 Speed modes | 0° collation angle | Air pressure regulator |
| Best For | High-volume pinning (up to 600 shots/charge) | General trade work, lighter gauge metal | Soft, green concrete (per manual) |
The DeWALT’s three speed settings are your material selector. Speed 1 is for softer materials like cinder block or concrete under 4000 psi, typically using 19-25 mm pins. Speed 2 handles medium-hardness concrete above 4000 psi, typically using 19-29 mm pins. Speed 3 is for hard materials like structural steel, with a typical pin length range of 13-57 mm. Using Speed 3 on soft block isn’t just overkill; the manual warns it causes excessive wear and leads to early tool failure.
The Bosch runs a simpler, single-speed brushless motor but adds a crucial detail: it will not operate below 23°F (-5°C) or above 122°F (50°C). Leaving it in an unheated truck overnight means no work the next morning. The Makita AN250HC, being pneumatic, is an outlier. Its manual explicitly states it’s only for “soft concrete built up not so long before.” That’s a specific edge case, freshly poured curb forms or similar, not your basement wall.
Powder-Actuated Tools (PA Tools)
This is the traditional method. A controlled explosive charge (.22 or .27 caliber powder load) in a steel barrel drives a pin. Brands like Hilti (DX), Ramset, and Simpson Strong-Tie dominate. They are unequivocally more powerful and can drive the longest, thickest pins into the hardest concrete.
They are also the most regulated. OSHA’s standard mandates that pneumatically driven nailers operating at over 100 p.s.i. Must have a safety device on the muzzle to prevent fastener ejection unless in contact with the work surface. For powder-actuated tools, safety relies on the operator’s procedure: loading the correct power level, ensuring the muzzle is in full contact, and wearing appropriate personal protective equipment.
Renting a Hilti DX 460 from a home center for a weekend is how most DIYers correctly access this power. You get a professional-grade tool, the correct pins and loads for your job, and you return it. You’re not left with a $500 specialized tool you’ll use once.
The Step-by-Step Method for a Powder-Actuated Tool or Concrete Nailer
This is the procedure missing from forum snippets. It assumes you’ve chosen the right tool and verified your concrete isn’t pre-stressed or post-tensioned (if you’re unsure, drill and screw instead).
1. Preparation and Safety Setup
Clear the area of people. Put on ANSI Z87.1-rated safety glasses. If using a powder-actuated tool, add hearing protection. For cordless nailers, know your escape path if the tool kicks, keep your body offset from the barrel.
Before you start: Check behind and within the concrete for electrical wires, plumbing, or rebar. A pin hitting rebar can deflect dangerously. The pin bending/failure guide for the DeWALT DCN890 recommends moving 8 cm (about 3 inches) and trying again if you suspect aggregate or steel.
Gather your materials: the tool, the correct fasteners, a tape measure, and a marker. For powder-actuated work, have the manufacturer’s load chart open. It tells you which color-coded load (from lowest to highest power) matches your concrete strength and desired pin length.
2. Choosing the Right Fastener and Setting
This is where projects go sideways. The pin isn’t just “long enough.” It must account for:
- The thickness of the material you’re attaching (e.g., a 2×4 is 1.5″ thick).
- The required embedment depth into the concrete for holding power.
- A slight protrusion (if any) for the fastener head.
We will use the DeWALT DCN890’s published allowable loads as our source. For a straight-shank pin (0.102″ diameter) in 2500 psi concrete, an embedment of 3/4″ provides an allowable pullout load of 155 lbs. If you’re attaching a 1/2″ thick plywood sheet, your minimum pin length is 1/2″ + 3/4″ = 1.25″, or about 32mm. You’d round up to a 38mm pin for safety.
For a powder-actuated tool, you use the load chart. Say you’re fastening a 2×4 (1.5″) to 4000 psi concrete and want 1″ of embedment. You need a 2.5″ pin. The chart will tell you a “high” power load (often a red or green cartridge) drives a 2.5″ pin into 4000 psi. Using a “medium” load will leave the pin proud, and you can’t just hit it again.
3. The Firing Sequence
For a cordless concrete nailer:
- Load the magazine with pins of the correct length and diameter.
- Set the speed selector (on the DeWALT) according to your material.
- Place the muzzle flush and perpendicular to the work surface. Tilting reduces retention values.
- Depress the safety tip, then pull the trigger. The tool will fire, retract, and reset.
For a powder-actuated tool:
- Insert the correct power load into the tool’s breech.
- Load a single pin into the muzzle.
- Firmly press the muzzle flush against the work surface. The tool will not fire unless this safety is fully depressed.
- Aim perpendicular to the surface.
- Fire. The report is loud and sharp.
After any firing, inspect the pin. Is it flush? Is it at the correct depth? If a powder-actuated pin is proud, you cannot fire another load at it. You must use a pin driver or a hammer to set it, which is why selecting the right load is critical.
Powder-Actuated Fasteners vs. Concrete Screws: Which Wins?
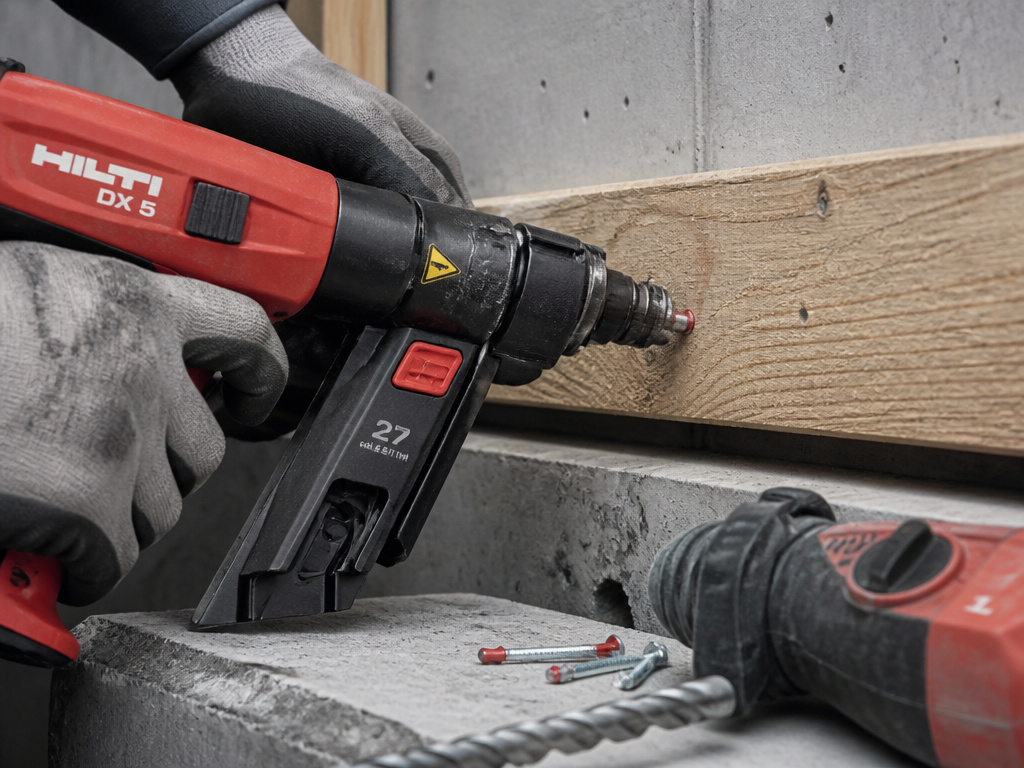
You’re not locked into pins. The other major player is the concrete screw (often called a Tapcon). Here’s how they stack up for a typical task like attaching a wooden bottom plate to a foundation.
| Factor | Powder-Actuated Pin | Concrete Screw (Tapcon) |
|---|---|---|
| Speed | Extremely fast (seconds per pin) | Slower (drill hole, vacuum dust, drive screw) |
| Holding Power | High, depends on embedment & concrete strength | Very high, excellent pullout resistance |
| Tool Cost | High (or rental fee) | Lower (standard hammer drill/driver) |
| Skill Barrier | Higher (load selection, safety procedure) | Lower (familiar drilling process) |
| Reversibility | None (pin is permanent) | Removable |
| Best Use Case | High-volume metal track/electrical work | Wood-to-concrete, especially where adjustment is needed |
The holding power numbers are telling. A 3/4″ embedment of a DeWALT pin in 4000 psi concrete gives you 195 lbs of pullout strength. A properly installed concrete screw in the same concrete can provide very high pullout resistance. For sheer holding force in a critical application, the screw wins.
But speed changes the calculus. An electrician hanging fifty clips for conduit with a powder-actuated nail gun will finish before the screw-gunner has their holes marked. The pin is the production tool; the screw is the precision anchor.
For attaching wood, my stance has evolved. I used to reach for the pin gun for everything, it felt more professional. Now, unless I’m doing miles of metal track, I fasten wood to concrete with screws. The hole is cleaner, the clamp is immediate, and if I’m off by a quarter-inch, I can back it out. You can’t back out a pin.
Renting vs. Buying: The Access Equation
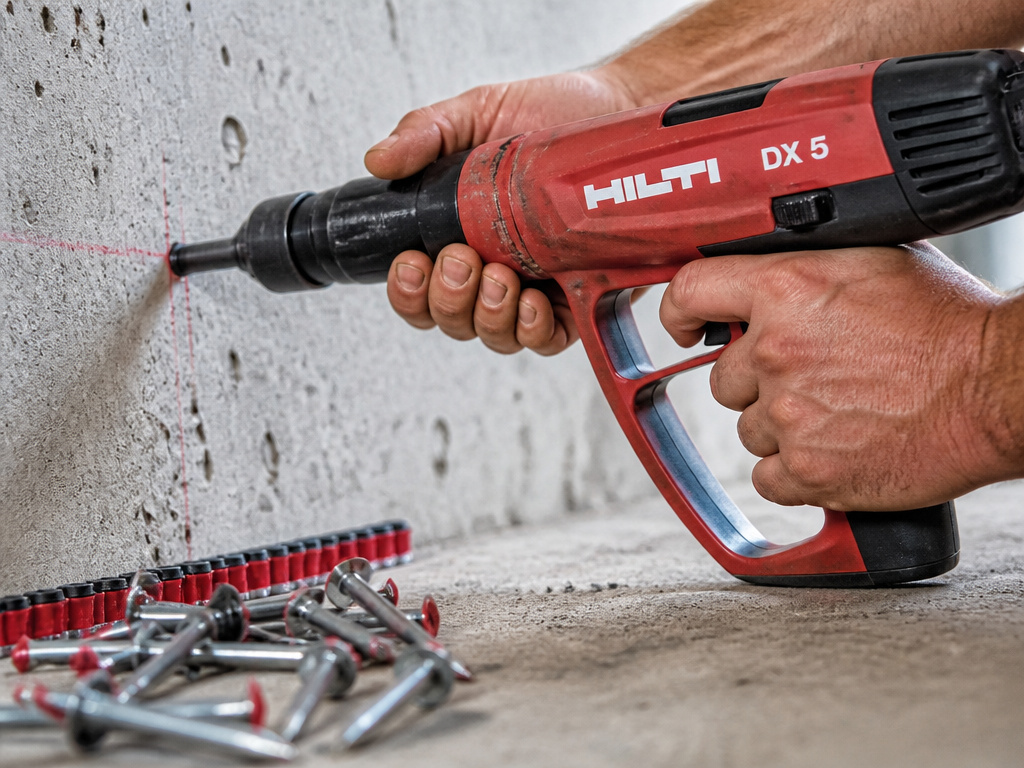
You need the right tool for the job. You don’t need to own it.
For a one-off project like installing a basement bathroom (adding wooden stud walls to concrete), buying a top-tier concrete nailers like the DeWALT DCN890P2 is a significant investment. The bare tool represents a significant investment, plus batteries.
Renting a professional powder-actuated kit for a weekend is often cost-effective. You get a more powerful tool, you don’t store it, and you don’t worry about its long-term health. The rental counter staff (if it’s a specialized tool rental place) will often help you select the right loads.
Buy if:
- You’re in a trade that uses the tool weekly (electrical, drywall, HVAC).
- You have a series of large projects lined up over the next year.
- You’re already invested in the brand’s battery ecosystem.
Rent if:
- This is a single project.
- The concrete is exceptionally hard (requiring the highest power loads).
- You lack confidence in selecting settings and want expert guidance at the counter.
Critical Safety Procedures You Cannot Skip
This is the documented outcome of skipping steps. The OSHA nail gun safety manual highlights the risk of injury from improper nail gun use. The risks with concrete tools are amplified by the material’s hardness.
- Eye Protection is Absolute. Concrete spalls. A tiny chip flying at eye velocity is all it takes. Wear glasses that seal to your face.
- Verify the Path. Use a stud sensor or know your building plans. Hitting live electrical conduit or a pressurized water line with a pin is catastrophic.
- Follow the Manual’s Sequence. With a powder-actuated tool, this means loading the charge, then the pin, in the correct order. Never carry a loaded tool with the muzzle uncapped.
- Perpendicular Contact. The DeWALT manual states that tilting the nailer while driving reduces pin retention. It also increases the chance of a glancing blow and a ricochet.
- Know When to Stop. If a pin bends or doesn’t drive flush, don’t just fire again. Diagnose. Is the concrete too hard? Is there rebar?
These procedures aren’t just good practice; they’re the boundary between a finished project and an emergency room visit. Your nail gun safety discipline is your most important tool.
Can You Use a Modified Framing Gun with Hardened Nails on Concrete?
Using a standard framing nailer modified for hardened or case-hardened nails on concrete is not a recommended practice and poses significant risks. Concrete nailers are engineered with specific power systems and safety mechanisms to handle the extreme resistance of masonry. A framing gun, even with tougher nails, lacks the necessary force and control for reliable penetration into concrete aggregate. This mismatch can lead to dangerous fastener ricochet, tool damage, and poor holding strength. For any work on concrete, always use a tool specifically designed as a concrete nailer or powder-actuated tool to ensure both safety and a successful, secure fastening.
Frequently Asked Questions
What nail gun is best for shooting into concrete?
For most professionals, a cordless concrete nailer like the DeWALT DCN890 or Bosch GNB18V-12 is the best balance of power and convenience. For the hardest concrete or the thickest pins, a powder-actuated tool from Hilti or Ramset is the definitive answer.
Can you nail directly into concrete?
Yes, but not with a standard nail. You use a hardened steel pin driven by a specialized concrete nailer or powder-actuated tool. The pin’s holding power depends on its embedment depth and the concrete’s compressive strength.
Can I use my framing nailer with concrete nails?
No. “Concrete nails” are hardened steel nails designed to be hammered in. They will not feed or fire correctly from a framing nailer’s magazine. Attempting this will damage the tool’s driving mechanism and is a safety hazard.
How deep should a concrete pin go?
The required embedment varies by pin diameter and concrete strength. For example, a 0.102″ diameter pin in 2500 psi concrete requires 3/4″ of embedment to achieve its rated pullout strength (155 lbs). Always add this embedment to the thickness of the material you’re attaching to find your minimum pin length.
Are concrete screws better than pins?
It depends. Concrete screws have higher pullout strength and are removable, making them better for precise wood-to-concrete work. Pins are faster and more economical for high-volume applications like attaching metal track or electrical conduit, where sheer speed outweighs maximum holding power.
The Bottom Line
Using a nail gun on concrete isn’t a question of force; it’s a question of specialization. Your wood nail gun belongs on the bench. For concrete, you step into a different category of tool with its own rules, specs, and safety protocols.
If you’re staring at a project and need one actionable rule: if the attachment is wood to concrete and precision matters, use concrete screws. If it’s metal to concrete and speed matters, rent a professional powder-actuated tool or invest in a cordless concrete nailer.
The numbers from the manuals are your map. A 3/4″ embedment in 4000 psi concrete gives you 195 lbs of pullout. That number gives you confidence that the furring strip for your basement walls is secure. Match the tool to the task, match the fastener to the numbers, and keep your safety glasses on. Everything else is just noise.
