
How to Cut Porcelain Tile With a Wet Saw: Without Damage
This post contains affiliate links. As an Amazon Associate, we earn from qualifying purchases.
*To cut porcelain tile with a wet saw, you need a diamond blade specific for porcelain, a continuous water supply, and a feed speed so slow it feels wrong.* Mark the tile face-up, align it with the blade guard, and push it through with gentle, consistent pressure, letting the blade do the work. A 10–12 square inch box cut can take 20 to 25 minutes; rushing it guarantees a broken tile.
That time estimate isn’t a scare tactic. It’s from Crossville’s own technical bulletin on plunge cuts, and it’s the first sign you’re dealing with a material that fights back. Porcelain’s density is its superpower and your main obstacle, which is why it’s crucial to know how to cut porcelain tile with a wet saw.
What follows: the real setup that stops blade wandering, the manufacturer debate on how to actually push the saw when you compare a how to cut porcelain tile with a wet saw, and the one debris mistake that turns a perfect line into a 6mm error. By the end, you’ll know why a wet saw is the only tool for the job and how to use it without turning a $50 tile into scrap.
Key Takeaways
- Use a continuous-rim diamond blade specifically rated for porcelain; a general-purpose blade will glaze over and chip the tile edge within the first few cuts.
- Feed the tile with gentle, consistent pressure, let the blade cut, don’t force it. Rushing increases heat, glazes the blade, and almost always causes breakage.
- Always cut porcelain face-up on the wet saw table. This puts the finished glaze surface against the table support, reducing the chance of surface chips.
- A 1mm piece of debris under your tile can cause a 5–6mm deviation by the end of the cut. Wipe the saw bed and guides before every single pass.
- For thick (20mm) pavers or plunge cuts, manufacturers disagree on technique: Landmark Ceramics says apply horizontal force only, while RUBI’s method for its DC-250 implies a vertical plunge, and Crossville’s plunge-cut advice implies a controlled vertical motion.
Why a Wet Saw Is Non-Negotiable for Porcelain
Try to cut porcelain with anything else, and you’ll learn the hard way. A manual snap cutter works on ceramic, but it’ll crack porcelain unpredictably. An angle grinder throws hazardous silica dust everywhere and leaves a ragged, chipped edge, highlighting the wet saw vs dry cutting advantages. A wet saw is the default because it solves the two big problems: heat and dust.
The water does more than just keep things cool when learning how to cut porcelain tile with a wet saw. It lubricates the cut, so the diamond blade’s edges can grind through the dense material without loading up with powdered tile. That lubrication is what gives you a clean, chip-free edge. Without it, the friction builds heat so fast it can actually glaze the blade, the diamonds get coated in a hard, glassy layer of melted tile and binder, and the blade stops cutting. You’ll hear a high-pitched whine and see smoke, and the tile will likely snap.
A wet saw’s blade passes through a shallow well of water as it rotates. This constant cooling and lubrication is what allows a diamond blade to grind through porcelain’s extreme hardness without overheating and losing its cutting ability.
So the wet saw isn’t just the best tool. For a clean, safe cut on porcelain, it’s the only tool that makes sense for more than one or two tiles.
Gear Up: The Saw, Blade, and Safety Kit
Before you plug anything in, get your kit right. This isn’t a place to cheap out or improvise.
The Saw: For larger format tiles or plunge cuts, a saw with a sliding table or a bridge-style (gantry) saw can provide greater control. Crossville notes gantry saws provide the greatest control on plunge cuts by keeping the tile stationary and reducing vibration. If you’re cutting thick 20mm porcelain pavers for outdoors, specific cutting techniques are required.
The Blade: This is the most critical piece. You need a diamond blade, and not just any diamond blade. Look for one labeled for porcelain or hard materials. Crossville uses an MK 415 XL 8-inch blade designed for cutting hard materials like porcelain and granite. RUBI ships its DC-250 wet saw with a CEV-SUPERPRO Ø250 mm diamond blade for a reason. A cheap, segmented blade might get through the cut, but as Landmark Ceramics notes, it leaves a “very poor cutting finish”.
Safety Gear: This is a power tool spraying water and fine silica slurry. Goggles are essential. Wear gloves to protect your hands from sharp edges and the slurry. A dust mask rated for fine particles is essential, even with water suppression. And always plug the saw into a GFCI outlet, mixing water and electricity demands this precaution.
The Step-by-Step Wet Saw Process
This is where most guides start. The truth is, if you skip the prep, the cut will fail. The process is simple, but the discipline isn’t.
1. Mark the Tile.
Use a pencil or wax pencil to draw your cut line on the finished face of the tile. For chip prevention, you can run a strip of masking tape over the line and mark on the tape, as RUBI suggests, a key step in cutting tile without chipping. The tape helps hold the glaze layer together as the blade passes through.
2. Set Up the Saw.
Place the saw on a stable, level surface. Fill the water reservoir so the water covers the pump’s intake. Create a drip loop in the power cord to prevent water from running down the cord into the outlet. Double-check that the blade is tight and the water pump is flowing onto the blade.
Before you start: The blade is sharp and wet. Keep hands and clothing clear of the cutting path. Unplug the saw before making any adjustments to the fence or blade guard. Familiarize yourself with the power switch location, if something goes wrong, you need to find it instantly.
3. Position the Tile.
Place the tile on the saw table face-up. This is crucial. The finished surface should be against the table, not facing the blade. Align your marked line with the blade, using the saw’s fence or guide for a straight cut. Take a second to ensure no tile fragments or debris are stuck to the table bed.
4. Make the Cut.
Turn on the saw and let the blade come to full speed. Gently feed the tile into the blade. The key phrase from every manufacturer is gentle pressure and consistent speed. You shouldn’t be pushing hard. You should feel a slight resistance, and hear a steady grinding sound. If the motor bogs down or the sound changes pitch, you’re feeding too fast.
5. Finish and Clean.
Once the cut is complete, turn off the saw and let the blade stop completely before removing the tile. Landmark Ceramics recommends cleaning the newly cut surface with water to remove all dust. Inspect the edge. You might see light scorch marks, this is normal and will be hidden by grout.
| Step | Action | What Happens If You Skip/Rush It |
|---|---|---|
| Marking | Draw line on finished face with tape. | Blade wanders, cut is off-line, edge chips badly. |
| Saw Setup | Fill reservoir, check water flow. | Blade overheats, glazes over, and breaks tile within minutes. |
| Positioning | Place tile face-up, clear debris. | A 1mm debris causes a 5–6mm deviation by cut’s end. |
| Cutting | Gentle feed, consistent speed. | Motor strains, blade glazes, tile snaps from heat stress. |
| Finishing | Clean edge with water. | Dust dries in pores, affecting grout adhesion later. |
Handling Thick Porcelain Pavers & Plunge Cuts
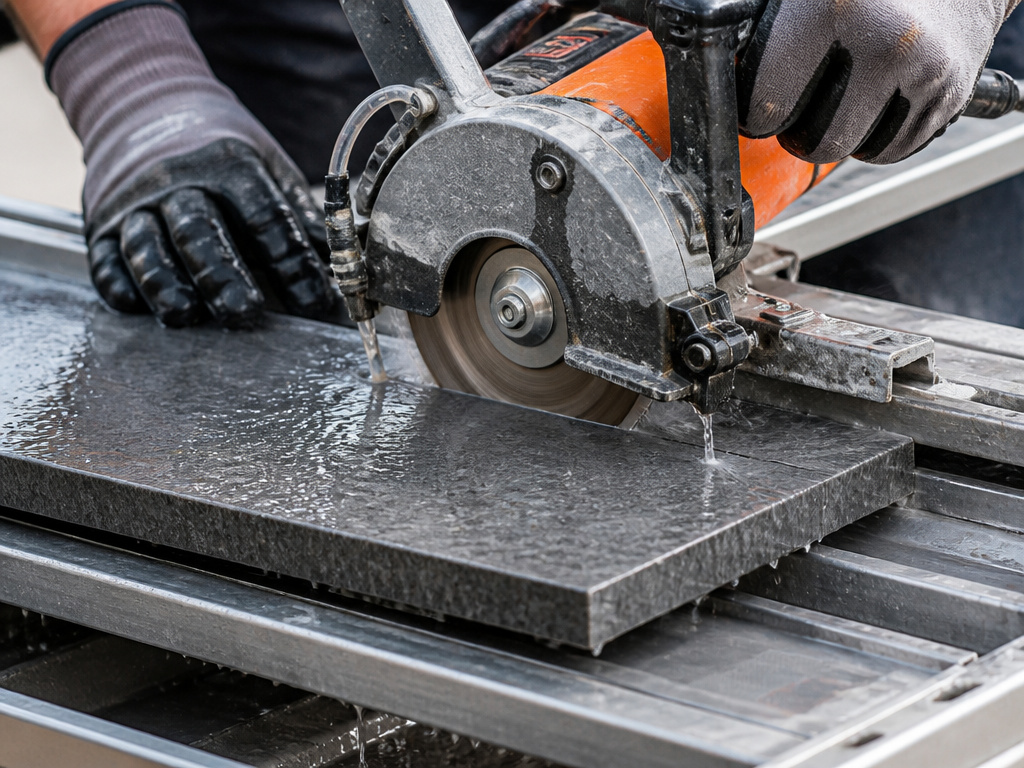
Standard tiles are one thing. When you step up to 20mm thick porcelain pavers or need to cut an opening for an electrical box, the rules get more specific, and manufacturers don’t fully agree.
The Disagreement on Force:
- Landmark Ceramics states clearly: apply horizontal force parallel to the tile plane. “It is not recommended to carry out the cut by applying a force perpendicular… (pushing down the saw into the tile).” They warn this can affect internal tensions and lead to breakage.
- RUBI’s guidance for its plunge saw (like the DC-250) involves notching the tile 1-2 inches on each end, which implies a vertical plunge action to start the cut.
So who’s right? It comes down to your tool and the tile’s support. A bridge saw (gantry saw), which Crossville recommends for plunge cuts, keeps the tile stationary and lowers vibration. A hand-fed wet saw trying to do a plunge cut can twist, applying uneven pressure. The rule of thumb: if your tile is fully supported on a stable table, a careful vertical start is possible. If it’s not, use Landmark’s horizontal method and consider drilling starter holes at the corners with a diamond core bit.
The Time Reality:
A plunge cut for a 10–12 square inch box isn’t a quick job. Crossville’s data says it takes 20 to 25 minutes. For plunge cuts, Crossville recommends pausing for 30 to 60 seconds between cuts to let the tile and blade cool. For plunge cuts, Crossville recommends soaking the tile in cold water before (and after) making a cut. This isn’t a place for speed.
Troubleshooting Common Wet Saw Problems
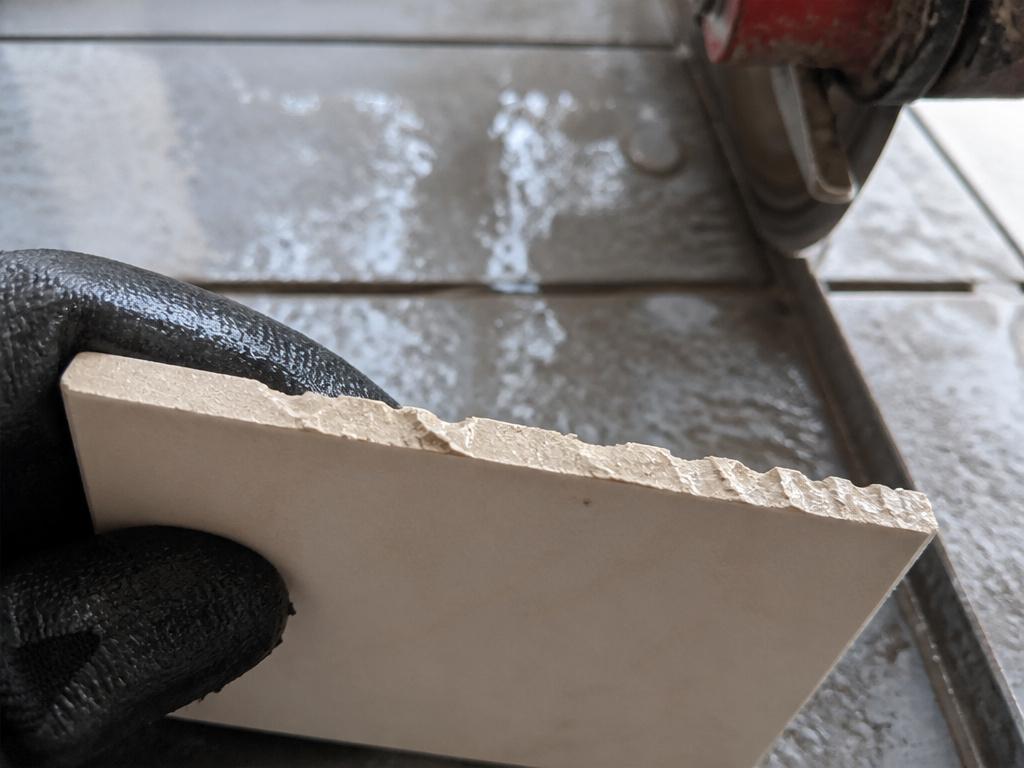
Even with perfect setup, things can go sideways. Here’s how to diagnose and fix the most common issues.
Problem: The blade is wandering, creating an uneven cut.
- Likely Cause: Debris under the tile or a warped/worn guide on the saw table.
- The Fix: Stop the cut. Unplug the saw. Wipe the entire table bed and the guide rails with a damp cloth. A 1mm piece of debris can cause a 5–6mm deviation by the end of a long cut. Check that the tile itself isn’t rocking on an uneven spot.
Problem: The edge is chipping badly, especially on the top surface.
- Likely Cause: Dull blade, too-fast feed rate, or cutting tile face-down.
- The Fix: First, ensure you’re cutting face-up. If the blade is old or glazed, it needs to be dressed or replaced. A dressing stone can be used to sharpen and expose fresh diamond edges on a blade. Slow your feed rate to a crawl.
Problem: The motor is straining or the blade is smoking.
- Likely Cause: Feeding too fast, insufficient water flow, or a blade not designed for porcelain.
- The Fix: Immediately stop feeding and let the blade run freely. Check that water is flowing onto the blade adequately. If it is, your feed pressure is simply too high. Let the blade do the work.
Where this goes sideways: Using a low-quality blade not meant for porcelain. Landmark Ceramics notes that using a low-quality blade not meant for porcelain might need to be revived 2 or even 3 times during the same cut.
Wet Saw vs. Other Cutting Methods
When is a wet saw overkill? Almost never for porcelain. But it’s useful to know the alternatives’ limits.
- Manual Snap Cutter: Only works on smooth-faced porcelain up to 1/2-inch thick. The tile often cracks off the score line. Use only for rough cuts where the edge will be hidden.
- Angle Grinder with Diamond Blade: Can make any cut, but creates massive amounts of hazardous silica dust. The cut edge is rough and requires extensive smoothing. It’s a last-resort tool for one-off notches.
- Tile Nippers: Useful only for nibbling away tiny curves or notches after a main cut is made with a saw. They cannot make a straight, clean edge.
The wet saw wins on cleanliness, precision, and safety. It’s the right tool for this job.
Frequently Asked Questions
Can I cut porcelain tile with a wet saw?
Yes, a wet saw with a diamond blade is the standard and recommended tool for cutting porcelain tile. The water cools the blade and suppresses dust, allowing for clean, precise cuts without the high risk of breakage associated with dry methods.
Do you cut porcelain tile face up or face down?
Cut porcelain tile face-up on the wet saw table. This positions the finished glaze surface against the stable table support, which helps prevent chips and cracks on that visible surface as the blade exits the tile.
What is the best blade for cutting porcelain tile with a wet saw?
The best blade is a continuous-rim diamond blade specifically designed for porcelain or hard materials. Examples include the MK 415 XL (cited by Crossville) or the CEV-SUPERPRO blade that comes with the RUBI DC-250. Avoid general-purpose masonry blades.
How do I prevent my porcelain tile from chipping when cutting?
Use a sharp, porcelain-specific diamond blade, apply gentle and consistent feed pressure, and cut the tile face-up. Applying masking tape over the cut line can also help stabilize the glaze layer. Ensure the saw bed is clean and the tile is fully supported.
Can I cut large format (24-inch) porcelain tiles on a standard wet saw?
It is challenging. The tile will overhang the table, leading to poor support and potential breakage. Proper support on the infeed and outfeed sides of the saw is critical.
The Bottom Line
Cutting porcelain with a wet saw is a test of patience, not strength. The machine does the cutting; you just guide it. If you remember one thing, let it be this: feed so slowly that it feels inefficient. That slow pace is what keeps the blade cool, the cut straight, and the tile intact.
The manufacturers’ technical bulletins give you the numbers, the 20-minute plunge cut, the 1mm-debris rule, the horizontal-force warning. Those aren’t suggestions. They’re the documented results of what happens when porcelain’s hardness meets real-world tools. Your job is to follow them.
So plug into that GFCI, suit up, and let the water flow. Listen for the steady grind, not a straining whine. That’s the sound of a job done right.
