
How to Sharpen Drill Bits: Step-by-Step Guide
This post contains affiliate links. As an Amazon Associate, we earn from qualifying purchases.
To sharpen a drill bit, you must restore its cutting lip and maintain its original point and clearance angles. For a standard 118° point angle on a bench grinder, hold the bit at a 60° angle to the wheel, present the cutting lip, and rotate the wrist to create relief. A sharp bit drills fast, doesn’t squeal, and produces curly chips.
That’s the goal, but the path depends entirely on your tools. A file, a bench grinder, and a dedicated sharpener like the Drill Doctor DD500X each have a different learning curve and precision ceiling. Most frustration starts when you mix up which method you’re using. Understanding how to sharpen drill bits correctly for each tool is key.
What follows: the three core sharpening methods ranked by difficulty, the angles that actually matter (and where Tormek and Drill Doctor disagree), and a clear rule for when it’s smarter to throw a bit away than try to save it.
Key Takeaways
- The point angle (usually 118° or 135°) defines the bit’s aggression; the clearance angle (around 11°) behind the cutting edge prevents rubbing and overheating.
- Sharpening on a bench grinder is fast but risks overheating; a quick touch-and-lift rhythm keeps the steel cool and preserves its temper.
- For drilling harder materials like stainless steel, both Tormek and Drill Doctor recommend a larger point angle (130–135°), but they disagree on the optimal clearance angle for the same job.
- A dedicated drill bit sharpener like the Drill Doctor DD500X removes skill from the equation, producing a factory-perfect 118° or 135° point in under a minute.
- Masonry bits cannot be sharpened like twist bits; you must “plunge” the carbide tip straight into the grinding wheel, never rotate it.
The Anatomy That Matters
Forget the shank and the flutes for a second. Sharpening lives and dies at the very tip, in the geometry of two intersecting planes.
The cutting lip is the sharp edge that actually shears the material. It must be straight, and on a sharp bit, the two lips are exactly the same length. The chisel edge is the pointed center that pushes into the work; it should be centered and sharp. Behind each cutting lip is the relief or clearance angle. This is the backward slope that ensures only the cutting lip contacts the workpiece. Without it, the back of the lip rubs, creating heat and stopping the cut dead.
Most general-purpose bits have a 118° point angle and an 11° clearance angle. This is the default. The larger the point angle, the shallower and wider the point, a 135° point is flatter, spreads the force over more surface area, and is the go-to for harder steels. Centering bits, used to start a hole precisely, often have a 90° point.
The first time I tried to freehand a bit on a grinder, I got the lip sharp but ignored the relief in the how to sharpen drill bits procedure. The bit looked great but drilled like it was made of butter. It generated smoke on mild steel in seconds. That’s the clearance angle’s job, to get the metal out of the way so the cutting edge can work.
A Tormek-sharpened drill lasts up to four times longer than a brand-new conventional bit, according to an independent test cited by the manufacturer. The precision of the four-facet point geometry reduces heat and wear.
The 3-Step Bench Grinder Method
This is the classic, skill-based approach. It’s fast, cheap, and teaches you the most about bit geometry. It’s also the easiest way to ruin a bit by overheating it.
Before you start: Wear safety glasses and keep loose clothing and hair secured. Do not wear gloves, they can catch on the grinder and pull your hand in. Use a grinder with a tool rest, and have a cup of water nearby to cool the bit.
Step 1: Set the Angle. The 118° point angle means each cutting lip is ground at 59° to 60° from the bit’s axis. Use the tool rest as your guide. Hold the bit horizontally and tilt it down until it forms that rough 60° angle with the wheel. This isn’t about a protractor; it’s about consistency.
Step 2: Present the Lip. With the bit at the correct angle, bring the cutting lip into contact with the spinning wheel. The goal is to grind the face of the lip, not the top. You should see sparks coming only from the very edge.
Step 3: Create the Relief. This is the wrist-flick most people miss. After touching the lip to the wheel, rotate your wrist slightly downward (like you’re pouring a drink). This grinds the relief angle behind the cutting lip. Do this in one smooth, 2–3 second motion, then lift the bit and dunk it in water. Repeat for the other lip, matching the angle and the amount of material removed.
The rhythm is touch, rotate, lift, cool. If the bit turns blue at the edge, you’ve overheated it and lost the temper. If your grinding produces a squealing sound, you’re rubbing, not cutting, re-check your angle.
| Common Mistake | Result | Fix |
|---|---|---|
| Grinding only the lip, no relief | Bit rubs, overheats, stops cutting | Incorporate the downward wrist rotation to create the clearance. |
| Uneven lip length | Hole drills oversize, bit walks | Match material removal on both sides; use a marker to paint the lip and grind until the ink is gone. |
| Overheating (blue steel) | Soft bit dulls instantly | Use shorter contact times (1-2 seconds) and quench in water after each pass. |
Choosing the Right Sharpening Angle
The standard 118° point isn’t a universal law. It’s a compromise that works okay for wood, plastic, and soft steel. When the material changes, the ideal geometry shifts, and here, the manufacturer guides don’t always agree.
For aluminium and plexiglass, a larger point angle is better. Tormek states a larger angle reduces the risk of the drill cracking plexiglass as it exits. For harder materials like stainless steel and tool steel, sources recommend a larger point angle: Drill Doctor specifies 135°, while Tormek suggests larger angles, such as 130°. The disagreement comes in the clearance angle. Tormek advises that “a harder material requires a drill with a smaller clearance angle,” while Drill Doctor’s process for its 135° point maintains its standard relief.
Why does this matter? Clearance is what keeps the bit from rubbing. In a hard material, less clearance might provide more support directly behind the cutting edge, preventing chipping. In a soft material, more clearance allows the bit to sink in faster. If you’re using a jig or a dedicated sharpener, follow its settings.
| Material | Recommended Point Angle | Recommended Clearance Angle | Notes |
|---|---|---|---|
| Wood, Soft Steel, Plastic | 118° | 11° (Standard) | The default for most drill bit sharpeners and general use. |
| Stainless Steel, Tool Steel | 135° | 11° (Drill Doctor) / Smaller (Tormek) | Drill Doctor specifies 135°; Tormek suggests “larger point angle” and smaller clearance. |
| Aluminium, Plexiglass | 130°+ | Standard or Larger | Larger point reduces cracking in plexiglass and improves cutting in soft metals. |
| Centering | 90° | Standard | Used for starting holes accurately in a drill press. |
The easiest way to hit these angles consistently when you compare a how to sharpen drill bits method is to use a dedicated drill bit sharpener. They turn geometry from an art into a repeatable process.
Dedicated Sharpeners: From Parkside to Drill Doctor
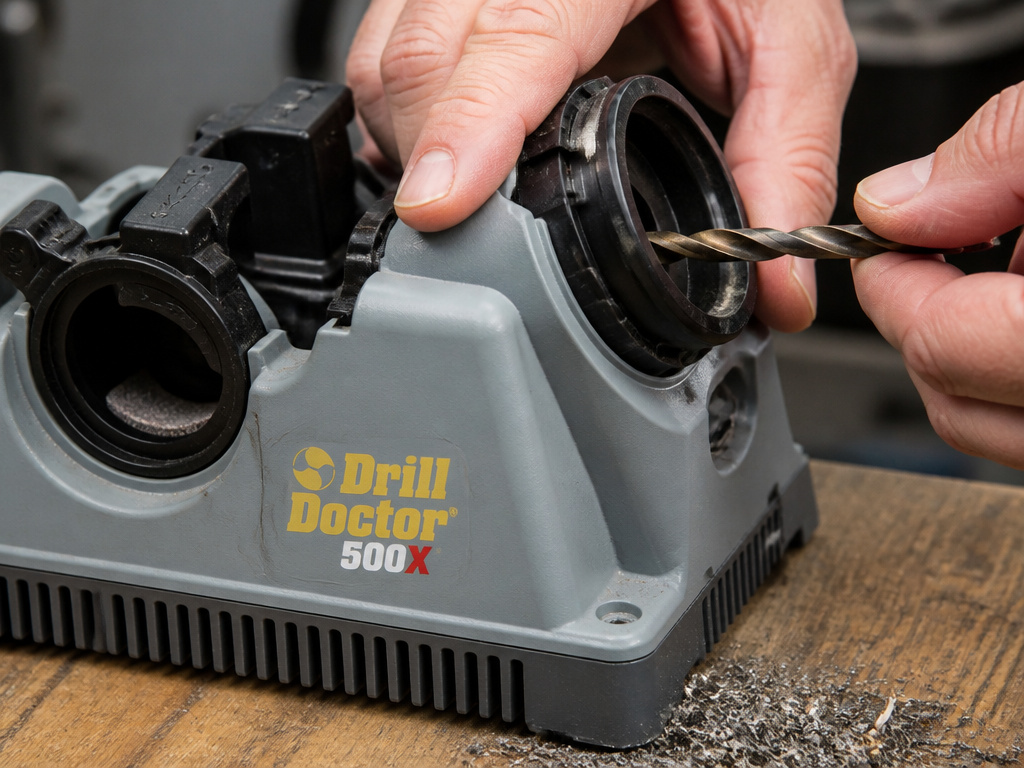
When freehand grinding gets old, a dedicated sharpener is the logical upgrade. These devices hold the bit at a fixed, precise angle and do the grinding for you. They range from simple, low-cost units to professional systems.
According to its manual, the Parkside Drill Bit Sharpener (IAN 488384_2501) handles bits from 2.5 to 19 mm and allows you to set point angles of 118°, 135°, or anywhere between 115° and 140°. At 92W, it’s not a powerhouse, and its 74.5 dB noise level is noticeable. It’s a step up from freehand for the occasional user.
The Drill Doctor DD500X is the mid-range benchmark. It sharpens bits from 3/32” to 1/2” and is famously simple: chuck the bit, select 118° or 135°, and let its diamond wheel do the work. Drill Doctor’s three-step process, align, sharpen, split the point, is foolproof for standard twist bits. For larger bits up to 3/4”, the DD750X with its large bit chuck is the choice.
I won’t recommend a bench grinder for someone sharpening their first dozen bits. The visual feedback is honest, but new users overcorrect on every imperfection and chase ghosts. A dedicated sharpener gets you a working tool in two minutes, which is better than a perfect-looking bit that never drills another hole.
At the top end, systems like the Tormek DBS-22 attachment transform a Tormek water-cooled grinder into a precision sharpening station. It sharpens bits from 3 to 22 mm and allows setting the point angle to any angle between 90° and 150°, and the clearance angle to 7°, 9°, 11°, or 14°. This is for the workshop where drill bits are a consumable cost center, not an occasional purchase.
The choice here isn’t just about price. It’s about volume. Sharpening a handful of bits a year? A file or careful grinder work is fine. Burning through bits on regular projects? A Drill Doctor DD500X pays for itself. Running a small shop? The Tormek system’s flexibility and water-cooled grinding justify the investment.
Sharpening Specialty Bits (Masonry, Carbide)

Not all bits are simple twist drills. Masonry bits and carbide-tipped bits follow different rules.
For masonry bits with a carbide insert, the Drill Doctor manual is explicit: do not use rotations. The correct method is “plunging.” You insert the chucked bit straight into the sharpening port to grind one side of the carbide tip, then remove it, rotate 180 degrees, and plunge again for the other side. Rotating the bit will round over and ruin the carbide.
Industrial carbide button bits, like those from Sandvik, are another world entirely. They’re resharpened on specialized machines to restore the dome shape of each button. Sandvik’s handbook gives precise discard criteria: for bits 45mm and smaller, discard if 1 face button or 1–2 gauge buttons are missing. For bits 48–115mm, discard if 2 face buttons or 2 gauge buttons are broken. The appearance of ‘snakeskin’ surface cracks means it’s time to resharpen.
The part nobody mentions: When resharpening cobalt-containing bits (like many industrial carbide bits), Sandvik mandates full PPE, gloves, respirator, eye protection, and warns never to use a broom or compressed air for cleanup due to toxic dust. Always shower after working with cobalt.
These bits aren’t sharpened to a point; they’re-profiled to a specific curve. This isn’t a DIY task. For the homeowner with a worn masonry bit, plunging it in a Drill Doctor is the limit. Otherwise, replacement is the safe and effective choice.
When to Sharpen vs. When to Replace
Sharpening saves money, but only up to a point. Your time and the bit’s remaining life have value.
A bit needs sharpening when drilling becomes slow, the bit squeals, or it produces fine powder instead of curly chips. If the cutting lips are chipped, you can often grind past the damage. If the bit is severely bent or the flutes are cracked, it’s garbage.
For standard HSS bits, you can resharpen them many times until they become too short to chuck. The real cost-benefit question hits with more expensive bits. A quality drill bit might cost significantly more than a cheap one, but if a sharpener can extend its life, the math can work. The breaking point is often the time and consistency a sharpener provides. If you can salvage a $5 bit in 90 seconds with a Drill Doctor, you’re ahead. If it takes you ten minutes of fiddling on a grinder to get a mediocre result, you’ve lost.
Sometimes, replacement is the only right answer. According to Sandvik’s data, a drill bit used without resharpening lasted about 170 meters in their test. The same bit, resharpened three times, drilled 340 meters total. But they also note resharpening can be done up to 10 times depending on rock type and wear. For a homeowner’s twist bit, the wear limit is simpler: when the web (the central metal between the flutes) becomes too thick from repeated sharpenings, the bit won’t cut efficiently. That’s your signal to retire it.
How to sharpen specialty bits like Forstner or carbide
Specialty bits require specific techniques. For carbide-tipped masonry bits, sharpen by a ‘plunging’ method, inserting the chuck to sharpen one side, then removing and repeating for the other side. Do not use rotations. For large carbide drill bits, resharpening is needed before the wear flat on any button reaches 50% of the button’s diameter. The appearance of ‘snakeskin’ surface cracks on carbide buttons also indicates a need for resharpening. Always wear full personal protective equipment, including eye protection, a respirator mask, and gloves, when working with materials like cobalt, and clean up carefully without using a broom or compressed air.
Frequently Asked Questions
What is the best way to sharpen drill bits for a beginner?
For a beginner, a dedicated sharpener like the Drill Doctor DD500X is the most reliable method. It removes the variables of angle and hand steadiness, guaranteeing a symmetric 118° or 135° point. Learning on a bench grinder is valuable but has a high failure rate for the first several attempts.
Is it worth buying a drill bit sharpener?
It depends on your bit usage. If you go through several bits a month on DIY projects, a sharpener like the Drill Doctor DD500X or a Parkside sharpener can save on replacement costs. If you only rarely use drill bits, mastering the bench grinder technique or using a simple file is more cost-effective.
Can you sharpen drill bits with just a file?
Clamp the bit in a vise. Use a fine, flat file to carefully refine the cutting lip, maintaining the original angle. The challenge is creating the correct relief angle behind the lip, which is difficult to do evenly with a file. It’s a last-resort method for thin or delicate bits you don’t want to overheat on a grinder.
What angle do I use to sharpen a drill bit for metal?
For general metal drilling (soft steel, aluminium), use a 118° point angle. For harder metals like stainless steel, a 135° point angle is recommended. The clearance angle behind the cutting lip is equally important and should be around 11° for most work.
Why does my newly sharpened drill bit not cut?
The most common reasons are unequal cutting lip lengths (causing the bit to wobble and drill an oversized hole) or insufficient relief behind the lips (causing the bit to rub instead of cut). Check your sharpening symmetry and ensure you’ve ground the clearance angle, not just the lip’s face.
The Bottom Line
Sharpening drill bits isn’t about perfection; it’s about restoring function. A bit that drills cleanly and efficiently is a success, even if its geometry isn’t textbook.
If you want one answer: start with a Drill Doctor DD500X. It gets you back to work with minimal fuss. If you enjoy the craft, learn the bench grinder method, its skills transfer to other tools. And remember the one rule that overrides all others: if a bit is bent, cracked, or more missing than metal, let it go. No sharpening jig in the world can fix structural failure. Your next project deserves a tool that’s ready for it.
