
How to Use a Concrete Vibrator: A Step-by-Step Guide
This post contains affiliate links. As an Amazon Associate, we earn from qualifying purchases.
To use a concrete vibrator, you insert the vibrating head into freshly poured concrete, move it vertically for 5-15 seconds per insertion to release trapped air, and withdraw it slowly once bubbles stop rising and the surface develops a glistening sheen. The specific steps, safety gear, and timing depend entirely on your vibrator’s model and the manufacturer’s manual.
That last clause is the whole game. A Harbor Freight unit demands you “shock” the head against pavement before every use. A Viber or Husqvarna model will overheat if you run it in air for more than a few minutes. Following generic “insert and move” advice without checking your manual is how you burn out bearings, glaze concrete, or throw slurry across the jobsite. The manual provides the correct method for how to use a concrete vibrator.
What follows is the procedural spine from six OEM manuals, matched head-to-head where they disagree. You’ll get the step-by-step, the safety non-negotiables, and the maintenance schedule that keeps a rented unit from failing halfway through your slab.
Key Takeaways
- Always wear safety impact eye goggles and heavy work gloves; concrete under vibration can throw sharp aggregate.
- Never run the vibrator head in air for more than a few minutes; submerging it in wet concrete cools the bearings and prevents overheating.
- For effective consolidation, place concrete in layers no deeper than the vibrator head length plus 4-6 inches, and do not exceed 18-20 inches total.
- Withdraw the head slowly and vertically to let concrete fill the void; pulling it out fast or stirring creates new air pockets.
- Manufacturers disagree on cleaning method: Harbor Freight Tools advises cleaning with a damp cloth, while Husqvarna instructs using running water from a hose.
The Non-Negotiable Safety Gear and Setup
You need two things before you plug in the motor: the right personal protection and a power source that won’t strand you mid-pour.
The Harbor Freight manual is blunt: always wear safety impact eye goggles and heavy work gloves. Concrete under high-frequency vibration isn’t a liquid; it’s a slurry of sand, aggregate, and cement that can jet out of the formwork or splatter when the head is withdrawn. Goggles stop a rock from hitting your eye at speed. Heavy gloves keep your hands from getting abraded by the vibrating cable and protect against accidental contact with wet concrete, which is caustic.
Before you start: Never use this product in a damp or wet location. Never leave the Concrete Vibrator unattended when it is plugged into an electrical outlet. Never carry the Concrete Vibrator by the Vibrating Head or Cable—always carry it by the Handle, supporting the head and cable.
Your power source is the second checkpoint. Manuals like the one from Northrock Industries specify a grounded, three-prong plug. For outdoor use, manuals such as Northrock Industries specify that your extension cord must be marked with the suffix W-A (like SOW-A) following the cord type designation. An undersized cord causes a voltage drop, the motor slows and pulls more current, and the windings overheat. The failure isn’t immediate; it’s cumulative, and the tool dies after a few uses.
| Motor Amperage (120V) | Cord Length 0-25 ft | Cord Length 26-50 ft | Cord Length 51-100 ft |
|---|---|---|---|
| 12-16 Amps | 14 AWG | 12 AWG | Not Recommended |
| 16-20 Amps | 12 AWG | 10 AWG | Not Recommended |
Global Manufacturing puts a number on it: a motor can withstand about a 10% voltage drop without too many problems. For a 120V circuit, don’t let the voltage drop more than 6 volts over the cord length. That table isn’t a suggestion; it’s the boundary between a tool that lasts 300 hours and one that smokes on its third job.
The 7-Step Process for Internal Vibration
The goal is simple: remove entrapped air to create dense, strong concrete, ready for final finishing with a power trowel, which is the core objective when you learn how to use a concrete vibrator. The process is a sequence of physical actions with specific timings. Miss one, and you get honeycombing or a weak cold joint.
Step 1: Start the Vibration (Check Your Manual)
Here’s the first major split between manufacturers. For a Harbor Freight 3/4 HP Concrete Vibrator, you must “shock” the head every time. The manual states: “Strike the head sharply against a solid surface such as a concrete floor or pavement. This ‘shocking’ of the head will start the Head vibrating.” Other brands like Bartell Global (Morrison), Northrock, and Viber do not mention this step. Their instructions begin with turning the motor on and submerging the head. If your manual says shock it, shock it. If it doesn’t, don’t.
Step 2: Submerge the Head Completely
Turn the motor on and lower the head into the wet concrete. Let it sink under its own weight. Forcing it can cause it to lock between rebars. The head must be totally submerged. Global Manufacturing is explicit: “Do not leave the vibrator running in air. Totally submerse the vibrator head in the concrete. This cools the bearings.”
Step 3: Penetrate to the Bottom of the Layer
The head must reach the bottom of the current lift. Global Manufacturing says to let it penetrate “as quickly as possible under its own weight.” If you’re placing a new layer on top of a previous one that’s still workable, you need to knit them together.
Step 4: Vibrate for 5-15 Seconds
Keep the head vertical and mostly stationary. You’ll see bubbles rise to the surface. Husqvarna gives a clear window: “Wait approximately 10–20 seconds until the surface around the vibrator head is shiny and no air bubbles come to the surface.” The motor’s sound will change—a steady “whine” indicates the vibrator speed has leveled off.
Step 5: Withdraw Slowly and Vertically
This is the part people rush. Pull the head out slowly. Let the concrete flow in behind it to fill the hole. “Do not attempt to ‘stir’ the concrete,” warns the Viber manual. Yanking it out creates a vacuum that pulls air back into the void.
Step 6: Move to the Next Insertion Point
The area of influence depends on the head and concrete mix. Place the next insertion about 12-19 inches from the previous one, as a common guideline. Overlap these zones to ensure full coverage.
Step 7: Recognize the End Point
Consolidation is complete when three things happen: no new bubbles come to the surface, a glistening layer of mortar covers the concrete surface, and the motor’s whine indicates a steady speed.
Where this goes sideways: Operating the head out of the concrete for “just a minute.” The Northrock manual states this causes overheating. On a hot day, you can damage the bearings quickly. The wet concrete isn’t just the medium; it’s the cooler.
Concrete Placement: Layer Depth and Rebar Rules
You can’t vibrate what you can’t reach. The weight of concrete above the vibrator head can prevent air from escaping, so layer depth is critical.
Global Manufacturing specifies a formula: layers should be no deeper than the length of the vibrator head plus 4-6 inches. They also set an absolute ceiling: “Layers should not exceed 18-20 inches.” Husqvarna agrees with a metric equivalent: “Fill concrete in equally thick layers, 30–50 cm / 12–20 in.“
When you place a new layer, you must knit it with the one below to prevent a cold joint. The Viber manual says to “push the vibrator 4-6 inches into the lower layer. Move the vibrator up & down for 5-15 seconds.” Husqvarna calls for putting the head “approximately 15 cm / 6 in. Down into the nearest lower layer.”
Keep the head at least 3-4 inches from the forms. Vibration can damage forms, causing surface defects. More importantly, do not allow the vibrator head to touch reinforcements, such as rebar. The vibration can break the bond between the rebar and the surrounding concrete, compromising structural integrity.
Head and Shaft Maintenance Schedules
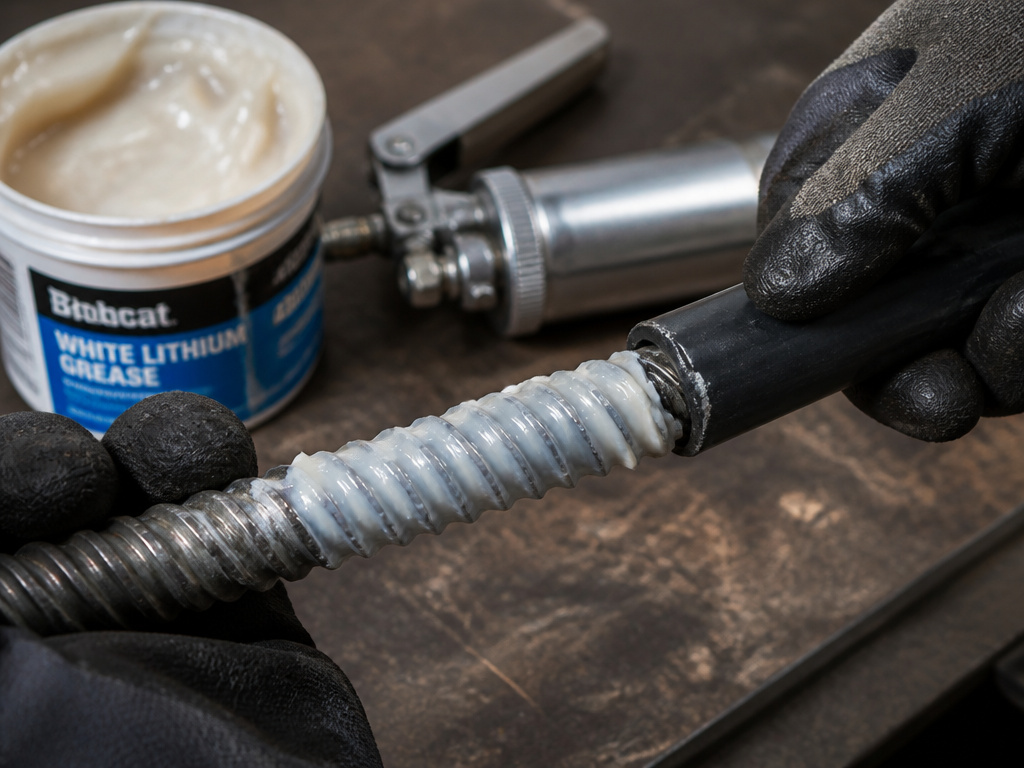
Maintenance is essential for keeping a tool functional throughout an entire project.
The flexible shaft is a different story. There’s consensus on the interval but disagreement on the consequence of neglect.
| Component | Maintenance Action | Interval (Consensus) | Consequence of Skip |
|---|---|---|---|
| Flexible Shaft Core | Inspect & lubricate with lithium grease | After approx. 50 hours of operation | Core rattles excessively, increased drag, shaft overheats |
| Motor Brushes | Check/Replace | Per model schedule (e.g., every 100 hrs) | Loss of power, erratic operation, motor damage |
| General Cleanliness | Clean with damp cloth or running water | Immediately after each use | Concrete hardens on tool, ruining bearings and mechanism |
Bartell Global, Northrock, and Viber all specify inspecting inner cores for lubrication after approximately 50 hours. The Viber manual adds: “Re-grease core after every 50 hours of use or if core rattles excessively.” The grease is specific: a high-quality lithium grease, applied in an approximately 1/16 inch thick coating. The universal warning: “Do not over grease the flexible shaft as this will cause excess drag on the motor, and the shaft to get hot.”
For the motor unit, Bartell Global’s routine service schedule is the most detailed, breaking down tasks by intervals: Each Use, First months/10 hrs, Every 3 months/25 hrs, Every 6 months/50 hrs, Every year/100 hrs, Every 2 years/300 hrs.
Choosing the Right Vibrator for Your Project
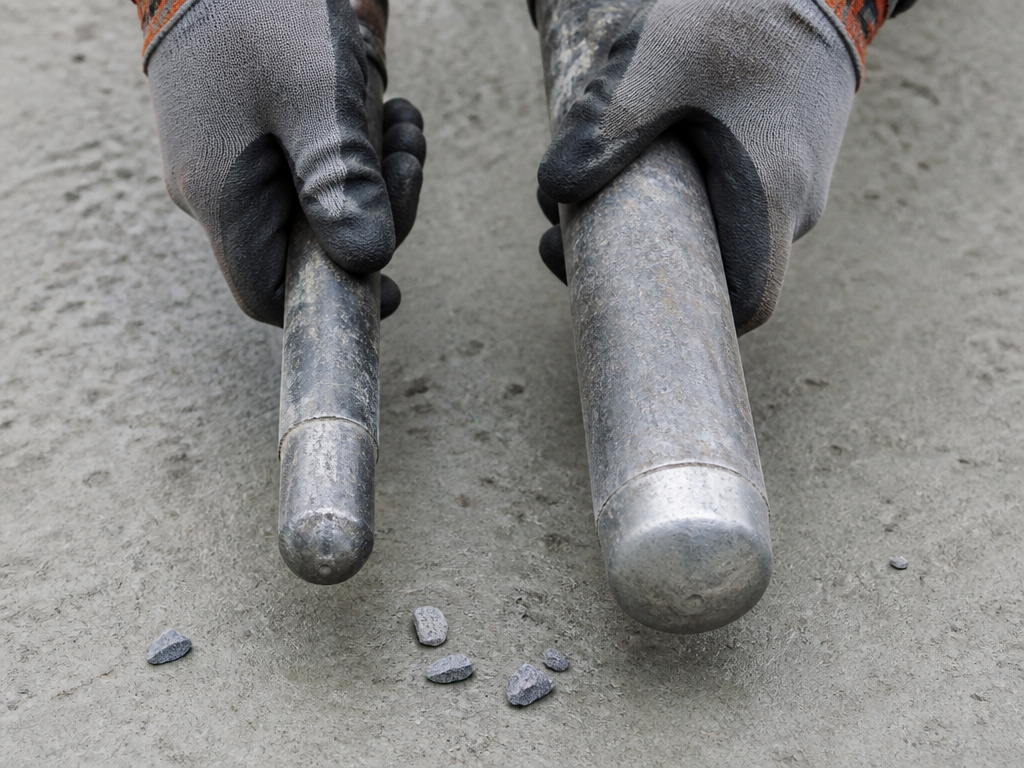
Choosing the right vibrator depends on matching its capacity to your slab thickness and reinforcement density.
For a DIY patio or sidewalk (4-6 inch slab with minimal rebar), a light-duty electric vibrator like the Harbor Freight 3/4 HP or a Northrock Pro 1.5+ (max 1.5” head) is sufficient for the concrete you’ve prepared in a concrete mixer. Their lower amp draw works on a standard household circuit with a heavy-duty outdoor extension cord.
For thicker slabs (8+ inches), stem walls, or areas with congested rebar, you need more power and a larger head diameter to move the concrete effectively. For thicker slabs, a vibrator with a larger head diameter and higher power, like a Northrock Pro 2+ (max 2.5” head), is a better match. Ensure your circuit and cord gauge are up to the task.
Common mistake: Using a head diameter smaller than the aggregate in your mix. If you’re using 3/4-inch aggregate, a 1-inch head can’t create enough movement to consolidate properly around the stones. Honeycombing is the guaranteed result.
The Viber VMK-2750 (120V, 15A) and VMK-3500 (120V, 20A) models are examples of 120V electric vibrators. Their interchangeability—any Viber head fits any Viber power unit—is a genuine advantage for contractors doing varied work.
Types of Concrete Vibrators
Concrete vibrators are categorized by how they apply vibration to the mix. Internal or immersion vibrators, the most common type, use a vibrating head on a flexible shaft that is submerged directly into the wet concrete. This type is for consolidating deep placements like slabs, walls, and columns. Surface vibrators, like screed vibrators, are placed on top of the concrete formwork and vibrate downwards through the form, typically for shallow slabs. Form vibrators are clamped directly onto the exterior of the formwork, vibrating the concrete through the form itself, which is useful for precast elements or thin walls. The choice depends on the project’s depth, formwork, and access.
Frequently Asked Questions
How long should I vibrate concrete per insertion?
Most manufacturers specify 5-15 seconds. The visual cue is key: stop when no new bubbles rise to the surface and a shiny film of mortar appears around the insertion point. Over-vibration can cause segregation, where the heavier aggregate settles and the paste rises.
What are the signs of over-vibration?
Puddle of watery cement paste (laitance) forming on the surface is the main sign, which may require correction with a concrete grinder. The concrete looks soupy and weak. If you see this, stop immediately. The damage is done, but further vibration will only make it worse by further separating the mix components.
Can I use a concrete vibrator on vertical pours like walls or columns?
Yes, but the technique changes. You must secure the forms exceptionally well, as vibration exerts lateral pressure. The insertion pattern is often horizontal, moving upwards in lifts. The head must be kept away from the form face (still the 3-4 inch rule) to avoid surface defects. It’s more challenging, and renting a higher-frequency, pencil-type vibrator is often better for walls.
How do I clean a concrete vibrator?
Here the manuals disagree. Harbor Freight Tools says: “Clean all components with a damp cloth after each use. Remove all concrete residue.” Husqvarna instructs: “Use running water from a hose to clean the product.” The universal rule is immediacy. Use water if you can avoid soaking the motor assembly (Harbor Freight warns against this). Use a damp cloth if you’re in a confined space. The goal is to remove all wet concrete before it cures.
Why is my vibrator head not vibrating?
First, check the manual for the “shocking” step if you have a Harbor Freight model. If it’s not that, the flexible shaft core is likely dry or damaged. A core that hasn’t been greased in 50+ hours of operation will rattle and eventually fail to transmit rotation. Disconnect the power, disassemble the shaft, and inspect the core for dry spots.
The Bottom Line
The process of how to use a concrete vibrator is a mechanical process with physical rules. The 10-20 second window per insertion is your primary timer. The glistening mortar surface is your visual stop signal. The difference between a 50-hour and a 100-hour lubrication schedule depends on whose name is on the motor casing.
If you’re renting, ask for the manual. Check the head size against your aggregate. Inspect the flexible shaft for grease. That five-minute pre-use check is cheaper than a ruined pour.
For a one-time DIY slab, a well-maintained rental unit is the smart play. For multiple projects, a dedicated unit may be worthwhile. Just remember the first rule: the manual that comes in the box is a functional part of the tool.
