
How to Use a Hot Glue Gun: Step-by-Step (Without the Mess)
This post contains affiliate links. As an Amazon Associate, we earn from qualifying purchases.
Using a hot glue gun requires matching three things: the correct glue stick diameter for your model, a safe, heat-resistant workspace with the included stand, and an understanding of your specific gun’s warm-up time, which can range from 30 seconds to 10 minutes. Always press bonded parts together within the time specified for your gun (commonly 15–30 seconds) and let the joint cure as recommended, which can range from 2 to 5 minutes before handling.
That last spec is where most quick-start guides stop. They don’t tell you what to do with the half-used stick when you’re done for the day, or why your brand-new gun suddenly won’t feed adhesive. The difference between a tacky, weak bond and a solid one isn’t the gun, it’s the five steps you take before you ever pull the trigger, which is the real core of how to use a hot glue gun.
What follows is the workshop method for how to use a hot glue gun: setup, warm-up, application, shutdown, and troubleshooting. We’ll walk through the exact warm-up times from six manufacturer manuals, the specific first-aid steps for a burn, and the one mistake that jams the feed mechanism for good.
Key Takeaways
- Match the glue stick diameter exactly to your gun’s spec (7mm, 11mm, or 12.7mm); using the wrong size can cause jams or poor flow.
- Warm-up times are not universal; they range from 30 seconds for a Worx WX746L to 6–10 minutes for a heavy-duty 3M applicator.
- For any burn, cool the skin immediately with cold water as specified in your manual; never try to peel the hot glue off, as this removes skin.
- Never remove a partially used glue stick; instead, extrude one full stick to clear the nozzle before storage to prevent charring and clogs.
- Structural bonds need epoxy; hot glue softens at relatively low temperatures; some adhesives used in these tools soften at 140°F (60°C), while others are rated up to 75°C, so it’s best for tacking, crafts, and light repairs.
The 5-Minute Setup & Warm-Up Check
Plug the gun into a grounded outlet on a clean, dry surface. Unpack the stand, it’s usually tucked underneath or in the box, and make sure it’s locked in place. This isn’t a suggestion. The UHU Hot Melt Glue Gun, 3M Hot Melt Applicator AE, and DeWalt DWHTGR50 manuals all state the tool must be placed on its stand when not in use. Placing the gun on its side can cause molten adhesive to flow back into the mechanism or onto your work surface.
Now, find the glue stick diameter. This is the first place users jam their guns. It’s not “close enough.”
The correct glue stick diameter is printed on your gun or in its manual. A 7mm stick will rattle in a chamber built for 11mm, melting unevenly and causing feed problems. A 12.7mm stick simply won’t fit into a 7mm barrel.
Check the rear loading port. For a Worx WX746L or Parkside PNKP 105 C2, you need a 7mm diameter stick. For a UHU Hot Melt Glue Gun, it’s 11mm. For the 3M Hot Melt Applicator AE or DeWalt DWHTGR50, you need a 12.7mm (1/2 inch) stick. Load the stick straight in until you feel slight resistance from the internal drive mechanism.
Here’s the warm-up surprise nobody mentions: the time varies wildly by model and power. Don’t guess.
| Glue Gun Model | Official Warm-Up Time | Visual/Sound Cue |
|---|---|---|
| Worx WX746L (Cordless) | 30 seconds | Red LED turns green |
| DeWalt DWHTGR50 | 2 minutes (initial) | None specified |
| Parkside PNKP 105 C2 | ~5 minutes | None specified |
| UHU Hot Melt Glue Gun | 5–8 minutes | None specified |
| 3M Hot Melt Applicator AE | 6–10 minutes | None specified |
| Henkel Loctite HM24-050 | 4–5 minutes | None specified |
If your gun has a ready light, wait for it. If it doesn’t, respect the full time in the manual. A gun at half-temperature makes stringy, weak glue that bonds poorly. After the wait, squeeze the trigger gently to extrude a small bead onto a scrap piece of cardboard. You should see a smooth, steady flow, not a drip, not a reluctant blob. If nothing comes out, the gun isn’t hot enough. Wait two more minutes and try again.
How to Apply Glue Without Strings and Blobs
Your first instinct is to hold the gun like a pen, hovering over the workpiece. That’s how you get spiderwebs of glue strings everywhere. The right method is lower and faster.
Rest the nozzle lightly on or just above the surface you’re gluing. You want about 1/8 inch of clearance. Squeeze the trigger with steady, even pressure and move the gun along your intended path. Don’t stop and start. A continuous motion lays down a smooth bead; a hesitant one makes blobs. For large surfaces, apply glue in a series of dots or a zigzag pattern rather than trying to cover the whole area, the adhesive sets fast.
Common mistake: Applying glue to both surfaces. You only need it on one. Hot glue bonds by cooling, and if you coat both sides, the glue skins over before the pieces meet, creating a weak bond.
The open time, how long you have to join the parts, is short. The UHU manual says press parts within 15–20 seconds. Parkside specifies holding for about 30 seconds, and Henkel Loctite specifies 20–30 seconds. Have your pieces aligned and ready. Press them together firmly and hold them without shifting for that full half-minute. You’ll feel the glue firm up.
This is where the practical details of how to use a hot glue gun matter, as some models may struggle to maintain a consistent temperature under load. For projects requiring a continuous bead, a model known for consistent performance is the reliable choice. The bead starts hot and ends cool, leading to an inconsistent bond. For a project longer than a few inches, a corded model is the reliable choice.
The Right (and Wrong) Way to Shut Down
You’ve finished your project. The gun is hot, and a three-inch stick is still in the chamber. Do you pull it out? Absolutely not.
Where this goes sideways: Yanking a partially melted stick from the gun. The 3M and UHU manuals explicitly warn this can damage the feed mechanism irreparably. The soft glue sticks to the internal sleeve, and when it cools, it locks everything up.
The correct shutdown procedure has two goals: clear the nozzle of molten glue so it doesn’t harden into a plug, and protect the mechanism.
- With the gun still hot and on its stand, squeeze the trigger to extrude the remaining stick until the drive mechanism stops.
- Immediately feed a fresh glue stick all the way in. Now extrude this new stick until about an inch of fresh adhesive comes out of the nozzle. This pushes any old, potentially charred adhesive out of the heating chamber.
- Unplug the gun. Leave it sitting upright on its stand to cool completely.
Why the fresh stick? The 3M manual recommends this as an optional shutdown to cool the applicator and prevent charring. A gun cooled with an empty chamber can let residual heat bake the last bit of glue into a carbonized plug. That plug is what causes “backmelt” and a complete blockage on your next startup.
What to Do When Your Glue Gun Won’t Work
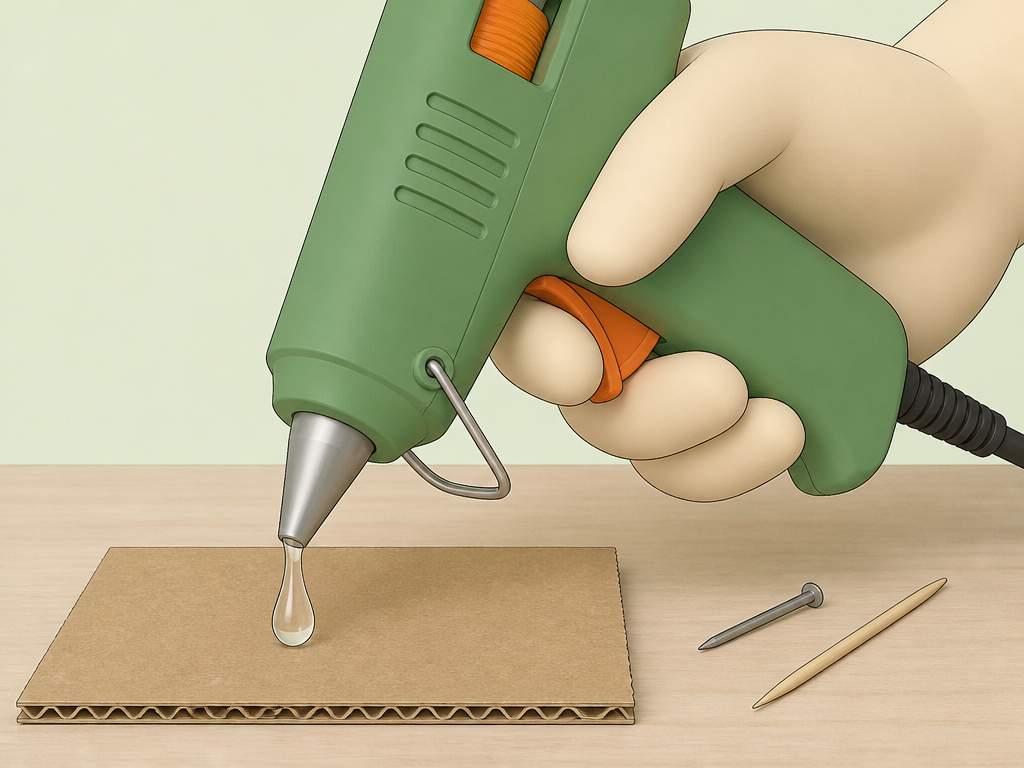
A glue gun that’s powered on but won’t extrude adhesive usually has a cold nozzle or a plugged tip. The fix depends on the symptom.
Problem: No glue comes out, trigger is hard to squeeze.
- Likely Cause: The gun isn’t fully heated, or the nozzle is plugged from improper shutdown.
- Fix: Wait the full warm-up time. If still nothing, unplug the gun and let it cool completely. Once cool, use a toothpick or a small finishing nail to gently clear the nozzle orifice. Do not use a metal object that could scratch the interior. Plug the gun back in, heat fully, and try extruding with a fresh stick.
Problem: Glue drips constantly from the nozzle, even without touching the trigger.
- Likely Cause: This can be a normal occurrence during warm-up. If it continues after heating, a worn seal or over-softened glue stick could be the issue.
- Fix: Hold the gun over a scrap piece of cardboard during warm-up to catch drips. If dripping persists, the gun may need to sit upright longer to equalize internal pressure. Use higher-temperature sticks if your model supports them.
Problem: The glue comes out in thin, weak strings instead of a thick bead.
- Likely Cause: The glue is too cool, you’re holding the gun too high, or you’re using low-temperature sticks in a high-temperature setting.
- Fix: Ensure the gun is fully heated. Hold the nozzle closer to the work surface. Match your glue sticks to the gun’s temperature setting, don’t use low-temp sticks expecting a strong, fast-setting bond.
If you left the gun on overnight by accident, the tip is almost certainly plugged. Follow the cool-down and physical clearing process above. A plugged tip from extended operation can occur.
Hot Glue Gun Safety: Beyond “Be Careful, It’s Hot”
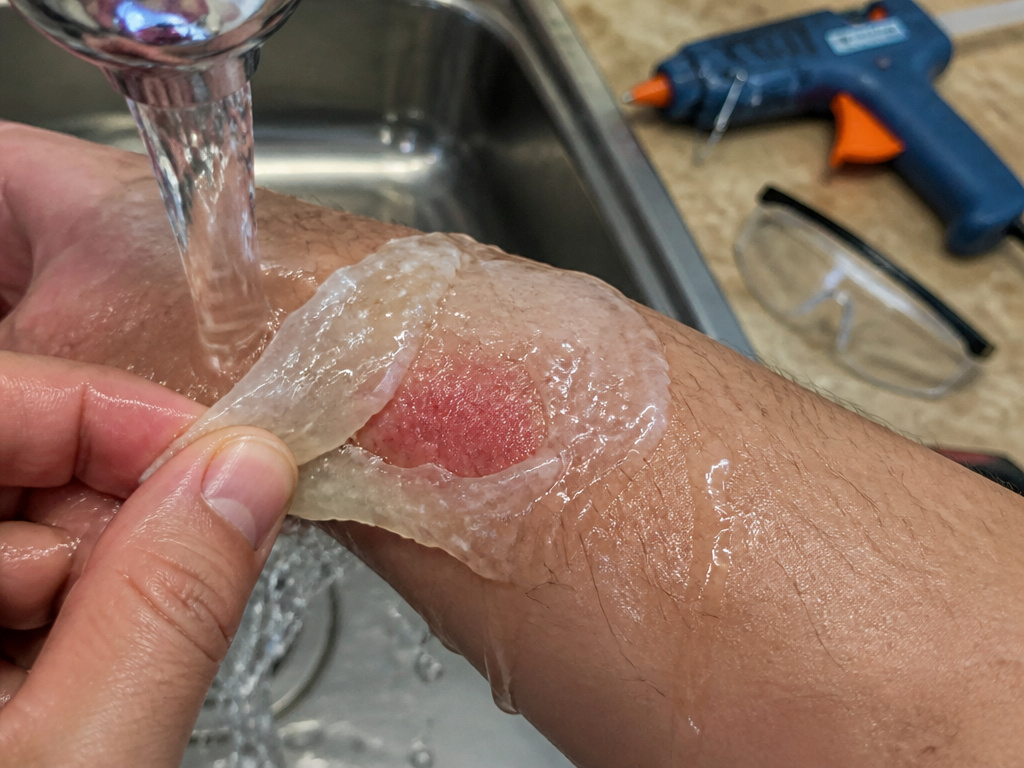
Safety glasses are essential. Molten glue can spit or string up into the air, and a drop in the eye is a trip to the emergency room. The DeWalt DWHTGR50 manual lists “always use safety glasses” as a core rule.
The real risk is the burn. If 400°F (200°C) adhesive lands on your skin, your instinct is to peel it off. That’s the worst thing you can do.
The part nobody mentions: Peeling hot glue off skin pulls away the top layer of epidermis with it, turning a first-degree burn into a second-degree wound that scars.
Every manufacturer manual, from Worx and Parkside to Henkel Loctite, agrees on the first aid: immediate and prolonged cooling. Don’t try to remove the glue. Put the affected area under cold running water or immerse it in cold water for several minutes. The Henkel manual says to immerse it. The cold water cools the glue and the skin beneath it, minimizing tissue damage. The glue will pop off on its own once it’s fully cooled. If the burn is severe, seek medical attention.
Keep the gun away from anything flammable. The 3M and UHU manuals warn against use near combustible materials or in explosive environments. That means don’t use it over a rag soaked in solvent or in a dusty workshop without proper ventilation.
Finally, know the limits of the bond. Hot glue is not structural. The 3M and DeWalt manuals state that adhesives used in these tools can soften at 140°F (60°C). Don’t use it to repair a chair leg or a garden tool that will bear weight or be left in a hot car. That’s a job for epoxy or construction adhesive.
Choosing Projects and Materials
Hot glue excels at bonding porous materials where it can seep into tiny voids and lock in place as it cools. It’s perfect for:
- Crafts & Fabrics: Felt, cardboard, wood ornaments, dried flowers.
- Quick Repairs: Reattaching a loose carpet edge, sealing a small gap in a window frame, securing a wire in place.
- Temporary Fixturing: Holding a small trim piece in place while a slower-setting adhesive cures.
It fails on smooth, non-porous surfaces like glass, metal, or most plastics (especially polyethylene and polypropylene). The glue can’t mechanically grip, so the bond pops off with a little flexing. For these materials, you need a specialized adhesive or proper surface preparation.
If you must glue a non-porous material, scuff the surface with sandpaper to give the glue something to grip. Warm the metal or glass slightly first with a heat gun, as the Parkside manual recommends this for better adhesion on cold materials. Apply the glue and clamp immediately.
Remember, a hot glue gun is a tool for speed and convenience, not ultimate strength. Understanding that divide is what separates a messy, frustrating job from a clean, lasting one.
Testing flow on scrap material
Before starting your actual project, always test the glue flow on a piece of scrap material. This step confirms the gun is at the correct operating temperature and allows you to gauge the speed and thickness of the bead. Press the trigger gently and observe how the glue emerges; it should flow smoothly without sputtering. Testing also helps you practice controlling the amount of glue you apply. Use this opportunity to check how quickly the glue sets on your specific scrap material, as this can vary. This simple practice prevents messy mistakes and wasted adhesive on your final workpiece.
Frequently Asked Questions
How long does hot glue from a glue gun take to dry?
Hot glue doesn’t “dry”; it solidifies as it cools. A bond is typically handleable within a few minutes, depending on the glue layer thickness and ambient temperature; specific models cite times from 2 to about 5 minutes. Full bond strength, however, takes longer. The UHU Hot Melt Glue Gun manual states final strength is reached after 2 hours.
Can I use any size glue stick in my gun?
No. You must use the diameter specified for your model. Using a smaller stick (like a 7mm in an 11mm chamber) causes poor feeding and uneven melting. A larger stick won’t fit. Always check your manual for the required glue stick diameter.
What’s the difference between high-temp and low-temp glue guns?
The operating temperature. Operating temperatures vary by model. For example, the Worx WX746L runs at about 400°F (200°C), while the Parkside PNKP 105 C2 runs between 105–140°C. Higher temperatures are often used for stronger bonds on materials like wood, while lower temperatures are safer for delicate materials. You can explore the high-temp vs low-temp glue guns decision in more detail.
How do I clean the nozzle on my glue gun?
Wait for the gun to cool completely. Once cool, any hardened glue on the exterior of the nozzle can often be picked off with a fingernail or gently peeled away. For a clogged tip, use a wooden toothpick or a small pin to clear the orifice. Never use a knife or metal tool that could damage the interior.
Is a cordless glue gun worth it?
For pure convenience and small, quick jobs away from an outlet, yes. For any project requiring more than a few inches of continuous bead, no. Cordless models struggle to maintain consistent temperature, which leads to weaker bonds. They also have a finite runtime. For workshop use, a corded model is more reliable.
The Bottom Line
A hot glue gun is less about the tool and more about the ritual. Load the right glue gun sticks, wait the full warm-up time, apply with the nozzle low, and shut down by extruding a fresh stick. That sequence prevents 90% of jams, burns, and failed bonds.
Its sibling tool, the staple gun, is for mechanical fastening; this one is for instant adhesion. Remember the temperature limit: if what you’re gluing will ever get warmer than a hot summer day, choose a different adhesive. For everything else, from crafts to quick fixes, a glue gun is the fastest way from loose pieces to a finished project. Just keep the cold water running.
