
Using an Impact Wrench for Lug Nut Removal: How to Choose
This post contains affiliate links. As an Amazon Associate, we earn from qualifying purchases.
Using an impact wrench for lug nut removal requires matching the tool’s power to your vehicle, using impact-rated sockets, and following a specific loosening sequence with the tire on the ground. A cordless impact wrench with sufficient breakaway torque is needed for passenger cars and light trucks. You then finish tightening with a hand torque wrench to the exact manufacturer specification, which varies by vehicle (e.g., 150 lb-ft for a Ford with M14x1.5 studs, 145 lb-ft for a RAM ProMaster with M16x1.50 studs).
That specific torque number isn’t a suggestion. It’s the engineered limit of the stud’s tensile strength. Exceed it by even 50%, and you’re stretching metal that’s supposed to stay elastic. The nut won’t feel tighter; the stud will just be one pothole away from shearing.
What follows is the full sequence: how to pick the right wrench, the safe order of operations that keeps the car on the jack, and what to do when a lug nut laughs at your impact gun. By the end, you’ll know why Ford issued a technical service bulletin banning standard impact use for tightening back in 1998, and why that warning still matters today.
Key Takeaways
- Use the impact wrench only for loosening and snugging; final tightening requires a calibrated torque wrench set to your vehicle’s exact specification.
- Loosen and tighten lug nuts with the tire on the ground before jacking; trying to break a nut loose with the wheel in the air can spin the vehicle off the jack.
- Always use 6-point impact-rated sockets; a standard chrome socket can shatter under the hammering force and send sharp fragments flying.
- Retorque lug nuts after driving; sources disagree on the interval (RAM says 25 miles, Ford says 100 miles, NACG says within 24 hours or 150 km), but all agree it’s a mandatory step.
- A cordless impact wrench with 300-500 ft-lbs of breakaway torque is sufficient for most cars and light trucks; heavy-duty trucks may need 1,000 ft-lbs or more.
Why Torque Specifications Aren’t Guesses
The torque specification printed in your owner’s manual, like Ford’s 150 lb-ft or RAM’s 145 lb-ft, is a physical limit, not a best practice. It’s calculated from the stud’s grade, diameter, and the clamping force needed to keep the wheel seated flat against the hub without yielding the metal.
A lug nut torqued to 150 lb-ft on a clean, dry thread creates a precise clamp load. The same torque applied to a rusty or lubricated thread creates a wildly different, and dangerous, clamp load.
That’s why every manual, from Ford to NACG procedures, states torque specs are for threads free of dirt and rust. A little anti-seize or road grime changes the friction coefficient, and your impact wrench’s raw power becomes a liability. The Ingersoll Rand engineering director put it bluntly: an application needing 80 ft-lbs can easily receive 300-400 ft-lbs from the wrong tool.
The risk isn’t just a loose wheel. Overtorquing stretches studs, warps brake rotors, and distorts wheel hubs. A Ford technical service bulletin (TSB 98-5A-4) for 1972-1998 models explicitly linked air impact tool use to brake vibration and hub damage. Their solution was a specialized “Accutoro” socket to limit output, or the directive to avoid impacts for tightening altogether.
The 7-Step Tire Change Sequence (Right Tools, Right Order)
This isn’t just about power; it’s about procedure. Get the sequence wrong, and you risk the car falling, damaging components, or creating a safety hazard. Here is the safe, manufacturer-backed order.
- Gather the Right Tools. You need a jack, jack stand, lug wrench, your impact wrench, impact-rated sockets, and a hand torque wrench. Never rely on the impact for final torque.
- Break Lug Nuts Loose (Tire on Ground). Set your impact wrench to its highest reverse torque. With the car’s weight on the tire, break each lug nut loose with a short burst. Do not remove them yet. This prevents the wheel from spinning when it’s in the air.
- Jack Up the Vehicle and Secure It. Place the jack at the manufacturer’s specified lift point. Raise the vehicle, then immediately place a jack stand under a solid axle or frame member. Lower the car onto the stand. Never work under a vehicle supported only by a jack.
- Remove Lug Nuts and Tire. Now you can zip the pre-loosened lug nuts off fully with the impact and pull the tire away.
- Install Spare and Snug Lug Nuts. Hand-thread the lug nuts to ensure no cross-threading, then use the impact on a low setting to snug them until they are just seated. The RAM manual warns: “To avoid the risk of forcing the vehicle off the jack, do not tighten the lug nuts/bolts fully until the vehicle has been lowered.”
- Lower Vehicle and Torque in Star Pattern. Lower the car so the tire just touches the ground, taking full weight off the jack stand. Now, with the vehicle’s weight on the tire, use your hand torque wrench in a star pattern to tighten to spec. The RAM ProMaster manual specifies this pattern and says to tighten each nut twice.
- Retorque After Driving. This step is essential. Settling occurs. Ford says within 100 miles. RAM says check after 25 miles. The North American Construction Group standard says within 24 hours or 150 km. Pick the shortest interval for your vehicle and do it.
Choosing the Right Impact Wrench and Socket
Not all impacts are created equal, and the wrong socket is a genuine safety hazard. Match the tool to the job.
Ingersoll Rand provides a useful general guide: passenger cars (80–100 ft-lb), light trucks/SUVs (100–140 ft-lb), and heavy-duty trucks (450+ ft-lb). Your impact wrench needs enough breakaway torque (the force to loosen a tightened nut) to handle these. A mid-torque cordless model in the 300-500 ft-lb range covers most cars and light trucks. For a heavy-duty truck, a higher-torque impact wrench is required.
The socket is just as critical.
Common mistake: Using a chrome vanity socket on an impact wrench. The sudden hammering force can shatter the hardened chrome, turning the socket into sharp shrapnel.
You must use impact sockets. They are made from softer, tougher steel that flexes slightly to absorb the blows without cracking. They’re also typically black oxide or bare metal, not shiny chrome. A 6-point socket is superior to a 12-point for lug nuts, more contact area on the flat sides means less chance of rounding off the corners.
| Vehicle Type | Typical Torque Spec | Minimum Recommended Impact Wrench | Socket Drive & Type |
|---|---|---|---|
| Passenger Car | 80-100 ft-lbs | 300 ft-lb breakaway | 1/2″, 6-pt Impact |
| Light Truck/SUV | 100-150 ft-lbs | 400-500 ft-lb breakaway | 1/2″, 6-pt Impact |
| Heavy-Duty Truck | 450+ ft-lbs | 1,000+ ft-lb breakaway | 3/4″, 6-pt Impact |
For a balanced recommendation, a 1/2-inch drive cordless impact like the Ingersoll Rand W7153 IQV20 or similar from major brands provides more than enough power for the average homeowner or DIYer. It eliminates air hoses and maintains portability.
When Your Impact Wrench Won’t Budge a Nut
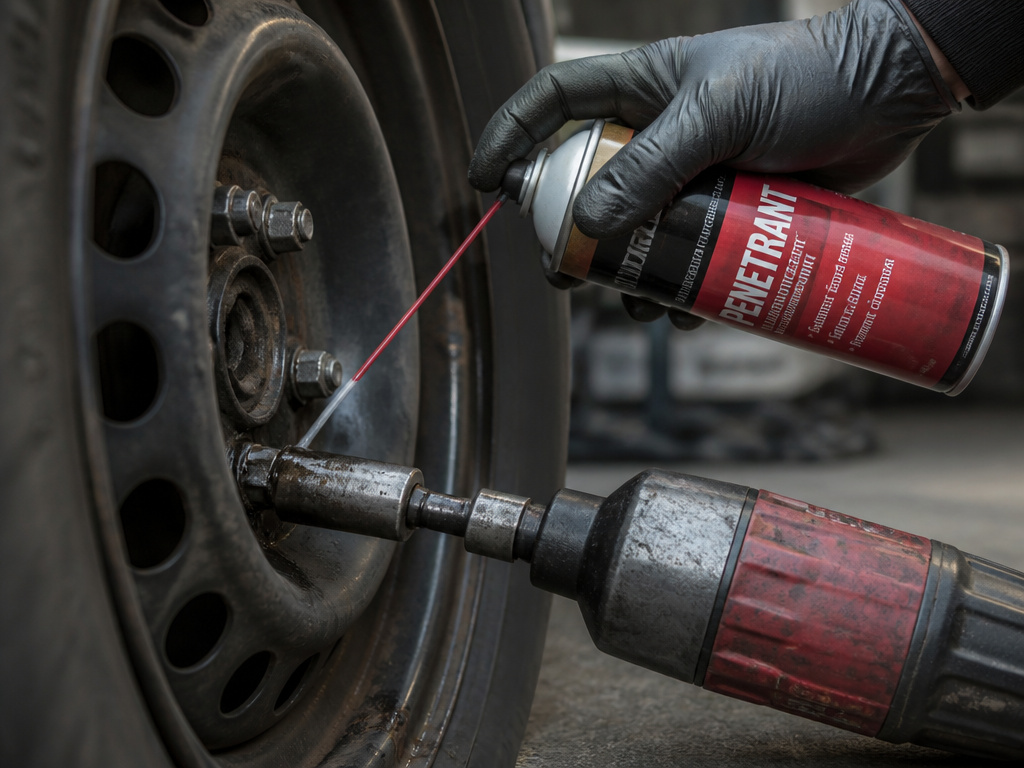
You’ve got the right tool for using an impact wrench for lug nut removal, you’re pushing 500 ft-lbs, and the lug nut isn’t moving. Before you crank the power and risk snapping a stud, work through this diagnostic list.
First, feel and listen. An impact wrench in good working order will produce a rapid, deep thud-thud-thud as the hammer strikes. If you hear a high-pitched whirring with no impact, the nut might already be loose, or the socket isn’t fully seated. If you feel massive vibration but no rotation, the fastener is likely seized or corroded.
- Penetrating Oil is Your First Resort. Soak the lug nut thoroughly with a quality penetrant like PB Blaster or Kroil. Let it sit for 10-15 minutes. The creaking sound of the oil working its way in is often audible. Try the impact again.
- Apply Controlled Heat. If oil fails, use a propane or MAP gas torch to heat the lug nut only, not the wheel stud. The goal is to expand the nut slightly, breaking the corrosion bond. Never heat an alloy wheel, it can warp or discolor.
- Breaker Bar for Backup. If heat doesn’t work, you need more mechanical force. Use a long breaker bar (never a ratchet) on the stuck nut while the wheel is still on the ground. The steady, high torque can break a seizure that an impact’s hammering can’t. This is where a technique for removing seized bolts becomes essential.
- The Last Resort: Extraction. For a completely rounded or broken lug nut, you’ll need a dedicated extractor socket or a drill-and-easy-out kit. This is a repair, not a removal.
Remember, locking wheel lug nuts are a special case. A Ford technical service bulletin (TSB 98-5A-4) explicitly warned against using standard air impact tools for tightening wheel lug nuts. The key is fragile and the mechanism can be destroyed by the impact’s vibration.
The Critical Retorquing Debate
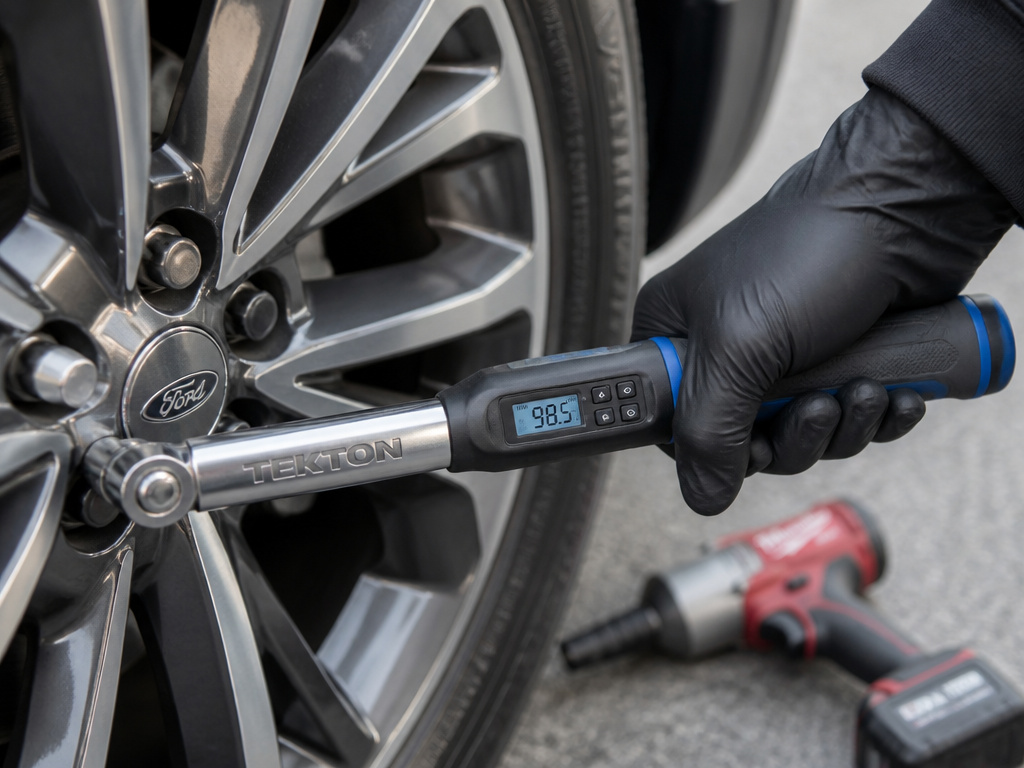
You’ve torqued everything perfectly. You’re done, right? Not according to every manufacturer and safety standard. Lug nuts must be retorqued after driving.
Here’s where sources disagree on the timing, but not the necessity. The NACG standard for commercial vehicles mandates retorquing within 24 hours or 150 km. The RAM ProMaster manual says check torque after 25 miles (40 km). The Ford manual says within 100 miles (160 km). The NACG standard says within 24 hours or 150 km. Why the difference?
It comes down to settling. As you drive, the wheel, hub, rotor, and lug nuts undergo thermal cycles and vibration. Microscopic high spots on the mating surfaces wear down, and the clamp load relaxes slightly. A 2024 NHTSA recall document for Vermeer equipment cited incorrect torque specs leading to loose lug nuts and potential wheel separation, underscoring that this settling is a real, documented failure mode.
Where this goes sideways: Skipping the retorque because the drive home felt fine. The clamp load loss happens gradually, and the first sign can be a wobble at highway speed, followed by elongated stud holes or worse.
My rule is simple: retorque to the original specification after your first short drive, using the same star pattern. If you followed step one and cleaned the mounting surfaces, the torque should hold. If a nut turns more than a fraction of a turn to reach spec, something settled, and you just caught it.
Impact Wrench vs. Impact Driver: Clearing the Confusion
This is a common point of confusion in the shop. An impact wrench is designed for high-torque applications like lug nuts and suspension bolts. An impact driver is for driving screws and smaller fasteners, with higher rotational speed but much lower torque.
Using an impact driver for lug nuts is not recommended. Even a powerful driver might hit 150-200 ft-lbs, which is at the lower edge of what’s needed just to install lug nuts on a light truck, let alone remove a seized one. You’ll likely stall the tool, damage the driver’s anvil, or round off the lug nut. The form factor is all wrong, too, the collet is for 1/4-inch hex bits, not half-inch drive sockets.
Stick with the right tool. A dedicated impact wrench has the mass, anvil design, and power profile to shock fasteners loose without transferring all that reactive force into your wrist.
Safety Gear and Final Precautions
Power tools demand respect. An impact wrench is one of the most dangerous tools in the box if used carelessly.
- Hearing Protection: Impact tools exceed 85 dBA instantly. The NACG procedure states this plainly. Wear earmuffs or plugs.
- Eye Protection: Always. A shattered socket, a broken stud, or flying rust scale is a real risk. Always wear proper eye protection.
- Gloves: Wear mechanics’ gloves to protect your hands from sharp edges and pinch points, but ensure they fit snugly to avoid getting caught in the tool.
- Two Hands: Use two hands to control the tool, especially when breaking nuts loose. The NACG guideline warns not to place your hand in the “line of fire” near the reacting socket.
- Cold Weather Caution: The NACG standard has a specific warning for temperatures below -20°C (-4°F). Condensation from air tools can freeze on mating surfaces, and material properties change. In extreme cold, final torque must be verified with a manual torque wrench.
Frequently Asked Questions
Is it okay to use an impact wrench to remove lug nuts?
Yes, an impact wrench is an excellent tool for removing lug nuts. Its hammering action is highly effective at breaking corrosion and overcoming overtightened fasteners. The safety rule is to use it only for removal and initial snugging during installation. Final tightening to the exact manufacturer specification must be done with a hand torque wrench.
How much power does an impact wrench need to remove lug nuts?
For most passenger cars and light trucks, a cordless impact wrench with 300-500 ft-lbs of breakaway torque is sufficient. This covers the required installation torque (typically 80-150 ft-lbs) plus a safety margin for corrosion and overtightening. Heavy-duty trucks may require 1,000 ft-lbs or more. Always check your vehicle’s manual for its specific torque specification.
Why won’t my impact wrench take off my lug nuts?
If your impact wrench isn’t removing a lug nut, the cause is usually insufficient power for a seized fastener, a worn or incorrect socket, or user error. Ensure you’re using a fully charged battery (for cordless) or adequate air pressure (for pneumatic). Soak the nut in penetrating oil. Use a 6-point impact socket fully seated on the nut. If it still won’t budge, use a breaker bar for initial loosening before using the impact.
Which impact wrench is best for removing lug nuts?
For most DIY users, a 1/2-inch drive cordless impact wrench from a major brand like Ingersoll Rand, Milwaukee, or DeWalt offers the best balance of power and convenience. Look for a 1/2-inch drive cordless model with sufficient torque for your vehicle’s requirements. For professional or heavy-duty use, a pneumatic 1/2-inch or 3/4-inch drive impact may be necessary.
Can I use regular sockets on an impact wrench?
No. You must use impact-rated sockets. Regular chrome sockets are hardened and can shatter under the hammering force of an impact wrench, creating a serious projectile hazard. Impact sockets are made from softer, tougher steel that flexes to absorb the blows. You can learn more about the critical differences in our guide to impact sockets.
The Bottom Line
Using an impact wrench for lug nuts boils down to one principle: it’s a removal and rough-assembly tool, not a precision instrument. Its job for using an impact wrench for lug nut removal is to break things loose and get them snug. The precision job of applying the final, life-saving clamp load belongs to the torque wrench.
If you remember nothing else, remember this: find your vehicle’s torque spec, it’s in the manual or often in the door jamb, and buy a torque wrench that covers that range. Torque the nuts in a star pattern with the car on the ground. Then, drive 25 miles and check them again. That last step is what separates a wheel that stays on from one that has a chance of coming off.
Everything else, the power of the impact, the socket type, the penetrating oil, serves that final, measured twist of the wrench. Get that right, and the impact wrench becomes the incredible time-saver it’s meant to be. Get it wrong, and you’re relying on hope, which is a terrible fastener.
