
Why Is My Cordless Nail Gun Jamming? 5 Causes and Fixes
This post contains affiliate links. As an Amazon Associate, we earn from qualifying purchases.
A cordless nail gun jams when fasteners are wrong or damaged, the magazine is dirty, the battery is weak, or internal parts are worn. The fix is always the same: disconnect the power, remove the fasteners, and clear the jam with the right tool, following the specific steps for your brand like DEWALT or SENCO.
That’s the direct answer. The real-world fix, though, depends on which of those five things went wrong first. A jammed nail is a symptom, not the disease. You can pull it out and keep working, but if you don’t fix the root cause, it’ll jam again in ten minutes. This is exactly why someone might ask, “Why is my cordless nail gun jamming?”
What follows is a map for answering why is my cordless nail gun jamming. We’ll walk through the five most common jamming causes, give you a step-by-step guide to clear any jam safely, and show you when it’s time to put down the screwdriver and call for service.
Key Takeaways
- Mismatched fasteners cause most first-time jams. The collation angle, length, or gauge must match your tool’s spec sheet, using 21-degree nails in a 30-degree magazine can cause nails to bend.
- A weak or dying battery is a cordless-specific jam trigger. The motor lacks the torque to drive the nail fully, leaving it half-stuck and jamming the next round. A fresh, fully charged battery is essential.
- Dirt and sawdust act like glue in the magazine. A clean and dry magazine is the single best preventive step, wipe it down every second coil of nails.
- Never force a jam. Follow the OEM steps: remove the battery, unload the magazine, then use the provided tool (often a 4mm hex key) to open the mechanism. Forcing it breaks the driver blade.
- Three jams in one hour means stop. If you clear a jam and it re-jams immediately after loading, something internal is worn or misaligned. Continuing will cause more damage.
The 5 Most Common Causes of Cordless Nail Gun Jams
Jams don’t happen at random. They follow a short list of physical failures that answer why is my cordless nail gun jamming. If you learn to spot which one you’re dealing with, you can clear the jam more efficiently.
Where this goes sideways: Assuming all jams are the same. A jam from a wrong nail looks different from a jam from a weak battery, and the fix for one can make the other worse.
1. Wrong or Damaged Fasteners
This is the number one cause, especially for new tools or when switching between projects. The magazine and driver blade are precision parts designed for a specific nail size, gauge, and collation angle.
The RYOBI support guide is clear: you must confirm that the collation angle of the nails matches the specifications of your tool’s magazine. You’ll find this angle on the tool’s rating plate. A 34-degree nail in a 30-degree magazine doesn’t sit flush; it cocks slightly sideways. The driver blade hits it off-center, and the nail bends instead of driving.
Damaged nails are just as bad. Nails with corrosion, bent tips, or imperfect plastic collation will hang up. Always check a fresh coil before loading. If you see one bent nail in the strip, assume there are more.
2. A Dirty or Gummy Magazine
Sawdust, wood sap, and moisture mix into a paste inside the magazine. That paste grabs the nail strip and slows its progress. The spring-loaded pusher can’t keep up, and the next nail doesn’t seat fully against the driver blade path.
The RYOBI advice applies to every brand: check that the magazine is clean and dry with no sticky residue. Do this more frequently with regular use. A quick wipe with a dry cloth after each coil can prevent many feed-related jams.
3. Low Battery Power (The Cordless Culprit)
A pneumatic nailer jams from low air pressure. A cordless nailer jams from low battery voltage. It’s that simple. The motor needs a certain torque to drive the nail home quickly. On a dying battery, the motor stalls mid-cycle.
The nail gets driven halfway and stops. Now the driver blade is extended, a half-shot nail is stuck in the nosepiece, and the next nail is trying to feed behind it. Everything locks up. This is why most cordless nailer manuals tell you to start with a fully charged battery and stop when the power indicator drops to one bar.
4. Incorrect Loading Technique
It sounds basic, but it’s a frequent offender. There are two big mistakes here. First, loading nails backward. The nail points must face the nosepiece. Second, “slamming” the follower. When you reload, you must gently push the nail strip in until the spring takes over. Slamming it forces the strip in at an angle, misaligning the first few nails.
5. Worn or Damaged Internal Parts
This is the cause you hope it isn’t. After thousands of cycles, parts wear. The driver blade can develop burrs. The magazine lips can deform. O-rings and seals degrade. Wear isn’t a sudden failure; it’s a creeping increase in jam frequency.
The DeWalt DCN692 manual gives the rule: should nails jam frequently or the driver blade continually fail to reset, have the tool serviced by an authorized DeWalt service center. One jam is an incident. Three jams in an hour, after you’ve checked nails, battery, and cleanliness, is a sign.
| Cause of Jam | What It Looks/Sounds Like | Immediate Action |
|---|---|---|
| Wrong Nails | Nails feed but bend or stop; tool makes a straining sound. | Stop. Verify nail specs against tool rating plate. |
| Dirty Magazine | Nails feed slowly or not at all; visible dust/debris. | Unload, wipe magazine clean and dry. |
| Low Battery | Nail drives halfway and stops; tool may flash a low-power light. | Swap to a fully charged battery. |
| Worn Parts | Increasing jam frequency over time, with no other cause. | Stop DIY. Schedule professional service. |
Step-by-Step: How to Clear a Jam Safely
Every manufacturer’s manual says the same thing first: disconnect the power. For a cordless tool, that means removing the battery. Do not skip this. The mechanism can be under spring tension, and a accidental trigger pull with a nail in the chamber is a fast track to the emergency room.
Before you start: The magazine spring is under tension. Wear safety glasses. Keep fingers clear of the nosepiece. Follow your tool’s specific steps, the general process below is a framework.
Here is the universal clearing sequence, drawn from the DeWalt DCN692, SENCO F35FRHXP, and WORX WX842L manuals.
- Remove the battery. This step is mandatory. It eliminates the risk of the tool firing while you’re working on it.
- Engage the trigger lock-off if your tool has one (like the DeWalt DCN692). This adds a mechanical safety.
- Unload all the non-jammed fasteners. The RYOBI guide says to remove any nails or staples that aren’t jammed to relieve pressure. Pull the spring-loaded pusher back and take out the good nail strip.
- Access the jam. This is where brands differ.
- DeWalt DCN692: Use the provided hex tool to loosen the two hex bolts at the top of the magazine. Rotate the magazine forward to remove the jammed nail.
- SENCO F35FRHXP: Remove the magazine using the attached Allen key. Three bolts hold it, and they don’t need to be fully removed.
- WORX WX842L: Pull up on the Tool-Free Jam Release, unhook the latch, and open the magazine.
- Remove the jammed nail. Use needle-nose pliers. Pull straight out. Don’t twist or yaw it sideways, or you might damage the delicate guides inside the nosepiece.
- Inspect and reset. Before reassembling, check that the driver blade is in its “home” position. The WORX manual says if it’s not, use a flat head screwdriver to push it back. Look for any other bent nails or debris and remove them.
- Reassemble and test. Tighten any bolts you loosened. For the DeWalt DCN920/DCN930, the service bulletin specifies a critical torque: 30-35 in. Lbs. for the magazine attachment bolts. Under-tightening causes misfires and jams. Load a fresh coil of correct nails, insert a fresh battery, and fire two or three test shots into scrap wood.
Brand-Specific Jam Clearing Guides
While the principles are universal, the latches and bolts are not. Here’s what you need to know for three major cordless brands.
DeWalt Cordless Nailers (DCN692, DCN920, DCN930)
DeWalt designs its tools with a specific clearing procedure. The DCN692 uses a hex tool (K) to loosen two hex bolts (Q). The newer DCN920/930 series, according to a June 2024 service bulletin, requires a 4mm hex wrench for its magazine bolts.
If the driver blade is down, rotate the stall release lever. If it doesn’t reset, the bulletin notes that manual resetting with a long screwdriver may be necessary. The bulletin directly ties improper bolt torque to “unwanted nail jamming and/or misfiring during initial usage.”
SENCO Fusion (F35FRHXP)
A SENCO Fusion tool tells you it’s jammed with a flashing red light. The manual is explicit: remove the battery, unload fasteners, and remove the magazine. It warns that the tool contains pressurized air at all times, even without the battery.
For a severe jam where the driver blade locks in place, the manual states the red light will not clear and the tool requires service. This is a built-in safety to prevent you from forcing a damaged mechanism.
WORX & RYOBI Brad Nailers
These brands often feature tool-free jam release levers. The WORX WX842L has a Tool-Free Jam Release you pull up on. The RYOBI troubleshooting guide adds a useful tip: insert a flat-blade screwdriver into the driving mechanism and gently push the firing pin back to expose a stubborn jam.
Both emphasize keeping the magazine clean and dry and checking for straight, good condition nails with no corrosion.
When to Stop DIY and Seek Professional Repair
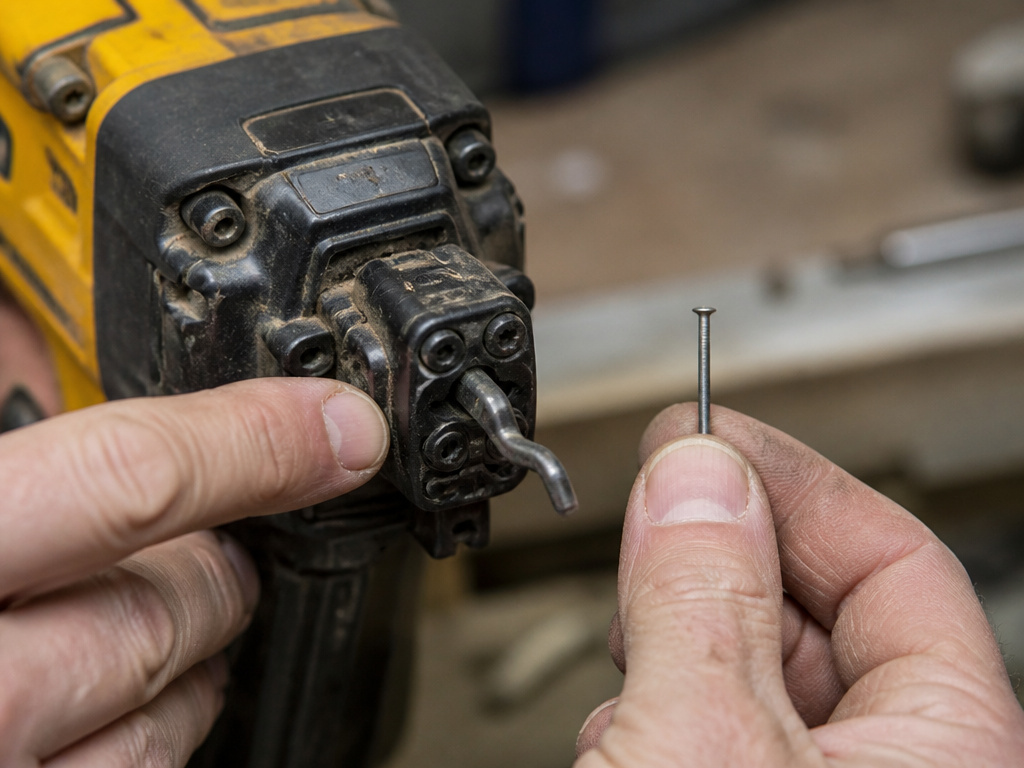
You can fix a lot. You can’t fix everything. Knowing the line saves you money and prevents turning a small problem into a paperweight.
Here are the signs your jam needs a pro:
- The jam clears, but re-jams immediately with correct nails and a full battery.
- The driver blade will not reset even after using the stall release lever and manually cycling it.
- Visible damage to the driver blade, magazine lips, or nosepiece.
- Unusual noises (grinding, scraping) during operation that weren’t there before.
- Frequent stalling in material the tool used to handle easily.
The SENCO manual frames this well: their warranty does not cover seals, driver blades, piston stops, and piston/driver assembly damaged by misuse. If you force a jam, you’re now in that “misuse” category. An authorized service center has the jigs, parts, and knowledge to do it right.
I’ve seen a few tools where the owner fought a jam for an hour, got the nail out, and then the tool never fired right again. The force they used tweaked the magazine alignment by a fraction of a millimeter. It’s cheaper to walk away and call for help than to win the battle but lose the war.
How to Prevent Jams Before They Start
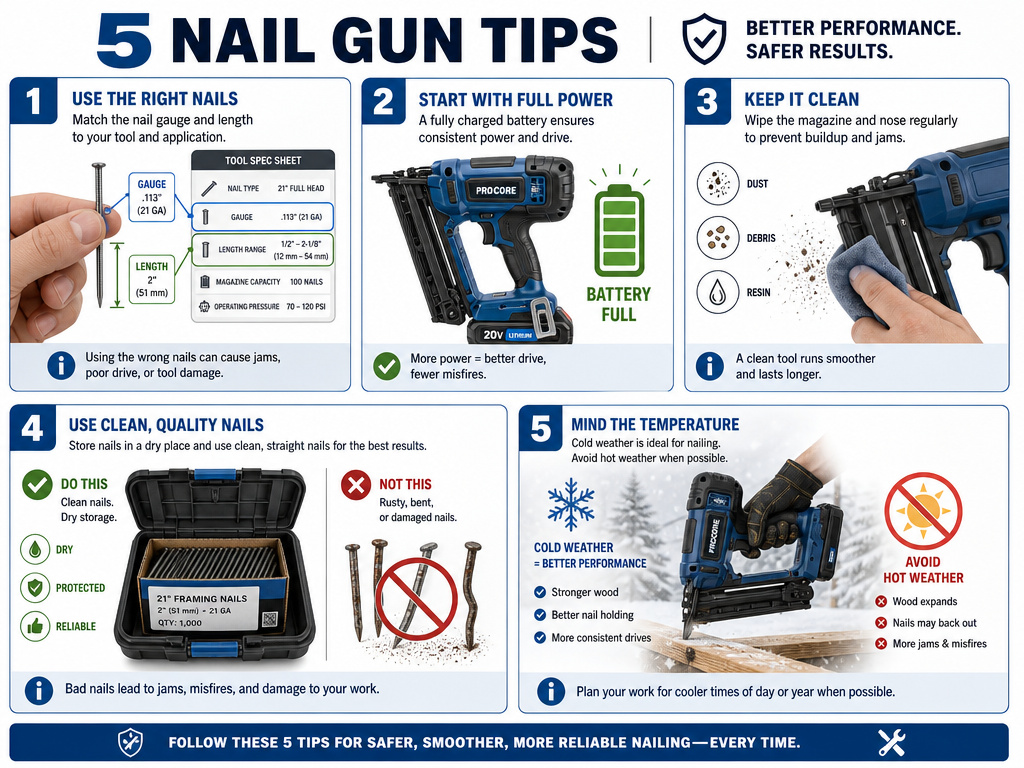
Prevention is simpler than the cure. Build these five habits.
- Match the nail to the tool. Keep the spec sheet. Before buying nails, check the gauge, length, and collation angle.
- Start with a full battery. Treat your cordless nailer like a precision instrument, not a brute-force tool. A full battery ensures consistent power.
- Clean the magazine every time you reload. A five-second wipe with a dry cloth clears sawdust. A quick blast with compressed air periodically is even better.
- Store nails properly. Keep them in a dry place. Don’t use rusty, corroded, or bent nails.
- Follow the manual for break-in and environment. The DeWalt DCN692 manual has specific advice: in cold weather, actuate the tool 10 or 15 times into scrap lumber before using. In hot weather, keep the tool out of direct sunlight.
How does lack of lubrication cause jams?
A dry or dirty magazine is a direct path to jams. The magazine channel needs to be clean and dry, with no sticky residue from wood sap or old adhesives, so nails can slide freely. With regular use, sawdust and debris build up, creating friction that can stop a nail strip dead. Always remove the battery before cleaning. Check that your nails are straight and free of corrosion, as damaged fasteners can also grind against the sides. For some tools, a specific collation angle is required, and using the wrong nails adds extra stress. A simple wipe-down after each use prevents most of these problems.
Frequently Asked Questions
Why does my nail gun keep getting jammed?
If it keeps jamming after you clear it, you haven’t fixed the root cause. The most likely reasons are persistently using the wrong nails, a dirty magazine you haven’t cleaned, a weak battery, or an internal wear issue like a worn driver blade. Diagnose by process of elimination: change one variable (new battery, different brand of nails, deep clean) and see if the jamming stops.
What to do if your gun keeps jamming?
Stop the cycle. First, ensure you’re following the exact step-by-step clearing process for your brand. Second, implement all the preventive measures: correct nails, full battery, clean magazine. Third, if jams persist, stop using the tool. You are likely dealing with internal damage, and continued use will make a rebuild more complex and expensive.
Why is my nail gun not releasing nails?
If the tool fires but no nail comes out, it’s likely an empty firing or a jam right at the nosepiece. Check that the magazine is loaded correctly (nails facing forward). If it is, you probably have a small, invisible jam, a nail tip or plastic collation fragment stuck in the drive path. Follow the clearing steps to open the magazine and inspect the path with a flashlight.
How common is it for a gun to jam?
For a well-maintained tool using the correct fasteners, jams should be rare. Frequent jamming is not normal. It’s a clear signal that something is wrong, either with your technique (loading, battery), your supplies (nails), or the tool itself. A common first-time jam often traces back to not loading the nail gun correctly or using off-spec fasteners.
The Bottom Line
A jammed cordless nailer is telling you something broke the process. Your job is to listen, not just to react. The process is simple: right nail, clean path, full power.
Most jams are fixable in five minutes if you have the right hex key and a calm approach. But the moment the tool tells you it’s a deeper problem, through repeated jams, strange noises, or a locked blade, listen. That’s the sign to hand it over to a professional who can perform an internal cleaning or replace worn components. The goal isn’t never having a jam; it’s knowing exactly why it happened and how to make sure it’s the last one for a long, long time.
