
How to Cut Metal With a Circular Saw: Step-by-Step
This post contains affiliate links. As an Amazon Associate, we earn from qualifying purchases.
To cut metal with a circular saw, you need a metal-cutting saw with the correct blade, full personal protective equipment (PPE), and a controlled, steady feed rate. A dedicated metal-cutting saw like the DEWALT DCS373, intended for light gauge metals, or a Milwaukee model is designed for the job. Use a sharp, cermet-tipped blade rated for the saw’s RPM, set the depth so the teeth extend no more than 1/4 inch below the material, and feed at 2-5 seconds per inch depending on thickness to avoid overheating the blade and motor.
The difference between a successful cut and a damaged tool, or worse, an injury, comes down to matching three numbers: blade speed, material thickness, and feed rate. Get one wrong and the blade dulls instantly, the motor burns out, or kickback sends the saw jumping toward you. Understanding how to cut metal with a circular saw is critical to getting these numbers right.
What follows is the complete walkthrough for how to cut metal with a circular saw: the essential safety gear, the blade that actually works, the step-by-step cutting motion, and the manufacturer-specific rules for thick metal that most guides gloss over.
Key Takeaways
- Never use a standard wood-cutting circular saw. Its higher RPM and open design create a fire hazard from sparks and can damage the motor. A dedicated metal-cutting saw is built for the lower speeds and contains sparks.
- Wear ANSI Z87.1 safety glasses, NIOSH-approved respiratory protection, and ANSI S12.6 hearing protection. Everyday glasses won’t stop a metal shard, and metal dust is a serious respiratory hazard.
- A deeper setting increases binding, kickback risk, and produces a rougher cut.
- For metal over 1/4 inch thick, follow the manufacturer’s feed rate and cool-down charts. For a saw like the Milwaukee 6370-20, cutting 1/2-inch steel plate requires a feed of 2-4 seconds per inch and a mandatory cool-down of 60 minutes after a maximum cutting time of 18-36 seconds.
- Clamp everything. Always. An unsecured piece of sheet metal will vibrate, grab the blade, and become a dangerous projectile.
The Essential Safety Gear You Cannot Skip
Cutting metal creates unique hazards: hot, sharp chips flying at high speed, fine metallic dust you can inhale, and significant noise. The safety protocols are not suggestions; they are requirements pulled directly from operator manuals and OSHA standards.
You need a full kit before you pull the trigger:
- Eye Protection: ANSI Z87.1-certified safety glasses are mandatory. The DEWALT DCS373 manual states plainly: “EVERYDAY EYEGLASSES ARE NOT SAFETY GLASSES.” A face shield worn over safety glasses is the best practice for full-face coverage.
- Hearing Protection: Metal cutting is loud. Wear ANSI S12.6 (S3.19) hearing protection, earmuffs or high-quality plugs. The same DEWALT manual notes that noise from this work can contribute to hearing loss.
- Respiratory Protection: Metal dust is harmful. NIOSH/OSHA-approved respiratory protection appropriate for the dust is required. A simple dust mask is often insufficient; use NIOSH/OSHA-approved respiratory protection appropriate for the dust.
- Gloves (At the Right Time): The Power Tool Institute (PTI) advises wearing gloves when handling the workpiece after the cut, as it will be hot and have sharp edges. However, they explicitly warn: Do not wear gloves of a material that can roll up or get caught in the tool, such as cotton, wool or cloth during the cutting operation itself.
- Apparel: Wear fitted, long-sleeved shirts, long pants, and sturdy boots. No loose strings, jewelry, or dangling sleeves.
Before you start: Metal chips are sharp and hot enough to ignite dry debris. Clear your work area of flammable materials and have a fire extinguisher nearby. Always ensure the saw’s lower guard moves freely and closes instantly before each use, a stuck guard is a direct violation of OSHA portable tool guarding standard 1910.243.
Blade Selection: The Single Most Important Choice
The blade is everything. Putting a wood blade into metal will ruin the blade, likely damage the saw, and spray shattered carbide teeth around your workshop. You need the right blade for the metal you’re cutting.
For cutting steel, aluminum, or other metals with a circular saw, you need a blade rated for the material. These blades have teeth made from a ceramic-metal composite that withstands the heat of cutting metal without the need for cutting fluids.
Blade Specs to Match:
- Diameter and Arbor: Must match your saw (e.g., 5-1/2″, 7-1/4″, 8″).
- Tooth Count: More teeth are generally better for thinner sheet metal and smoother cuts, while fewer teeth can be used for thicker plate, though feed rate becomes more critical.
- RPM Rating: The speed marked on the blade must be at least as high as the no-load RPM marked on your saw. This is a critical safety rule. Running a blade faster than its rating can cause it to disintegrate.
- Material Specification: Ensure the blade is rated for the metal you’re cutting (e.g., “for steel and aluminum”).
A dull or damaged blade isn’t just inefficient, it’s dangerous. Dull blades require more force, overheat, and can throw teeth. If you’re unsure about your blade selection, inspect it. Missing or chipped teeth mean it’s time for a replacement.
Preparing Your Workpiece and Saw
A clean, secure cut in the process of how to cut metal with a circular saw starts before the saw is turned on. Rushing this step is the most common beginner mistake.
Secure the Workpiece: Use clamps. C-clamps or bar clamps, to fasten the metal to a sturdy work surface. For sheet metal, clamp it between two scrap boards (sacrificial lumber) along the cut line. This prevents vibration, reduces the terrifying screech, and minimizes the risk of the thin metal grabbing the blade. The workpiece must not move.
Set the Blade Depth: Loosen the depth adjustment lever and lower the shoe so the blade teeth extend no more than 1/4 inch below the bottom of the material. This minimizes the exposed blade, reduces binding, and improves cut quality. It’s the same principle as setting blade depth for wood, but even more critical here.
Check the Saw’s Guards: The lower guard must retract smoothly and snap back instantly when released. The Milwaukee service bulletin states: “Never operate a saw if the lower guard does not move freely and close instantaneously.” This is a mandatory pre-flight check.
Plan Your Cut and Exit: Mark your cut line clearly with a marker or scribe. Always position yourself so you are not in direct line with the blade path in case of kickback. Ensure the path of the saw and the area behind your workpiece are clear.
Step-by-Step: The Cutting Procedure
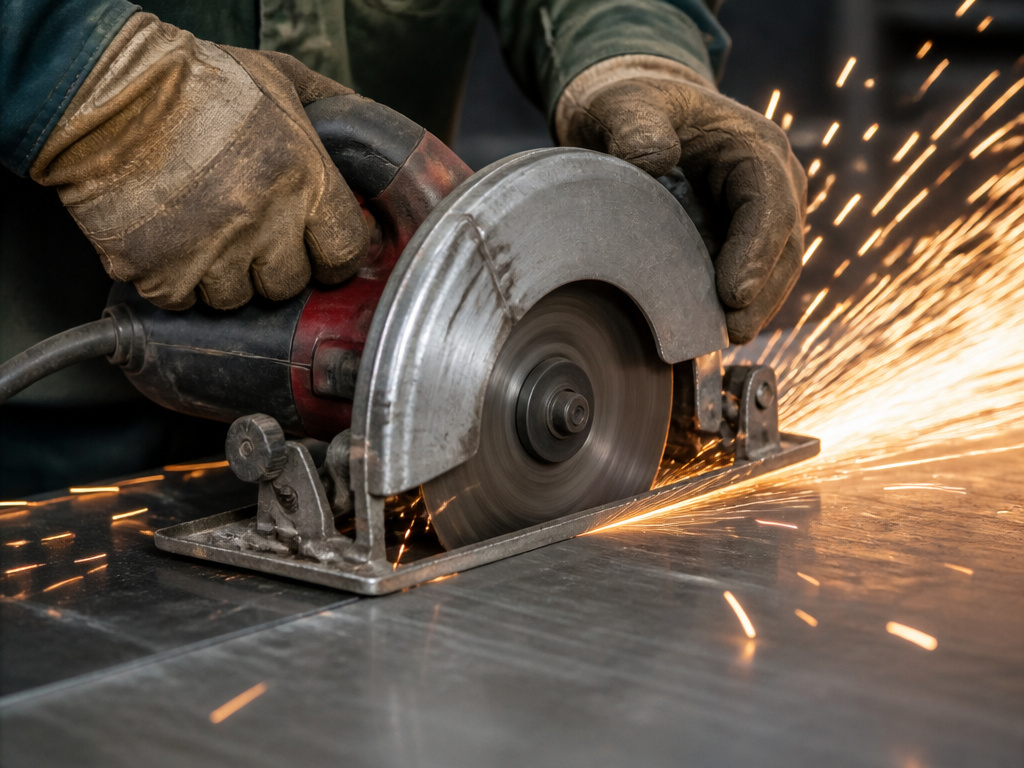
Now for the actual cut. The goal is a smooth, continuous motion without forcing the tool.
- Don Your PPE: Put on all safety gear, glasses, respirator, hearing protection.
- Position the Saw: Place the saw’s shoe flat on the workpiece with the blade clear of the metal. Align the notch in the shoe (the kerf indicator) with your cut line.
- Start the Saw: Let the saw reach full speed before it contacts the metal. A running start is crucial.
- Initiate the Cut: Gently but firmly push the blade into the metal. You’ll hear a steady, high-pitched whine. A change in pitch to a straining groan means you’re feeding too fast.
- Maintain Feed Rate: This is the key. Feed the saw steadily, letting the blade do the work. Do not push. For reference, the Milwaukee 6370-20 bulletin specifies a feed rate of 2-3 seconds per inch for 3/8″ material. Let the sound be your guide.
- Follow Through: Keep the shoe flat and maintain steady pressure all the way through the cut. As you finish, be prepared for the saw to want to drop forward slightly.
- Release and Retract: Release the trigger and hold the saw in place until the blade comes to a complete stop. Only then should you lift it from the workpiece or set it down.
If part way through a cut the cut is not straight, stop feeding, release the trigger, allow blade to stop, remove saw, and start over. Forcing a crooked cut sideways will instantly damage the blade’s cermet tips.
What about a standard circular saw?
It’s a bad idea. A wood saw spins at a much higher RPM than a metal-cutting saw, isn’t sealed against metal dust, and lacks the appropriate design for metal cutting. You risk overheating the blade, filling the motor with conductive metal dust, and starting a fire. Dedicated metal-cutting circular saws are designed for this job.
Cutting Thick Metal: The Rules Change Dramatically
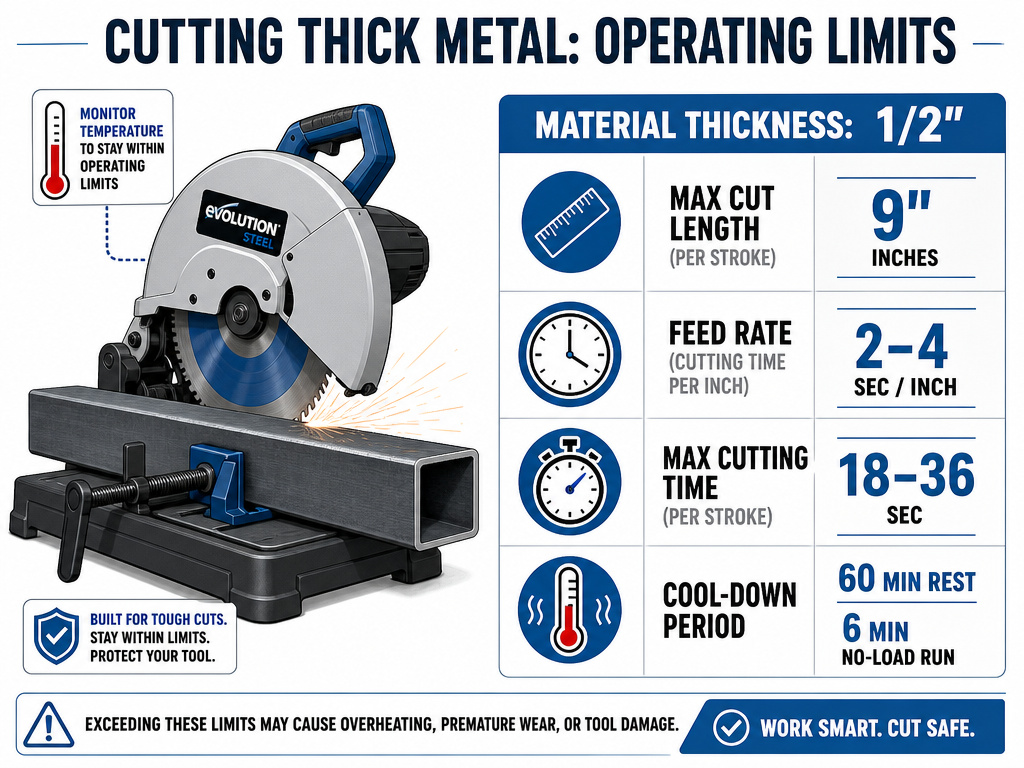
Cutting metal thicker than light gauge (e.g., over 3/8 inch for some saws) is an entirely different operation that demands strict adherence to manufacturer limits. Exceed them, and you will burn out the motor or destroy the blade. The Milwaukee 6370-20 bulletin provides specific data for that model.
| Material Thickness | Max Length of Cut | Feed Rate (sec/inch) | Max Cutting Time | Cool-Down Period |
|---|---|---|---|---|
| 3/8″ (10 mm) | 15″ (38 cm) | 2 – 3 | 30 – 45 seconds | 60 min at rest or 6 min running no-load |
| 1/2″ (13 mm) | 9″ (23 cm) | 2 – 4 | 18 – 36 seconds | 60 min at rest or 6 min running no-load |
| 5/8″ (16 mm) | 6″ (15 cm) | 3 – 5 | 18 – 30 seconds | 60 min at rest or 6 min running no-load |
| 3/4″ (19 mm) | 5″ (13 cm) | 4 – 5 | 20 – 25 seconds | 60 min at rest or 6 min running no-load |
Interpreting the Table:
- Max Cutting Time: This is the total time the saw motor can be under load (actually cutting) before it must cool down. Cutting a 9-inch length of 1/2-inch steel must be completed in under 36 seconds.
- Cool-Down Period: After reaching the maximum cutting time, you must stop. The saw then needs 60 minutes sitting still, or 6 minutes running with no load (trigger pulled but blade not touching anything) before you can make another maximum-length cut.
- The Consequence: “Cutting too fast or too long in heavy material will damage the tool if the tool is not allowed to cool.” This is the documented path to a burnt-out motor.
These are the operating parameters that separate a successful cut from damaging the tool.
Understanding Guard Requirements: OSHA vs. California Code
The law literally surrounds this tool. There are specific, legally mandated rules for the guards on a circular metal-cutting saw, and they differ slightly depending on your location.
The federal OSHA circular saw guard requirement (1910.243) states that all portable circular saws with a blade over 2 inches must have upper and lower guards. The lower guard must automatically and instantly return to cover the blade when the saw is withdrawn from the work.
Sources differ on guard requirements: The California Code of Regulations requires a hood covering to the depth of the teeth, permitting a fixed guard if the gap doesn’t exceed three-eighths of an inch, while OSHA requires an automatically returning lower guard.
Where this goes sideways: Assuming the guard is just a nuisance. A non-functional guard is a violation of workplace safety code and removes a critical barrier between you and a 4000 RPM blade. It’s the first thing an OSHA inspector would check.
Never operate a saw with a damaged, tied-back, or removed guard. Its proper function is your first line of defense against catastrophic contact.
Common Mistakes and How to Avoid Them
Here’s where theory meets the grinder. These are the errors that ruin blades, damage saws, and cause injuries.
- Using a Dull or Wrong Blade: Using a wood blade to cut metal can severely damage the blade and the saw. A dull metal blade forces the saw, overheats the material, and causes kickback. Use sharp blades. Inspect them before every use.
- Incorrect Feed Rate: Pushing too fast overheats the blade and motor. Going too slow grinds away the blade’s teeth without progressing. Listen to the saw, it should sound engaged but not shrieking in protest.
- Skipping the Cool-Down on Thick Cuts: The 60-minute cool-down period is necessary to prevent tool damage. Ignoring the cool-down period can permanently damage the tool. The tool requires this cool-down period to prevent overheating.
- Poor Workpiece Support: Cutting a long sheet of metal that sags will pinch the blade, causing sudden, violent kickback. Always support the entire piece, especially the cutoff side.
- Neglecting Dust and Sparks: The California Code of Regulations 4231 makes exceptions to hood requirements for saws used for cutting hot metal. Empty the saw’s chip container frequently, as hot chips can smolder.
How to deal with noise and metal dust
Cutting metal creates significant noise and fine metallic dust you can inhale. The safety protocols are not suggestions. Always wear proper personal hearing protection that conforms to ANSI S12.6 (S3.19). For the dust, always use approved respiratory protection appropriate for the exposure. This dust requires NIOSH/OSHA approved respiratory protection appropriate for the exposure. Keep the saw’s guards and any chip collection containers installed, as they help contain debris. Plan your work in a well-ventilated area and be prepared for hot, sharp metal chips to be ejected from the cut.
Frequently Asked Questions
Can you use a normal circular saw to cut metal?
You can, but you absolutely should not. A standard circular saw operates at too high an RPM, isn’t sealed against conductive metal dust, and lacks spark containment. It can damage the saw, create a fire hazard, and pose a serious injury risk. Use a dedicated tool like the DEWALT DCS373 or use a different metal-cutting method.
What is the best circular saw blade for cutting metal?
For cutting steel and aluminum, use a blade rated for those metals. The Power Tool Institute prohibits using abrasive cut-off wheels or dry diamond blades. The specific tooth count depends on material thickness: use a blade with more teeth for thinner sheet metal and fewer teeth for thicker plate, while meticulously following feed rate guidelines.
How do you prevent the blade from overheating?
Control your feed rate and respect the cool-down periods for thick metal. Overheating is caused by excessive friction, which occurs when you feed too slowly or cut for too long without a break. For materials over 1/4″ thick, follow the manufacturer’s chart for maximum cutting time and mandatory cool-down. A blade that’s too hot to touch is a blade that’s losing its temper and sharpness.
Is it safe to cut galvanized metal with a circular saw?
Yes, but with enhanced respiratory precautions. Galvanized steel is coated with zinc, which produces fumes when heated. These fumes can cause “metal fume fever,” a flu-like condition. Cutting galvanized metal requires all standard PPE plus excellent ventilation or a supplied-air respirator. Always cut in a well-ventilated area or outdoors.
Why did my metal-cutting blade lose teeth?
This is usually caused by one of three things: forcing the cut (side-loading the blade), hitting a hard spot or weld in the metal, or continuing to use the blade long after it became dull. The Milwaukee bulletin directly links tooth loss to not allowing the tool to cool between heavy cuts. Once a blade loses one tooth, the stress distribution changes, and it will likely lose more quickly. Retire it immediately.
The Bottom Line
Cutting metal with a circular saw is a straightforward job when you respect the variables. The tool demands specificity: the right blade, the right speed, the right feed. The single most important habit you can build is checking the guard and setting the depth before every cut. That 1/4-inch protrusion rule isn’t a tip, it’s the foundation of control.
For the occasional user tackling a steel stud wall or a sheet of aluminum, a cordless metal-cutting saw is a revelation. For anything over 1/4 inch thick, you’re not just cutting; you’re managing a thermal equation with a countdown timer. Follow the chart, endure the cool-down, and the saw will last for years. Fight the chart, and you’ll be shopping for a new motor before the project is done.
Your first few cuts will feel slow and awkward. That’s correct. Let the blade sing its steady, high-pitched song, keep your feed hand relaxed, and the line will stay true. The noise and the sparks are part of the process. The kickback isn’t.
