
How to Use Electric Metal Shears: The 5-Step Setup
This post contains affiliate links. As an Amazon Associate, we earn from qualifying purchases.
To use electric metal shears, match three things to your material: the tool’s rated capacity (in gauge or mm), the minimum cutting radius, and your power source. For a straight cut, secure the workpiece, align the blade on your mark, and apply moderate, steady pressure while guiding the tool forward. Forcing the cut, ignoring the radius limit, or using the wrong extension cord are the three fastest ways to jam the blades or trip a circuit.
The capacity rating printed in the manual is a mechanical limit. Push a Hercules shear past its 14-gauge steel limit, and you risk damaging the tool or causing the blades to jam. Try a 3-inch radius on a tool rated for 7 inches, and the metal buckles. These are practical points that separate a clean job from a ruined workpiece and a repair bill. Understanding how to use electric metal shears correctly begins with respecting these limits.
What follows is the shop-floor method: the five-step setup every manual assumes you know, the real difference between a corded Genesis GES40 and a cordless Hercules, and how to handle the curly metal waste strip that every first-timer fights. By the end, you’ll read any shear’s spec sheet and know exactly what it can and cannot do in your hands.
Key Takeaways
- Always verify the rated capacity in gauge for your specific metal; a Hercules cuts 14-gauge steel, but a Genesis GES40 maxes out at 18-gauge, using the wrong tool burns out the motor.
- Use ANSI Z87.1 safety glasses and heavy-duty gloves without exception; the scrap strip ejected is sharp and moves fast enough to cause serious injury.
- For inside cuts, you must drill a 12–14 mm starter hole first; trying to plunge-cut will instantly destroy the blades.
- Manage the waste curl by adjusting the slotted blades on models like the Genesis GES40; a misdirected curl can jam the cut or whip back at you.
- If the tool binds, release the trigger immediately, forcing it is the single most common cause of sheared pins and permanent blade damage.
The 5-Step Setup for Your First Cut
Plugging in and pulling the trigger is the last step, not the first. Most binding and poor cuts start here, with skipped setup. The goal is to eliminate all movement and variables before the metal meets the blade.
First, clear the stage. Your work area needs a solid, non-flammable surface. The Hercules charger manual is explicit: place it on a stable metal workbench or concrete floor, at least 1 foot away from all flammable objects. This isn’t just fire safety, a wobbly bench means a wobbly cut. Secure your sheet metal with clamps. If it can vibrate, it will.
For a 4-amp tool like the WEN Variable Speed Shear, the manual provides a specific extension cord gauge table: 25 feet requires 18-gauge wire, 50 feet needs 16-gauge, 100 feet demands 14-gauge, and 150 feet must use 12-gauge. Using a thinner cord causes voltage drop, the motor overheats, and the cut stalls.
Second, dress for the part. This means ANSI Z87.1 safety glasses or a face shield, plus heavy-duty work gloves. The Fox Throatless Shear manual mandates both. The scrap strip coming off the cut is a continuous, razor-sharp ribbon. It will fly off to the side with enough force to slice skin. Gloves protect your hands from the scrap and from the sharp edges of the workpiece you’re holding steady.
Third, know your tool’s numbers cold. Don’t just remember “it cuts steel.” Know which steel and how thick. Capacity isn’t universal.
| Tool Model | Max Steel (Gauge) | Max Stainless (Gauge) | Min Radius |
|---|---|---|---|
| Hercules HC1012B | 14 Gauge | 16 Gauge | 7 inches |
| Genesis GES40 | 18 Gauge | 20 Gauge | 5.5 inches |
| Fox Throatless | 18 Gauge | 22 Gauge | 1.5 inches |
Fourth, mark your cut line clearly with a scribe or painter’s tape. A faint pencil line vanishes under the tool’s base. For a long cut, consider clamping a straightedge as a guide. The DRÄCO shears offer optional adjustable guides for this exact purpose, which attach to the tool for repeatable straight cuts.
Fifth, do a dry run. Without power, position the shear at the start of your line. Check for cord clearance, confirm your body stance is balanced, and ensure your support hand is clear of the cutting path. Only then do you plug in a corded tool or insert the battery on a cordless model. This ritual takes a short time and prevents most beginner errors.
Operating the Shear: Pressure, Speed, and the Waste Strip
You’ve set up. Now the blade meets the metal. The sound of a cut is a rapid, steady brrrrrp, not a labored groaning. The feel is a smooth forward push against mild resistance. If you’re straining, something is wrong.
Start the tool and let it reach operating speed before contacting the metal. Align the front corner of the lower blade exactly on your mark. Apply firm, consistent forward pressure. Let the tool do the cutting, your job is guiding. The Fox Throatless Shear manual states it clearly: only moderate pressure is required. Forcing it is the fastest route to a jam.
The variable speed trigger is your control for material thickness. On thin aluminum, you can run a variable-speed shear at full speed. On thicker, harder steel, start slower. The slower speed gives each stroke more cutting force, preventing the motor from bogging down. If your tool has a lock-on button for continuous operation, use it only for long, straight cuts where you can maintain full attention and a secure grip.
Now, the waste strip. This is the curled ribbon of metal that peels away from the cut. On a properly adjusted shear, it curls cleanly to one side. If it’s jamming back into the cut path or flailing wildly, the slotted blades on models like the Genesis GES40 need adjustment. Unplug the tool, loosen the head bolts, and shift the left or right blade slightly. Tighten and test. A well-directed curl is both neat and safe.
Where this goes sideways: Letting the waste strip build up into a tangled bird’s nest. That mass of sharp metal can suddenly catch, pull back into the cut, and violently jerk the tool. Stop every foot or so, lift the running shear clear of the workpiece, and let the strip fall away cleanly.
What about cutting oil? Sources disagree. The Genesis GES40 manual says lubricate the bearing assembly every 60 days to 6 months. The WEN manual states this tool requires no additional lubrication. This is a design difference. Follow your tool’s manual. If it says lubricate, use a few drops of heavy oil on the moving parts inside the head. If it says don’t, listen.
Cutting Curves and Complex Shapes
Straight lines are one thing. Curves are where shear design truly matters, and where the minimum radius spec becomes critical. That Fox Throatless Shear with a 1.5-inch radius can navigate a tight corner the Hercules, rated for 7 inches, simply cannot physically follow.
The technique shifts from pushing to steering. For an outside curve, start your cut and then begin applying side pressure in the direction you want the tool to turn. The Fox manual’s advice is perfect: apply pressure in the direction needed to follow the curve. Don’t jerk or pivot sharply. Think of guiding a shopping cart around a corner, smooth and wide.
If the tool binds or the motor labors, stop. Release the trigger immediately. This is the Fox manual’s command for a reason. Forcing a bound shear can snap a blade pin or warp the cutting jaws. Back up, check for a burr or an overly tight radius, and trim away a little more material before continuing.
For an inside cut, like cutting a hole or a window in the middle of a sheet, you cannot plunge-cut. You must drill a starter hole first. The DRÄCO manual specifies a 12–14 mm diameter drill. Feed the lower blade into this hole, start the shear, and cut outwards to your marked line. For circular cuts, DRÄCO adds another rule: always cut counter clockwise and from left to right. This direction keeps the waste strip flowing cleanly away from your cutting path.
Safety Procedures That Aren’t Optional
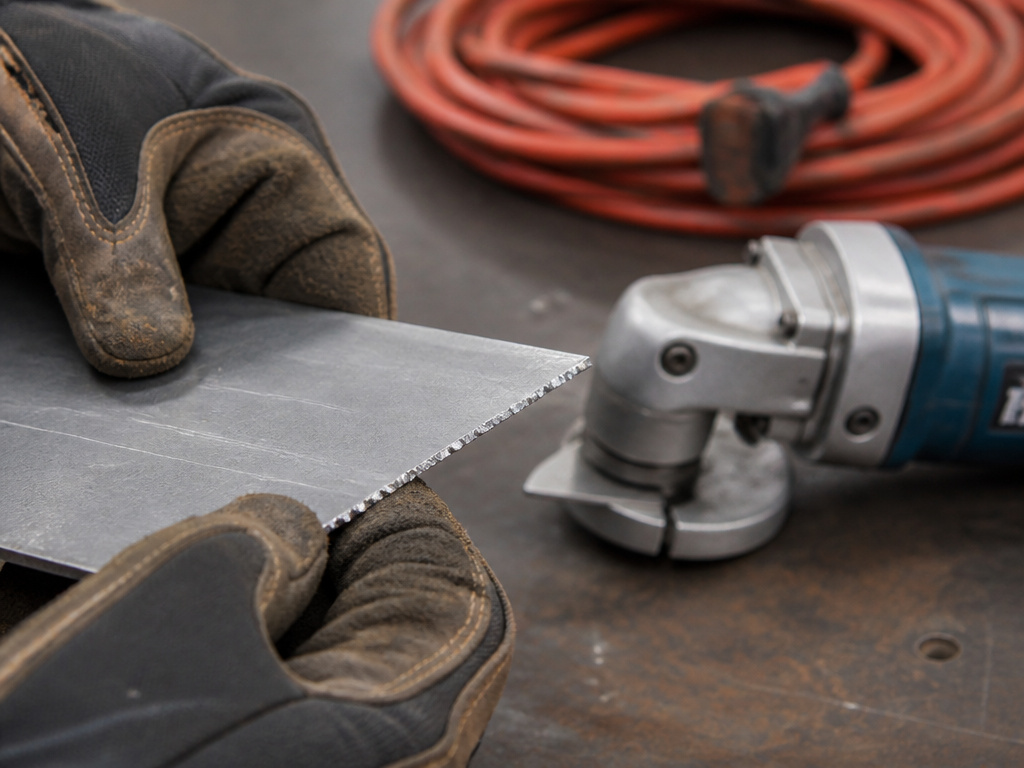
We touched on glasses and gloves. The safety system goes deeper because the hazards are real and specific. This is a YMYL topic, your physical safety is on the line.
Eye and Hand Protection: The Genesis manual insists on safety glasses marked to comply with ANSI Z87.1. The Fox and DRÄCO manuals add heavy-duty gloves. This isn’t generic “be careful” advice. The scrap strip is a continuous, sharp-edged projectile. Gloves also protect from the burr left on the cut edge, which is often sharper than a knife.
Power and Extension Cords: Here’s a clear source disagreement you must respect. The Hercules manual forbids using any extension cord with its charger. The Fox manual allows one, but specifies AWG 16 or greater, no longer than 25 feet. The WEN manual provides a full gauge/length table. Because sources disagree, your tool’s manual is the law for that tool. Violating the Hercules rule risks charger overheating and fire. Ignoring the WEN table burns out the motor.
Material Warnings: The DRÄCO manual lists two absolute bans: do NOT cut sheet metal along welding points and do NOT cut multi-layer sheets that exceed the capacity. Welding points are often harder than the base metal and can shatter carbide blades. Multiple layers can slip, jam, and suddenly release with violent force.
If It Jams: The response is universal across manuals: stop forcing it. The Genesis procedure is to release the trigger and unplug the tool immediately. The Hercules says to release the trigger to restart. The first step is always the same: take your finger off the trigger. Then, and only then, diagnose the jam.
Electric Shears vs. Other Metal Cutting Tools
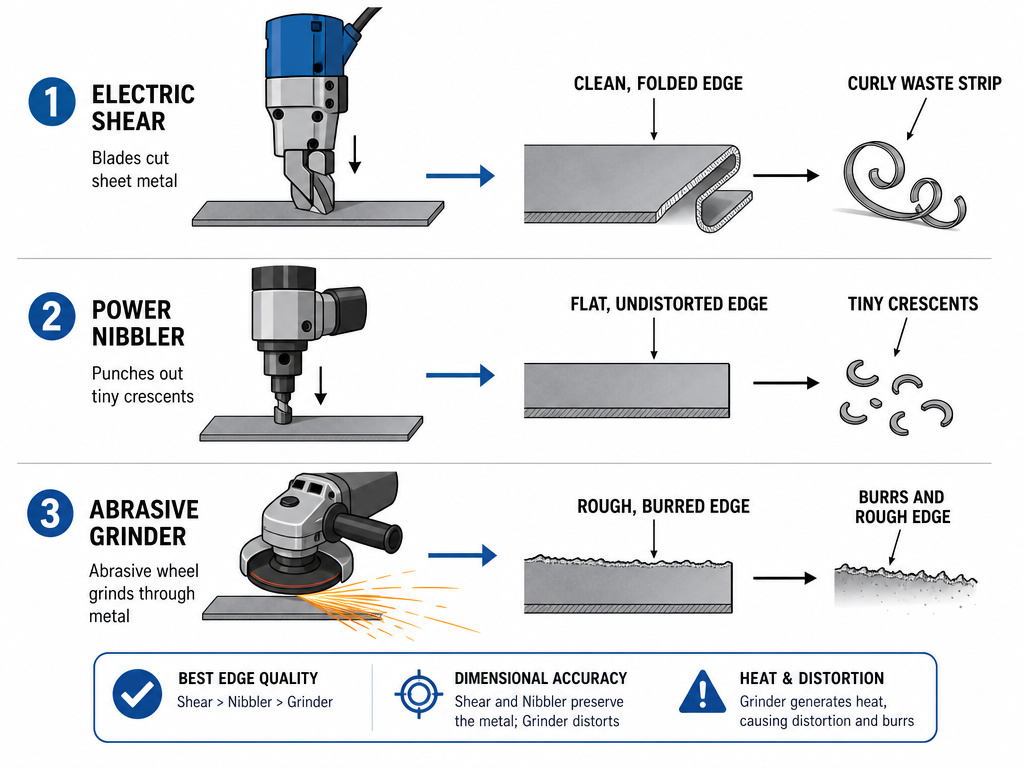
A shear isn’t the only tool in the box. Knowing when to use it, and when to grab a nibbler or snips, saves time and gives a better finish. It comes down to the cut’s purpose.
Shears vs. Nibblers: A shear cuts like scissors, leaving a clean, folded edge on both sides with a curly waste strip. A power nibbler punches out tiny, overlapping crescents of metal, creating a narrow kerf and no edge distortion. Use shears for faster, long straight or large-radius cuts where a little edge bend is acceptable. Use a nibbler for intricate shapes, tighter radii, or when you need a perfectly flat edge for welding. The choice between power shears vs nibblers often hinges on material thickness and the need for a distortion-free edge.
Shears vs. Snips: Hand aviation snips are for light gauge, small jobs, or trimming. Electric shears are for production work, longer cuts, and thicker materials. Your hand will fatigue after three feet of cutting 18-gauge steel with snips. An electric shear doesn’t tire.
Shears vs. Grinders: An abrasive cut-off grinder is for solid bar, angle iron, or fast, rough cuts where edge quality doesn’t matter. It throws sparks, creates dust, and leaves a burred, heat-affected edge. A shear is for sheet goods, producing a cooler, cleaner cut ready for finishing. For learning more about cutting sheet metal with the right tool, the distinction is everything.
The best metal shears for you depend on your most common task. Need portability for a roof? The cordless Hercules. Mostly shop work on thin gauge? The corded Genesis GES40. Complex fabrication with tight curves? The Fox Throatless.
Maintenance, Blade Care, and Troubleshooting
These tools are simple mechanically, but they demand consistent care. Neglect shows up as a slow, noisy cut, then a sudden jam.
Blades are consumables. When cuts start to require more pressure or leave a ragged edge, inspect them. Look for chipping, rounding, or excessive wear. It is generally recommended to replace blades as a set only. Mixing a new blade with a worn one creates uneven pressure and will ruin the new blade quickly. For models like the Fox with tungsten carbide blades, you’re looking at replacement, not sharpening, for all but the most specialized shops.
Lubrication, as noted, is model-specific. If your manual calls for it, the process is straightforward: unplug the tool, remove the shear head from the power unit, and apply a few drops of heavy oil to the bearing assembly. Wipe off excess. The goal is to prevent wear on the moving pins and bushings, not to lubricate the cut.
Common mistake: Over-tightening the head bolts after blade adjustment or reassembly. Over-tightening the head bolts can prevent the blades from moving freely, causing premature wear or a failure to operate. Snug is sufficient.
Troubleshooting is logical. If the tool won’t start, check the power source, cord, and battery. If it starts but won’t cut, the blades are likely dull or jammed with debris. If it cuts poorly or binds, verify you’re not exceeding the material thickness or radius limit. The most common fix for how to use electric metal shears is also the simplest: stop, unplug, clear the jam, and reassemble correctly.
Single-Cut vs. Double-Cut Metal Shears
Electric metal shears use two main cutting actions. Single-cut shears make one straight cut, leaving a flat edge on your workpiece and a narrow strip of scrap. The scrap curls to one side, and you can often adjust the blades to change the direction of this curl. Double-cut shears, sometimes called ‘duplex’ or ‘throatless’ shears, make two cuts that separate a wider strip of waste from the middle. This leaves two clean edges on your work material. The type of cut affects the minimum radius you can achieve; a tool with a smaller minimum cutting radius allows for tighter curves. Always check your tool’s specifications for its cutting capacity and minimum radius to see if it matches your project.
Frequently Asked Questions
What safety gear do I absolutely need for electric metal shears?
You need ANSI Z87.1 safety glasses and heavy-duty work gloves as a minimum. The glasses protect your eyes from the fast-moving, sharp waste strip. The gloves protect your hands from that same strip and from the sharp edges of the metal. Hearing protection is also recommended for extended use.
Can I cut curves with any electric metal shear?
No. Your ability to cut a curve is limited by the tool’s minimum cutting radius. A Fox Throatless Shear can handle a 1.5-inch radius. A Hercules requires a 7-inch radius. Trying a tighter curve than your tool is rated for will buckle the metal and likely jam the blades. Always check your manual’s radius specification before attempting complex shapes.
Why is there a curly piece of metal coming off my cut?
That’s the waste strip or scrap curl. It’s the thin sliver of metal removed to create the kerf, or width, of the cut. On a double-cut shear, two blades overlap to cut from both sides, peeling this strip away. You can often adjust its direction on models with slotted blades to keep it from interfering. Properly managing this strip is a key part of safely using a nibbler or shear.
My shear jammed. What should I do first?
Release the trigger immediately. Do not try to force or rock the tool. Unplug a corded tool or remove the battery from a cordless one. Then, inspect the cut line and the blade area for a trapped piece of the waste strip, a burr, or evidence that you exceeded the thickness or radius limit. Clear the obstruction before restarting.
How do I choose between corded and cordless metal shears?
Choose corded for unlimited runtime in a shop, typically higher power, and lower cost. Choose cordless for portability, working on roofs or away from outlets, and convenience. A model like the cordless Hercules offers clear mobility benefits, but you trade some cutting capacity (14-gauge vs. 18-gauge on some corded models) and must manage battery life. For heavy-duty, all-day cutting sheet metal with power tools when you compare a how to use electric metal shears approach, a corded model is often the more reliable workhorse.
Can I use electric metal shears on materials other than metal?
It is not recommended. While they might cut thin plastics or composite boards, the abrasive nature of materials like fiber cement siding will rapidly dull and wear out the expensive metal-cutting blades. These tools are engineered for specific materials; using them outside that purpose is an expensive mistake.
The Bottom Line
Using electric metal shears correctly is about respecting three hard limits: the thickness on the spec sheet, the radius in the manual, and the power guidelines for your cord. Ignore any one, and the tool will tell you, usually with a jarring stall or a ruined workpiece.
Start every job with the five-step setup. It builds the discipline that prevents the majority of errors. When you make that first cut, listen to the tool. A smooth, steady sound means you’re within its design. A labored groan means stop and reassess.
Finally, remember that these are specialized tools. For long, straight cuts in sheet metal, they’re faster and cleaner than anything else. For intricate work, a power shears vs nibblers comparison might lead you to a different tool entirely. Your job is to match the tool to the task, not force a single tool to do everything. That’s how you get professional results without professional-grade headaches.
