
Brad Nails or Finish Nails for Quarter Round Molding
This post contains affiliate links. As an Amazon Associate, we earn from qualifying purchases.
Use 18-gauge brad nails, 1 to 1-1/4 inches long, for 3/4-inch quarter round molding. Their 0.0475-inch shank is thin enough to prevent splitting the delicate trim, while the length bites securely into the baseboard or floor behind it. In nearly all cases, a brad nailer is the right tool for this job.
That’s the direct answer, but the confusion comes from packaging. Many retailers label 18-gauge brads as “finish nails,” which is why searches turn up three different recommendations. The real finish nails, 15- or 16-gauge with thicker shanks, are built for baseboards and door casing, not thin quarter round. The choice between brad nails or finish nails for quarter round molding is therefore critical. Using the wrong one splits the wood, and you’re left with a piece to replace before you’ve even started.
What follows is a breakdown of gauge numbers, material thickness, and the specific edge cases where the standard rule for brad nails or finish nails for quarter round molding doesn’t apply. By the end, you’ll know which nails to load and what to do when your quarter round isn’t made of soft pine.
Key Takeaways
- For standard 3/4-inch pine quarter round, load 18-gauge brad nails between 1 and 1-1/4 inches long. This prevents splitting.
- The shank diameter is the deciding factor. An 18-gauge brad is 0.0475 inches thick; a 16-gauge finish nail is 0.0625 inches, nearly a third wider and much more likely to crack thin trim.
- Sources like WoodWiki recommend a finish nailer for hardwood or MDF because 18-gauge brads may buckle, while other guidance suggests choosing gauge based on the project’s need for strength versus delicacy.
- Follow the 3x thickness rule from manufacturers: your nail should be at least three times longer than the thickness of the material you’re fastening.
- Pre-drill mitered corners in hardwood quarter round with a 1/16-inch bit. The stress of nailing at that joint is where oak or maple will split every time.
The Quarter Round Nail Gauge and Length Breakdown
This isn’t a matter of preference. It’s a matter of physics. A thinner nail displaces less wood fiber as it drives, which directly translates to a lower chance of splitting your trim, especially near the vulnerable mitered ends.
For 3/4-inch quarter round molding, the correct fastener is an 18-gauge brad nail with a shank diameter of 0.0475 inches and a length of 1 to 1-1/4 inches. This size provides adequate holding power while minimizing the risk of splitting the thin, narrow profile of the molding.
The numbers from the WoodWiki brad vs finish nailer guide make the difference clear. An 18-gauge brad nail has a shank diameter of 0.0475 inches. A 16-gauge finish nail has a shank diameter of 0.0625 inches. That thicker shank is the difference between a pinhole that closes with a dab of filler and a visible scar that needs careful patching.
Here’s how the common gauges stack up for trim work:
| Gauge & Type | Shank Diameter | Typical Length Range | Best Use Case |
|---|---|---|---|
| 18-Gauge (Brad) | 0.0475 in. | 1 to 1-1/4 in. | Quarter round, shoe molding, thin trim |
| 16-Gauge (Finish) | 0.0625 in. | 1-1/2 to 2 in. | Baseboard, door/window casing |
| 15-Gauge (Finish) | 0.072 in. | 1-1/4 to 2-1/2 in. | Crown molding, stair treads |
The length recommendation isn’t arbitrary. Manufacturer guidance, like the Grabber Fasteners spec sheet, states you should multiply the material thickness by three to find the minimum nail length. For 3/4-inch material, that’s a length of at least 2-1/4 inches. But that’s for a standalone joint. Since quarter round is fastened through its thickness into another material (the baseboard and wall), a 1 to 1-1/4 inch nail provides plenty of penetration. It goes through the 3/4-inch trim and sinks at least a 1/4 inch into the backing, which is enough for a solid hold.
Common mistake: Choosing nails based on the label “finish nails” on the box. Always check the gauge number. That ‘finish nail’ could be an 18-gauge brad or a 16-gauge nail, only the number tells you the truth.
Sources disagree slightly on the ideal length within that range. Some, like the ToolsGuide quarter round brad nail sizing article, suggest 1 to 1-1/4 inches is suitable. Others argue for longer nails, such as 1-1/2 inches, for a stronger hold into the baseboard. In practice, for standard pine quarter round against wood, the 1-1/4 inch nail is the sweet spot. It offers a bit more bite than the 1-inch option.
Brad Nailer vs. Finish Nailer: Which Tool for Quarter Round?
Your nail choice dictates your tool choice. For 18-gauge brad nails, you need a brad nailer. For 15- or 16-gauge nails, you need a finish nailer. They are different tools with different magazines, and they are not interchangeable.
This is where the brad nailer vs finish nailer decision crystallizes. A brad nailer is a lighter-duty tool designed for delicate work. It has less recoil, which helps when you’re holding a small piece of trim in place with one hand. The nails it fires are essentially glorified pins with tiny heads.
A finish nailer is a heavier tool. It drives a thicker nail with more force, which is necessary for joining two thicker pieces of wood. The recoil is more pronounced. Using a finish nailer on quarter round is like using a sledgehammer to tap in a picture hook, it’s overkill, and you’re likely to damage the workpiece.
For a clean quarter round job, a brad nailer is the default. It’s also the more versatile tool for a DIYer. You can use it for other light trim, cabinet face frames, and small crafts. If you’re shopping for one tool for trim work, start with a brad nailer. Our guide on the best nailers for trim can help narrow the field.
TL;DR: Buy or rent an 18-gauge brad nailer for quarter round. A finish nailer is the wrong tool for this specific job.
When the Standard Advice Flips: Hardwood, MDF, and More
The 18-gauge rule assumes your quarter round is made of a softwood like pine or poplar. These woods are forgiving. Their fibers compress easily, allowing the thin brad to slide through.
The rule for brad nails or finish nails for quarter round molding changes when the material gets dense.
In materials like oak, maple, MDF, or even thick plywood, 18-gauge brads tend to buckle and fold instead of driving straight. You’ll hear a dull thud instead of a crisp pop, and the nail will be bent inside the material or jammed in your tool. The WoodWiki guide notes this explicitly: for hardwood or MDF, a finish nailer is required.
The reason is sheer density. The thicker shank of a 16-gauge finish nail has the column strength to push through the tight fibers without deforming. So, if you’re installing pre-finished oak quarter round or painting MDF trim, plan to use a finish nailer and 16-gauge nails.
This also applies to the backing material. If you’re nailing into old, rock-hard fir framing instead of a modern pine baseboard, the added resistance can cause brads to fail. When in doubt, test-fire a nail into a scrap piece of your trim and a sample of the backing material. If the brad drives clean and straight, you’re good. If it bends, step up to the finish nailer.
Where this goes sideways: Using brads on MDF trim. The dense core doesn’t compress; it resists. The thin nail buckles, jams your gun, and leaves a fastener that’s folded over inside the trim, providing almost zero holding power.
Installation Tips: More Than Just Picking the Right Nail
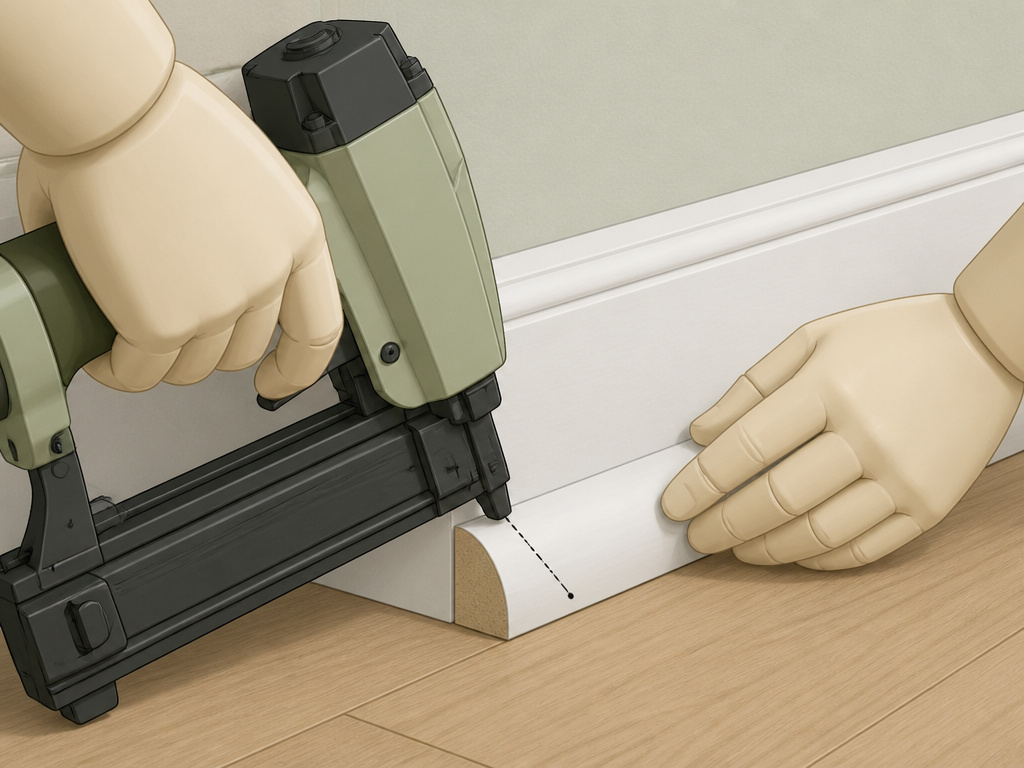
Getting the right nail is 80% of the battle. The other 20% is technique. These steps ensure your quarter round looks professional and stays put.
- Dry-fit everything first. Miter your corners at 45 degrees and set all pieces in place. Check for gaps against the floor and baseboard. You can’t fix a bad cut by nailing harder.
- Set your nailer depth. Modern brad nailers have a depth adjustment dial. Use it. The goal is to drive the nail head just flush with the wood surface, not to sink it deep enough to crush the fibers around it. A crushed dimple is harder to fill invisibly.
- Angle the nail downward. Don’t shoot straight into the quarter round. Angle the nailer slightly so the nail drives down through the trim and into the baseboard (and hopefully the wall stud behind it). This “toe-nailing” technique provides a much stronger mechanical lock than a straight shot.
- Pre-drill hardwood miters. This step is essential for oak or maple. The end grain at a miter joint is incredibly prone to splitting. A 1/16-inch pilot hole relieves the pressure and allows the nail to pass through cleanly. It adds two minutes and saves a $15 piece of trim.
- Space nails appropriately for a secure hold. Put one nail near each end and each corner. In high-movement areas like bathrooms, use closer nail spacing.
- Use adhesive in tricky spots. On bowed walls or over uneven floors, a thin bead of construction adhesive on the back of the quarter round provides insurance. The nail holds it in place while the glue sets. This is a pro trick that many basic guides omit.
For a full walkthrough of the process, our article on installing baseboard with a brad nailer covers the same fundamental techniques.
What If You Don’t Have a Nail Gun?

Not everyone owns a pneumatic or cordless nailer. You can install quarter round with a hammer, but it requires more care.
You’ll need 18-gauge brads (1 to 1-1/4 inch) and a nail set. Don’t try to drive finish nails by hand into quarter round, you’ll bend more than you drive.
- Hold the brad with needle-nose pliers to start it. This saves your fingers.
- Tap it until it’s just gripping the wood.
- Then, use the nail set to drive the head about 1/16-inch below the surface. The small head of a brad makes this easier than with a larger finish nail.
- The hole will be slightly larger than one from a nail gun, so filling is essential.
It’s slower, and your arm will feel it after a few linear feet, but it’s absolutely doable. For beginners, learning to use a brad nailer safely is a worthwhile skill that pays off on this and future projects.
Filling and Finishing for an Invisible Install
The final step is what makes trim work look professional. A nail hole that isn’t properly filled shouts “DIY.”
After all nails are set, use a paintable latex wood filler. Dap a small amount into each hole with a putty knife, overfilling slightly. Let it dry completely.
Once dry, sand it flush with 220-grit sandpaper. A sanding sponge works well for this.
This seals the gap and creates a clean line.
Frequently Asked Questions
Can I use 16-gauge finish nails on quarter round?
You can, but you shouldn’t. The 0.0625-inch shank of a 16-gauge nail is significantly more likely to split thin quarter round, especially near the mitered corners. The holding power is overkill for this application, and the larger hole is harder to hide. Reserve 16-gauge nails for the baseboard itself.
What about 23-gauge pin nails for quarter round?
23-gauge pin nailer leaves the smallest possible hole, often needing no filler. However, it provides almost zero holding power on its own. Pin nails are meant to hold pieces together while glue dries. For quarter round, which needs to withstand bumps and seasonal wood movement, the holding power of an 18-gauge brad is necessary. Save the pin nailer for tiny decorative moldings or mitered picture frames.
How do I choose between a brad nailer and a pin nailer for trim?
It comes down to holding power versus visibility. For structural holds like quarter round, baseboard, or crown molding, a brad nailer vs pin nailer comparison shows the brad nailer wins. For delicate, purely decorative trim or tacking glue-ups, the pin nailer’s near-invisible hole is the advantage.
Is glue enough, or do I need nails?
For quarter round, use both. Nails provide the immediate clamping force to hold the piece in place perfectly while the glue cures. The glue then provides long-term adhesion, especially on less-than-perfect walls. Using only glue means wrestling with tape or clamps for hours, and the trim can shift before the glue sets.
What’s the difference between quarter round and shoe molding for nail choice?
They’re similar, and the same 18-gauge brad nail rule applies. Shoe molding is often slightly more flexible and may be used over uneven floors. The key is material thickness. If your shoe molding is 1/2-inch thick or less, the 18-gauge brad is still the right call. Always let the thickness, not the name, guide your nail size for trim.
Before You Go
The right answer is almost always 18-gauge brad nails, 1 to 1-1/4 inches long. Memorize that. The one exception that changes everything is material density. If your quarter round is oak, maple, or MDF, put the brad nailer away and get the 16-gauge finish nailer. That switch is the difference between a clean install and a frustrating mess of bent nails and split wood.
Test on a scrap piece first. It takes thirty seconds and confirms your tool, nail, and material are all in agreement. Then, take your time with the finish work. The filling, caulking, and painting are what transform a row of nailed-on wood into a seamless, professional detail.
