
How to Change a Tile Saw Blade: The Universal 7-Step Swap
This post contains affiliate links. As an Amazon Associate, we earn from qualifying purchases.
To change a tile saw blade, you must unplug the saw, remove the water tank and lower blade guard, use wrenches to loosen the arbor nut while holding the spindle, swap the blade ensuring it faces the correct rotation direction, and reassemble everything tightly. The inner and outer flange washers are different, mixing them up causes wobble.
That sequence is fixed, but the specifics, like where the screws are or how to hold the spindle, change between a Harbor Freight 10-inch saw and a Ryobi tabletop model. Getting those details wrong turns a ten-minute job into a broken-tool afternoon. This is why it’s critical to know exactly how to change a tile saw blade for your specific model.
What follows: the universal seven-step swap that works on any saw, the brand-specific quirks for Harbor Freight, Ryobi, and Radley models on how to change a tile saw blade, and how to spot a bad install before you ruin a blade or a tile.
Key Takeaways
- Unplug the saw first. Every manufacturer manual states this as step zero; skipping it risks the blade spinning as you touch the nut.
- Match the blade rotation arrow. Install the new blade so its cutting face rotates in the direction marked on the lower blade guard, backwards installs burn out blades.
- Inner and outer flange washers are different. The Ryobi TC180II manual explicitly warns they are not identical; reversing them prevents the nut from seating flush.
- Use only smooth rim/continuous rim diamond blades. Both Harbor Freight and Radley manuals forbid blades with openings, grooves, or teeth for tile saws.
- Tighten the arbor nut firmly, but don’t crush. Overtightening can strip the spindle threads.
The Universal 7-Step Blade Swap
The process of how to change a tile saw blade is mechanically simple. You’re removing a nut, a washer, a disc, and reversing the order. The danger lives in skipping a step or forcing something that’s stuck.
Before you start: Put on ANSI Z87.1 safety goggles. The manual for the Harbor Freight 64684 model specifies this standard, and for good reason, a slipped wrench or a fragment from a chipped blade travels fast. Have two adjustable wrenches or the specific wrenches supplied with your saw ready.
Common mistake: Trying to loosen the arbor nut without immobilizing the blade. The whole assembly spins, you apply more force, and the wrench slips into the blade teeth or your hand. Always use a wrench on the nut and a second tool or the saw’s spindle lock to hold the blade still.
- Disconnect the power. Unplug the saw from the wall outlet. Do not just turn the switch off. The Ryobi TC180II manual is clear: “Remove the plug from the power socket before carrying out any adjustment, servicing or maintenance.”
- Drain and remove the water tank. Pull the tank out and empty it into a bucket. The Ryobi manual adds, “do not allow water to splash onto ground or around machine.” Water around the electrical components is a shock risk for the next step.
- Remove the lower blade guard. There are typically two screws, one on each side. Set them aside. This exposes the blade, arbor (the shaft it spins on), and the arbor nut.
- Loosen the arbor nut. Place one wrench on the flats of the arbor shaft or engage the saw’s spindle lock if it has one. Place a second wrench on the arbor nut. Turn the nut wrench counterclockwise to loosen. If it’s stuck, a drop of penetrating oil on the threads and a light tap with a mallet can help. Never depress a spindle lock while the saw is running, the Harbor Freight 64684 manual explicitly warns against this.
- Remove the nut, outer flange, and old blade. Take off the nut, then the outer flange washer, then slide the old blade off the arbor. Leave the inner flange washer on the spindle.
- Install the new blade. Slide the new blade onto the arbor. Ensure the blade’s rotation arrow (usually printed on the blade) matches the direction arrow molded into the lower blade guard you just removed. This is critical.
- Reassemble and tighten. Slide the outer flange washer on, then thread the arbor nut on by hand. Use your two wrenches again, one to hold the arbor, the other to tighten the nut clockwise. Tighten firmly, but avoid extreme force that could strip the threads.
The short version: Unplug, drain, uncover, hold, swap, orient, tighten. The order matters more than speed.
Tools You’ll Need (Beyond the Wrenches)
You can manage this job with the tools packed with most saws. For stubborn nuts or annual maintenance, a few extras save time.
- Two adjustable wrenches or the supplied spanners. Most saws include them. If yours didn’t, two adjustable wrenches of an appropriate size work.
- Penetrating oil (like WD-40). A small spray can frees rusted nuts. Let it soak for five minutes before trying again.
- Safety goggles rated ANSI Z87.1. Not safety glasses, goggles. The Radley manual notes glasses not meeting this standard “could cause serious injury when they break.”
- A small container or magnetic tray. For holding screws, washers, and the nut. Losing the outer flange washer halts the job.
- Gloves. Not for grip on the wrench, for handling the sharp, often grit-caked old blade during removal.
A clean workspace is a safe one. Wipe the area under the saw before you start to avoid kneeling on debris.
Which Way Does the Blade Face? (The Arrow Rule)
Blade orientation is the most common post-swap error. Install it backwards, and it will cut poorly, overheat, and wear out prematurely.
The rule is simple: the blade must rotate so that the diamond-coated edge at the front of each segment enters the tile first. Imagine the blade spinning; the top edge moves toward you (or the fence, on a table saw). The cutting face should lead that rotation.
Most saws have a rotation arrow cast into the plastic of the lower blade guard. Your new blade will also have an arrow stamped on it. Match them. If your guard has no arrow, the rule of thumb is that the blade’s decorative label or brand name typically faces outward, away from the motor.
I learned this the hard way on an early job with a cheap saw that lacked guard arrows. The new blade screamed, smoked, and cut a ragged, chipped line. I shut it off, flipped the blade, and it cut like butter. The difference was night and day.
Brand-Specific Instructions & Quirks
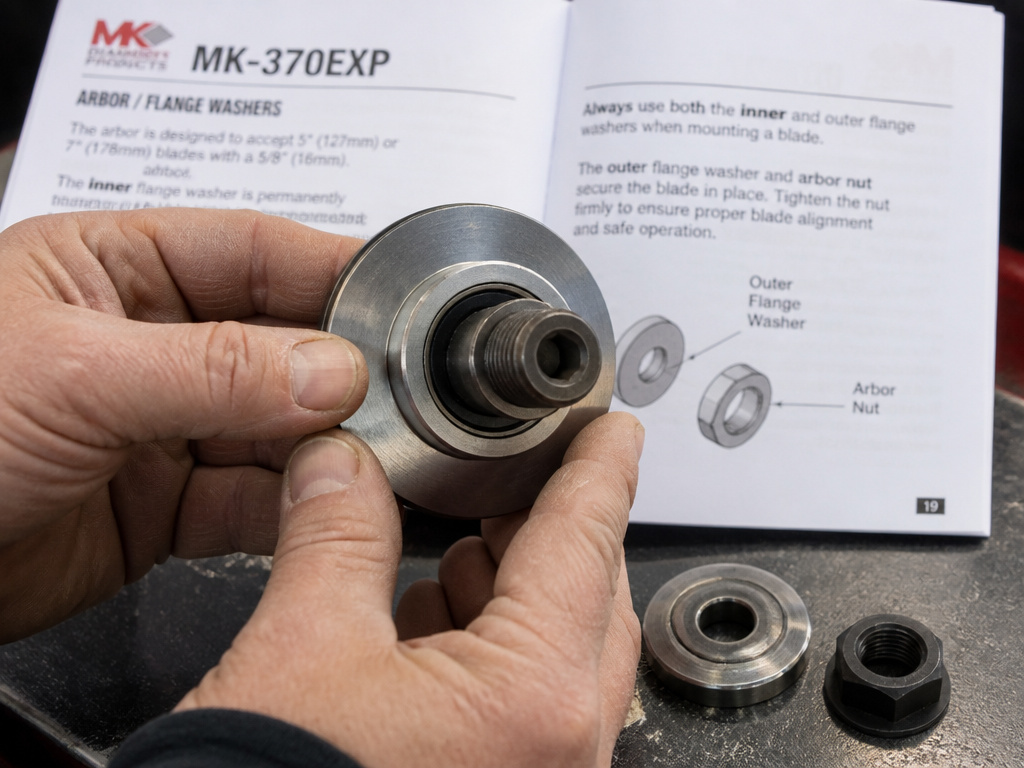
While the core steps are universal, each brand has a manual with its own warnings and part names. Ignoring them is how you break the tool.
For Harbor Freight 10″ (Model 64684) & 4-1/2″ (Model 69230) Saws
The Harbor Freight manuals are strict on blade specs. The 10-inch model demands a “smooth rim, wet cutting, 10″ Blade rated to at least 4,000 RPM.” It also warns not to use a blade too thick for the flange or one with openings or teeth. Their 4-1/2-inch model has a motor no-load speed of 5,300 RPM.
Both manuals stress using the blade guard and spreader for every cut and forbidding freehand operation. When changing the blade, the “unplug before maintenance” rule is repeated in all caps. Their motor vents also require periodic cleaning with compressed air while wearing the approved safety gear.
For Ryobi / Vevor TC180II Wet Tilesaw
The Ryobi manual provides the clearest disassembly sequence. It specifies: remove tank, then remove lower blade cover screws. It then highlights a critical, easy-to-miss detail: “Notice: The inner and outer flange washers are different.”
| Part | Function | What Happens If Wrong |
|---|---|---|
| Inner Flange Washer | Stays on spindle; provides bearing surface for blade. | If omitted, blade rubs directly on spindle threads. |
| Outer Flange Washer | Goes on after blade; distributes nut pressure evenly. | If swapped with inner, nut may not seat, causing wobble. |
| Arbor Nut | Locks everything together. | Over-tightening strips spindle threads; under-tightening allows wobble. |
The manual also says to “leave the inner flange washer on the spindle” during removal. This is your reference point. The outer flange comes off with the blade.
For Radley Wet Tile Saws
The Radley manual is direct: “This tile cutter is only designed for wet cutting, and only the continuous rim diamond blade can be used.” No dry cutting, no notched blades.
Its blade change steps mirror the universal list but note the arbor size is 5/8”, a standard shared with the Harbor Freight and Ryobi models. It lists specific replacement blade part numbers (1252-006, 1252-007 for glass, 1252-014 for porcelain), which is helpful if you own this brand.
Troubleshooting a Wobbly or Noisy Blade
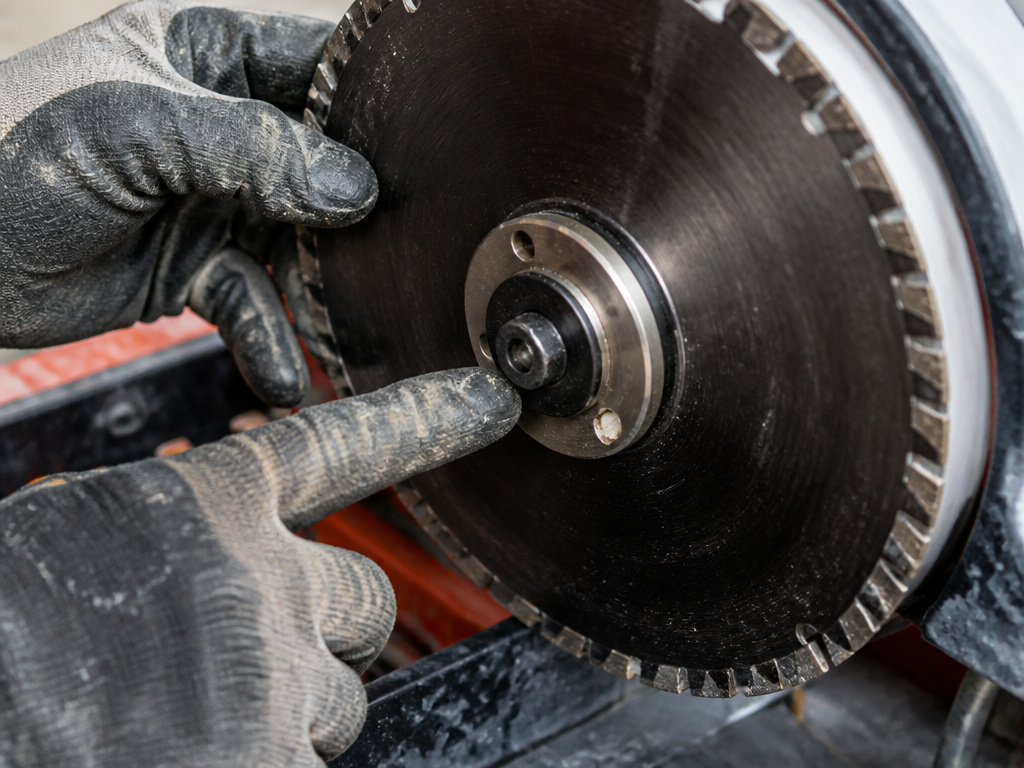
You followed the steps, but the saw now vibrates or sounds wrong. Don’t run it. Stop and check these three points.
Symptom: Vibration or visible blade wobble.
- Likely Cause: The blade isn’t seated flat against the flange, or the flanges are reversed. Dirt or a small chip of tile between the blade and flange can tilt it.
- Fix: Unplug, disassemble, clean all parts with a dry cloth, and reassemble carefully. Ensure the inner flange is flush on the spindle.
Symptom: High-pitched whining or squealing during cuts.
- Likely Cause: The blade is installed backwards, or you’re using a dry-cutting blade with a wet saw.
- Fix: Check the rotation arrows. Confirm your blade is a continuous-rim diamond blade rated for wet cutting.
Symptom: Knocking or grinding sound from the motor area.
- Likely Cause: The nut is loose, allowing the blade to shift, or the blade itself is damaged (a cracked core will make this sound).
- Fix: Unplug and check nut tightness. Inspect the blade for cracks or missing segments.
If problems persist after these checks, the issue may be a bent arbor or worn motor bearings, this is when you follow the Radley and Ryobi manuals’ advice and seek a qualified technician.
How to Choose the Right Replacement Blade
Picking a blade from the store shelf involves two specs: the one that must match, and the one that should match.
The Must-Match Spec: Arbor Hole Size. This is the diameter of the hole in the center of the blade. For the Harbor Freight and Radley saws in our sources, it’s 5/8 inch. A 1-inch arbor blade will not fit without an adapter, which most tile saw manuals discourage or forbid.
The Should-Match Spec: Blade Type. Match the blade to your material. The Radley manual distinguishes between blades for glass/mosaic tile and those for porcelain/granite. For general use, a continuous rim diamond blade is the type specified for the wet saws in our sources.
Other marks to look for: A maximum RPM rating higher than your saw’s no-load speed (e.g., 4,000+ RPM for a Harbor Freight 64684), and a blade from a reputable manufacturer. For more on this selection process, our guide to choosing a tile saw blade breaks down segment bonds and durability.
Frequently Asked Questions
How often should a tile saw blade be replaced?
There’s no fixed hour count. Replace the blade when cutting takes noticeably more pressure, produces ragged or chipped edges consistently, or the diamond segments look visibly rounded and smooth. Regular cleaning your saw blade can extend its life by preventing glazing.
Do you cut ceramic tile face up or face down on a tile saw?
For a standard tabletop wet saw, you typically place the tile face up. The blade cuts downward through the glazed surface, yielding a cleaner finish on the visible side. This is a key technique for learning how to cut tile without chipping.
My arbor nut is stuck. What do I do?
First, ensure you’re turning it counterclockwise (lefty-loosey). If it won’t budge, apply a few drops of penetrating oil to the thread area where the nut meets the spindle. Wait five minutes. Use a wrench with a longer handle to apply more force, but be careful not to bend the spindle. As a last resort, you may need to carefully hold the blade with a clamp or vise grips (protected by rags) to counter the force.
Can I use this same process to change the blade on a handheld tile saw?
The mechanical steps are similar, unplug, secure the blade, loosen the nut, but the housing and guard design is completely different. Handheld saws often have a blade cover that hinges open. Always refer to the specific manual for your handheld model.
Where can I find a replacement blade for my tile saw?
Home centers, hardware stores, and online retailers carry them. Know your saw’s arbor size (5/8″ is standard) and preferred blade diameter (e.g., 7-inch, 10-inch) before you shop. Buying the correct blade is as important as the swap itself; our resource on selecting wet tile saw blades can help.
Before You Go
Changing a tile saw blade is a five-minute job that feels like a victory when you do it right. The stakes are low, a few hand tools, a new blade, but the consequence of a mistake is a ruined tool or a dangerous slip. The truth is, the manuals are repetitive for a reason. Unplug the saw. Match the arrows. Remember the flanges are different.
Your first swap might take twenty minutes as you double-check each step. That’s fine. By the third time, you’ll do it from muscle memory before the puddle of water from the tank even drains. And when that new blade zips through a porcelain tile with a smooth, quiet hum, you’ll know you got it right. If you’re still deciding on the best tool for your tile job, our comparison of a tile saw vs angle grinder lays out when each tool makes sense. Now go make some dust, the wet, safe kind.
