
How to Convert a Cordless Drill to Corded: Step-by-Step
This post contains affiliate links. As an Amazon Associate, we earn from qualifying purchases.
To convert a cordless drill to corded, you need a DC power supply matching the drill’s voltage, the ability to handle its peak current draw (often 3-4 times the battery’s rated amps), and a safe method to wire it internally, usually involving soldering and careful insulation. It’s a technical project that can extend a drill’s life by 2–5 years, but it voids warranties, requires electrical safety knowledge, and often costs as much as buying a used corded drill.
That 2–5 year extension comes from Drill Villa’s estimate, and it’s the reason anyone considers this project. The math is simple: a new battery for an older drill often costs more than the tool is worth, and a conversion to corded power sidesteps that dead end. This is the core of how to convert a cordless drill to corded.
What follows is a breakdown of the technical hurdles, peak amps, grounding conflicts, and motor compatibility, that most how-to videos on how to convert a cordless drill to corded gloss over. By the end, you’ll know exactly which drills are worth converting, how to spec a power supply that won’t burn out, and the one wiring mistake that turns this from a repair into a fire hazard.
Key Takeaways
- Match voltage exactly, but oversize the power supply’s current rating by at least 3x the battery’s amp-hour rating to handle the drill’s peak motor startup draw.
- Double-insulated tools like many DeWalt models are designed without a ground path; adding one incorrectly can create a new shock hazard.
- Per DeWalt’s manual, an 18 AWG extension cord is only rated for up to 50 feet before voltage drop affects performance.
- The total project cost for parts (power supply, wire, connectors, enclosure) often meets or exceeds the price of a basic, new corded drill.
- A conversion is permanent and voids all tool warranties and safety certifications (like UL62841-1 for Ryobi tools).
What You’ll Need: Parts, Tools, and Safety Gear
Gathering the right components for how to convert a cordless drill to corded isn’t just a shopping list; it’s a compatibility check. The wrong choice at this stage means the drill either won’t run or will fail under load, possibly damaging the motor.
You need a DC power supply. Its output voltage must match your drill’s nominal battery voltage, such as 12V, 14.4V, or 18V. This isn’t a suggestion. A 20V supply on a 12V drill will almost immediately overheat the motor. A 12V supply on an 18V drill will be gutless.
The current rating is where people get burned. Literally. A Ryobi 20V MAX 2.5Ah battery’s amp-hour rating indicates its capacity, not the current the drill draws. On startup, that motor can pull a high peak current for a fraction of a second. Your power supply must be rated for that peak current, not just the battery’s amp-hour rating. An undersized power supply will sag and shut down, leaving you with a stalled drill.
Common mistake: Using a power supply rated only for the battery’s amp-hour capacity. The motor’s startup surge will overwhelm it, causing the supply to thermally shut down or the drill to bog down on any load thicker than balsa wood.
For wiring, It handles the current and vibration better than the thin stuff. A soldering iron, electrical tape, and heat-shrink tubing are essential for solid, insulated connections. You’ll also need a multimeter to verify voltages and continuity before you plug anything into the wall.
Safety gear is not optional. You are exposing wires that were never meant to see 120V AC. Safety glasses, work gloves, and a well-ventilated workspace are the bare minimum. If your drill requires disassembling the trigger assembly, take photos with your phone at each step. The springs inside have a talent for launching themselves into another dimension.
| Component | Spec to Look For | Why It Matters |
|---|---|---|
| DC Power Supply | Voltage: Match battery (e.g., 12V, 18V). Current: Sufficient for the drill’s peak draw. | Supplies stable power; undersized units overheat or trip. |
| Wire | 16 AWG or 14 AWG stranded copper. | Carries high startup current without voltage drop or overheating. |
| Connectors | Bullet connectors or terminal blocks. | Allows disassembly for troubleshooting; better than permanent solder-only joints. |
| Enclosure | Plastic project box (if supply is exposed). | Contains any potential short or arc; must be non-flammable. |
| Multimeter | DC voltage and continuity test settings. | Verifies correct voltage and checks for dangerous shorts before power-on. |
The .095 vs .105 Trade-Off That Burns Out Electric Motors
The invisible problem is internal resistance. In a battery system, the battery’s internal resistance acts as a natural current limiter. A direct-connect power supply doesn’t have that. When you pull the trigger, the motor presents a near-dead short to the power supply for an instant. If the supply can’t deliver that burst, the voltage at the drill’s terminals crashes. The motor stalls, draws maximum current continuously, and the windings heat up.
You’ll smell it before you see smoke, a sharp, acrid odor like burning varnish. That’s the insulation on the motor coils cooking. Once that happens, the drill is a paperweight.
This is why the “match the voltage” advice is incomplete. You must also ensure the power supply has a high enough peak current rating and low output impedance. A cheap, unregulated supply might say “12V 5A” on the label, but its voltage will droop to 9V under a 3-amp load. Better yet, use a bench power supply with adjustable current limiting for your first test.
Where this goes sideways: Connecting a high-current supply directly without a fuse. A short in your wiring or a failed motor could turn your power supply into a welder, melting wires and risking fire.
The Step-by-Step Conversion Process
Disconnect any battery and confirm the drill is dead with your multimeter. Remove the housing screws, often hidden under rubber grips or labels. Inside, you’ll see the battery terminals: two flat metal tabs or springs. These are your connection points.
The goal is to solder your power wires directly to these terminals, preserving the drill’s original forward/reverse switch and variable speed trigger. Clip the wires from your power supply, strip about half an inch of insulation, and tin the ends with solder. Do the same to the battery terminals on the drill.
Now, solder the positive supply wire to the terminal marked “+” or colored red. Solder the negative wire to the “-” or black terminal. Use plenty of heat-shrink tubing to cover each joint individually, then wrap the pair together. The idea is to prevent any accidental short if the wires shift inside the case.
Before reassembling, perform a continuity check with your multimeter. Set it to the ohms setting. Touch one probe to the bare tip of your positive wire and the other to any exposed metal on the drill’s chuck or gearcase. You should see infinite resistance (no continuity). If you get a reading, you’ve created a short to the chassis, find and insulate it.
Next, a voltage test. Connect your power supply to the wall but don’t yet attach it to the drill. Set your multimeter to DC volts, appropriate for your voltage. Touch the probes to the supply’s output wires. You should see a stable voltage within 0.5V of your target. Now, connect the supply to your drill wires, secure everything temporarily with tape, and pull the trigger. The chuck should spin smoothly.
If it works, you can proceed to the permanent installation. Route the new power cord out of the drill’s case through a new hole you’ll drill, or repurpose the battery compartment door. Use a strain relief grommet, a rubber grommet from an automotive store works, where the cord exits. This prevents the wire from flexing and breaking at the solder joint.
The one step nobody skips but should: Testing under load. Don’t just spin the chuck in air. Clamp a scrap piece of wood in a vise and drive a drill bit into it. Listen to the motor. If it labors, slows dramatically, or you notice the power supply’s fan roaring, your supply is likely current-limited. That load test is what separates a working conversion from a reliable one.
Grounding vs. Double Insulation: The Safety Conflict
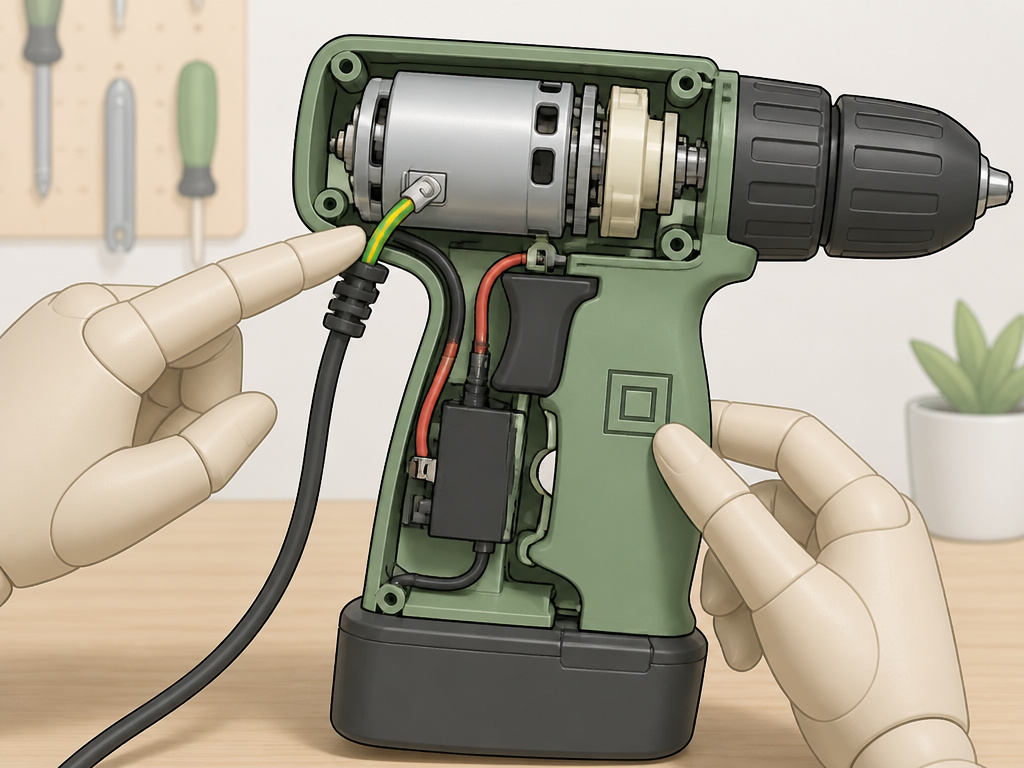
Here’s where official manuals and DIY forums directly disagree. The DeWalt cordless drill manual states its tools are double insulated, meaning “no earth wire is required.” The plastic housing is designed as two separate, independent insulating barriers. Even if a live wire touches the inside, you shouldn’t get a shock holding the outside.
Many conversion guides, including one Stack Exchange discussion, suggest connecting one of the DC output wires to the ground pin of your AC power cord for safety. Their logic: if the AC-side of your power supply fails and sends high voltage to the DC output, that ground path will trip your breaker.
But if your drill is double-insulated, adding a ground connection to its internal metal parts can actually create a new hazard. You’re now creating a potential path for current where the manufacturer explicitly designed one not to exist.
So who’s right? It depends entirely on your power supply. If you’re using an isolated supply (one with a transformer), the AC and DC sides are separated. A fault is unlikely to bridge that gap, so grounding might be redundant. If you’re using a non-isolated switching supply (like many modern, lightweight bricks), a fault could put AC on the DC lines. In that case, grounding the drill’s chassis, if you can even find a metal part to connect to, might add a layer of safety, but it also violates the original double-insulation design.
From the DeWalt manual: “These tools are double insulated, meaning no earth wire is required.”
My take? If your drill housing is entirely plastic and the original design is double-insulated, maintain that. Focus your safety efforts on using a high-quality, certified (UL/ETL) power supply and excellent insulation on all your connections. The safer play is to double-insulate the entire system by putting the power supply in a sealed plastic box.
Is This Worth It? Cost vs. Buying New
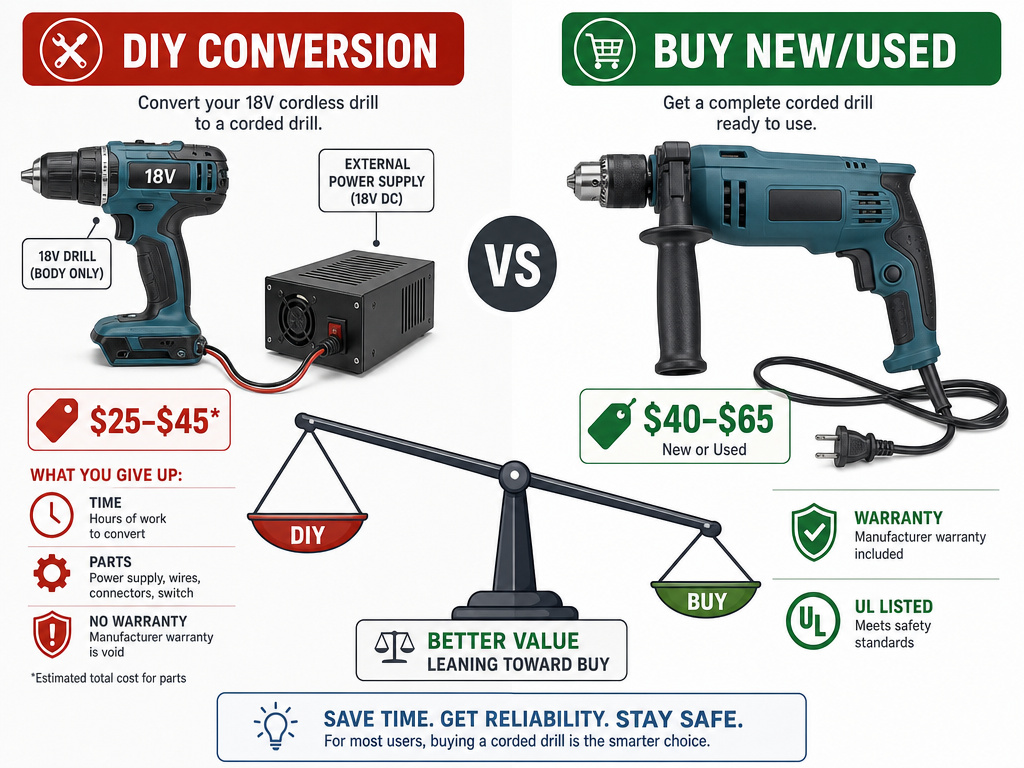
Here are the numbers with real examples. For a common 18V drill, you’ll need:
Now, search “corded drill” on any marketplace. You can find new, basic corded drill models. They come with a warranty, are UL-listed, and are designed from the ground up for corded power. For $65, you could buy a used but professional-grade corded drill from a pawn shop.
The conversion only makes financial sense in two scenarios: 1. 2. The drill has sentimental or specific ergonomic value that a new drill won’t match.
Otherwise, you’re spending time and money to create a tool that’s less safe, less reliable, and tethered to an outlet, which defeats the original purpose of a cordless drill. The cordless vs corded debate is settled by your use case; a conversion sits in an unsatisfying middle ground.
Troubleshooting a Converted Drill
You’ve wired it, plugged it in, and nothing happens. Start with the multimeter.
Drill doesn’t turn on:
- Check voltage at the drill’s terminals. If it’s zero, trace back to the power supply. Is it switched on? Is the AC plug loose?
- If voltage is correct, check the trigger switch. Use the continuity setting on your multimeter. Press the trigger; you should hear a beep indicating the circuit is closed. No beep means a faulty switch or broken wire.
Drill runs slow or bogs down instantly:
- This is almost always a voltage drop under load. Set your multimeter to DC volts, attach the probes to the drill’s terminals, and pull the trigger while drilling into a scrap block. If the voltage dips significantly under load, your power supply may not deliver the needed current. You need a beefier supply.
- Also, check your wire connections. A loose or corroded solder joint adds resistance, which creates heat and drops voltage.
The power supply gets very hot or shuts off:
- It’s overloaded. The drill is drawing more current than the supply’s thermal limits. This is a design flaw, your supply is undersized. Don’t just let it cool and restart; you will damage both the supply and the drill motor.
Your Alternatives to a Permanent Conversion
Before you solder, consider reversible options. They’re safer and preserve resale value.
A “Battery Eliminator” Adapter: This is an external box that mimics a battery pack. You open a dead battery shell, remove the cells, and wire in terminals connected to your power supply. You then plug this modified shell into the drill. The drill thinks it’s a battery. It’s non-destructive and you can switch back to a real battery later. For a deep dive on working with power tool electronics, our guide to replacing a power tool cord covers similar principles of internal wiring and insulation.
Using a Car Battery: For a 12V or 18V drill, a car battery (or a deep-cycle marine battery) is an excellent, high-current DC source. It’s portable, powerful, and perfectly matched to the drill’s need for surge current. The obvious downside is lugging a 40-pound battery around your workshop.
Buying a New Battery or Drill: This isn’t giving up; it’s a pragmatic calculation. A new, higher-capacity battery might cost the same as your conversion parts and restore true cordless convenience. Or, as the math shows, putting that cash toward a dedicated best corded drills candidate often yields a better, safer tool for the same money.
Before You Go
If your drill’s battery is dead and you’re staring at a half-finished project, the appeal of a quick conversion is real. But treat this as a last resort, not a first option.
The threshold is clear: if you cannot find a replacement battery and the drill is otherwise a high-quality keeper, a conversion with a properly sized, certified power supply can work. Follow the wiring diagrams in a primary source like this NPS DeWalt drill technical manual to understand the internal layout before you cut anything.
For everyone else, especially if you’re looking at a big-box store drill that’s a few years old, weigh the $65 in parts and an afternoon’s work against the $50 price tag of a new, warrantied corded drill. The latter is almost always the smarter, safer play. Knowing how to do this is a valuable skill. Knowing when not to do it is wisdom.
What’s different about converting a 12V drill versus an 18V or 20V drill
The primary difference is the voltage your power supply must provide. A 12V drill needs a 12V DC supply, while an 18V or 20V MAX tool requires a higher voltage supply, typically 18V. Using a lower voltage will result in weak performance; using a higher voltage can burn out the motor. Higher voltage tools often draw more current, so the power supply must also have a higher current rating to handle the demand, especially at startup or when the drill is under heavy load. Always match the power supply to the tool’s nominal battery voltage for safe and effective operation.
Frequently Asked Questions
Can you really convert any cordless drill to corded?
No. Drills with sophisticated electronic triggers or battery management systems can be incompatible. Simple, brushed-motor drills from major brands like DeWalt, Ryobi, or older Makita models are the best candidates. If your drill has a digital battery gauge or “smart” features, the conversion likely won’t work.
Is a converted drill as powerful as a real corded drill?
Usually not. A true corded drill is designed for continuous, high-torque operation with a motor that can dissipate heat. A converted cordless drill uses a smaller motor designed for intermittent battery use. Under sustained load, it will heat up faster and may deliver less torque than a comparably rated best wired drills model.
How do I find my drill’s voltage?
Check the label on the drill’s battery or the tool itself. Common ratings are 12V, 18V, 20V MAX (which is 18V nominal), or 14.4V. If the battery is lost, search the model number online, often found near the battery latch, to find the original specifications.
Can I switch back to battery after converting?
Only if you install a connector plug (like a DC barrel jack) instead of permanently soldering the wires. A permanent solder conversion is irreversible without damaging the drill’s battery terminals.
Is converting a cordless drill dangerous?
Yes, it involves working with mains electricity and creating permanent modifications that void safety certifications. If you are not comfortable wiring a household outlet or using a soldering iron, do not attempt this. The risk of electric shock, fire, or damaging the tool is significant.
