
How to Make Straight Cuts With a Circular Saw
This post contains affiliate links. As an Amazon Associate, we earn from qualifying purchases.
To make a straight cut with a circular saw, you need three things: a sharp blade, a secure guide, and the correct blade depth. The saw’s base plate must ride firmly against a straight edge, and you must support the workpiece on both sides of the cut line to prevent binding. A dull blade or incorrect depth is the fastest route to a crooked cut and kickback.
That setup advice is universal, but the specific numbers for blade depth aren’t. Manufacturers disagree on the exact measurement, and using the wrong one is a common, quiet mistake that ruins cuts. This guide walks through the official, sourced recommendations from RIDGID, SKIL, DeWALT, and CRAFTSMAN manuals, plus the essential safety steps that let you focus on the line, not the tool. Understanding these fundamentals is the key to how to make straight cuts with a circular saw.
What follows: the three setup checks you must do every time for how to make straight cuts with a circular saw, a comparison of every guide method from a speed square to a DIY track, and the practice drill that builds straight-cutting instinct in twenty minutes.
Key Takeaways
- Set your blade depth correctly—manufacturers disagree: CRAFTSMAN recommends not exceeding 1/4 inch, DeWALT recommends one-half tooth depth, and SKIL recommends not more than one full tooth length below the material.
- Always use a physical guide. A clamped straightedge or factory rip fence is required for accuracy; freehand cutting is for pros in the field.
- Support the workpiece on both sides of the cut. An unsupported piece will sag and pinch the blade, causing kickback and a ruined cut.
- Wear ANSI Z87.1 eye protection and hearing protection. Sawdust and noise are cumulative hazards, not occasional nuisances.
- A sharp, clean blade cuts straight. A dull blade forces the saw to wander and increases the risk of binding.
The 3 Rules of Saw Setup That Prevent Wandering
A circular saw that drifts is misconfigured. Before you touch the trigger, verify three things.
First, the blade must be sharp. The RIDGID and DeWALT manuals are identical on this point: “Do not use dull or damaged blades. Unsharpened or improperly set blades produce narrow kerf causing excessive friction, blade binding and kickback.” A dull blade doesn’t cut; it tears. The saw motor fights through the material, and the base plate gets tugged off your guide line. You’ll hear the difference—a healthy blade has a steady, clean whine. A dull one strains, whining higher as the motor bogs down.
Second, every locking lever must be tight. The RIDGID manual states, “Blade depth and bevel adjusting locking levers must be tight and secure before making cut.” This isn’t a gentle suggestion. Before each cut, grab the shoe and try to wiggle it. There should be zero play. If you can move it, tighten the lever until you can’t.
Third, set the blade depth. This is where the manuals disagree, and the wrong choice makes your saw harder to control.
| Brand | Recommended Depth Setting | Primary Goal |
|---|---|---|
| CRAFTSMAN | “Should not exceed 1/4 inch below the material to be cut.” | Safety and kickback prevention. |
| DeWALT | “One-half tooth of the blade will project below the material.” Measured from tooth tip to the gullet. | Balanced cutting efficiency and reduced binding. |
| SKIL | “Not more than one tooth length of the blade should extend below the material.” | Minimum splintering on the cut’s top side. |
The CRAFTSMAN rule is the most conservative. A quarter-inch of blade below the material gives you a clean exit cut with minimal exposed teeth. The SKIL method exposes more blade, which can leave a cleaner top surface on plywood. The DeWALT method is a middle ground. My take? For a beginner, start with the CRAFTSMAN rule. It’s the safest. As you get comfortable and start chasing finish quality on plywood, experiment with the SKIL method.
Where this goes sideways: Setting the blade several inches too deep. This exposes excessive blade, dramatically increases the chance of catching on something below the workpiece, and makes the saw far more difficult to control. The cut quality suffers, too.
Choosing and Using Your Straight Edge
Freehand cutting with a circular saw is a field carpentry skill. In the shop, you use a guide. Your goal is to let the saw’s base plate ride along something perfectly straight, so you only have to worry about forward motion.
You have four main options, each with a best-use case.
- Factory Rip Fence: This is the guide that attaches to the side of your saw’s shoe. The CRAFTSMAN manual is blunt: “USE RIP FENCE. Always use a fence or straight edge guide when ripping.” It’s fantastic for cutting narrow strips where you can reference the fence off the board’s factory edge. It’s less stable for wide cuts on sheet goods.
- Clamped Straightedge: This is the most versatile shop-made guide. You clamp a known-straight piece of lumber or a level to your workpiece, using the saw’s base plate as a guide. The SKIL manual recommends using “a straight piece of 1” (25 mm) lumber to the sheet as a guide” for rip-cutting large panels.
- Speed Square: Ideal for cross-cutting 2x4s and other dimensional lumber. Hook the square’s lip over the edge of the board, and run the saw’s shoe against the body. It’s fast, accurate for 90-degree and 45-degree cuts, and almost foolproof.
- DIY Guide Rail/Track: This is a clamped straightedge system you build for your specific saw. You attach a base to a straight board that your saw’s shoe nestles into, creating a zero-clearance guide. It’s the closest you can get to a track saw without buying one.
I’ve stuck with a chalk line and a clamped guide for long cuts on plywood. Snap the line, clamp the straightedge just offset from it, and run the saw. The speed and accuracy beat trying to eyeball a pencil line across eight feet every time.
No matter which guide you use, the principle is the same. Position the guide so the saw blade cuts on your marked line, not the edge of the guide. This usually means measuring the offset from your saw’s blade to the edge of its shoe, then setting the guide that distance away from your cut line. Do this once, write the measurement on your saw with a paint marker, and you’re set for life.
The Step-by-Step Cut: From Marking to Finish
With your saw set and your guide ready, the actual cutting process is a disciplined sequence. Missing a step here introduces error.
- Mark and Support. Mark your cut line clearly with a pencil and a straightedge. Then, support the workpiece. The RIDGID and DeWALT manuals are clear: “Supports must be placed under the panel on both sides, near the line of cut and near the edge of the panel.” Use sawhorses or scrap wood. The piece you’re cutting off must also be supported so it doesn’t fall and tear the wood as you finish the cut.
- Position and Align. Place your saw at the start of the cut with the blade off the material. Align the notch on the front of the shoe (the sight line) with your pencil mark. For a 90-degree cut, use the right side of the notch, as shown in the SKIL manual. For a 45-degree bevel, use the left side.
- Start the Saw and Ease In. Start the saw and let it reach full speed before the blade touches the wood. Gently lower the spinning blade onto your starting point. Don’t force it; let the teeth bite.
- Feed with Steady Pressure. Push the saw forward at a consistent pace. Listen to the motor. If it bogs down, you’re pushing too fast or the blade is dull. Don’t twist or steer the saw—let the guide do the work. Keep your body positioned to the side of the blade, not directly behind it, as DeWALT advises.
- Finish and Release. Once the cut is complete, release the trigger and hold the saw in place until the blade stops spinning. Only then set it down, making sure the lower guard has closed over the blade.
Common mistake: Rushing the finish. Letting the cutoff piece fall away unsupported often causes a splintered tear-out on the last inch of the cut. Either support it with your hand (safely away from the line) or have a helper hold it.
Building Your Muscle Memory
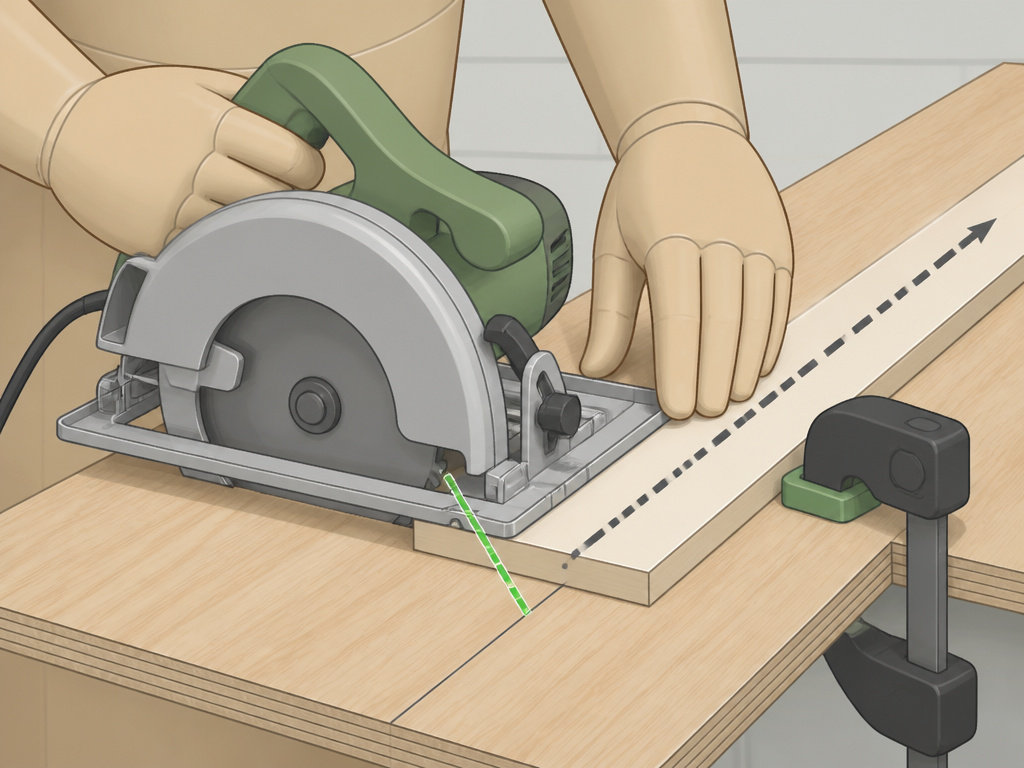
Knowing the steps is different from doing them smoothly. If you’re new to a circular saw, your first ten cuts should be practice. Use cheap scrap lumber—2×4 offcuts or plywood scraps.
Here’s a practice drill. Take a piece of scrap and draw three straight lines across it. For the first cut, don’t even turn the saw on. Practice positioning the saw, aligning the sight, and running the shoe along your clamped guide. Feel the motion. For the second cut, make the cut but focus only on your starting and stopping technique.
The goal is to make the sequence of look-align-start-feed-stop for how to make straight cuts with a circular saw feel automatic on scrap wood, so when you’re cutting your expensive project plywood, your brain is free to focus on the line.
Troubleshooting: Why Your Saw Won’t Cut Straight
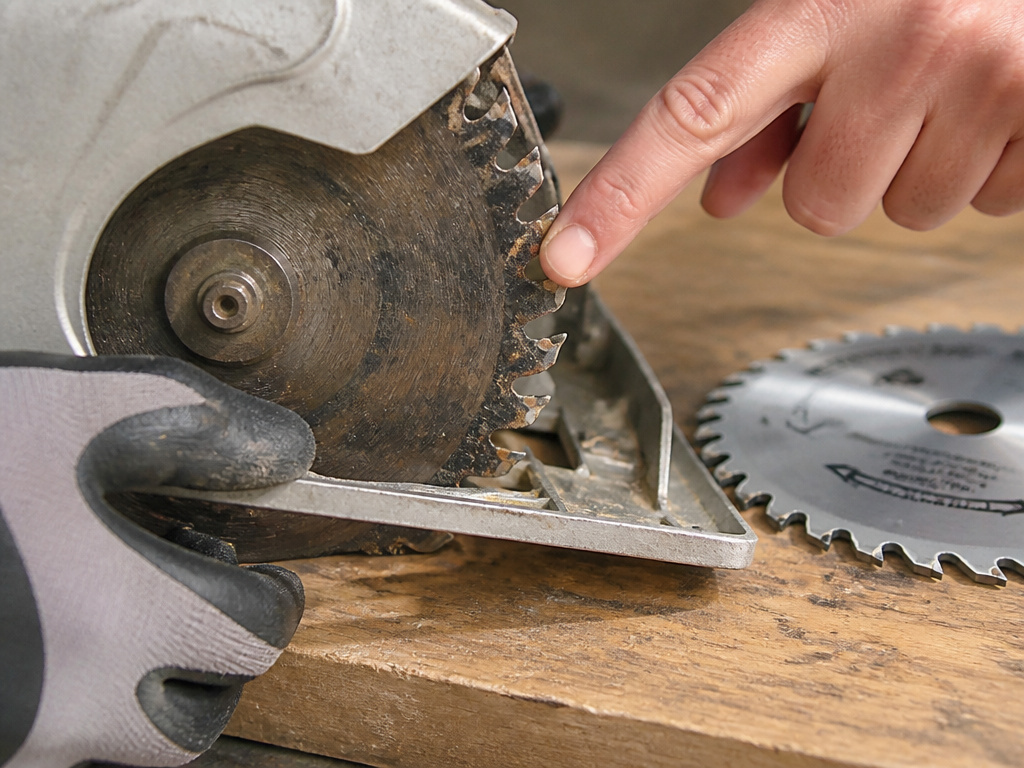
If your saw is still wandering after checking setup and using a guide, the problem is usually one of these three things.
- The Blade is Dull or Dirty: This is the number one cause. Pitch and sap buildup on the blade teeth create drag. Clean the blade with a dedicated cleaner or carefully with a brass brush. If it’s dull, replace it. A sharp blade should cut through a 2×4 with steady, light pressure.
- The Base Plate is Loose or Misaligned: Over time, the shoe can get bent or the pivoting mechanism can wear. If the shoe doesn’t sit flat on the workpiece, the saw will rock and drift. Check for flatness and tighten any pivot bolts.
- You’re Forcing the Saw: Let the tool do the work. Pushing or twisting the saw to “steer” it along the line guarantees a wavy cut. If you’re fighting it, stop. The blade is likely dull, the depth is wrong, or you’re trying to cut too fast.
Worth knowing before you start: A circular saw’s lower guard must move freely. The RIDGID manual warns to check it before each use. If it’s sticky or slow to close, clean out the sawdust and debris around the pivot point. A bound-up guard is a safety hazard and can snag on the workpiece mid-cut.
Safety: The Non-Negotiable Foundation
This is a YMYL (Your Money or Your Life) topic. Getting hurt isn’t a mark of experience; it’s a sign you skipped a step. The manuals don’t mince words.
Eye and Ear Protection: The RIDGID manual specifies “eye protection with side shields marked to comply with ANSI Z87.1.” DeWALT adds “ANSI S12.6 (S3.19) hearing protection” and “NIOSH/OSHA/MSHA respiratory protection” for dusty operations. Safety glasses aren’t sunglasses. Get a pair with the Z87.1 stamp on the frame.
Secure the Workpiece: “Use clamps or other practical way to secure and support the workpiece to a stable platform. Holding the work by hand or against your body is unstable and may lead to loss of control.” This is verbatim from both RIDGID and DeWALT. Clamp it down.
Respect the Lower Guard: This spring-loaded cover is your primary safety device. The manuals are unanimous: never tie or clamp it open. Only retract it manually for special cuts like plunge cuts, and release it as soon as the blade enters the material.
Check Blind Areas: “Use extra caution when sawing into existing walls or other blind areas. The protruding blade may cut objects that can cause kickback.” That electrical wire or plumbing pipe you forgot about will turn a simple cut into an emergency.
Build these checks into your routine. Safety glasses on. Workpiece clamped. Guard moving freely. Area clear. Now you can think about making a straight cut.
Blade-Left vs. Blade-Right Saws
Circular saws are designed with the blade on one side of the motor, and which side matters for visibility and control. On a blade-right saw, the blade is to the right of the motor, placing the main weight of the tool over the piece you’re keeping. This design often makes the cut line harder to see because the motor housing blocks your view. A blade-left saw positions the blade left of the motor, giving you a clearer, unobstructed view of your cutting line as you push. Your dominant hand also influences choice; right-handed users may find a blade-left saw allows them to stand comfortably to the side of the cut, aligning with the safety advice to keep your body not in line with the blade. Regardless of type, always secure your workpiece and check that the blade depth and bevel adjusting levers are tight before starting a cut.
Frequently Asked Questions
How do you cut perfectly straight with a circular saw?
You use a physical guide. Perfectly straight cuts are impossible freehand over any distance. Clamp a straight piece of lumber, a level, or a factory rip fence to your workpiece so the saw’s base plate rides against it. This removes steering from the equation and guarantees a straight line.
Why does my circular saw cut crooked?
Three reasons, in order of likelihood: a dull blade, an incorrect blade depth setting, or you are forcing and steering the saw instead of letting it feed naturally. A dull blade is the most common culprit—it tears instead of cuts, causing the saw to bind and wander.
What is the best DIY guide for a circular saw?
Clamped straightedge is the best all-around DIY guide. Take a long, straight 1×4 or a 4-foot level and clamp it to your workpiece. Set it parallel to your cut line by measuring the offset from your saw’s blade to the edge of its shoe. This method is cheap, adaptable to any cut length, and highly accurate.
How deep should a circular saw blade be set?
Manufacturers disagree. CRAFTSMAN says no more than 1/4 inch below the material. DeWALT recommends one-half tooth depth. SKIL recommends no more than one full tooth length. For beginners and general safety, follow the CRAFTSMAN rule of 1/4 inch. It minimizes exposed blade and reduces kickback risk.
The Bottom Line
Making straight cuts is about removing the need for a steady hand. A sharp blade, a clamped guide, and proper support do 95% of the work. Your job is to set the correct blade depth and push at a steady pace.
The one rule I won’t bend on is safety. The circular saw safety and operation protocols from RIDGID, DeWALT, and others are written for a reason. Wear your ANSI Z87.1 glasses, clamp your work, and respect the guard. That foundation allows you to practice the skill without fear.
Start with the CRAFTSMAN depth rule on some scrap. Get comfortable with a DIY guide rail. Then, when you move to cut plywood or rip a board, the process will feel routine, not risky. That’s when you start making furniture, not just cuts.
