
How to Oil a Pneumatic Nail Gun: The 5-Step Manual Process
This post contains affiliate links. As an Amazon Associate, we earn from qualifying purchases.
To oil a pneumatic nail gun, add 2-6 drops of dedicated pneumatic tool oil into the tool’s air inlet fitting, then dry-fire the tool 3-4 times without fasteners to distribute the oil. Lubricate before each use or after every 2-8 hours of continuous operation, depending on the manufacturer’s specific guidance for your model.
The POWERNAIL technical bulletin from 2012 spells out the stakes: lack of lubrication leads directly to sluggish cycling, shorter seal life, and internal rust from compressor moisture. That’s not a maybe; it’s a documented failure mode with a timeline. A core part of proper maintenance is knowing how to oil a pneumatic nail gun.
What follows is the procedure pulled from six different OEM manuals, the exact oil types they name, and the one field test that decides whether you’ve mastered how to oil a pneumatic nail gun. We’ll also cover where the manuals disagree, on drop count, frequency, and cold-weather prep, so you can match your tool to the right schedule.
Key Takeaways
- Add oil into the air inlet, never into the magazine or exhaust port. The air stream carries the oil through the internal valves and O-rings.
- Use only dedicated pneumatic tool oil. Detergent oils, additives, and substitutes like WD-40 accelerate seal wear and cause leaks within weeks.
- Dry-fire the tool several times after adding oil. If you skip this, the oil pools at the inlet and the tool’s first few shots run dry.
- Frequency splits by model: Some POWERNAIL manuals say every 8 hours or before each use, Palm Nailer says every 2 hours, and others say once or twice a day. Check yours.
- Over-oiling vents as a fine mist from the exhaust, which can stain light-colored wood. The correct amount varies by model, from 2 to 6 drops.
Where Does the Oil Go? (The Air Inlet is the Only Port)
Look at the back of your nail gun, opposite the nose. You’ll see a threaded metal port where the air hose quick-connect plugs in. That’s the air inlet, sometimes called the air plug or male fitting. Every manual from POWERNAIL to Everwin points here.
The technical snippet: Pneumatic nail gun lubrication is performed by introducing a light-grade oil into the tool’s pressurized air stream via the male air inlet fitting. The oil is atomized and carried through the internal passageways to lubricate the piston, cylinder, valves, and O-ring seals, preventing friction wear and corrosion from moisture-laden air.
The air inlet is the only path that gets oil to the parts that need it, which is the core principle of how to oil a pneumatic nail gun. Adding oil anywhere else, down the magazine, into the exhaust port, onto the driver blade, does nothing for the internal seals. At best, it’s wasted. At worst, it gums up the works.
I’ve seen guys try to “lube” a sticking driver by dripping oil into the nose. That might free it for a dozen shots, but it does nothing for the O-ring that’s actually drying out and causing the drag. The fix is always the same: disconnect the air, add oil to the inlet, dry-fire, and reconnect. The oil travels where the air goes.
What Oil Should You Use? (The Short List vs. The Banned List)
The manuals are unanimous on what not to use. Detergent oils, motor oils, and all-purpose lubricants like WD-40 are explicitly banned. They contain additives and viscosity modifiers that attack the nitrile rubber in O-rings and seals, causing them to swell, harden, and crack.
Use this:
- Pneumatic Tool Oil: This is the generic, always-safe answer. Brands like POWERNAIL (Part #09-445-29757A), Paslode, and Bostitch sell it in small bottles.
- Mobil Velocite #10: Named specifically in the Everwin coil nailer manual as an acceptable equivalent to air tool lubricant. It’s a light spindle oil.
Never use this:
- WD-40, 3-In-One Oil, Sewing Machine Oil: These are not pneumatic oils. They leave varnish deposits and damage seals.
- Detergent Motor Oil (5W-30, 10W-30): The detergents are corrosive to rubber.
- Automatic Transmission Fluid (ATF): Far too heavy and loaded with additives.
Common mistake: Using whatever light oil is on the shelf. A finish nailer gummed up with WD-40 will start leaking air from the exhaust within two weeks, the O-rings go hard and lose their seal. Replacing them means a full teardown.
The oil needs to be light enough to atomize in the air stream and thin enough to flow in cold weather. Dedicated pneumatic oil is formulated for that. Everything else is a gamble your seals will lose.
How Much Oil? The Manufacturer Split (2 Drops vs. 6 Drops)
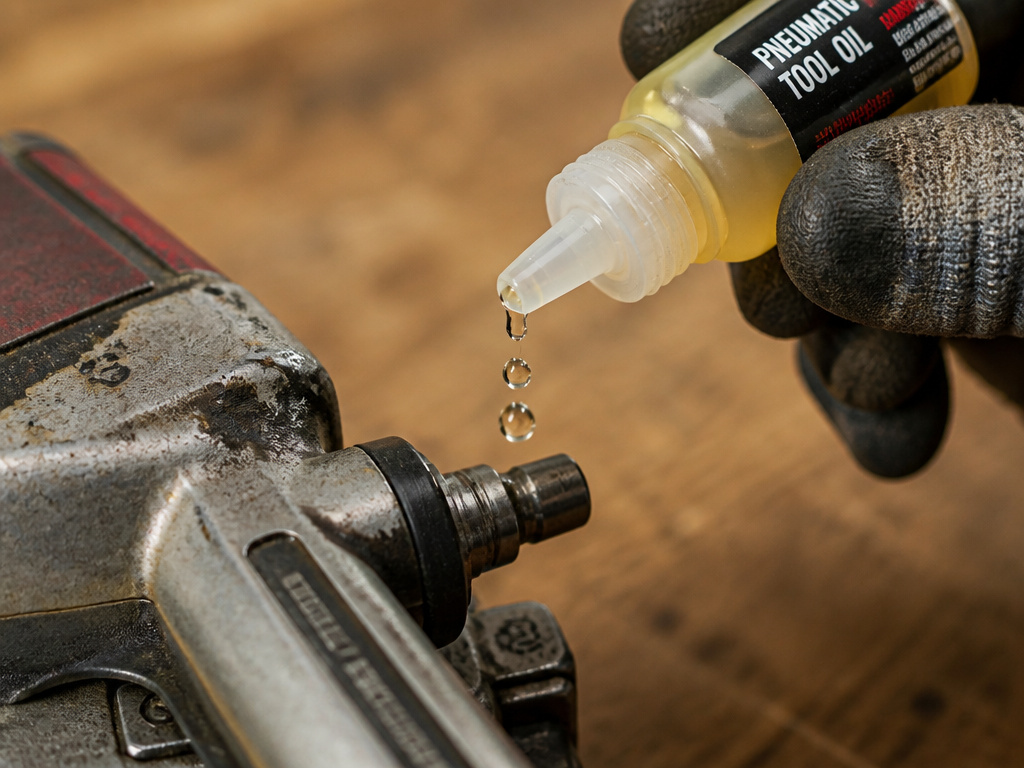
How many drops should you add? This is where the manuals disagree, and the answer depends entirely on your tool’s make and model. There is no universal number.
| Tool Model / Manual | Recommended Drops | Notes |
|---|---|---|
| POWERNAIL 50F / 2000F | 2 drops | Specified as “two (2) drops of air-tool oil in the air plug.” |
| POWERNAIL 445LS | 2-4 drops | “Place 2-4 drops of Air Tool Oil… at least every eight (8) hours.” |
| POWERNAIL 445/445FS/50PFlex | 3-4 drops | From the 2012 Technical Bulletin: “three to four drops.” |
| Palm Nailer | 2-6 drops | “Place 2 to 6 drops… before each work day or after every 2 hours.” |
| General Guideline | 3 drops | A safe middle-ground for an unknown tool. |
If you have the manual, follow it. If you don’t, start with three drops. The goal is a light coating, not a flood. Over-oiling has a clear symptom: after you reconnect the air and fire a few test shots, a fine mist of oil will blow out of the exhaust port. If you see that, you used too much. It’s messy and can stain wood.
How Often Should You Oil? Duty Cycle is Everything
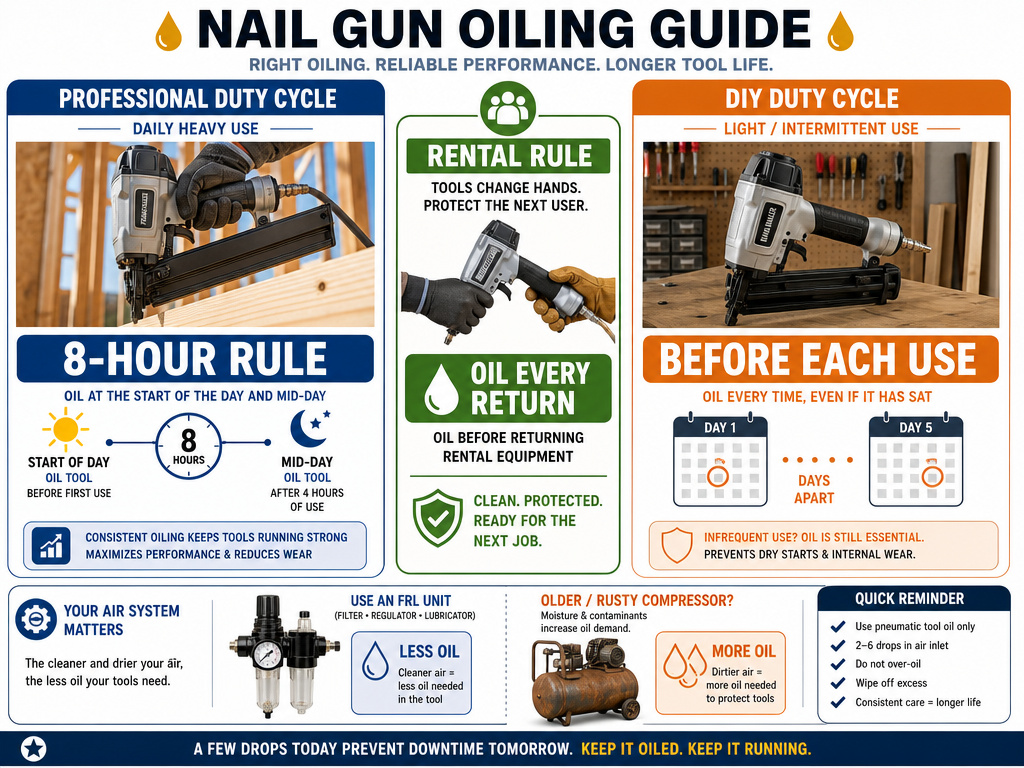
Lubrication frequency isn’t about calendar days; it’s about hours of trigger time and the condition of your air supply. The core split is between high-cycle professional use and intermittent DIY work.
- For continuous professional use (framing, decking, sheathing): The 8-hour rule from POWERNAIL is the benchmark. Oil at the start of the day and again at the mid-point if you’re running non-stop.
- For intermittent DIY/contractor use: The “before each operation” advice applies. If you’re picking up the tool after it’s sat for a day or more, give it a couple of drops. This accounts for any oil that has drained or settled.
- For palm nailers or high-speed tools: The Palm Nailer manual recommends oiling before each work day or after every 2 hours of continuous use.
- The rental rule: POWERNAIL’s bulletin adds a specific clause: oil every time the tool comes back from a rental. Assume it hasn’t been lubed.
Where this goes sideways: Following a generic “oil daily” rule when running a coil nailer on a production line. That tool will burn through its lubrication in three hours, and by hour four the O-rings are running dry. You’ll hear the piston start to squeak before the power drops.
Your air compressor is a variable. A well-maintained system with a filter-regulator-lubricator (FRL) adds a continuous micro-dose of oil, extending the time between manual oilings. A rusty tank that never gets drained pumps water vapor into the tool, which washes away the oil and demands more frequent lubrication. If you see moisture blowing out of your nail gun’s exhaust, oil more often and fix your compressor.
The 5-Step Manual Oiling Process (No Automatic Oiler)
Here is the step-by-step, synthesized from every manual. It works for any pneumatic nail gun.
- Disconnect the air hose and clear the tool. Unplug the quick-connect. Fire the trigger once or twice to bleed any residual air from the line. Ensure there are no fasteners in the magazine. Dry-firing with a nail loaded can cause a jam or dry-fire damage.
- Add the oil. Hold the tool with the air inlet facing up. Using the dropper bottle, place the recommended number of drops (2-6, based on your model) directly into the center of the air inlet fitting. Let the oil run down into the tool.
- Reconnect the air hose briefly. Plug the hose back in to allow air flow to pull the oil inward.
- Dry-fire to distribute. With the air connected but no fasteners loaded, point the tool in a safe direction and pull the trigger 3-4 times. You’ll hear a distinct, solid thump instead of the sharper pop of driving a nail. This is the sound of the piston cycling through the oiled cylinder.
- Load fasteners and resume work. Disconnect the air hose again, load your nails or staples, and reconnect. You’re lubricated.
Skip step 3 at your own risk. Reconnecting the air before dry-firing is what actually pulls the oil from the inlet into the tool’s internal galleries. If you just add oil and then start nailing, the first dozen fasteners are driven with unoiled parts. That’s where the wear happens.
When to Use an Automatic Inline Oiler
An inline air tool oiler is a small reservoir that installs between your compressor hose and your nail gun. It injects a fine mist of oil into the air stream automatically.
Pros:
- Provides continuous lubrication, ideal for marathon nailing sessions.
- Eliminates the need to remember manual oiling schedules.
- Protects all pneumatic tools on that hose, not just the nail gun.
Cons:
- Can over-oil low-consumption tools like finish nailers.
- Another component to maintain and refill.
- Not practical for quick job-site moves with a single tool.
Every manual that mentions an inline oiler recommends it. If you’re running a production shop or framing crew, it’s worth the investment. For the weekend warrior, manual oiling is perfectly sufficient. If you do use one, you still need to know how to oil pneumatic tools manually for those times you’re working off a borrowed compressor or the oiler runs dry.
Cold Weather and Other Edge Cases
Cold changes everything. Oil thickens, O-rings contract, and tools cycle slowly. The Palm Nailer and Everwin manuals have specific cold-weather procedures.
For temperatures near or below freezing: 1. Use pneumatic tool oil (as per the Palm Nailer manual) or, for Everwin tools specifically, permanent antifreeze (ethylene glycol).
- Add the oil, up to 6 drops, into the air inlet as usual.
- For cold weather, some manuals like the Palm Nailer’s recommend lowering your air pressure to 80 psi or less before cycling the tool.
- Connect the air and dry-fire the tool several times into scrap wood to work the oil in.
- After cycling, increase the pressure back to your normal operating range (70-120 psi).
Other edge cases:
- After long storage: Always lubricate before putting the tool away. A thin coat of oil on internal parts prevents corrosion during idle months.
- When fixing air leaks: If you’re replacing O-rings to fix an air leak, lubricate the new seals generously with pneumatic oil before reassembly. Dry seals can tear during the first cycle.
- After a thorough cleaning: If you’ve had to clean your nail gun to clear jammed debris, you’ve washed away all residual oil. Relubricate immediately using the full 5-step process.
Troubleshooting: Signs of Over-Oiling and Under-Oiling
Your nail gun tells you when the lubrication is wrong. Listen to it.
Under-Oiling (Too Dry):
- Sound: A high-pitched squeal or scraping noise on each cycle.
- Feel: The tool feels sluggish, like it’s fighting to complete its cycle. The recoil is harsher.
- Visual: No moisture or oil mist at the exhaust. Fasteners may not sink to depth.
- Timeline: These symptoms appear after extended dry running, which varies by tool model and usage.
Over-Oiling (Too Wet):
- Sound: A wet, sputtering exhaust note.
- Feel: The tool might cycle okay, but the exhaust blast feels oily on your hand.
- Visual: A fine, visible mist of oil sprays from the exhaust port. Oil droplets may land on your workpiece, causing stains on raw wood.
- Fix: Disconnect the air and dry-fire the tool repeatedly into a rag to blow out the excess. You may need to disassemble and clean the piston chamber if it’s badly flooded.
Most air leaks stem from under-oiling, which dries and cracks seals. Over-oiling rarely causes immediate failure, but it makes a mess and wastes oil. Aim for the middle: a clean, solid firing sound with no squeal and no visible mist.
Frequently Asked Questions
Can I use WD-40 instead of pneumatic oil?
No. WD-40 is a solvent and water displacer, not a lubricant. It will temporarily free a stuck part but will then evaporate, leaving the O-rings and seals dry. Its additives also cause rubber to deteriorate. Using it guarantees you’ll be replacing O-rings sooner.
How do I know if my nail gun is oil-less?
Check the manual or look for markings on the tool itself. True oil-less nailers (like some Paslode models) are factory-lubricated with special grease and are designed to run for thousands of cycles without added oil. You should never add oil to an oil-less tool, as it can disrupt that grease. If you’re unsure, assume it needs oil, most pneumatic nail guns do.
My nail gun is leaking air from the exhaust. Did I over-oil it?
Probably not. An exhaust leak is usually a sign of a worn or dried-out O-ring on the piston or valve, which is typically caused by under-oiling. The oil wasn’t reaching the seal to keep it pliable. You’ll likely need to rebuild the nail gun to replace the worn seals.
Do I need to oil a brand new nail gun?
Yes. New tools often have a protective coating that isn’t a substitute for working lubrication. Before first use, follow the manual’s oiling procedure. The break-in period is when internal parts seat themselves, and proper oiling is critical.
Can I use the same oil for my air compressor and nail gun?
Maybe, but it’s not ideal. Air compressor oil is generally heavier than pneumatic tool oil. Using it in your nail gun won’t necessarily cause damage, but it may not atomize as well, leading to less effective lubrication and more exhaust mist. Stick with dedicated pneumatic tool oil for the nailer.
The Bottom Line
Oil your pneumatic nail gun through the air inlet with 2-6 drops of dedicated pneumatic tool oil, then dry-fire it 3-4 times to distribute the lubricant. Do this before each use or every 2-8 hours of runtime, depending on your specific tool’s manual.
The one rule that overrides all others: if you see moisture blowing out of your compressor line, oil more often. That water vapor is washing the lubrication off your seals. A well-oiled tool feels smooth, sounds solid, and will last for years. A dry one sounds angry and will eventually quit. Keep the bottle on your bench, and make it part of your routine when you connect your nail gun to the air compressor. Your O-rings will thank you.
