
Why Is My Nail Gun Leaking Air? By Location and Cause
This post contains affiliate links. As an Amazon Associate, we earn from qualifying purchases.
A leaking nail gun loses power, drains your compressor, and signals internal wear. The fix starts by matching the leak’s location, top, exhaust, bottom, or trigger, to the specific failed part: worn O-rings, cracked seals, loose screws, or excessive air pressure. Most leaks trace to a handful of causes listed in manufacturer manuals, and a systematic diagnosis beats random part swapping.
That location-to-cause map is your starting point. The hiss isn’t just annoying; it’s the core symptom that prompts the why is my nail gun leaking air question. A leak from the top near the air inlet often means a loose fitting or a worn inlet seal. A constant exhaust leak points to a piston or cylinder seal. A trigger-area leak implicates the valve assembly. You find the spot, you find the failed component.
What follows: a diagnostic flow chart to isolate the leak, the exact pressure specs that blow seals, a step-by-step guide for the three most common repairs, and the one rule that decides whether you rebuild the tool or replace it when you compare a why is my nail gun leaking air.
Key Takeaways
- Pinpoint the leak first, a soapy water spray reveals bubbles at the exact failure point, separating air supply issues from internal tool failures.
- Respect the PSI ceiling, exceeding the maximum pressure (which varies by brand, such as 110 psi for POWERNAIL or 120 psi for others) blows seals; the POWERNAIL 445LS manual explicitly warns that pressure above 110 psi blows seals.
- Never use solvents inside, the DeWALT manual states to never spray lubricants or solvents inside the tool; they wash out grease and damage non-metallic parts.
- Cold tools leak, the PowerPalm manual notes cold seals and lubricant can cause leaks until the tool warms to operating temperature.
- Drywall dust kills nailers. POWERNAIL states using nailers in drywall dust dramatically decreases life because the abrasive dust grinds seals.
The Diagnostic Flow: Pinpointing the Leak by Sound and Location
Ever connected your nailer and heard a hiss, but couldn’t tell if it was the tool, the hose, or the fitting? That’s where most people waste an hour. Start with the air off.
Disconnect the nailer from the hose. Plug the compressor line directly into the tool’s air inlet, bypassing any quick-connects or extensions. Turn on the compressor and listen. If the hiss is gone, your leak is in the hose or fittings, not the nailer. If the hiss remains, it’s inside the tool.
Now, find the exact spot. A spray bottle with soapy water is your best diagnostic tool. Spray it around every joint while the tool is pressurized. Look for the bubbles. They’ll cluster at the leak’s origin.
The trigger valve area, exhaust port, cylinder cap, and air inlet are the four primary leak locations. Each points to a specific set of failed components: O-rings, seals, bumpers, or loose fasteners.
Your ears help too. A sharp, high-pitched hiss often means a small, external leak at a fitting or a cracked hose. A deeper, rushing air sound usually comes from an internal seal failure, like a worn piston seal venting out the exhaust.
| Leak Location | Likely Cause | Primary Source |
|---|---|---|
| Air Inlet / Fitting | Loose air plug, cross-threaded fitting, worn inlet O-ring | POWERNAIL (loose air plug), Harbor Freight (cross-threaded housing) |
| Trigger Area | Damaged O-rings in trigger valve, worn trigger valve stem or seal | Generic Finishing Nailer Manual (damaged O-rings, stem, seal) |
| Exhaust Port | Worn piston head O-ring, damaged cylinder seal, stuck exhaust deflector | POWERNAIL (worn O-ring in cylinder assembly) |
| Cylinder Cap / Bottom | Loose cap screws, worn or damaged O-ring or bumper | DeWALT (loose cap screws), Generic Framing Nailer Manual (loose screws, worn O-rings) |
The sound and location give you a shortlist. A leak at the bottom with loose screws? That’s a five-minute fix. A constant exhaust leak means opening the cylinder. We will examine each common spot.
Fixing Common Leak Locations (With the Right Parts)
Once you’ve found the leak, the repair is usually straightforward. The biggest mistake is using the wrong replacement parts or forcing things during reassembly. Here’s how to tackle the big three.
Leak at the Air Inlet or Fitting
This is the easiest fix. Unplug the air, and try tightening the air inlet plug with a wrench. Don’t crank it, snug is enough. If it still leaks, unscrew it completely.
Check the threads on the plug and inside the tool’s inlet. Look for cross-threading or damage. The Harbor Freight manual lists cross-threaded housing components as a cause of severe leakage. If the threads are good, the culprit is usually a small, flat O-ring or nylon washer seated inside the inlet. Replace it.
Common mistake: Overtightening the air fitting. This can crack the aluminum housing or crush the O-ring, creating a new leak. Finger-tight plus a quarter-turn with a wrench is the rule.
Sometimes the leak is in the quick-connect coupler itself, not the tool. Swap it with a known-good coupler to test. If you need a perfect seal on threaded fittings, using thread seal tape on the male threads is the standard method.
Leak from the Trigger Valve Area
A leak here when you’re not pulling the trigger means air is escaping past the valve assembly. According to the generic finishing nailer manual, causes are damaged O-rings in the trigger valve, damaged valve heads, or a damaged valve stem seal.
Fixing this requires disassembling the trigger mechanism. The steps vary by brand, but the principle is the same:
- Remove any external safety covers or triggers. There’s often a single pin or screw holding the trigger in place.
- Carefully extract the valve assembly. It’s usually a cylindrical unit with several small O-rings.
- Replace every O-ring you see. Don’t just swap the one that looks bad. A complete nail gun rebuild kit for your model will have all the necessary seals.
- Lubricate the new O-rings with a light pneumatic oil before reassembly. This helps them seat and seal.
- Reassemble in reverse order, ensuring springs and spacers go back in their original orientation.
The trigger valve is precision-machined. If the metal housing or stem is visibly scored or damaged, a new valve assembly is needed, a simple O-ring swap won’t fix it.
Leak from the Exhaust Port or Cylinder Cap
A constant flow of air from the exhaust, even when the tool is idle, points to an internal seal failure. The most common culprit is the O-ring on the piston head. It’s a wear item.
For a leak between the cylinder body and the end cap, the generic framing nailer manual lists loose screws or worn O-rings/seals. Tighten the cap screws first. If that doesn’t work, you need to open it up.
Here’s a condensed guide for a piston seal replacement:
- Depressurize and clear the tool. Remove all fasteners from the magazine.
- Remove the cylinder cap. This is held by several long screws (often 4 or 6). Keep them organized.
- Extract the piston assembly. You may need to gently pry or tap it out. Note how the bumper and springs are arranged.
- Replace the piston head O-ring. Clean the piston groove thoroughly. Lubricate the new O-ring with oil.
- Inspect the cylinder wall. Look for scoring or deep scratches. Light marks are okay; a deep gouge means the cylinder is damaged and the tool may not be worth repairing.
- Reassemble. A light coat of oil on the cylinder wall helps the piston move smoothly.
If you’re doing this, you’re already performing a major service. It’s the right time to replace all the seals in the head and cap with a full seal kit. A step-by-step guide to replacing nail gun O-rings for your specific model is invaluable here.
Pressure Problems: When Too Much Air is the Cause
Your compressor’s regulator is not a suggestion. It’s a requirement. Exceeding your nailer’s maximum pressure doesn’t make it more powerful; it breaks things.
Manufacturers disagree on the exact ceiling. The DeWALT DWFP12233, a generic framing nailer, and a Harbor Freight manual list a maximum pressure of 120 psi. However, the POWERNAIL 445LS manual is unequivocal: its max is 110 psi, and it states that “excessive air pressure blowing out seals (above 110 psi)” is a direct cause of air leaks.
Where this goes sideways: Setting your regulator to 120 psi “to be safe” on a tool rated for 110 psi. The higher pressure forces seals into gaps they weren’t designed for, causing them to extrude, crack, and fail, often within a few days of use.
Set your regulator to the middle of your tool’s operating range. For example, the POWERNAIL 445LS manual recommends 90 psi. This gives you a cushion below the max while providing plenty of driving force. Check your tool’s manual for its specific “working pressure”.
A related issue is inadequate CFM (cubic feet per minute). If your compressor can’t deliver the required air volume (e.g., the POWERNAIL 445LS requires 3-1/2 CFM), the tool will cycle slowly and the compressor will run constantly, but it won’t typically cause a leak. The leak comes from pressure, not volume.
Maintenance That Prevents Leaks Before They Start

Leaks are often a failure of maintenance, not a sudden breakdown. Three habits stop most leaks before they start.
First, oil, but only in the right place. The generic framing nailer manual says to add “up to 6 drops of oil into the air inlet before each use” if you don’t have a filter-regulator-lubricator. POWERNAIL recommends “2-4 drops of Industrial Light Oil for every 8 hours of use.” This oil lubricates the internal seals and O-rings as air passes through. Without it, seals dry out, crack, and leak. But remember the DeWALT rule: never spray oil inside the tool. Add it to the air inlet so the airflow distributes it. Our guide on how to oil a pneumatic nail gun covers the right types and frequency.
Second, keep it clean. Drywall dust is a seal killer. The POWERNAIL manual explicitly warns that using nailers in drywall dust “will dramatically decrease the life of the Nailer” because the abrasive dust grinds seals. Blow out the exhaust and magazine with compressed air after dusty jobs. A regular nail gun cleaning procedure removes the grit that accelerates wear.
Third, check the simple stuff. The DeWALT manual advises checking that all screws and fasteners are tight before each use to prevent leaks. A loose cylinder cap screw is a two-minute fix. Ignoring it allows the seal to shift and fail, changing a simple tightening into a full seal replacement.
When to Repair vs. Replace Your Leaking Nailer
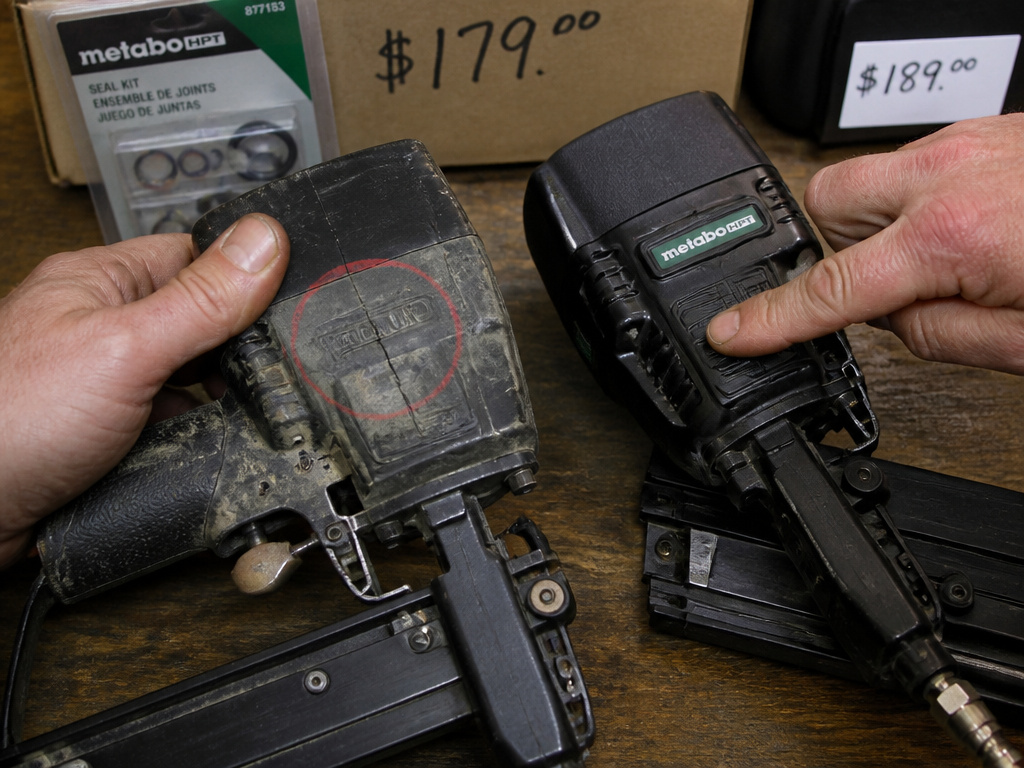
You’ve diagnosed the leak. You’ve priced the seal kit. Now, is it worth fixing? The answer isn’t always yes.
Consider repair if:
- The leak is in an accessible, serviceable part (like the trigger valve or inlet fitting).
- A rebuild kit for your model is available and costs less than 40% of a new, comparable tool.
- The tool body and cylinder show no major damage (cracks, deep scoring).
- It’s a pro-grade or mid-range brand (like DeWALT, POWERNAIL, or similar) known for serviceable parts.
Consider replacement if:
- The leak is caused by a cracked tool body or housing (a fatal flaw).
- The required parts are obsolete or cost more than 60% of a new tool.
- It’s a low-cost, disposable nailer where the repair labor exceeds its value.
- The leak is just one of several problems (weak driving, frequent jams, broken safety).
Sometimes the leak isn’t in the nailer at all. Before you condemn the tool, rule out upstream issues. A leaking air hose fitting or a faulty compressor coupler can mimic a tool leak. And if your compressor itself is losing pressure, you’ll need to address that compressor air leak first.
Frequently Asked Questions
Why is my nail gun leaking air out of the exhaust?
Constant exhaust leak means the piston head O-ring or cylinder seal is worn. Air is escaping past the piston inside the cylinder and venting out the exhaust port. This requires disassembly and replacement of the piston seal, and often the bumper as well.
My air valve is leaking air. How can I fix it?
Leaking air valve (trigger valve) is typically fixed by replacing the small O-rings inside the valve assembly. You’ll need to disassemble the trigger mechanism, remove the valve cylinder, and replace all its seals. Using a rebuild kit ensures you get the right sizes.
Do I need to oil my nail gun?
Yes, most pneumatic nail guns require regular oiling to keep internal O-rings and seals lubricated and prevent them from drying out and leaking. Follow your manual’s instructions: typically a few drops of pneumatic tool oil in the air inlet before use or after every few hours of operation.
What psi should a nail gun be set at?
Set your air compressor regulator to 90 psi for most nail guns. This is a safe midpoint within the common operating range of 70–110 psi. Always check your specific tool’s manual for its exact working pressure and never exceed its maximum pressure (usually 110 or 120 psi).
Before You Go
Chasing a leak starts with the bubble test. Find the exact spot before you pick up a screwdriver. Remember the 90 psi rule, it keeps you safely below the pressure that blows seals on most tools.
If the leak is from a simple loose fitting or screw, fix it now. If it’s internal, weigh the cost of a seal kit against the tool’s value. For a quality nailer, a rebuild is almost always worth it. For a bargain-bin model, the leak might be its way of telling you it’s done.
And the one step nobody does but should: after any repair, especially a seal replacement, test the tool without nails first. Listen for that hiss. Feel for solid cycling. A quiet, confident cycle means you fixed it. A lingering whisper means you missed a spot. Go find it.
