
How to Sand Wood Between Grits: Step-by-Step
This post contains affiliate links. As an Amazon Associate, we earn from qualifying purchases.
Sanding wood between grits properly means stepping up in small, progressive increments. Key sources agree on the principle but differ on the math: the National Wood Flooring Association (NWFA) and Uneeda Abrasives say to skip no more than one grit, Polyvine advises the next grit be no more than roughly 50% higher, and International Paint recommends the difference between grits never exceed 100. That’s a key rule from manufacturers like Uneeda Abrasives, who state ‘never skip more than 1 grit,’ and is aligned with the principle from the National Wood Flooring Association to skip no more than one grit from the abrasive used in the first and second cuts. Skip it, and you embed deeper scratches that no finer paper can remove, guaranteeing a rough finish and premature wear.
The rule’s logic is mechanical, not just cosmetic. Each grit leaves peaks and valleys in the wood surface. The next, slightly finer grit’s job is to shave down those peaks without digging into the valleys. Jump too far ahead, and the finer abrasive can’t reach the deeper valleys, leaving the scratch pattern visible under a finish. What follows is the three-step rhythm every pro uses: evaluate, sand, clean. Then repeat. You’ll learn the specific pressure settings, the exact signs that tell you a grit is done, how to sand wood between grits, and how to adapt the sequence for staining versus painting.
Key Takeaways
- Follow the “skip no more than one grit” rule strictly; jumping from P80 to P180 leaves deeper scratches that cause a blotchy stain job and premature finish wear.
- You’ve moved to the next grit only when every pencil mark is gone and you can run your hand across the grain without feeling scratches from the previous paper.
- For a stain-ready surface on raw wood, Uneeda Abrasives advises stopping at no finer than P240, while Polyvine recommends not using grits finer than P180, as sanding finer can close wood pores and lead to uneven stain absorption.
- Clean with a vacuum and tack cloth between every grit change; leftover coarse dust acts like grit paper and will scratch your freshly smoothed surface.
- Let the sander’s weight do the work, excess pressure heats the paper, glazes the abrasive, and creates uneven spots that show up only after you apply the finish.
Why Grit Sequencing Isn’t Optional
Skipping grits to save time is the single fastest way to ruin a project. Here’s why it fails every time.
When you run a P80 grit belt across a board, it doesn’t just make the surface rough. It plows a series of microscopic trenches into the wood. The next grit, say P120, is designed with slightly smaller, closer-spaced abrasive particles. Its job is to mill down the high ridges left by the P80 without deepening the trenches. If you jump straight to P180, its even finer particles simply glide over those deeper P80 trenches. They can’t reach them.
The result isn’t a smoother surface. It’s a surface with two distinct scratch patterns superimposed, a coarse base and a fine top. Under a stain or oil, those deeper scratches wick up more pigment and appear as dark, blotchy lines. Under a film finish like polyurethane, they create weak points that wear through quickly. The National Wood Flooring Association states plainly that improper grit sequence, specifically skipping more than one grit, causes premature wear of the finish.
The goal throughout your grit sequence is to even out the peaks and valleys so the surface becomes smoother, without ‘invading’ the valley. If the valley is invaded, the wood closes, causing pooling and a blotchy finish. . Uneeda Abrasives, “Grit Sequence: Let grit do the hard work for you.”
Manufacturers disagree slightly on the math, but not the principle. The NWFA says “skip no more than one grit.” International Paint, in its marine coatings guide, recommends that “the difference between sanding grades never exceeds 100.” Polyvine advises the next grit be “no more than roughly 50% higher.” They all agree on the same point: small, progressive steps are essential.
| If You Start With… | Your Next Grit Should Be… | What Happens If You Jump To… |
|---|---|---|
| P80 (Coarse) | P100 or P120 | Removes P80 scratches efficiently. |
| P80 (Coarse) | P150 or P180 | P150 grit cannot reach P80 valleys. Scratches remain, causing finish flaws. |
| P120 (Medium) | P150 or P180 | A proper, progressive step for refinement. |
| P120 (Medium) | P220 or P240 | The fine paper burnishes over P120 scratches, creating a polished, non-absorbent surface that rejects stain. |
How to Know When to Move to the Next Grit
You don’t move to the next grit because you’ve made a certain number of passes. You move when the surface tells you it’s ready. That conversation happens through two simple tests.
First, the pencil test. After you’ve sanded a section with your current grit, take a carpenter’s pencil and scribble a light, cross-hatch pattern across the grain. Now, sand that area again, still using the same grit, but this time sand with the grain. Your goal is to erase every last trace of pencil lead. If any grey lines remain, your current abrasive hasn’t yet removed all the scratches from the previous grit. Keep going. When the board is clean, you’ve fully transitioned to the new scratch pattern.
Second, the hand test. Put the sander down. Run your bare fingertips lightly across the board, perpendicular to the grain. You’re feeling for the sharp, distinct ridges left by the grit you just finished. Now run your hand with the grain. The surface should feel uniformly smooth. If you feel catchier spots or a discernible scratch pattern, you’re not done. Don’t look, feel. Your fingertips are more sensitive to texture than your eyes.
That’s why you must clean the paper itself frequently. International Paint notes that removing sanding dust from the paper during the process prolongs the life of the paper and prevents marking the surface with clogging lumps. Tap your belt or sheet against a bench leg. Use a crepe rubber cleaning stick for sanding discs. A loaded sheet is a dead sheet.
Step 1: Choose Your Starting Point Wisely
Your starting grit isn’t a choice. It’s a diagnosis. The National Wood Flooring Association guideline is clear: the initial grit choice is determined by existing coatings, unevenness, species, and condition, aiming for the finest grit possible.
Be realistic. Grabbing the coarsest paper you own feels decisive. It’s also usually wrong. If you’re flattening a cupped oak floor, you might legitimately start with a very coarse grit. But if you’re prepping a slightly rough pine board for paint, starting at P80 just creates three times the work. You have to sand through P100, P120, and P150 just to get back to the smoothness you could have had if you’d started at P120.
Here’s a quick diagnostic guide:
- Heavy Planer or Mill Marks: Start with a coarse grit.
- Light Scratches or Old Finish Removal: Start with a medium grit.
- Already Smooth, but Needs Refinement for Finish: Start with a fine grit.
The “finest grit possible” rule is about efficiency. A P120 belt removes material nearly as fast as a P80 belt on most woods, but it leaves a scratch pattern that’s two steps closer to your finish goal. You save time, paper, and effort. This is where consulting a good sandpaper grit chart pays off, it shows you exactly what each grit is designed to do.
Common mistake: Starting too coarse on softwoods like pine. A P80 grit can dig in and create deep gouges that require extensive sanding to remove, turning a 30-minute job into a two-hour one.
For intricate moldings or detailed work where a detail sander is your only option, you have less power and a smaller pad. The “finest grit possible” rule is even more critical. Start too coarse, and you’ll round over crisp edges before you know it.
Step 2: Prepare and Clean Your Work Area
Sanding is a clean trade. Dust is your enemy, and it’s a persistent one. The process of how to sand wood between grits isn’t just about changing paper. It’s about creating a clean slate, literally.
Before you even mount the first piece of sandpaper, get your dust control in order. If you’re using a random orbital sander or a belt sander, hook it up to a shop vacuum. The difference isn’t just a cleaner shop; it’s a better finish. Dust pulled away from the work surface can’t get ground into the wood, acting like a finer grit and creating a hazy, burnished surface. It also keeps your paper cutting longer.
After you complete a grit, follow this three-step clean-up ritual:
- Vacuum the entire workpiece. Get every corner, every crevice.
- Wipe with a tack cloth. A slightly sticky cheesecloth-type rag picks up the fine dust a vacuum leaves behind. Don’t use a dry rag, it just pushes dust around.
- Wipe one more time with a clean, dry cloth. This ensures no tack-cloth residue is left to interfere with stains or finishes.
Polyvine’s guide states this plainly: “Thoroughly vacuum the timber after each grit. Wipe the surface using a tack cloth or a solvent-dampened rag.” Skipping this is how a single rogue P80 particle, hidden in a corner, gets picked up by your P180 paper and drags a deep score across your nearly-finished surface.
And don’t forget the paper itself. As you sand, dust packs into the spaces between the abrasive grains. This is called “loading.” A loaded sheet stops cutting and starts heating up, which can glaze the abrasive and even burn the wood. Tap your belts, use a cleaning stick, or change discs more often than you think you need to. Your paper should always feel gritty to a light touch, not slick.
Step 3: Apply the Right Pressure and Pace
This is a key part of how to sand wood between grits where most DIYers go wrong. They lean into the sander, believing more pressure equals faster work. It’s the opposite.
Power sanders are designed to do the cutting. Your job is to guide them. The National Wood Flooring Association specs tie pressure directly to grit: finer grits require less pressure settings on the big machine; coarser grits require heavier pressure settings. For a belt sander flattening a floor with a coarse grit, you might use heavier pressure settings, as the NWFA states coarser grits require heavier pressure. For a random orbital sander with a P220 disc, the machine’s own weight is nearly sufficient.
Excess pressure creates three problems:
- It heats the abrasive, which can melt the resin bond that holds the grains to the backing. The grains fall off, and your paper dies prematurely.
- It heats the wood, especially on softwoods or veneers. This can cause localized glazing or even scorching.
- It creates an uneven surface. The sander’s pad can deflect under pressure, sanding the edges more than the center, leading to dips and waves.
The right pace is a slow, steady glide. Overlap each pass substantially. Let the tool’s motion do the work. If you’re not seeing dust in the collector, you might be going too fast or your paper is loaded. If you’re seeing smoke or smelling burnt wood, you are absolutely pressing too hard.
For hand-sanding, the principle is the same but amplified. Use a sanding block to distribute pressure evenly. Sanding without a block allows your fingers to press harder on the high spots, creating divots. A sanding block is the cheapest tool you’ll ever buy for a perfect finish.
Special Cases: Staining, Painting, and Between Coats
The final grit you choose is dictated by what comes next. Get this wrong, and the product you apply won’t behave as intended.
For Staining Raw Wood: This is the most debated rule. Uneeda Abrasives advises: “For white/raw wood, do not use finer grit than P240 for the last belt, as going finer may cause issues with the wood accepting stain.” Polyvine is more conservative: “Do not use grits finer than P180 if you are applying a stain, as over-sanding polishes the wood and closes the pores.”
- The Safe Bet: Test on a scrap piece to determine the final grit, noting that Uneeda Abrasives advises not finer than P240 and Polyvine advises not finer than P180 for staining. This opens the grain enough for even color absorption without burnishing the surface shut. Test on a scrap piece first.
For Painting: You need a “mechanical key” for the paint to grip, not a glass-smooth surface. Sanding to a medium grit is typically sufficient for painting. The final surface should be uniformly dull, with no shiny spots. If applying multiple coats, you’ll be sanding between coats of primer and paint anyway, so extreme initial smoothness is wasted effort.
Sanding Between Coats of Finish: This is called “denibbing” or “de-whiskering.” When you apply a water-based polyurethane or even an oil-based varnish, the moisture can cause wood fibers to swell and stand up. Polyvine recommends sanding lightly between coating layers using P240 – P320 grit to remove this grain raising. The goal isn’t to remove finish, but to knock off the tiny bumps. Use very light pressure, you should see a fine white powder, not raw wood. If you cut through to the layer below, you must spot-repair or reapply.
| Your Next Step Is… | Stop Sanding At… | Reason |
|---|---|---|
| Applying an oil or water-based stain | P180 (softwoods) / P220 (hardwoods) | Finer grits close pores, leading to blotchy, uneven stain absorption. |
| Applying paint or solid-color stain | P120 – P150 | Provides enough tooth for adhesion without wasting time on invisible smoothness. |
| Applying a clear film finish (poly, varnish) | P180 – P220 | A smooth base for a clear topcoat; further smoothing will happen between coats. |
| Sanding between finish coats (denibbing) | P240 – P320 | Knocks down raised grain without cutting significantly into the previous coat. |
Tool Maintenance: The Overlooked Variable
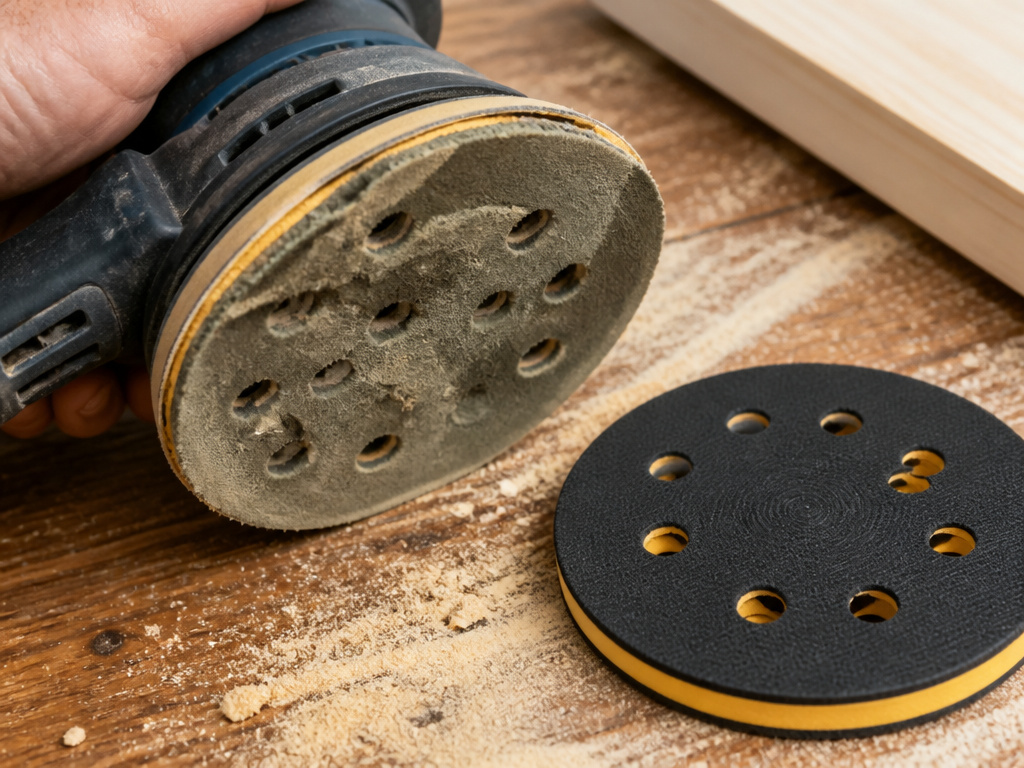
Your sander’s condition directly affects your grit progression. A worn-out tool can’t execute the plan.
The National Wood Flooring Association provides hard service intervals for professional gear, and the lessons apply to hobbyist tools too. For example, carbon brushes should be replaced after every 500 hours of use on electric sanders. Worn brushes cause a drop in power, making the sander bog down under normal pressure. You compensate by pushing harder, which leads to all the pressure-related problems we just discussed.
For random orbital sanders, check the backing pad frequently. If it’s torn, hardened, or uneven, it will transmit an irregular motion to the sandpaper, causing those tiny swirl marks you can’t seem to sand out. Replacing a pad is cheaper than redoing a project. A good orbital sander technique starts with a flat, clean pad.
Drum and belt sanders have more parts. The NWFA schedule is precise: inspect guide rollers every 650 hours; idler pulleys every 1,500 hours. Vibration is the enemy of a smooth finish. If your belt sander starts chattering or the dust collection drops off, it’s not just an annoyance, it’s creating an uneven surface that your next grit can’t fix. Clean the sanding chamber regularly. A five-minute maintenance check before a big project saves hours of corrective sanding later.
How Sharp Planer Blades Reduce Sanding Work
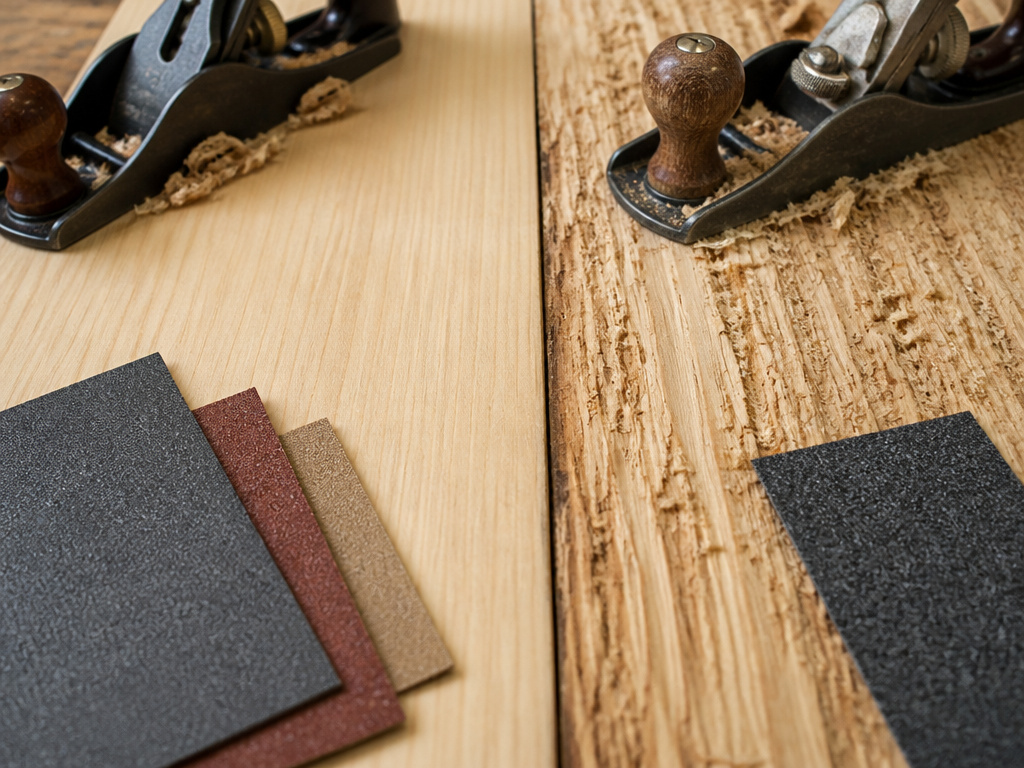
Starting with a well-tuned planer is the best way to minimize sanding. Sharp blades make clean, slicing cuts that leave a uniform surface with minimal tear-out. This directly reduces the depth of the initial scratches you need to sand out. A dull blade, however, pounds and tears at the wood fibers, creating a rougher surface with deeper imperfections. You then must start with a much coarser sandpaper grit to level that damaged surface, which adds steps and time to your entire sanding sequence. Keeping your planer blades sharp is a basic step that allows your abrasives to work well from the start, by letting you begin with the finest grit the wood needs.
Frequently Asked Questions
What is the recommended grit order for sanding wood?
For most projects starting on raw, rough-sawn wood, a progression that skips no more than one grit, such as the example from Uneeda Abrasives of P80 – P120 – P180 – P240, can be effective. You can adjust the start and end points based on your wood’s condition and final finish, but the rule of skipping no more than one grit between steps remains constant.
Can you sand wood with 80 grit?
Yes, but only when necessary. Use P80 grit for aggressive material removal, like flattening a warped board, leveling deep planer marks, or stripping thick old finish. It’s a foundation-laying grit, not a finishing grit. You must follow it with the next appropriate grit in sequence to remove its deep scratch pattern.
What grit do you need to sand wood for stains?
For best results, consult manufacturer guidelines: Uneeda Abrasives advises not finer than P240 for raw wood before stain, while Polyvine advises not finer than P180. Sanding finer than P240 can burnish the wood surface, closing the pores and causing the stain to sit on top unevenly, resulting in a blotchy finish.
Do you sand with higher or lower grit first?
Always start with a lower (coarser) grit number and work up to a higher (finer) grit number. The coarse grit removes material and major imperfections. Each subsequent finer grit removes the scratches left by the previous one, progressively smoothing the surface.
How do you avoid swirl marks when sanding?
To avoid swirl marks, keep your sander moving in straight, overlapping passes, never letting it rest in one spot. Use a sharp, fresh sanding disc appropriate for your grit level, and ensure your sander’s backing pad is clean and undamaged. Hook up a vacuum for dust extraction to keep the surface clean.
Before You Go
One threshold decides everything: if you can still feel the scratches from the previous grit with your fingertips, you are not ready to move on. No amount of hoping will make them disappear under a finish. The process is ruthlessly mechanical.
Your first step this week should be to check the paper you have on hand. Do you have a logical sequence? If you only have P80 and P220, you’re setting yourself up for failure. Buy the middle grit. P120 or P150, to bridge the gap. It’s a few dollars that saves the entire project.
Most instructors won’t say this, but I’d rather see you sand a small test piece perfectly through four grits than watch you rush a whole tabletop through two. The skill is in the rhythm, not the speed. Get the rhythm right on a scrap, and the big project will follow.
