
How to Store Power Tools in a Shed: Step-by-Step Guide
This post contains affiliate links. As an Amazon Associate, we earn from qualifying purchases.
To store power tools in a shed, focus on controlling moisture, temperature, and physical protection. A dry, well-ventilated shed free from ground damp and temperature swings is essential. Batteries require indoor storage or specific temperature management (above 35°F, below 90°F) to prevent performance loss.
The gap between “dry” and “damage” is about condensation physics. Condensation can form on metal when its surface temperature falls below the dew point of the surrounding air. A shed that feels dry can still be rusting your tools overnight. This isn’t about keeping rain out, it’s about controlling the air inside, which is the core of how to store power tools in a shed.
What follows: how to turn a basic shed into a tool-safe environment, which is the practical answer to how to store power tools in a shed, which tools deserve priority for indoor storage, and the exact sequence for winterizing your gear before the first hard freeze hits.
Key Takeaways
- Store batteries indoors, always. Cordless tool batteries are expensive to replace, and freezing temperatures permanently decay their charge.
- Prevent condensation rust by managing humidity with a dehumidifier or desiccant packs; in a ventilated shed, you must seal tools in containers with silica gel for the method to work.
- While Jewson advises against storing tools on the floor due to ground moisture, Public Storage suggests keeping heavier tools and toolboxes on lower shelves or the floor. To prevent rust, many sources recommend using shelves, pegboards, or tool chests to keep tools elevated.
- Prepare tools for seasonal storage by cleaning, applying a protective oil or wax to metal, and storing them in their original hard cases or canvas bags.
- Bring high-precision tools inside first if space is limited. Routers, planers, and any tool with machined columns or electronics are most vulnerable to shed conditions.
Shed Prep: Controlling Your Storage Climate
Your shed is a shell, not a sanctuary. Before you put a single tool inside, you need to audit it for the three things that wreck tools, which is the foundation of how to store power tools in a shed: water intrusion, wild temperature swings, and stagnant, humid air.
Start with a flashlight on a dry day. Look for daylight around the door frame, at the corners, and where the walls meet the roof. These gaps aren’t just drafts; they’re highways for humidity and pests. Seal them with silicone caulk or foam weather stripping. The goal isn’t to make it airtight, ventilation is good, but to block direct wind and rain.
Next, address the floor. A concrete slab or bare earth holds moisture, which evaporates and raises the humidity right where your tools sit. If your shed feels damp, a dehumidifier is your next move. But there’s a catch.
Using a dehumidifier can help keep the area free from damp, but its effectiveness may be reduced in a well-ventilated space. For true protection, you need to create a micro-climate inside the shed: seal your tools in plastic bins with desiccant packs, or use a dehumidifier inside a smaller, enclosed cabinet or locker.
For the walls, consider simple insulation to buffer temperature extremes, slowing down the heating and cooling that leads to condensation. Your priority is stability, not achieving room temperature.
Finally, think about air flow. A small, passive vent near the roof’s peak allows warm, moist air to escape. This is crucial in winter, when temperature differences between day and night are greatest.
Temperature & Humidity: The Invisible Killers
Freezing cold doesn’t just make a tool uncomfortable to hold. It changes the material itself. According to guidance from Jewson, metal and plastic can become brittle, and the oils and grease inside gear housings turn thick and sluggish.
The real danger isn’t the cold snap, but the warm-up afterward. That’s when condensation happens. Your shed air might be 60°F at noon, but your cast-iron table saw top, sitting against a cold wall, could easily be 46°F. By evening, it’s beaded with moisture.
This cycle, cool metal, condensing moisture, surface rust, repeats every day the conditions are right. High humidity above 80% can cause rust directly, but condensation is the silent, faster killer.
For batteries, the rules are stricter but simpler. Avoid storing power tool batteries above 90°F. Keep them above 35°F for reliable performance. Modern lithium packs have safety circuitry that makes catastrophic failure rare, but that doesn’t prevent a slow, steady loss of capacity. The chemistry itself degrades faster outside these bounds.
This is why your battery storage strategy cannot be an afterthought. It’s the first thing you should plan.
Tool Storage Solutions: Off the Floor, Organized, and Protected
Where you put the tool matters as much as the air around it. Advice from sources like Jewson and ToolMark is to get tools off the ground, while Public Storage suggests keeping heavier items on lower shelves or the floor. Concrete floors hold moisture, and placing a tool directly on it is asking for rust at the base.
Your options break down into three tiers, from simplest to most robust:
Tier 1: Basic Shelving & Pegboards
A set of sturdy metal shelves or a plywood pegboard wall gets everything up and visible. This is perfect for tools you use regularly. Hang circular saws, drills, and angle grinders by their bodies or built-in hooks. The air circulation is good, and you can see what you have at a glance. For a small workshop, this maximizes vertical space.
Tier 2: Enclosed Cabinets & Tool Chests
For better dust and humidity control, move to enclosed storage. A rolling tool chest or a wall-mounted cabinet with a door adds a physical barrier. Place anti-rust liners inside the drawers. This is where you put your less-frequently-used routers, biscuit joiners, and collections of bits and blades. It’s a critical step in any plan for garage storage.
Tier 3: Original Cases & Sealed Containers
This is the gold standard for long-term or seasonal storage. That hard plastic case your drill came in isn’t just for show. It’s designed to keep dust out and provide a snug fit that minimizes internal air movement, reducing condensation risk. For tools without a case, a heavy-duty plastic bin with a sealing gasket and a handful of silica gel packets works wonders.
| Storage Method | Best For | Key Limitation |
|---|---|---|
| Open Shelving / Pegboard | Frequently used tools; maximizes airflow. | No protection from dust or humidity swings. |
| Tool Chest / Cabinet | Infrequently used tools; organizes accessories; some climate buffering. | Can trap moisture if sealed with damp tools inside. |
| Original Hard Case | Long-term/seasonal storage; high-precision tools. | Bulky; not all tools come with one. |
| Sealed Bin with Desiccant | Extreme humidity control; creating a micro-climate. | Requires monitoring/replacing desiccant. |
Never wrap power cords tightly around a tool’s body. This stresses the internal wires at the strain relief and can lead to a short. Coil them loosely and use a velcro strap.
Battery Care: The Non-Negotiable Indoor Policy
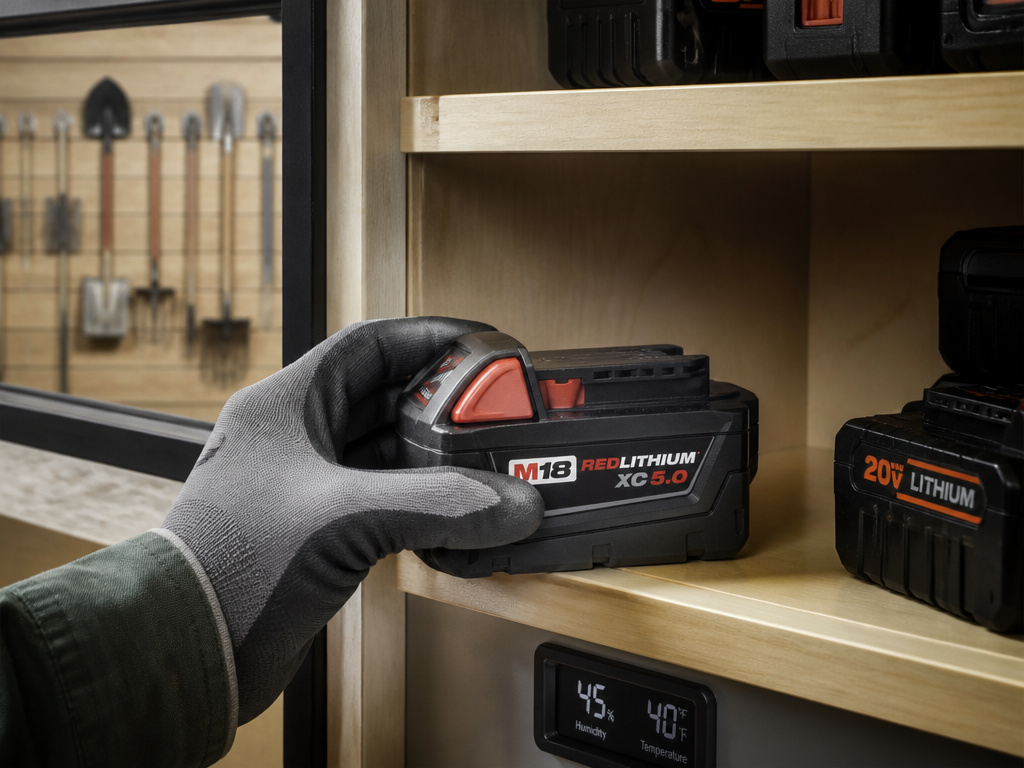
The best place for your cordless tool batteries is inside your house, in a dry cabinet or on a shelf. Every source agrees on this. Freezing temperatures “decay” the charge, as Jewson puts it. While the lithium-ion cells likely won’t explode thanks to modern circuitry, they will lose capacity and recharge slower.
If you must leave batteries in the shed because you use them daily, you need a managed environment. That means keeping them above 35°F. In practice, If you must leave batteries in the shed, you need to keep them within the temperature range recommended by the tool manufacturer. It’s a hassle.
Before charging a cold battery, the guidance is to let it warm up to room temperature for a few hours. Plugging a freezing-cold battery into a charger stresses the chemistry. This is a core part of cordless tool maintenance.
For the chargers themselves, keep them dry and away from sawdust and flammable clutter. A damp charger is a dead charger, and sawdust is both an insulator and a fire risk near electronics.
Rust Prevention: A Proactive Coating
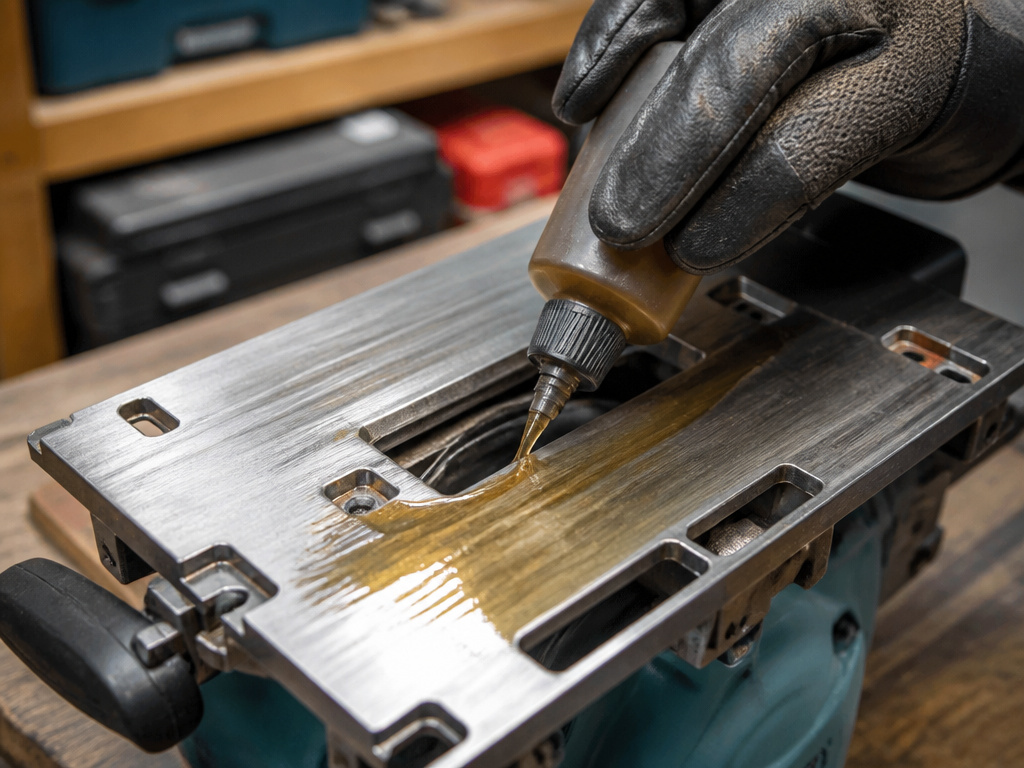
Rust isn’t an event; it’s a process. You stop it by placing a barrier between the metal and the oxygen and moisture in the air. Cleaning your tools before storage is the mandatory first step, dirt holds moisture. Our guide on how to clean power tools covers the right methods.
After they’re clean and dry, apply a protectant. Here are the common options, from lightest to most durable:
- Light Oil: Wipe on a thin coat. Good for hand tools and surfaces, but can attract dust over time.
- Paste Wax: Provides a thicker, drier barrier. Excellent for cast-iron tabletops and saw beds. Buff it to a light film.
- Anti-Corrosion Sprays: These are designed specifically for the job. They dry to a waxy film that lasts for months.
For tools already showing early rust, you may need to remove rust before applying any protectant.
The part nobody mentions: When applying any protectant, pay special attention to the bottom of the tool, the surface that will sit on the shelf. That’s the part that traps moisture against it. A quick wipe on the bottom does more good than a glossy coat on the top.
Seasonal & Long-Term Storage Steps
You’re not just putting tools away; you’re winterizing them. Follow this sequence for tools you won’t touch for months.
- Clean Thoroughly: Remove all dust, pitch, and grime. Use a brush and degreaser to clean tools thoroughly.
- Dry Completely: Let tools sit in a warm, dry place indoors for a day to ensure no moisture remains in nooks or on cords.
- Disassemble & Protect: Remove batteries. Apply your chosen rust protectant to all metal surfaces. For tools like routers, consider applying a protective coating to metal surfaces.
- Package Securely: Place the tool in its original case or a sealed bin with desiccant. Include all accessories and manuals.
- Store Intelligently: Place the container on a shelf, not the floor. If using a shed, position it away from exterior walls where temperature swings are greatest.
This process is the difference between finding a ready-to-work tool in the spring and finding a paperweight.
Prioritizing What Stays and What Goes Inside
Space is limited. If you can’t climate-control the entire shed, you need a triage system for which tools get the coveted indoor spots.
Bring Inside First (High Priority):
- All Cordless Tool Batteries and Chargers. This is essential.
- Precision Woodworking Tools: Routers, planers, jointers. Their machined surfaces and fine adjustments are easily ruined by rust.
- Tools with Electronics: Digital readout miter saws, laser levels, battery-powered diagnostic tools.
- Any Tool with a Cast-Iron Surface: Table saws, band saws. Rust here ruins flatness and causes friction.
Can Stay in a Well-Prepared Shed (Lower Priority):
- Heavy, Rust-Resistant Tools: Demolition hammers, most angle grinders, pressure washers.
- General-Use Drills & Saws: If cleaned and protected, these are more resilient.
- Manual Tools & Accessories: Wrenches, screwdriver sets, spare blades (if oiled).
This prioritization is the practical answer most other guides skip. It turns an overwhelming task into a manageable checklist.
How to keep mice and pests out of tool storage
A key part of pest prevention is denying them nesting material and food sources. Always clean your tools before storing them, removing any sawdust, grease, or debris that might attract rodents. Store tools in their original hard cases or in sturdy, lidded containers rather than leaving them exposed on open shelves. This creates a physical barrier. Pay close attention to sealing any gaps in your shed’s walls or floor, as these are entry points for pests and also let in moisture and wind. An uncluttered, organized space with tools stored off the ground in containers is far less inviting to unwanted visitors.
Securing power tools in a shed from theft
Good storage habits also improve security. An organized system where every tool has a designated place makes it obvious if something is missing. Using lockable tool chests or cabinets adds a primary layer of defense. For tools stored on pegboards or open shelving, consider secondary locking points for the shed itself, such as a hasp with a padlock on the door. Keep the shed windows obscured so the contents aren’t visible from outside. While storing heavier toolboxes on a lower shelf or the floor can be practical for organization, ensure they are within a locked container or anchored area to prevent someone from easily carrying the whole box away.
Frequently Asked Questions
Is it a good idea to store power tools in a shed?
It can be, if you control the environment. An unprepared shed is one of the worst places for tools due to condensation and temperature extremes. A shed that is sealed against rain, ventilated, and equipped with moisture-absorbing desiccants or a dehumidifier can work. For ultimate protection, store the most sensitive tools indoors.
What items should I never store in my shed with power tools?
Never store fuels, oils, solvents, paints, or aerosols in the same space. Public Storage explicitly lists these as prohibited materials to store with power tools due to fire hazard and the risk of fumes damaging tool electronics and plastic housings.
Will tools go rusty in a shed?
Yes, unless you actively prevent it. Rust is caused by condensation forming on metal when it’s colder than the dew point of the surrounding air. In a typical unheated shed, this condition occurs regularly. Preventing it requires a barrier (oil, wax) on the tool and/or controlling the shed’s humidity.
Is it okay to store power tools in an unheated garage?
An unheated garage shares many of the same risks as a shed: concrete floor moisture and temperature swings. However, garages are often better sealed and attached to the house, offering slightly more stability. The same rules apply: get tools off the floor, manage humidity, and bring batteries inside. For a full breakdown, see our guide on power tool storage for garages.
Before You Go
The one rule that reframes everything else: if your shed temperature regularly drops below 35°F or spikes above 90°F, you are in a high-risk zone. In those conditions, long-term shed storage shifts from a convenience to a constant battle against physics.
Your first action this weekend should be the flashlight audit. Find those gaps and seal them. Your second should be to bring every battery you own inside. Those two steps alone will prevent the majority of cold-weather failures.
For everything else, remember that rust and dead batteries happen slowly, then all at once. A home workshop is an ecosystem. Managing it is less about heroic effort and more about consistent, smart habits, starting with where you put things when you’re done using them.
