
How to Use a Cordless Drill: Step-by-Step Guide
This post contains affiliate links. As an Amazon Associate, we earn from qualifying purchases.
Using a cordless drill means matching three controls to the job: the forward/reverse switch, the clutch collar (torque setting), and the speed selector. The process is inserting the bit, setting the clutch for driving or drilling, and applying steady pressure straight into the work.
The numbers on the clutch collar and the two-speed switch are where most beginners freeze. They look complicated, but they boil down to a simple mechanical rule: low numbers for delicate screws, the drill icon for holes, and high speed only when you’re actually drilling. This is a key part of learning how to use a cordless drill.
What follows: a walkthrough of every part and control, the exact settings for drilling versus driving, a real project example that ties it all together, and the safety warnings straight from the Milwaukee, DEWALT, Bauer, and Kreg manuals that most guides skip when you compare a how to use a cordless drill.
Key Takeaways
- Always set the Direction Switch to the center (Trigger Lock) position when changing bits or the tool is idle, as stated in the Bauer manual. This prevents accidental starts.
- For driving screws, start with a low clutch setting (1-4) to avoid stripping the head; increase the torque only if the screw stops before it’s flush.
- When drilling, bypass the clutch by selecting the drill icon and use Speed 2 for full power; using the clutch in drill mode can cause dangerous kickback if the bit binds.
- Wear ANSI Z87.1 eye protection and, when drilling masonry or hammer drilling, NIOSH/OSHA/MSHA respiratory protection as mandated by DEWALT’s manual to guard against crystalline silica dust.
- If the drill bit jams, release the Trigger immediately; continuing to apply force can break the bit or twist the tool from your hands.
The Anatomy of Your Cordless Drill
Do you know what to call each part? Naming them is the first step to using them correctly. Every modern cordless drill shares the same basic layout, though the placement of switches might vary slightly between brands like Milwaukee, DEWALT, and Bauer.
The business end is the chuck, the three-jawed mechanism that grips the drill or driver bit. Most drills today have a keyless chuck, meaning you tighten it by hand. The trigger is your on/off and speed control, press lightly for slow rotation, fully for top speed. Right behind the trigger is the Direction Switch. Push it left for forward (driving/drilling), right for reverse (removing screws), and center to lock the trigger, a vital safety step when the tool is idle.
On top, you’ll find the Speed Selector, usually a sliding switch marked “1” and “2”. Speed 1 is high torque, low RPM, ideal for driving screws. Speed 2 is high RPM, lower torque, meant for drilling holes. The ring behind the chuck is the Clutch Collar, numbered from 1 up to a drill icon. These numbers control the torque, which we’ll decode next. Finally, the battery slides into the base; models like the Milwaukee M18 CBLDD use an 18V battery, while others like the Kreg KPTCHD050B use a 20V Max system.
Before you start: Wear safety glasses (ANSI Z87.1). Secure your workpiece with clamps. Inspect the battery for damage and ensure it’s charged. Never use the tool under wet conditions or near flammable liquids, as explicitly warned in the Kreg KPTCHD050B manual.
What Do the Clutch Numbers Actually Mean?
The ring of numbers behind the chuck is the most misunderstood part of a drill. It’s not a power dial. It’s a torque limiter, or clutch, designed specifically for driving screws.
Think of each number as a “give-up” point. When the resistance on the screw meets the torque setting you’ve selected, the clutch disengages with a rapid clicking sound, and the motor spins freely without driving the screw further. A setting of 1 or 2 is for small screws into soft wood or drywall. Settings 4-8 cover most general woodworking and assembly. The highest numbers on the clutch collar are for driving large lag bolts.
I learned the clutch the hard way assembling a cheap bookshelf. I left the clutch on the drill setting, drove a screw in, and kept going. The result wasn’t a seated screw, it was a stripped head and a spinning bit that gouged the particle board. That clicking sound is your friend. It means the drill is stopping before you break something.
The rule is simple: always start with a lower clutch setting when learning how to use a cordless drill. If the screw stops before it’s flush, turn the clutch up a few numbers and try again. This prevents most stripped screws.
| Clutch Setting | Best For | What Happens If You Go Higher |
|---|---|---|
| 1-3 | Small screws, electronics, drywall | Strips the screw head or over-drives |
| 4-10 | General wood screws, assembly, decking | May not seat the screw fully |
| 11-20+ | Large lag bolts, heavy-duty framing | Can split wood or snap smaller screws |
| Drill Icon | Drilling holes only | Bypasses clutch – risk of kickback if bit binds |
How to Insert and Change a Drill Bit
The process is physical, not just visual. You need to feel the chuck jaws grip the bit’s shank along its entire length.
First, lock the drill. Move the Direction Switch to the center position. This locks the trigger, so the drill won’t spin while you’re handling it. Hold the black, textured sleeve of the chuck with one hand. With your other hand, rotate the chuck body counter-clockwise to open the jaws. Open them wider than the bit you’re inserting.
Insert the bit straight in, pushing it all the way until it bottoms out. Now, while still holding the chuck sleeve, rotate the chuck body clockwise to tighten. Apply firm, even pressure. A properly tightened chuck will have no visible gap between the jaws and the bit shank, and the bit should not wobble if you gently try to wiggle it.
Never tighten the chuck by pulling the trigger while holding the bit. This is a common shortcut, but it often doesn’t seat the bit fully or evenly, leading to wobble and reduced accuracy. For removal, lock the drill again, hold the chuck sleeve, and turn the body counter-clockwise. If it’s stuck, you can briefly pull the trigger in reverse (with the switch set to reverse) while holding the sleeve, but keep a firm grip.
The 6-Step Process to Drill a Hole
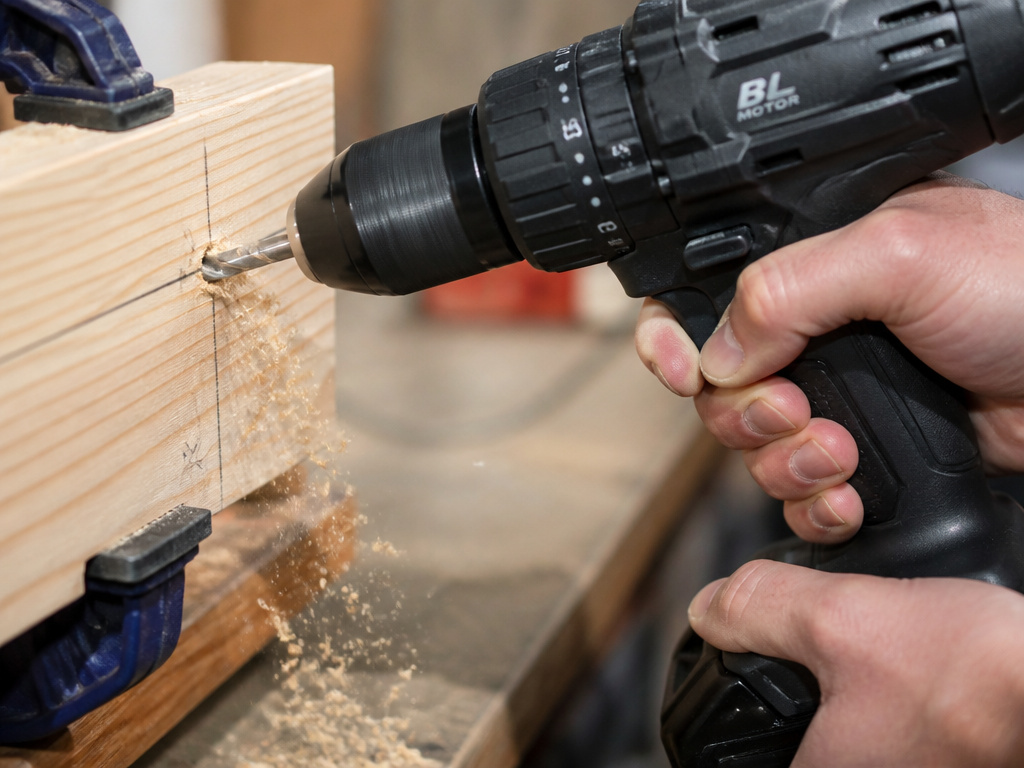
Drilling seems straightforward until you burn out a bit on metal or splinter the backside of a board. Follow these steps in order.
- Select the correct bit. Use a twist bit for wood and metal, a masonry bit for brick/concrete, a spade bit for large holes in wood. Match the bit’s specified maximum speed rating, exceeding it can cause the bit to bend or break.
- Insert and tighten the bit. Use the hand-tightening method described above. A loose bit is the top cause of oversized, ragged holes.
- Set the drill mode. Rotate the clutch collar so that the drill icon aligns with the pointer. This bypasses the torque limiter and gives you full power.
- Select Speed 2. Move the speed selector to the high-speed setting (usually “2”). This provides the high RPM needed for clean, efficient cutting.
- Mark and secure your work. Use a pencil or center punch to mark the hole location. Clamp the workpiece securely. Drilling into a piece held in your hand or against your body is unstable and dangerous.
- Drill with proper technique. Position the drill so the bit is perpendicular to the work surface. Start the drill at low speed by squeezing the trigger lightly, allowing the bit tip to establish a “dimple.” Then, apply steady, firm pressure straight into the work. Let the bit do the cutting, don’t force it.
Apply pressure only in direct line with the bit and do not apply excessive pressure. Bits can bend causing breakage or loss of control, resulting in personal injury. Bauer 20V LITHIUM-ION Drill Manual
Listen and feel. A sharp bit in the correct material will produce a consistent, smooth sound and shavings/dust. A high-pitched whine means you’re going too fast for the material or the bit is dull. If the drill stalls or the sound changes dramatically, release the trigger immediately. You’ve likely hit a knot, rebar, or the bit is bound. For drilling through wood, slow down as you approach the backside to prevent splintering.
How to Drive a Screw Without Stripping It
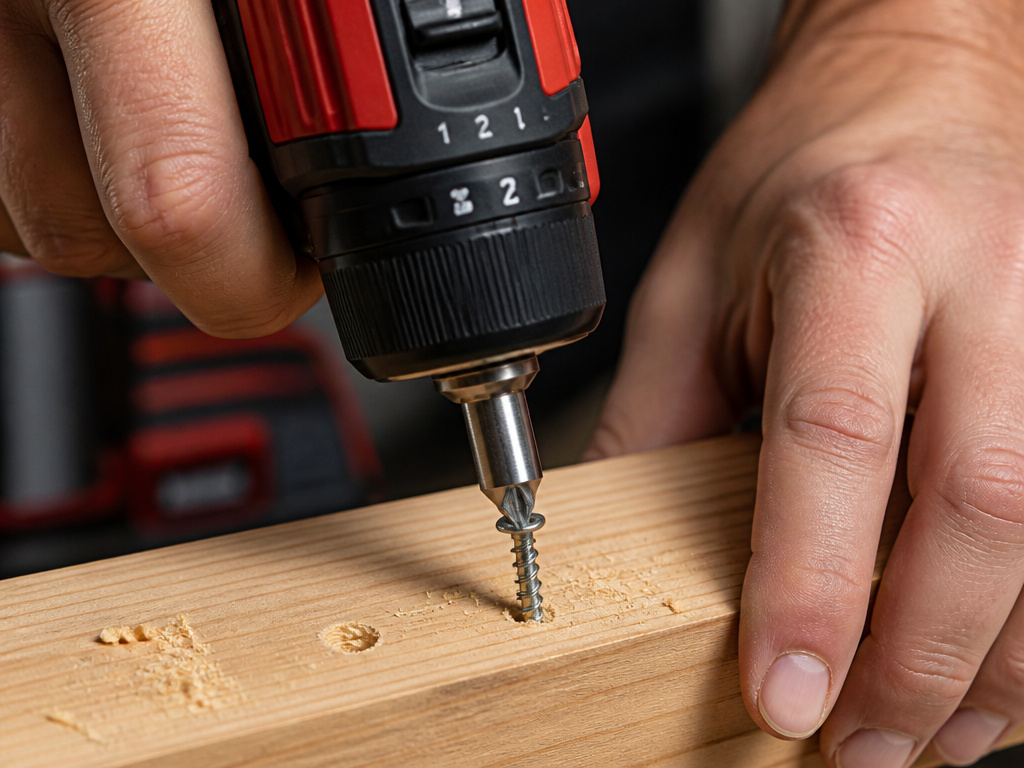
Driving a screw is a two-part operation: making a pilot hole, then driving the screw. Skipping the first part is why screws split wood and drivers cam out.
First, drill a pilot hole. Choose a drill bit with a diameter slightly smaller than the screw’s core (the solid part, not the threads). Follow the drilling steps above. The pilot hole guides the screw and reduces splitting.
Next, switch to driving. Remove the drill bit and insert a driver bit that perfectly matches the screw head, a #2 Phillips for a #2 Phillips screw. A mismatched bit will slip and strip the head instantly. Set the clutch to a low number (start at 4 for general wood screws). Set the speed selector to Speed 1 (low speed, high torque). Set the Direction Switch to forward.
Place the screw on the bit and align it with your pilot hole. Start the drill slowly, allowing the screw to “find” the hole. Once it’s started, apply firm, straight pressure. The drill will do the work. When the screw is nearly flush, ease off the trigger and let the clutch do its job, it will click and disengage when the screw is fully seated.
If the clutch clicks before the screw is flush, stop. Don’t just squeeze the trigger harder. Instead, increase the clutch setting by 2 or 3 numbers and try again. Repeat until the screw seats properly.
Putting It All Together: A Real Project Example
We will hang a simple shelf. This sequence uses every skill: drilling pilot holes, driving screws, and adjusting settings.
You have a 1×6 pine board and two shelf brackets. The goal is to mount the brackets to wall studs, then attach the shelf.
- Find the studs and mark their centers on the wall.
- Hold a bracket against the wall, aligning its mounting holes with the stud marks. Mark the hole locations through the bracket.
- Drill pilot holes for the brackets. Select a drill bit appropriate for your wall anchors or the screw size (often 1/8″ or 3/16″ for wood screws into a stud). Set the clutch to the drill icon, speed to 2. Drill straight into each mark on the wall to the required depth.
- Drive the bracket screws. Insert a driver bit. Set the clutch to a medium setting (around 8), speed to 1. Place the bracket, insert the screw into the pilot hole, and drive it until the clutch clicks and the bracket is snug against the wall. Do not overtighten.
- Attach the shelf to the brackets. Place the shelf on the brackets. From underneath, drive screws up through the bracket into the shelf. Use a lower clutch setting here (4-6) to avoid driving the screw up through the top of your new shelf.
This project moves you from theory to muscle memory. You’ll feel the difference between the raw power of the drill setting and the controlled, limited torque of the clutch.
Safety, Maintenance, and Troubleshooting
The manuals from Milwaukee, DEWALT, Bauer, and Kreg agree on three essential points: wear protection, don’t modify the tool, and service it professionally.
Safety first, every time. DEWALT’s manual mandates ANSI Z87.1 eye protection, ANSI S12.6 hearing protection, and NIOSH/OSHA/MSHA respiratory protection when drilling or cutting, as dust may contain crystalline silica, a known carcinogen. Always use the auxiliary handle if your drill came with one for better control. Hold the tool by its insulated gripping surfaces to prevent shock if you accidentally contact hidden wiring.
Battery care is critical. The Kreg manual advises storing a fully charged battery out of the charger in a cool, dry place away from sunlight and extreme temperatures. The Bauer manual warns not to open, drop, short-circuit, puncture, incinerate, or expose the battery pack to temperatures greater than 140°F. If liquid ejects from a damaged battery, flush with water immediately.
When things go wrong:
- Bit stuck in chuck? Lock the drill (Direction Switch center). Grip the chuck sleeve firmly with a cloth for better grip and twist counter-clockwise. If it’s seized, a few drops of penetrating oil on the jaws can help.
- Drill won’t start? Check the battery charge. Ensure it’s fully clicked into the tool. Check that the Direction Switch isn’t in the locked center position.
- Screw constantly strips? Your driver bit is worn or doesn’t match the screw head. Replace the bit. Also, ensure you’re applying straight-down pressure and not angling the drill.
- Excessive vibration or weird noise? Stop immediately. The bit may be bent, the chuck may be loose, or internal gears may be damaged. This is a job for a professional.
Repairs, maintenance, and adjustments should be performed by a DeWALT factory service to assure product safety and reliability. DEWALT DCD991P2 Manual
Milwaukee states the tool, battery, and charger should never be disassembled. DEWALT advises that repairs should be performed by a qualified repair person and that the charger and battery pack are not serviceable. All repairs must go through an authorized service facility. For a tool like the Milwaukee M18 CBLDD, the manual recommends returning the tool, battery, and charger to a Milwaukee service facility for repair after six months to one year, depending on use, as part of a regular maintenance program.
Cordless vs. Corded Drill Benefits
The main benefit of a cordless drill is portability and convenience. Without a power cord, you can work anywhere, from high on a ladder to the middle of a backyard project, without needing an extension cord or searching for an outlet. This makes them ideal for quick tasks, assembly work, and jobsites without readily available power. A cordless drill also eliminates the tripping hazard of a cord and simplifies storage.
Modern cordless drills offer significant power and speed ranges suitable for most common tasks, from driving screws to drilling holes in wood, metal, and masonry. Their performance is enabled by rechargeable battery packs. Remember to store a fully charged battery pack in a cool, dry place away from direct sunlight and excess heat or cold. For continuous, high-demand applications like drilling many large holes, a corded drill provides unlimited runtime and consistent power without battery management.
Frequently Asked Questions
What is the correct way to hold a cordless drill?
Use both hands. Your dominant hand grips the handle and operates the trigger. Your other hand supports the drill, either by cradling the battery pack or, better yet, by using the auxiliary handle if one is supplied. This second hand guides the drill and absorbs torque reaction, especially when the bit binds or the clutch disengages.
Why does my drill bit keep falling out?
The chuck isn’t tight enough. When hand-tightening, you must overcome the initial resistance of the ratcheting mechanism. After you’ve tightened it as much as you can by hand, give the chuck body one final, firm twist in the tightening direction. You should feel it click into a fully locked position.
Can I use my drill to mix paint or mortar?
Technically yes, but it’s harsh on the tool. Drills are not designed for the constant, thick resistance of mixing. It overheats the motor and strains the gears. If you must, use the lowest speed setting, apply minimal pressure, and work in short bursts to let the motor cool. A dedicated comparison of cordless drills and screwdrivers often highlights that a drill’s clutch isn’t suited for this sustained load.
When should I use the hammer drill function?
Only when drilling into masonry, brick, or concrete. The hammer function delivers a rapid pounding action along with the rotation to break up hard material. For a few small holes in brick, it’s fine. For any serious masonry work, like setting anchors in a foundation, a dedicated rotary hammer is the right tool. Our guide to different types of drills covers this distinction in detail.
How do I choose my first cordless drill?
Focus on a mid-range 18V or 20V Max model from a major brand like DeWalt, Milwaukee, or Makita. Look for a kit that includes at least two batteries and a charger. The chuck should feel solid with minimal wobble. For most homeowners, a model like those found in our list of best cordless drills for DIY offers the best balance of power, runtime, and value. The advantage of a cordless vs corded model is portability, which wins for most household tasks.
Before You Go
Mastering your cordless drill isn’t about raw strength. It’s about understanding three simple mechanical relationships: clutch numbers control screw depth, speed settings match the task (driving vs drilling), and perpendicular pressure prevents mistakes.
Your first project will feel clumsy. Your fifth will feel routine. The click of the clutch will change from a confusing noise to a useful signal. When you’re shopping, remember that a well-reviewed drill combo kit with a selection of bits is often a smarter buy than a bare tool. And finally, the best tip for driving screws with a drill is one nobody tells you: start with a lower clutch setting than you think you need. You can always add more torque, but you can’t un-strip a screw.
