
How to Use a Dual Action Air Sander: The 6-Step Setup
This post contains affiliate links. As an Amazon Associate, we earn from qualifying purchases.
To use a dual action air sander, you need clean, dry air at 90 PSI, a 3/8” inner diameter hose (switching to 1/2” for runs over 25 feet), and to lubricate the tool before and after every use. Start with the sander on the workpiece at its lowest speed, move in wide overlapping passes using only the tool’s weight for pressure, and work through grits sequentially. Never skip from a coarse grit directly to a fine one.
That 90 PSI figure isn’t a suggestion. It’s the ceiling for many models. Kobalt, Clarke, and Draper list it as the maximum operating pressure, while Husky (H4790) and Craftsman recommend a range of 60-90 PSI. Exceed it and you’re asking the internal vanes and seals to handle stresses they weren’t engineered for. A key part of how to use a dual action air sander is respecting this limit. The tool gets louder, hotter, and fails months early.
What follows is the setup most manuals assume you already know when learning how to use a dual action air sander, the technique differences they don’t agree on, and the maintenance step that 90% of owners skip until the sander starts bogging down. By the end, you’ll know why a $20 in-line oiler is a better investment than a more expensive sander, and how to read your compressor’s gauge like a pro.
Key Takeaways
- Run at 90 PSI maximum, higher pressure cooks the motor and voids warranties.
- Use a 3/8” inner diameter hose, but sources disagree on the length threshold for increasing diameter: Husky and Craftsman recommend a larger hose for runs over 8 ft, while Draper Tools suggests it for hoses over 25 ft long.
- Lubricate the tool regularly with air-tool oil; for extended storage, sources recommend running oil through for durations ranging from a few seconds to 30 seconds.
- Never press down, the tool’s own weight provides all the pressure needed for efficient cutting.
- Work through sequential grits (e.g., 80 → 120 → 180 → 220); jumping from coarse to fine creates swirls you can’t remove.
The 6-Step Setup and Safety Check
You can’t sand well with weak, dirty air. The setup is 80% of the battle. Get this wrong and no technique will save you.
First, safety. This isn’t optional.
Before you start: Wear ANSI Z87.1 safety glasses with side shields. Hearing protection is required for exposures at or above an 85dBA 8-hour average. When sanding for extended periods, use a protective mask, the dust contains crystalline silica and other harmful particulates. Never use oxygen or bottled gases as a power source.
Now, the air system.
- Drain Your Compressor. Do this daily. Water in the tank travels down the hose, mixes with the oil in your tool, and forms a sludge that corrodes the motor from the inside. The Draper and Husky manuals are adamant on this point.
- Blow Out the Air Hose. Before connecting the sander, run air freely through the hose for 5–10 seconds to clear accumulated dust and moisture. The Craftsman manual specifies this.
- Set the Regulator. Your compressor’s regulator may need to be set above 90 PSI to account for pressure drop in the hose, aiming for 90 PSI at the tool inlet. Remember, a hose can cause up to a 15 PSI drop (Kobalt manual), so 90 PSI at the compressor might only be 75 PSI at the sander.
- Choose a 3/8” inner diameter hose. The universal minimum is a 3/8” inner diameter hose. Here’s where sources disagree on the length threshold:
| Brand / Manual | Hose Diameter Rule |
|---|---|
| Husky HSTC4790 & Craftsman | 3/8” hose up to 8 ft. For longer runs, use a 1/2” hose. |
| Draper Tools | Minimum 3/8” ID. Increase to 1/2” ID for hoses over 25 ft long. |
| Clarke | If a hose over 8 metres (26 ft) is required, line pressure may need increasing. |
The takeaway: For a 25-foot hose in your garage, a 3/8” ID is fine. For a 50-foot reel, step up to 1/2” ID. Avoid connecting multiple hoses with quick-connect fittings, each joint adds another pressure drop.
- Add an In-Line Lubricator. This is the single best thing you can do for tool life. Install a filter-regulator-lubricator (FRL) as close to the tool as possible. It cleans, regulates, and oils the air automatically. The Husky and Craftsman manuals explicitly recommend it.
- Lubricate the Tool. Even with an FRL, add a few drops of air-tool oil into the air inlet before you start. You’ll hear the pitch of the motor smooth out within seconds.
Sanding Technique: Let the Tool Do the Work
Here’s where the official advice on how to use a dual action air sander splits. Do you start the sander on the workpiece or off it?
The Husky HSTC4790 manual says: “Start the sander off the work surface, set it down on the work surface evenly.” The Draper Tools manual counters: “Start the operation with the tool against the workpiece to prevent gouging upon first contact.” The Kobalt manual adds a third variable: “When first making contact with the surface, ensure speed is set to the lowest setting.”
So who’s right? In practice, it depends on your grit. For coarse grits (80-120) that cut aggressively, start off the surface and lower it gently to prevent dig-in. For fine finishing grits (220+), it’s safer to have the sander already on the surface at low speed to avoid bouncing or skipping.
The one rule they all agree on: don’t press down. The Clarke manual states it plainly: “The actual weight of the machine is normally sufficient for efficient sanding. Do not put additional pressure on the machine.” Pressing slows the pad’s orbit, reduces cutting efficiency, creates heat, and wears out the motor bearings. You’ll feel the difference, a free-running sander has a smooth, high-frequency buzz. A bogged-down one groans.
Move the sander in wide, overlapping passes. Keep it moving. Dwelling in one spot for even two seconds will create a low spot or a burn mark. For large panels, use a crisscross pattern.
Common mistake: Applying pressure. Your arms will tire in 10 minutes, the finish will be uneven, and you’ll wonder why the sander seems underpowered. It’s not. You’re choking it.
Grit Sequence and Pad Selection
You cannot rush the finish. Jumping grits is the fastest way to guarantee you’ll see every scratch from the previous step after you apply paint.
The Husky (HSTC4790) manual is blunt: “Never go from a coarse grit to a fine grit in one step.” If you sand with 80-grit, you must step up to 120-grit, then 180-grit, then 220-grit. Each finer grit removes the scratch pattern of the one before it. Skipping a step leaves deeper scratches that the finer paper can’t reach, leaving visible swirls under clear coat.
Use hook-and-loop (Velcro) pads. They allow quick disc changes and better conformability than adhesive (PSA) pads. Ensure your sanding discs have the correct hole pattern if your sander has a dust extraction port.
Where this goes sideways: Using a worn-out pad. A worn pad doesn’t lie flat, causing the outer edge to sand more aggressively than the center. This creates an uneven surface and can leave pad marks. If the backing pad is hard, cracked, or lost its cushion, replace it.
The Maintenance That Actually Matters
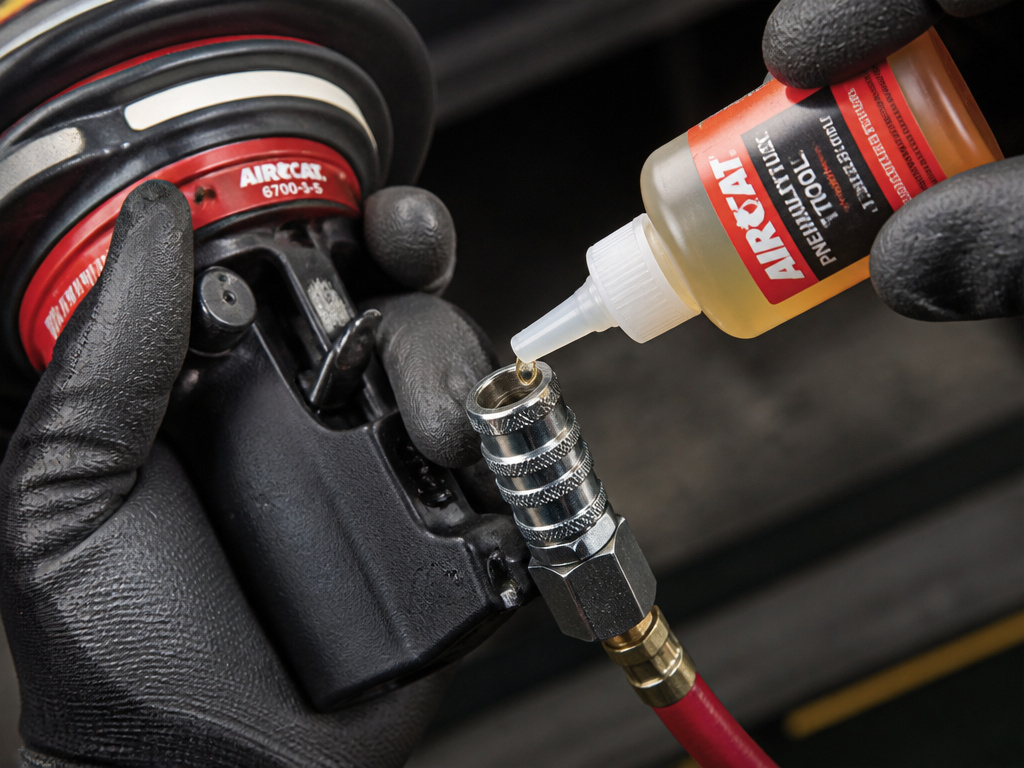
Pneumatic tools die from neglect, not use. The enemy is always the same: water and a lack of oil.
Daily, you drain the compressor. Every time you use the sander, you add a few drops of oil to the inlet. But what about when you’re done for the week or season? The manuals disagree on the procedure, but not the principle.
| Brand / Manual | Extended Storage Lubrication Procedure |
|---|---|
| Kobalt | “Generous amount of lubrication… then run for approximately 30 seconds.” |
| Husky HSTC4790 | “Generous amount of lubrication… run for approximately 10 seconds.” |
| Clarke | “If not used for longer than 24 hours, run a few drops of oil… run the tool for a few seconds.” |
| Draper Tools | “Pour a few drops of air tool oil into the air line coupling and depress the trigger lever several times.” |
The pattern is clear: oil it, then run it to coat the internal parts. The key is to get oil in there before it sits.
Use air-tool oil or high-grade turbine oil with specific additives. The Kobalt manual specifies “air-tool oil or high-grade turbine oil containing moisture absorbent, rust inhibitors, metal wetting agent, and EP (extreme pressure) additive.” Don’t use motor oil or WD-40.
TL;DR: A few drops of air-tool oil in the coupler before and after use. Run it for 10 seconds before storage. That’s the cheapest insurance you can buy.
Troubleshooting Common Problems
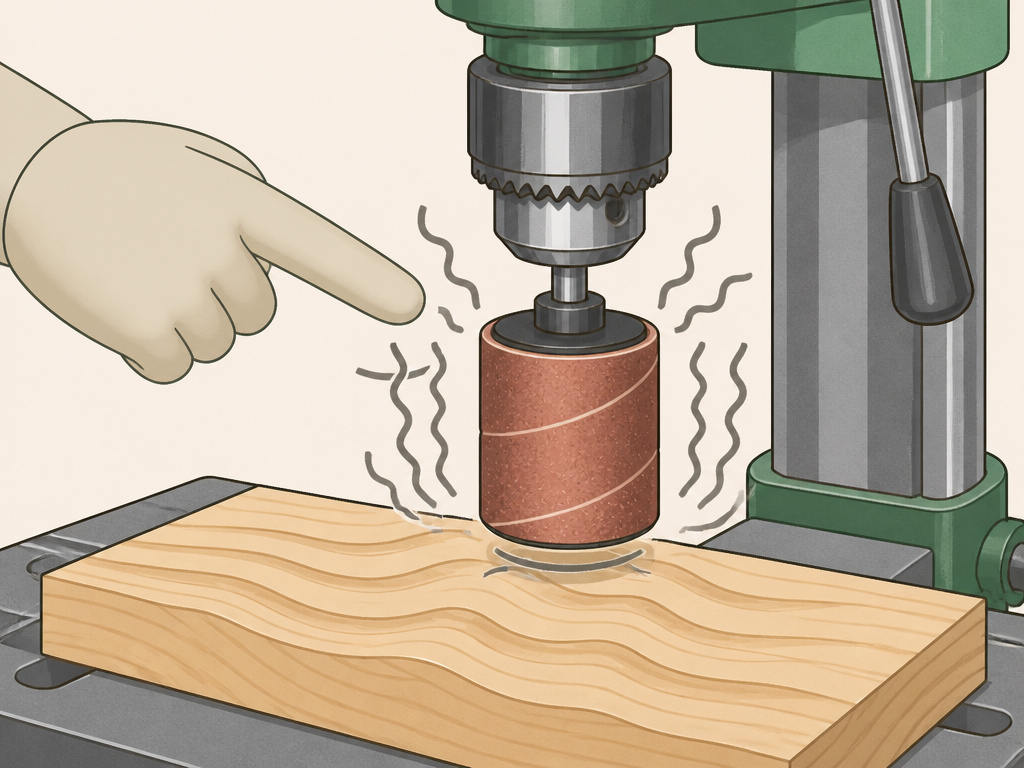
Your sander is simple. When it acts up, the cause is almost always in the air supply or lubrication.
- Problem: Low power, sander bogs down easily.
- Check 1: Air pressure. Is your regulator truly at 90 PSI? Connect a gauge directly at the tool’s inlet to verify.
- Check 2: Hose restriction. Are you using a 50-foot, 1/4” ID hose? It’s like drinking a milkshake through a coffee stirrer. Upgrade to 3/8” or 1/2” ID.
- Check 3: Lubrication. A dry motor has massive internal friction. Oil it.
- Problem: Sander won’t run.
- Check 1: Is the pad lock engaged? Some models have a spindle lock for changing pads. If it’s locked, the sander can’t orbit.
- Check 2: Is the trigger or throttle valve stuck? Dirt or dried oil can gum up the mechanism. A few drops of oil into the trigger area can free it.
- Problem: Excessive vibration or erratic orbit.
- Check: The backing pad. Is it damaged, warped, or has the bearing failed? A wobbly pad destroys finish quality. Replace it.
If you’ve checked air, oil, and the pad, and the tool still struggles, the internal vanes or bearings are likely worn. For a $100 sander, replacement is often more economical than repair. For a professional-grade model, rebuild kits are usually available.
How a Dual Action Sander Works
A dual action sander combines two motions. The backing pad spins in a rotary motion for fast material removal, but it also orbits in a small circle. This dual motion prevents the swirl marks common with a pure rotary sander, making it ideal for paint and clear coat work. The combined action allows the tool to sand aggressively while leaving a finish that’s ready for polishing. The tool’s own weight is typically enough for efficient sanding; applying extra pressure can harm the surface and the tool.
What the Mode Adjustment Knob Does
This knob typically switches the sander between a pure orbital mode and a locked mode. In the standard dual-action setting, the pad both orbits and spins freely, providing a swirl-free finish. When locked, the pad’s rotation is fixed, converting the tool to a more aggressive rotary sander for faster stock removal on tougher materials. Always start with the sander in the dual-action mode for finish work. Switch to locked mode only when you need the extra cutting power and are prepared to follow up with finer grits to remove any resulting swirl marks.
Frequently Asked Questions
What is a dual action sander used for?
Dual action (DA) air sander is primarily used for surface preparation where a swirl-free finish is critical. Its most common applications are automotive bodywork (sanding paint, primer, and filler), woodworking (smoothing bare wood before finishing), and marine repairs (sanding fiberglass and gel coat). The dual orbital-and-rotary motion prevents the predictable scratch pattern of a pure rotary sander, making it ideal for paint and clear-coat work.
Can you use a dual action sander for polishing?
Yes, but not effectively for final polishing. You can attach a foam polishing pad to a DA sander to apply and spread compound or wax, and it will work for light correction. However, its orbit is designed for sanding, not the high-speed rotation needed for cutting and jewelting a finish. For serious polishing and paint correction, a dedicated dual-action or rotary polisher is the right tool.
What size air compressor do I need for a DA sander?
You need a compressor that can deliver the sander’s required CFM (Cubic Feet per Minute) at 90 PSI. This is where sources vary: Kobalt lists 5 CFM, Clarke 6 CFM, Husky and Craftsman 4 CFM, and Draper about 3 CFM. To be safe, assume 5-6 CFM. Your compressor’s output must meet or exceed the sander’s CFM requirement continuously, not just in short bursts. A small “pancake” compressor with a low CFM rating will run constantly and may not keep up, stalling the sander.
How do I avoid swirl marks?
Swirl marks come from two main sources: skipping grits and using a worn or improper pad. Always follow a sequential grit progression (e.g., 80 → 120 → 180 → 220). Ensure your backing pad is clean, flat, and has life left in its cushion. Finally, use a proper technique to avoid swirl marks by keeping the sander moving and using only its own weight for pressure.
Are electric or air DA sanders better?
It depends on your use case. Electric dual-action sander models are more convenient for most DIYers, no compressor needed, consistent power, and often quieter. Air sanders, like the ones covered here, are lighter, run cooler, are more durable in professional shops, and their speed is easily adjustable with air pressure. For high-volume auto body work, pneumatic is still the standard. For home garage projects, a good electric DA sander is often the simpler choice.
Before You Go
The real secret to using a dual action air sander isn’t in your wrist. It’s in the air line. If you take away one thing, make it this: buy a $20 in-line filter-regulator-lubricator and install it. That single accessory will outlast three sanders. It guarantees clean, oiled air every time you pull the trigger, which is 90% of the battle for longevity.
Your first project, consciously resist the urge to push down. Let the tool float. Listen to the motor. A happy sander sounds like a steady, high-pitched hum. A struggling one groans and slows. Your job is to keep it in the hum. Everything else, the types of power sanders, the grit sequences, the pad choices, is just refinement of that basic partnership between you, the tool, and the air that powers it.
