
How to Use a Wall Chaser: Step-by-Step (Without Damage)
This post contains affiliate links. As an Amazon Associate, we earn from qualifying purchases.
To use a wall chaser, you match the tool’s cutting depth to one-third of your wall’s thickness, connect it to a dust extractor, and cut two parallel lines before chiseling out the center. The process is dry-cutting only, demands full PPE, and requires a pre-cut scan for hidden pipes and wires.
That “one-third” rule is the structural limit that keeps your wall from cracking. It’s not a suggestion from the tool manual, it’s engineering advice from rental pros who see what happens when people chase too deep. The manuals give you the mechanical range (0–30mm, 25mm, or up to 50mm), but your wall’s actual thickness gives you the real-world limit. This is a key principle for how to use a wall chaser.
What follows is the bridge between those numbers and the dust-cloud reality of how to use a wall chaser. We’ll walk through the six physical steps, the safety gear that isn’t optional, and how to interpret conflicting specs from brands like IAN, Nikolaou, and Ramset. You’ll finish knowing how to set the width, manage the unbelievable dust, and avoid the two mistakes that burn out the tool’s feed motor.
Key Takeaways
- Set depth to the lesser of one-third of wall thickness or the tool’s maximum capacity, as sources disagree: Speedy Hire advises one-third of wall thickness (~35mm for a 110mm wall), while tool manuals specify capacities like 30mm (IAN 93548), 25mm (Nikolaou BGC1700), or up to 50mm (Ramset RW150ES).
- Dry cutting is mandatory, introducing water for cooling risks electrocution, as stated in the Nikolaou Tools BGC1700 and Ramset RW150ES manuals.
- Use only diamond cut-off wheels rated for at least the tool’s no-load speed (e.g., 10,500 rpm for the BGC1700); the Nikolaou Tools BGC1700 manual states not to use bonded abrasive cut-off wheels.
- Connect a dust extractor before starting, silica dust from concrete and masonry is a serious respiratory hazard and will coat your workspace in seconds.
- Inspect and test wheels for one minute at full speed after installation, as per the BGC1700 manual, to check for hidden cracks before loading.
What a Wall Chaser Is Actually For
A wall chaser isn’t a fancy grinder. It’s a twin-blade slitting machine designed for one job: cutting clean, parallel channels in mineral materials like concrete, masonry, and brick to hide pipes, wires, or conduit. The two diamond blades spin in unison, carving out two precise lines in a single pass. The strip of material left between them is then easily removed with a chisel, leaving a neat trench ready for capping.
The alternative is using a single-blade angle grinder to cut each side separately, which doubles the time, increases the chance of wandering off line, and creates twice the dust. A dedicated wall chaser’s guided sled keeps the cuts straight and the depth consistent, which is why electricians and plumbers reach for them on renovation jobs.
This tool is solely determined for cutting slots and separation of mainly mineral materials (e.g., reinforced concrete, masonry, tiles, pavements) without water. . Ramset RW150ES Owner’s Manual
The key phrase there is “without water.” Every manual in our fact sheet, from the IAN 93548 to the Ramset RW150ES, specifies dry cutting only. Using water as a coolant violates the tool’s safety design and creates a severe risk of electric shock.
Wall Chaser Safety: The Non-Negotiable PPE List
You can’t half-gear-up for this. The combination of deafening noise, blinding dust, and flying debris is a triple threat. The manuals are not subtle about this.
The Nikolaou Tools BGC1700 manual explicitly lists the required personal protective equipment: a face shield or safety goggles, a dust mask or respirator, hearing protectors, gloves, and a shop apron. The IAN 93548 manual adds a blunt command: “Wear ear protection.” Here is why each piece of required equipment is essential.
- Hearing Protection: Sound pressure levels are brutal. Without earmuffs or plugs, you’ll hit your daily noise exposure limit in under 10 minutes. Tinnitus is permanent.
- Eye and Face Protection: A face shield is best. Diamond blades can throw off chips of masonry or, in a worst-case scenario, fragments of a cracked wheel. Safety goggles alone won’t stop a chunk from hitting your cheek or forehead.
- Respiratory Protection: A basic dust mask isn’t enough. You need a respirator rated for silica dust. Concrete and masonry dust contains crystalline silica, a known carcinogen that causes silicosis.
- Gloves and Apron: Heavy-duty gloves improve grip and protect your hands from abrasion against the wall or tool. A shop apron keeps the abrasive dust off your clothes.
Before you start: Ensure your work area is clear of bystanders, especially children and pets. Verify your power source is protected by a 30mA RCD (Residual Current Device) as mandated by the Nikolaou Tools BGC1700 manual. This is your last line of defense against electrocution if something goes wrong.
Tools and Materials You’ll Need
Gather everything before you plug the chaser in. Fumbling for a pencil mid-job while wearing a respirator and earmuffs is a comedy routine you don’t want to star in.
The Core Tool:
- Wall Chaser (e.g., IAN 93548, Nikolaou Tools BGC1700, Hilti DC-SE 20)
- Compatible Industrial Dust Extractor with HEPA filter
- Correct Diamond Cut-off Wheels (check arbor size and thread, e.g., 22.2mm mounting hole on the IAN 93548 and Ramset RW150ES, and M14 thread on the IAN 93548)
Layout and Safety:
- Cable/Pipe Detector (like a Radiodetection CAT)
- Pencil and Straight Edge or Chalk Line
- Measuring Tape
- Safety PPE (as listed above)
Finishing:
- Bolster Chisel and Hammer
- Plastic Conduit or Capping (for electrical wires)
- Bonding Plaster or Filler for final repair
The dust extractor is as important as the chaser itself. The Speedy Hire guide notes these tools “create so much more dust than you’d imagine possible.” Without extraction, you’ll lose sight of your line within a foot of cutting, and you’ll be breathing a toxic cloud.
Step-by-Step: From Marking to Cleanup
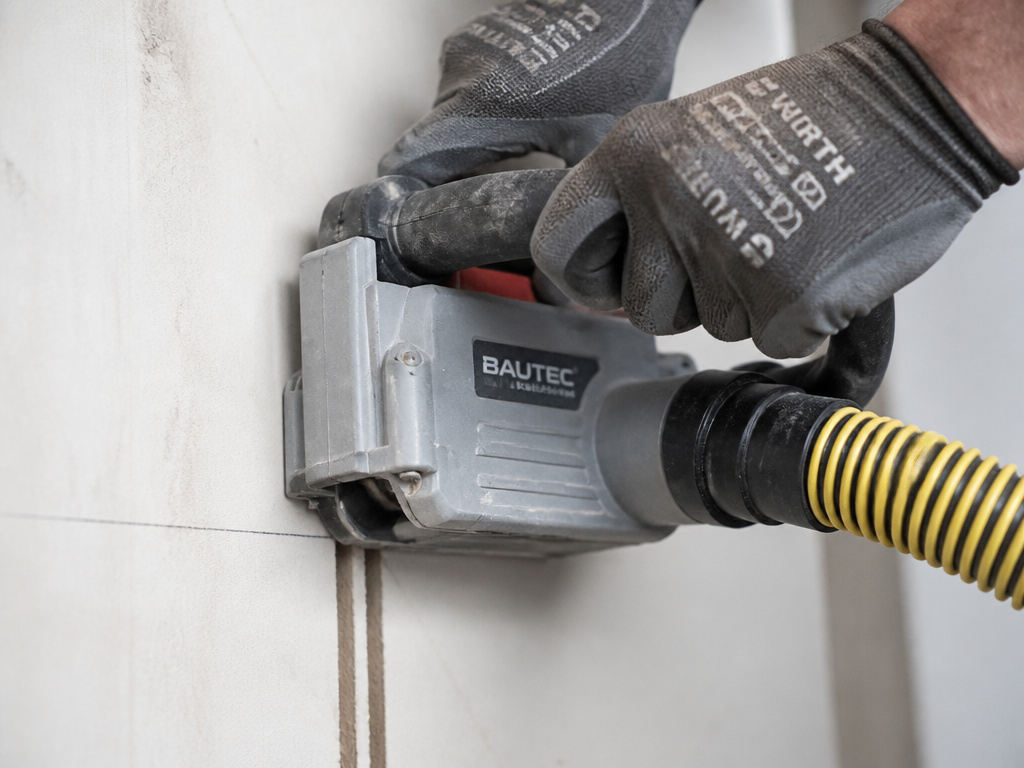
This is the six-stage sequence. Rushing the prep stages is how you hit a live wire or cut a chase too deep for the wall to handle.
1. Scan and Mark the Wall
Use your cable detector meticulously. Scan the entire path of your intended chase, both horizontally and vertically. Old wires and pipes often run in unexpected places. Mark any hazards clearly with a bright marker.
Once the coast is clear, mark your chase with a pencil and straight edge. Draw two parallel lines representing the outer edges of your channel. This visual guide is crucial for keeping the tool on track.
2. Set the Chase Depth and Width
Here is where you must reconcile the tool’s ability with your wall’s reality. Consult this table to see the conflict between manufacturer specs and structural advice:
| Source | Max Cutting Depth | Max Cutting Width | Key Limiting Factor |
|---|---|---|---|
| Speedy Hire (Structural Advice) | ~35mm (1/3 of 110mm wall) | Varies by tool | Wall thickness & stability |
| IAN 93548 Manual | 0–30mm | 8–26mm | Tool design |
| Nikolaou BGC1700 Manual | 25mm | 30mm | Tool design |
| Ramset RW150ES Manual | Up to 50mm | Not specified | Tool power |
The rule: Your depth setting is the LESSER of the tool’s maximum or one-third of your wall’s total thickness. Even if your Ramset can cut 50mm, doing so risks compromising the wall’s strength.
For width, refer to your specific model. If you need a non-standard width, its manual has a specific procedure: remove the second wheel and cut each side of the chase separately using the inner wheel.
3. Connect Dust Extraction and Install Wheels
Connect your dust extractor hose to the chaser’s port securely. Turn the extractor ON and check the suction. A loose connection means dust billows out the sides.
Install your diamond wheels. Ensure the arrow on the wheel matches the tool’s direction of rotation. Tighten the arbor nut with the provided pin wrench. Before you put the guard down, run the tool at full no-load speed for one minute in a safe direction, as the BGC1700 manual instructs. Listen for any vibration or wobble that indicates a cracked or poorly seated wheel.
4. Make the First Cut
Position the chaser’s guide sled at the start of your marked lines. Hold the tool firmly with both hands on the insulated grips. Turn on the dust extractor, then start the chaser.
Let the blades reach full speed, you’ll hear the motor pitch settle from a spin-up whine to a steady, loaded roar. Then, firmly and smoothly plunge the blades into the wall at the start of your line. Don’t force it; let the diamonds do the grinding.
The part nobody mentions: Plunge the chaser in decisively. Hesitating at the surface creates a ragged start and throws more dust back at you. The Speedy Hire guide says to get it sunk in ASAP so the dust is collected straight from the cut.
5. Guide the Tool and Make the Second Cut
Once the blades are at full depth, use the front guide point or laser (if equipped) to follow your pencil line. Move at a steady, moderate pace. Pushing too fast overheats the blades and glazes the diamond segments. Going too slow just wastes time.
If the tool binds or the motor bogs down, you’re likely forcing it or have hit rebar. Stop, back out, and reassess. At the end of the line, lift the blades clear of the wall before releasing the trigger.
For the second parallel cut, simply realign the guide sled with your other marked line and repeat the process. You’ll now have two clean, parallel cuts with a strip of material between them.
6. Chisel the Center and Install Conduit
Turn off and unplug the chaser. Using a wide bolster chisel and hammer, break out the strip of material between the two cuts. Work from one end to the other, using the chisel in the scored lines. The material should come out in chunks.
Clear all debris from the channel. If running electrical wires, now is the time to insert plastic capping or conduit. This protects the cables from the plaster and provides a smooth channel for future access. Finally, fill the chase with bonding plaster, smooth it flush with the wall, and allow it to set before sanding and painting.
Troubleshooting Common Wall Chaser Problems
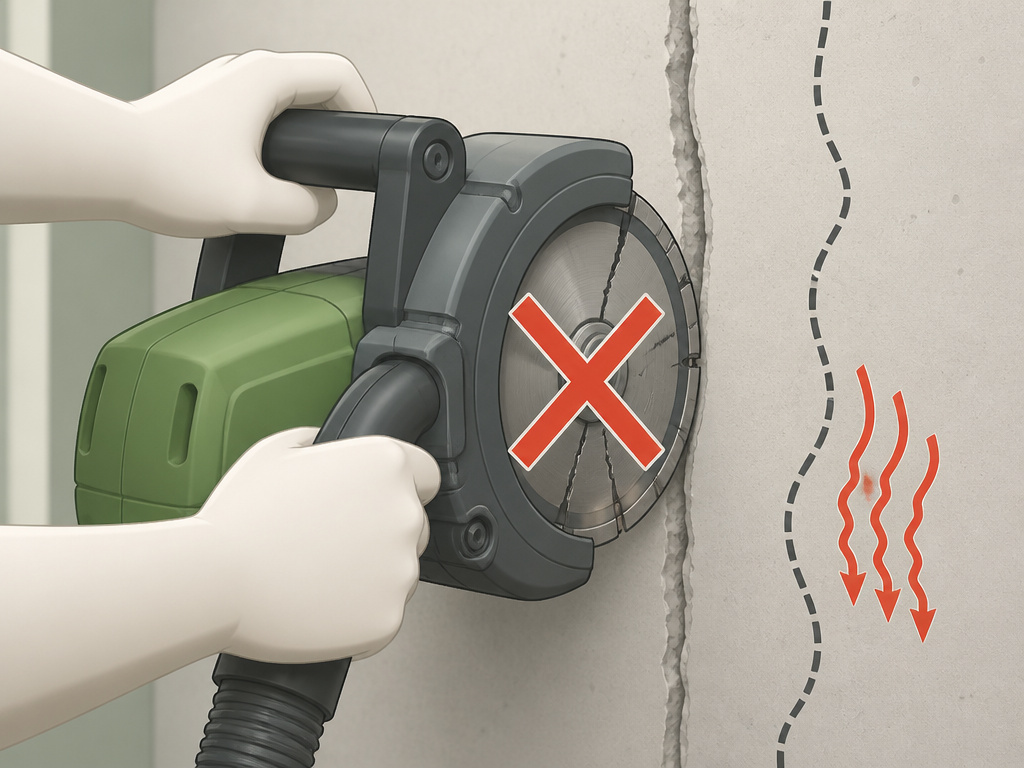
Sometimes, despite your best efforts, things don’t go smoothly. Here are the fixes for the issues you’re most likely to face.
- Motor Overheating or Bogging Down: You’re pushing too hard or the blades are dull. Ease up on the feed pressure. If the problem persists, your diamond blades are likely glazed or worn out and need replacing. Forcing the cut risks burning out the motor.
- Excessive Dust Escape: Check all connections between the chaser and the dust extractor. The seal must be airtight. Ensure your extractor’s filter isn’t already clogged and that it has sufficient suction power for the job.
- Uneven or Wandering Cuts: You are not holding the tool steady or are not using the guide. Let the sled rest flat against the wall and use the front guide point. Don’t twist the tool during the cut. The Hilti DC-SE 20 manual warns: “Do not allow the disc to twist in the cut.”
- Blade Vibration or Loud Noise: STOP IMMEDIATELY. You likely have a cracked diamond wheel or a loose arbor nut. Turn off the tool, unplug it, and inspect the wheels as per the pre-operation test. A vibrating blade can disintegrate.
Wall Chaser vs. Alternative Methods
Is a wall chaser always the right tool? Not for every job. Here’s when to use it and when to pick something else.
| Task | Best Tool | Reason |
|---|---|---|
| Cutting neat channels for multiple cables/pipes in masonry | Wall Chaser | Twin blades, guided sled, and integrated dust extraction make it the fastest, cleanest option. |
| Making a single, deep cut in concrete | Angle Grinder with diamond blade | More powerful motor can handle deeper, single-cut work where a chaser’s dual blades aren’t needed. |
| Demolishing a small section of a masonry wall | Rotary Hammer with chisel | A rotary hammer’s hammer-only mode delivers focused impact energy for breaking, not slicing. |
| Chasing a very short run (under 1 foot) in drywall/plaster | Utility Knife & Chisel | Overkill. A scored line and careful chiseling is quieter, less messy, and perfectly adequate. |
For most DIY wiring or plumbing projects involving longer runs in solid walls, learning how to use a wall chaser is worth the rental cost. The time and mess saved are substantial. For learning core masonry work like using a hammer drill for concrete, a hammer drill is a more fundamental skill.
Frequently Asked Questions
What is the most common mistake when using a wall chaser?
Skipping the dust extractor. People think they can manage the dust with a shop vac or just tolerate it. Within seconds, the cloud is so thick you can’t see your line, and you’re breathing hazardous silica. The tool is designed to be used with an extractor; not using one is the fastest way to ruin your work environment and your health.
Can I use a wall chaser on wood or drywall?
No. Every manual specifies “mineral materials” like concrete, masonry, brick, or tile. Using it on wood or drywall would clog the diamond blades with soft material, overheat the motor, and create a fire hazard from the excessive, flammable dust. Use a different tool.
These numbers reflect the mechanical design and power of specific models. A heavier-duty, more powerful model like the 2500W Ramset RW150ES can physically cut deeper than a 1350W IAN 93548. Sources disagree on the safe limit: Speedy Hire advises a maximum of one-third of wall thickness, while tool manuals specify their own maximum cutting capacities.
Is it better to buy or hire a wall chaser?
For almost all DIYers and even many tradespeople who don’t do chasing daily, hiring is the smarter choice. It’s a specialized, expensive tool. Hiring gives you access to a professionally maintained, high-end model (often a Hilti or Metabo) and shifts the cost of blade wear and potential repairs to the rental company. Buying only makes sense if you’re a professional electrician or plumber facing weekly chasing work.
What should I do if I suspect I’ve cut into a wire or pipe?
Stop immediately. Do not pull the tool out. Turn off the main power to the area if it’s a wire, or the main water valve if it’s a pipe. Carefully back the chaser out of the cut. Assess the damage visually. For wiring, you must consult a licensed electrician before proceeding. For plumbing, a plumber may be needed. This is why using a cable detector is a mandatory step.
Before You Go
The wall chaser’s manual is your first source, but the wall itself is your final inspector. If your calculated maximum depth (one-third of thickness) is less than the tool’s rated depth, listen to the wall. That’s the difference between a clean, stable installation and a cracked, costly repair.
Your first move after reading this should be to measure your wall thickness with a tape measure. Do the math: total thickness divided by three. That number, not the glossy spec on a tool box, is your true starting point. Everything else, the brand, the power, the blade type, works in service of that single, structural limit.
For related heavy-duty concrete work, our guides on using a rotary hammer or using a concrete grinder cover the companion skills you’ll need on site. The principles are the same: respect the material’s limits, control the dust, and let the tool’s design do the work it was engineered for.
