
How to Use an Air Cut Off Tool: The 7-Step Pro Setup
This post contains affiliate links. As an Amazon Associate, we earn from qualifying purchases.
To use an air cut-off tool, connect it to a clean, dry air supply regulated to 90 PSI, install a rated cutting disc, and run the tool at full speed before applying light, even pressure to the workpiece. The tool does the cutting; forcing it jams the disc and burns out the motor.
That 90 PSI line isn’t a suggestion. It’s the threshold where the motor’s vanes seal against the cylinder wall for full torque. Go over, and you accelerate wear on the rotor and bearings. Go under, and the tool bogs down on anything thicker than sheet metal. Understanding this pressure is fundamental to how to use an air cut off tool.
What follows: the seven essential setup steps every manual assumes you know, the one technique mistake that wrecks discs when learning how to use an air cut off tool, and the daily two-minute habit that adds years to the tool’s life.
Key Takeaways
- Always run the tool at full free speed (which is 20,000 RPM for many models like Toolmaster and Sealey, but 16,000 RPM for the Laser Tools 7626) before touching the workpiece, a half-speed disc grabs, binds, and shatters.
- Lubricate the tool daily before use with a few drops of air tool oil in the inlet; skipping this dries the seals within a week of shop use.
- Match your air hose diameter to the tool’s inlet, a 1/4″ BSPT inlet needs at least a 10mm (3/8″) ID hose; a smaller hose strangles airflow and kills power.
- Let the cutting disc do the work; the Toolmaster A087 manual specifies “light pressure,” while Sealey advises “adequate pressure”.
- Store the tool with extra oil in the air motor; run it for only 2-3 seconds after lubricating to coat the internals without blowing all the oil out the exhaust.
The Non-Negotiable Safety Gear
Eye protection is obvious. A cutting disc disintegrating at 20,000 RPM turns into a cloud of abrasive shrapnel. What most people skip is the combination of threats this tool creates all at once.
The Laser Tools 7626 manual spells out the triad: dust, vibration, and noise. You need a suitable-grade dust mask for fiberglass or rust, not a cloth bandana. Vibration from an unbalanced disc or a worn tool damages nerves and blood vessels in your hands, if your fingers go numb or tingle, stop immediately. And at noise levels around 90 decibels or higher, the whine is a hearing-loss hazard. Basic foam earplugs cut that to a safe level.
Your gloves matter too. Heavy leather work gloves protect from sharp edges and glancing sparks, but they shouldn’t be so bulky that you lose feel for the tool’s trigger. You’re balancing a spinning disc, not just holding a handle.
Before you start: A broken disc throws fragments at bullet speed, wear safety glasses or a full face shield. High-pressure air can inject oil or debris under the skin, never point the air inlet at yourself or others. Always disconnect the air supply before changing the disc.
Air Supply: It’s About Flow, Not Just Pressure
Your compressor might say 90 PSI on the gauge. That’s static pressure, measured with no air flowing. The moment you pull the trigger, the pressure at the tool can drop by 20 PSI if your setup is wrong. You need both sufficient pressure and sufficient airflow, measured in CFM (Cubic Feet per Minute).
Most 75mm air cut-off tools need about 3.5 to 4 CFM at 90 PSI; for example, the Toolmaster A087 requires 3.5 CFM. Here’s how to make sure it gets there:
| Component | Requirement | What Happens If It’s Wrong |
|---|---|---|
| Air Hose | Minimum 10mm (3/8″) Inside Diameter, per Toolmaster A087 manual. | A 1/4″ hose restricts airflow, causing power loss and motor overheating within minutes. |
| Hose Length | Under 8 meters (25 ft) for standard hose. Over 8m requires increased line pressure. | Long, thin hoses cause massive pressure drop; the tool stalls in the cut. |
| Quick-Change Coupling | Never connect directly to the tool. Use a short leader hose. | Vibration from the tool can crack the coupling or cause it to fail catastrophically. |
| Air Filter/Regulator | Must be present and drained daily. | Water in the air line washes away internal lubrication, leading to rust and seized rotors. |
The inlet thread is almost always 1/4″ BSPT or 1/4″ NPT. That’s your starting point. If not, manually add a few drops of air tool oil into the inlet every single day before you start work. The Sealey SA2501 manual is blunt: “Drain the air tank daily. Water in the air line will damage the cut-off tool.”
Disc Selection and Installation: The 60-Second Safety Check
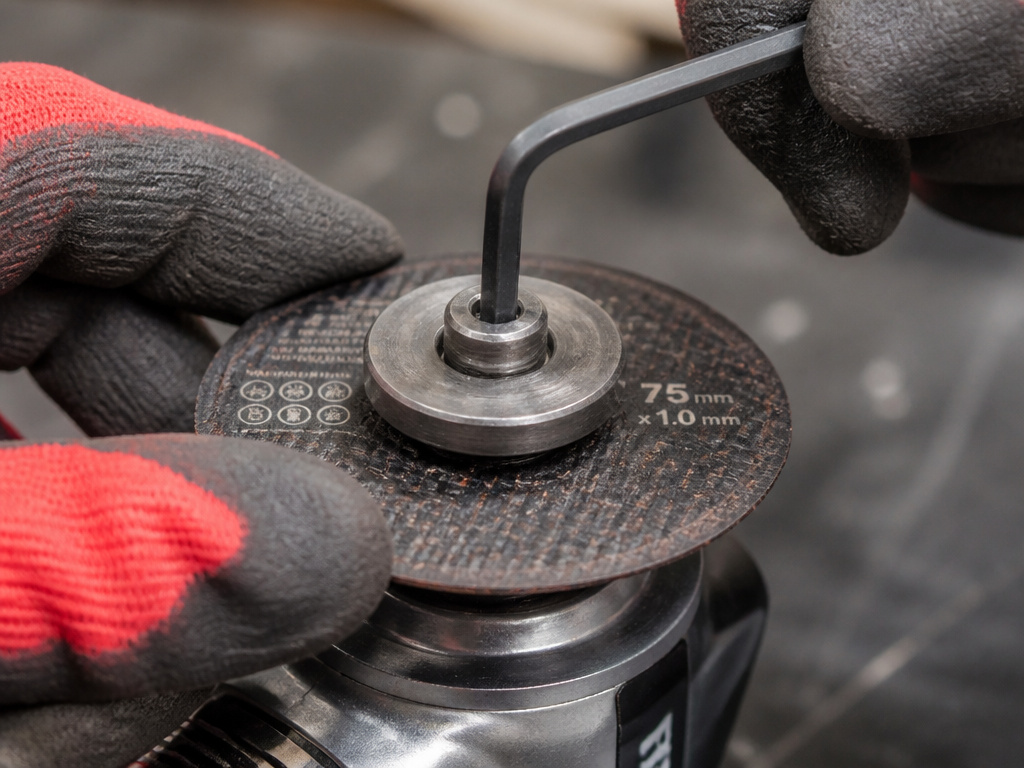
Not all 75mm (3-inch) cutting discs are the same. The critical spec isn’t the diameter; it’s the maximum RPM rating. Your disc’s rated speed must equal or exceed your tool’s free speed. A Toolmaster A087 spins at 20,000 RPM. A disc rated for 15,000 RPM will come apart.
The mounting hardware is specific, too. For models like the Sealey S01005.V2 and SA2501, the disc size includes a 10mm arbor hole, and they use two flanges (washers) that sandwich the disc.
Step-by-Step Disc Installation:
- Disconnect the air hose. This isn’t a polite reminder. The Laser Tools 7626 manual states: “Do not attempt to remove or change a cutting wheel until the tool has been disconnected from the compressed air supply.”
- Use the supplied wrench to hold the spindle steady.
- Slide on the first flange, then the new disc, then the second flange.
- Thread on the nut or socket-head cap screw and tighten it firmly with the hex key. Don’t crank it with a cheater bar, over-tightening can crack the abrasive disc.
- The one step nobody skips: Before making a cut, reconnect the air, point the tool in a safe direction, and run it at no-load speed for at least 60 seconds. Listen and feel. Any wobble, vibration, or a change in the motor’s sound means stop immediately. The disc might be cracked, off-center, or the bearings could be gone.
A cutting wheel that fits cleanly over the spindle prevents stress at the hole. Do not use any additional washers or spacers to mount the cutting wheel. – Paraphrased from the Laser Tools 7626 manual
The 7-Step Bump-Feed Replacement (and the One Step Nobody Skips)
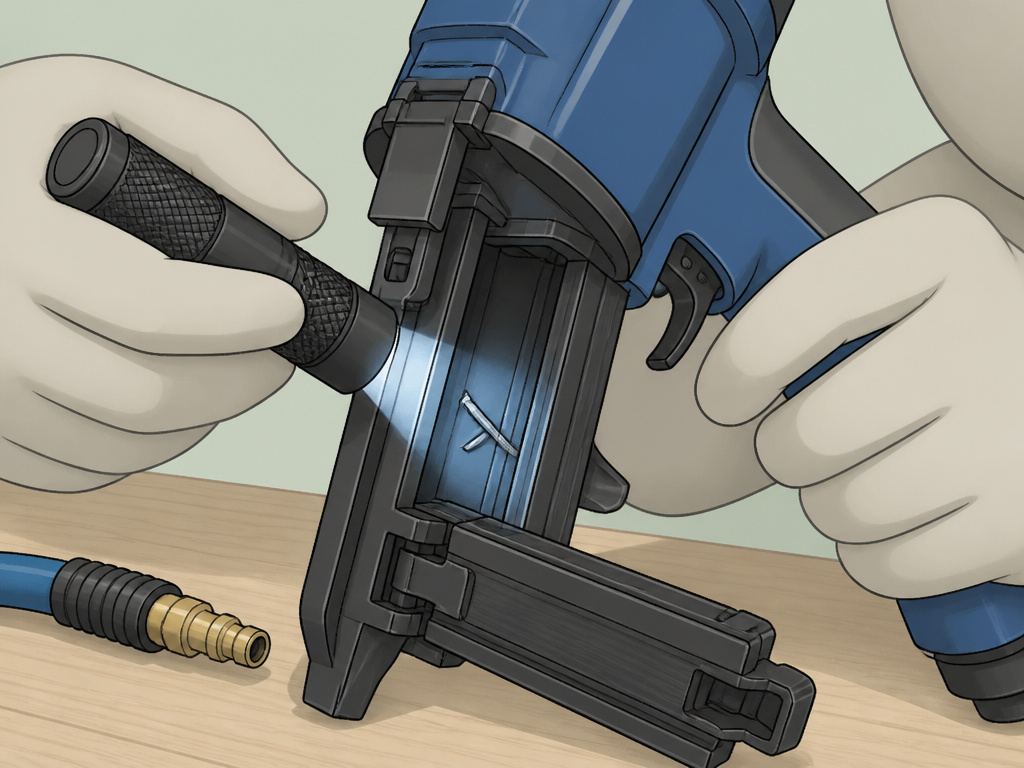
The truth is. You’re not just pressing a button. There’s a sequence that turns a noisy, scary tool into a precise cutter. Miss one, and you fight the tool all day.
- Gear Up. Don safety glasses, gloves, hearing protection, and a dust mask if needed.
- Connect and Lubricate. Attach your air hose, then add 3-5 drops of air tool oil into the air inlet. Pull the trigger for a second to suck the oil in.
- Test Run. Hold the tool firmly and pull the trigger. Let it scream up to its full 20,000 RPM free speed for a few seconds. Listen for a smooth, high-pitched whine. A rattling or grinding sound means stop and inspect.
- Position the Workpiece. Secure what you’re cutting in a vise or with clamps. Never hold it with your hand. The Toolmaster A087 manual is explicit: “Do not hold the work piece with your hand.”
- Initiate the Cut. With the tool at full speed, slowly lower the spinning disc onto the workpiece. The Sealey S01005.V2 manual says, “The disc must be running at its maximum speed before attempting to cut,” while the Sealey SA2501 manual advises starting the tool and bringing the disc to the surface evenly and slowly. A slow disc will grab and kick.
- Apply Controlled Pressure. Use a light, forward pressure. Let the abrasive grains do the cutting. You’ll feel a steady resistance and see a consistent stream of sparks. If you have to push hard, the disc is dull or you’re using the wrong type.
- Finish and Stop. Ease off the pressure. The Sealey SA2501 manual advises removing the disc from the work before stopping, while the Toolmaster A087 manual advises allowing the disc to come to a complete stop before placing the tool down. Letting a spinning disc stop while engaged can pinch and break it.
The Right Cut: Technique Beats Force
Here’s where forum questions about messy cuts and fast-wearing wheels when learning how to use an air cut off tool get answered. It’s not the tool. It’s the angle and the feed rate.
For a straight, clean cut in metal, hold the tool so the disc is perfectly perpendicular to the work surface. Any tilt widens the kerf, makes the disc wear unevenly, and increases the chance of binding. Let the tool find its own feed rate.
The manufacturer advice on pressure isn’t uniform, but it’s closer than it looks.
- Toolmaster A087: “keeping a light pressure allowing the tool to do the work.”
- Sealey S01005.V2: “Exert adequate pressure… According to the type and size of the material.”
- Sealey SA2501: “DO NOT apply excessive pressure, let the cutting disc do the work for you.”
‘Adequate’ and ‘light’ both mean the tool is doing the majority of the work. Your hand is guiding, not shoving. If the motor’s pitch drops significantly, you’re pushing too hard.
Daily and Weekly Maintenance: The Two-Minute Habit
Pneumatic tools are simple but unforgiving. They need clean, dry, lubricated air. Your maintenance routine is shorter than your coffee break.
Daily:
- Drain your compressor’s tank of water.
- Add 3-5 drops of air tool oil (like Sealey ATO/500) into the tool’s air inlet.
- Run the tool for 2-3 seconds to distribute the oil.
- Wipe the exterior clean with a dry cloth.
Weekly:
- Check and clean the air inlet filter if your model has one.
- Inspect the air hose for cracks or leaks.
- Flush the tool if performance drops. The Sealey S01005.V2 manual recommends a mix of SAE No 10 oil and paraffin, while the Sealey SA2501 manual recommends a mix of SAE No 10 oil and kerosene.
Where this goes sideways: Assuming the in-line oiler is enough. If you run an air tool without an oiler, you must add oil directly to the tool daily. The oil in the airline lubricates the hose and fittings first; very little may reach the tool’s internal vanes and bearings.
For storage, manufacturers disagree on the fine points. The JET JAT-930 manual says to oil the tool and disconnect the air hose before storage. The conservative take? Add a few extra drops of oil, run it for two seconds, disconnect it, and store it indoors.
Troubleshooting Common Problems
Even with perfect setup, things can go wrong. Here’s how to diagnose the usual suspects.
| Problem | Likely Cause | Immediate Fix |
|---|---|---|
| Tool won’t reach full speed / lacks power | Insufficient airflow (hose too long/small), low compressor pressure, clogged inlet filter. | Check hose size (min. 10mm ID), ensure compressor output is >90 PSI under load, clean inlet filter. |
| Excessive vibration | Damaged or unbalanced cutting disc, worn tool bearings, disc not seated flush on flange. | Stop immediately. Install a new disc, ensure flanges are flat and clean. If vibration persists, bearings may be shot. |
| Tool runs but doesn’t cut effectively | Dull or incorrect disc for material, applying too much pressure. | Use a fresh, sharp disc designed for your material. Apply less pressure. |
| Oil spraying from exhaust | Over-lubrication. | It’s messy but not harmful. Reduce oil to 3-5 drops daily. |
Air Cut-Off Tool vs. Angle Grinder: When to Use Which
This is the classic shop debate. An angle grinder is versatile but heavy. An air cut-off tool is a specialist.
Choose the air tool when:
- You need a narrower kerf (cut line). A 1mm cutting disc wastes less metal than a 3mm angle grinder wheel.
- You’re making many repeated cuts and have a big air compressor. It runs cooler and won’t overheat.
- Weight and balance are critical. Many air cut-off tools are lightweight; for example, the Toolmaster A087 weighs 0.35kg.
- You value repairability. You can rebuild a pneumatic motor with simple parts.
Choose the angle grinder when:
- You have no air compressor.
- You need one tool for cutting, grinding, and sanding.
- You’re working away from a fixed air supply.
For cutting metal, the air tool is often the cleaner, faster choice if the infrastructure is there.
Frequently Asked Questions
What is an air cut-off tool used for?
It’s designed for fast, precise cutting of metal, think bolts, rebar, sheet metal, conduit, and exhaust pipe. Its thin cutting disc minimizes material waste and works well in tight spaces where a larger angle grinder won’t fit.
How do I use a cut-off tool safely?
Follow a strict sequence: wear full PPE (eyes, ears, hands, lungs), secure the workpiece, use a disc rated for the tool’s RPM, let the disc reach full speed before cutting, apply minimal pressure, and disconnect the air before any maintenance. Our full power tool safety rules guide dives deeper.
Where do you put oil in an air tool?
Add a few drops of pneumatic tool oil directly into the air inlet (the threaded port where the hose connects) daily before use. For longer life, install an in-line lubricator in your air system. Proper air compressor safety includes managing moisture and lubrication.
Why is my air cut-off tool so weak?
Check three things: your air hose diameter (needs to be at least 10mm/3/8″ ID), your compressor’s ability to sustain 90 PSI while the tool is running, and your daily lubrication. A dry tool or a starved tool is a weak tool.
Can I use it for cutting wood or plastic?
You can, but you should use a specialized multi-material or plastic-cutting disc to avoid melting or burning the material. The technique is the same, light pressure and full speed, but dust control becomes even more important to avoid inhaling fine particles.
The Bottom Line
An air cut-off tool is a study in minimalism. It does one thing, cut fast and clean, with almost no electronics to fail. Your job is to feed it clean, dry, oily air and respect its limits.
The one rule that decides everything else: match the system. Your hose diameter, your compressor’s CFM, your disc’s RPM rating, and your cutting pressure all have to align. Get one wrong, and you’re fighting the tool. Get them right, and it feels like an extension of your hand. The difference isn’t subtle. It’s the difference between a chore and a craft.
For the occasional user, a cordless angle grinder is simpler. But for anyone cutting metal day in and day out, with a compressor already in the shop, the air cut-off tool is the quieter, lighter, more repairable choice. Just remember the oil. Every single time.
