
How to Use an Arbor Press: Step-by-Step (Without Damage)
This post contains affiliate links. As an Amazon Associate, we earn from qualifying purchases.
To use an arbor press, you bolt it to a solid workbench, align your workpiece squarely under the ram, and apply controlled downward force with the handle. The tool excels at installing or removing press-fit items like precision dowel pins and bushings, but misalignment or excessive force can shatter parts or eject them as projectiles.
That alignment requirement is the whole game. The University of Washington’s machine shop guide puts it bluntly: the vast majority of arbor press jobs involve pressing round items through holes. If those items and holes aren’t concentric and square to the ram’s travel, the press can kick the part out sideways. Proper alignment is fundamental to how to use an arbor press. You’re not just pushing down; you’re guiding a precision instrument.
What follows: the non-negotiable safety rules that keep fingers intact, a step-by-step walkthrough of the Harbor Freight 1-ton model that demonstrates how to use an arbor press, the specs that decide whether a 1-ton or 3-ton press fits your bench, and the troubleshooting fixes for when the ram sticks or the part won’t seat.
Key Takeaways
- Bolt the press to your bench. An unsecured press or wobbly bench turns a controlled push into a dangerous rocker. The Harbor Freight manual for its 1-ton model specifies bolt length as your bench thickness plus 2-1/2 inches.
- Alignment beats force. A perfectly square, concentric setup lets the ram do its job with modest pressure. An off-center setup needs brute force, which usually ends with a shattered bushing or a launched pin.
- Wear safety glasses, never gloves. The UW guide mandates eye protection and explicitly bans gloves, which can get pinched and pull your hand into the mechanism.
- Match the press tonnage to your work. A 1-ton press handles most bearings and pins for machinery. Jumping to a 3-ton model for small jobs just risks overloading your bench and the part.
- Inspect for cracks and burrs first. Pressing a part with a hidden fracture or a sharp edge is how you get explosive shatter or a deep cut. Look, then press.
The Non-Negotiable Safety Rules (They’re Not Suggestions)
The most serious danger with an arbor press is explosive shatter. The UW guide calls it out directly: arbor-pressed parts can violently shatter. This isn’t scare talk. It’s the predictable outcome of pressing a part with a hidden crack or using too much interference in a press fit.
Your personal protective equipment list is short and absolute.
Before you start: Safety glasses or a face shield are mandatory. The UW guide says eye protection should be worn whenever operating the arbor press. Wear sturdy, close-fitting clothing with no loose sleeves or scarves. Absolutely no gloves are to be worn while using the arbor press. Gloves reduce dexterity and can get caught, pulling your hand in.
Keep your work area clean. Clutter, dust, and debris on the plate create an uneven pressing surface. That unevenness stresses the part and the press frame. When you’re done, raise the handle and leave it in the safe, upright position. A dangling handle is a forehead-seeking missile in a busy shop.
The 7-Step Bump-Feed Replacement (and the One Step Nobody Skips)
How do you actually run the press? The Harbor Freight 1-ton manual gives a clean sequence. Let’s walk through it with the why-layer attached so you know what each step is preventing.
- Raise the rack press. Turn the handle clockwise to lift the ram all the way up. This gives you clear access to the plate below. If the ram is partly down, you risk pinching your workpiece while trying to position it.
- Set the plate. Rotate the plate under the ram until the opening that fits your workpiece is centered. For a solid pressing surface, rotate it until a solid part of the plate is underneath. This supports the entire workpiece, preventing flex and uneven pressure.
- Place your part. Set the part to be pressed onto the plate. Here’s the alignment moment. The part must sit flat. If it rocks on a burr or piece of debris, stop and clear it. An uneven seat guarantees a crooked press.
- Lower the ram onto the part. Turn the handle counter-clockwise until the bottom of the ram just contacts the part. You should feel a light touch. This is your zero point. Lowering it forcefully onto the part can mar the surface or knock it out of alignment.
- Apply steady downward pressure. Place your weight on the handle to press the part. Don’t jerk or bounce. A smooth, increasing load lets the metal deform gradually. A sudden shock load can crack brittle materials. > Where this goes sideways: Using a “cheater bar” (a pipe over the handle) to get more leverage. Using a ‘cheater bar’ (a pipe over the handle) to get more leverage exceeds the tool’s rated capacity, which can bend the ram or strip the gear teeth. You’re exceeding the tool’s rated capacity, which can bend the ram or strip the gear teeth.
- Release pressure and raise the ram. Ease off the handle, then turn it clockwise to lift the ram clear. The part is now pressed. If it didn’t go fully, don’t force it, reevaluate the interference fit.
- Remove the workpiece. This is the step people skip, then regret. Clear the area before starting the next press cycle. A leftover bearing race on the plate will ruin the next part you try to press.
The 1-Ton vs. 3-Ton Decision That Breaks Benches
What does “1-ton” actually mean? It’s the maximum force the press is designed to apply. A Harbor Freight 1-ton model has a 20:1 leverage ratio. That means 50 pounds of force on the handle yields 1,000 pounds (half a ton) at the ram. Your full body weight can approach the 1-ton limit.
Choosing the right size isn’t about future-proofing. It’s about matching the press to your bench and your typical work. A 3-ton press is significantly heavier than a 1-ton model and requires a sturdier bench. Your average garage workbench isn’t built for that. The Harbor Freight manual says to bolt the press down; For stability, especially with larger, heavier presses, securing the workbench itself is often recommended.
| Press Model | Rated Capacity | Max Work Height | Key Use Case |
|---|---|---|---|
| Harbor Freight 59766 | 1 Ton | 5-1/2 inches | General bench work: bearings, pins, light stamping |
| Dayton 4Z329H | 2 Ton | Not specified in source | Intermediate duty between 1-ton and 3-ton tasks |
For most home shop tasks involving lawnmower bearings, go-kart axles, or press-fit dowels, a 1-ton arbor press is sufficient. Stepping up to a 3-ton model for that work is overkill, you’ll struggle to mount it securely, and you risk crushing the parts you’re trying to assemble. The arbor press vs hydraulic press choice comes later, when you need forces beyond 5 tons.
What Are Arbor Presses Actually Good For?
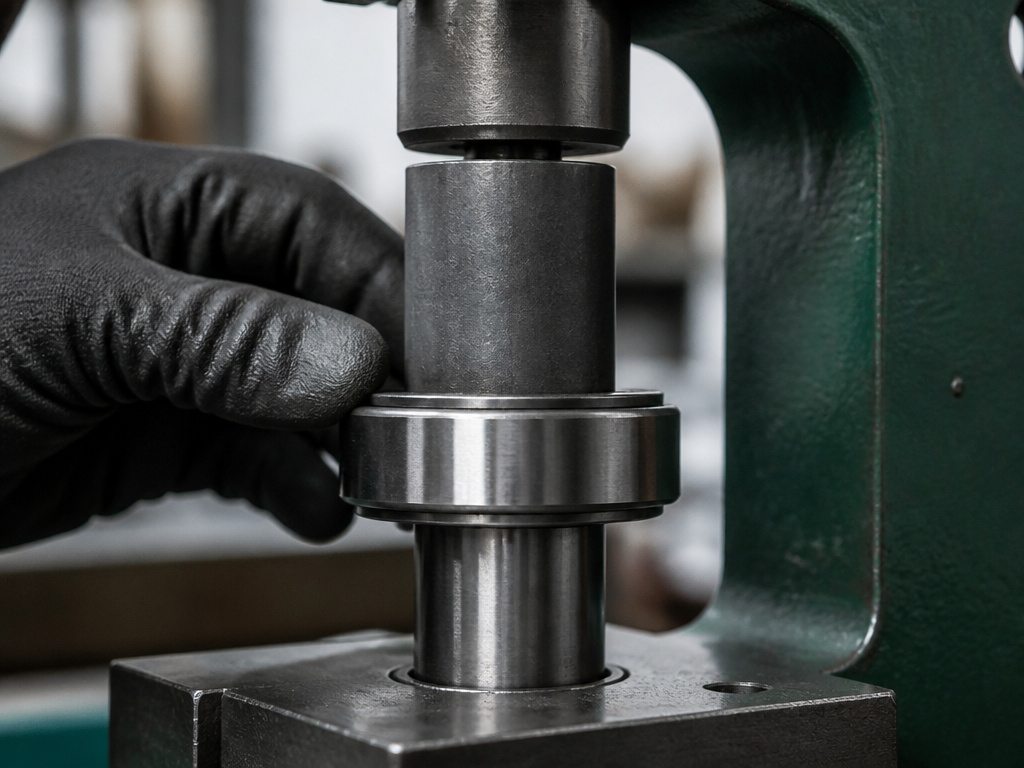
The University of Washington guide nails the primary use: to install or remove press fit relationships. Think of a metal pin that needs to go into a hole machined 0.001 inches smaller. A hammer will deform the pin; the arbor press pushes it in straight, which is a core principle of how to use an arbor press.
Here’s the short list of jobs where an arbor press is the right tool:
- Bearing installation/removal. The controlled, axial force presses a bearing into a housing or onto a shaft without cocking it. You can press bearings using an arbor press with the right-sized pipe as a drift.
- Bushing work. Similar to bearings, but often with softer bronze or brass material that deforms easily if hit sideways.
- Precision pin driving. Dowel pins for aligning machine parts or fixtures.
- Light stamping. With a lettered die set, you can stamp part numbers or labels into metal.
- Straightening. Carefully applied pressure can bend a thin rod or bracket back into line.
It is not a substitute for a hydraulic press for bending thick bar stock, nor is it a drill press for making holes. The precision is in the alignment, not the raw power.
Troubleshooting: When the Press Fights Back
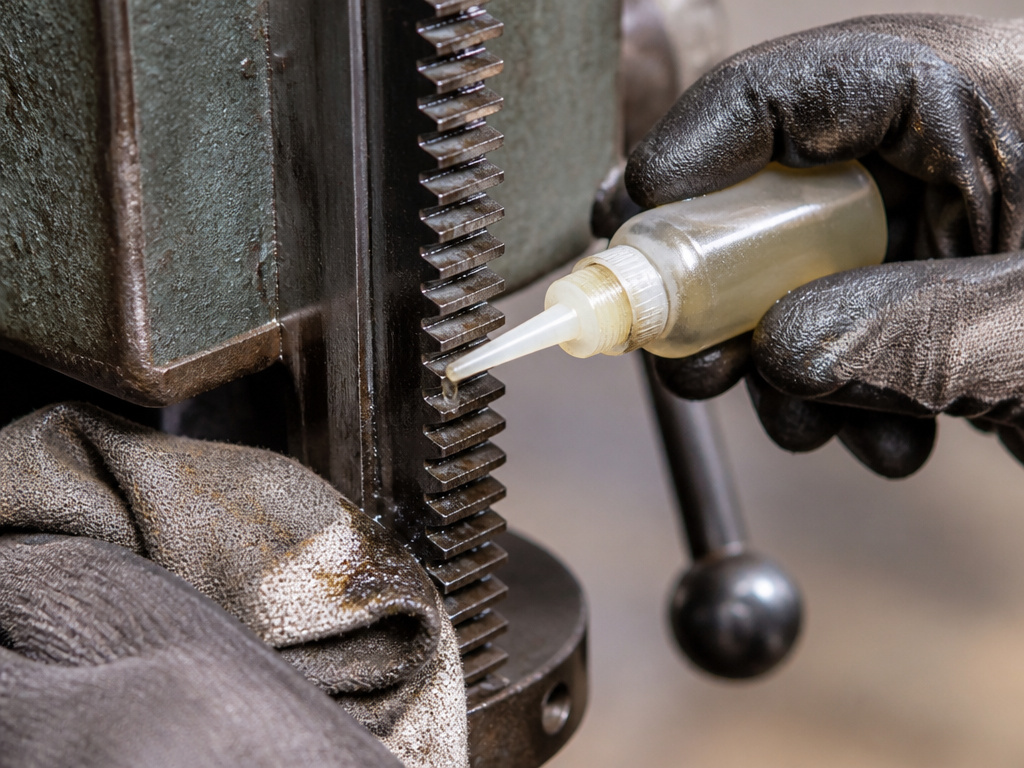
You followed the steps, but the part is stuck at an angle, or the ram won’t go down smoothly. Here’s what’s probably wrong and how to fix it.
Problem: The ram is stiff or sticks.
- Cause: Lack of lubrication on the rack gear or down the column. Grit and dust have built up.
- Fix: Wipe the exposed rack teeth and column clean with a dry rag. Apply a light machine oil (not grease) to the teeth and work the handle up and down to distribute it. Grease attracts more abrasive dust.
Problem: The part presses in crooked or jams.
- Cause: Misalignment. The part, the hole, and the ram’s line of travel are not concentric. The UW guide says this can cause the press to “kick the item out.”
- Fix: Stop pressing. Raise the ram. Use a square to check that the part is sitting flat on the plate and that the receiving piece is also square. Even a 2-degree tilt will bind.
Problem: The press rocks on the bench when you push.
- Cause: Insufficient mounting. The bench is too light or the bolts are loose.
- Fix: Tighten the mounting bolts. If the bench itself flexes, you need a sturdier bench or must fix the bench to the wall or floor, as the manufacturer’s equipment operation instructions advise for larger models.
Problem: The part deforms or cracks instead of pressing in.
- Cause: Excessive interference (the hole is too small for the pin) or a hidden flaw in the part.
- Fix: Measure the pin and hole. The interference should typically be a few thousandths of an inch. If the interference is excessive, you may need to ream the hole. Always inspect parts for cracks first, as the UW Physics machine shop guide insists.
Essential Accessories and Setup Upgrades
The press itself is simple. The accessories are what make it versatile and accurate. Think of your drill press vise, it holds work for drilling. For pressing, you need similar holding and alignment aids.
- V-Blocks. These cradle round stock to keep it centered under the ram. Crucial for pressing a pin into the center of a shaft.
- Parallels. Hardened steel blocks used to raise a workpiece off the plate to the exact needed height. They ensure the ram contacts the part at the right spot.
- Drift Punches. These are stepped cylinders that transfer force from the flat ram face to a specific spot, like the inner race of a bearing. Using the wrong size punch can damage the bearing.
- Angle Plates. For holding workpieces square to the plate when you’re pressing something into a vertical surface.
A well-set-up press station might have the press, a drill press table for holding ancillary tools, and a set of blocks and parallels within arm’s reach. This turns the press from a crude pusher into a repeatable assembly tool.
Types of Arbor Presses
Arbor presses are categorized by their mechanical action, which determines how force is applied. The most common type uses a single lever for direct, straightforward pressing. Other designs incorporate a ratchet mechanism, allowing the user to apply force in increments, which is useful for stubborn or precise operations. Compound presses use a system of levers to multiply the input force, generating higher pressure for the same amount of effort. The choice between these types depends on the specific task, such as installing or removing precision dowel pins and bushings, and the amount of controlled force required.
Key Components of an Arbor Press
Every arbor press is built around a few essential parts. The base provides a stable, flat surface to hold your work. The ram is the component that travels downward to apply the pressing force. You control the ram’s movement with the lever; pulling the lever activates the press’s mechanism to drive the ram down. A spring is responsible for returning the ram to its raised position once you release pressure on the lever. For the press to work correctly and safely, the items being pressed must be aligned both concentric and square to the downward travel of this ram.
Frequently Asked Questions
How do you use an arbor press for bearings?
Place the bearing on the hole in the housing. Select a drift punch that contacts only the inner race (or the outer race, if pressing into a housing). Center the punch on the bearing. Apply slow, steady pressure until the bearing seats flush. Using a punch that contacts the wrong race will destroy the bearing.
What’s the difference between an arbor press and a shop press?
An arbor press is manually operated, using a rack-and-pinion or lever system for force, and excels at precision, controlled pressing. A shop press is usually hydraulic, generates much higher tonnage (10+ tons), and is used for heavy bending, straightening, and u-joint removal. The arbor press vs hydraulic press breakdown is about finesse versus brute strength.
Can you use an arbor press as a drill press?
No. The arbor press applies vertical force only; it has no rotating spindle. You could theoretically use a drill press as a mortiser with a special attachment, but an arbor press cannot drill holes. For drilling, you need a dedicated drill press.
Do I need to lubricate my arbor press?
Yes, but sparingly. A light oil on the rack gear and the column reduces friction and wear. Do not grease these areas, as grease will trap abrasive metal dust and act like grinding compound. Wipe off old oil and grit before applying new.
How tight should a press fit be?
The interference, the difference between the pin diameter and the hole diameter, depends on the materials and application. The interference should be carefully measured for the specific application, as excessive interference is dangerous. The UW guide warns that excessive interference is dangerous. When in doubt, start with a lighter fit you can tap in, and only move to a heavier press fit if the joint is too loose.
Before You Go
One rule most guides skip: if your press handle feels crunchy or the ram moves in jerks, stop and clean it before your next job. Grit in the gears doesn’t just wear the tool; it makes the force application uneven, which is how you crack a bushing that should have slid in smoothly.
The 20:1 leverage ratio in a 1-ton press is enough for 95% of bench work. Trust that ratio, bolt the tool down, and focus your effort on alignment, not muscle. The difference between a successful press and a shattered part isn’t in your shoulders, it’s in the five minutes you spend checking squareness and clearing the plate. That’s the smell of sawdust and the sound of a perfectly tuned motor, right there.
