
How to Use an Impact Driver: Step-by-Step and Safety Rules
This post contains affiliate links. As an Amazon Associate, we earn from qualifying purchases.
To use an impact driver, install a 1/4″ hex impact-rated bit, select forward or reverse direction, lock the trigger, insert a charged battery, then press the trigger to start driving. The tool’s variable speed and internal hammering action deliver high torque for screws and bolts.
That sequence gets the tool running. What you feel and hear, the sharp buzzing rattle, the sudden twist in your wrist, is where most new users get spooked when learning how to use an impact driver and either pull away or hammer the trigger. That’s the tool doing its job. You need to let it.
What follows: the five essential setup steps, a hands-on scrap-wood drill to build trigger feel, and the manufacturer warnings that are literal legalese for a reason when learning how to use an impact driver. We’ll also cover where the manuals flatly disagree, whether you can drill a hole with this thing, so you know which brand’s advice to follow.
Key Takeaways
- Install only 1/4″ hex shank impact-rated bits; regular drill bits will snap under the hammering action.
- Always center the direction selector switch to lock the trigger before installing a battery or changing a bit, this is your primary safety lock.
- Let the tool do the work; squeezing the trigger harder increases speed, not power, and will strip screw heads or break bits.
- For critical fasteners, check final torque with a manual wrench; an impact driver’s output varies with thread condition and battery charge.
What You’re Actually Holding
An impact driver isn’t a louder drill. It’s a rotational hammer. Inside, a spring-loaded hammer and anvil slam together, measured by the Impact Per Minute (IPM) rating, to deliver sudden, high-torque twists. Your standard drill just turns. This thing hits while it turns.
The business end is almost always a 1/4″ hex collet or chuck. Manuals for the Skil 20V Brushless Impact Driver specify a 1/4 in. Collet, and the Bauer 20V Impact Driver specifies using 1/4″ hex shank bits. It’s a quick-release system: pull the collar forward, insert the bit, release. You should feel a solid click.
What most people get wrong: Assuming any 1/4″ hex bit will work. The Kreg Impact Driver manual states, “Use only impact accessories. Non-impact accessories may break and cause a hazardous condition.” Impact-rated bits have a hardened steel core and a thicker shank to absorb the blows. A regular bit turns into shrapnel.
The controls are simple. A variable-speed trigger, a forward/reverse switch with a center lock position, and sometimes a mode or light button. The trigger isn’t an on/off switch; pressure controls speed. The direction switch is your main safety: center it, and the trigger is mechanically blocked.
The 5-Step Core Operation (and Where It Goes Wrong)
Follow this sequence exactly. Skipping step two is how bits get launched across the room.
Step 1: Select and Seat Your Bit
Pull the collet collar forward. Insert a 1/4″ hex impact-rated bit until it clicks. Give the bit a firm tug to confirm it’s seated. The Bauer manual explicitly says, “Pull on bit to ensure it is secure after installation.” This isn’t optional. A loose bit wobbles, cams out of the screw head, and strips it.
Step 2: Lock the Trigger
Move the direction selector switch to the center (lock) position. The Bauer manual warns to set the switch to center “during set up, when changing bits, or when tool is idle.” This prevents the tool from starting the moment you plug in the battery.
Step 3: Install a Charged Battery
Slide a fully charged battery into the grip until it clicks. A weak battery is a problem. The Kreg manual notes, “Low voltage, due to a nearly discharged battery, will reduce fastening torque.” You’ll feel the tool struggling, which leads to overheating.
Step 4: Choose Your Direction
Forward (clockwise) drives screws in. Reverse (counter-clockwise) takes them out. Do not change this switch while the chuck is spinning. The Bauer rule is blunt: “Wait until Chuck has come to a complete stop before changing direction.” Forcing it wears the switch mechanism.
Step 5: Drive the Fastener
Place the bit firmly in the screw head. Press the trigger smoothly to start. Let the tool’s impacts do the tightening. If you need more speed, squeeze the trigger a little more, the tool is variable speed. The instant the screw head seats flush, release the trigger. Holding it for extra impacts is how you strip heads or shear screws.
The mechanics of an impact driver rely on this hammer-anvil engagement. If you fight the twist, you dampen the impact action and the tool will stall or overheat. The correct feel is a firm grip that allows the tool to jerk slightly in your hand.
What Does an Impact Driver Feel Like?
The first time you pull the trigger, it’s alarming. A drill whines. An impact driver delivers a rapid, percussive BRRRRT that vibrates up your arm. Your instinct will be to pull away. Don’t.
The wrist-twist is real. On higher torque settings, the reactive force can turn your wrist if you’re not braced. That’s why you hold it with your off-hand supporting the front of the tool, not just gripping the handle. The sound is your guide: a steady, rhythmic buzzing means it’s working. A straining, labored groan means you’re overloading it or the bit is slipping.
Practice on Scrap Wood First
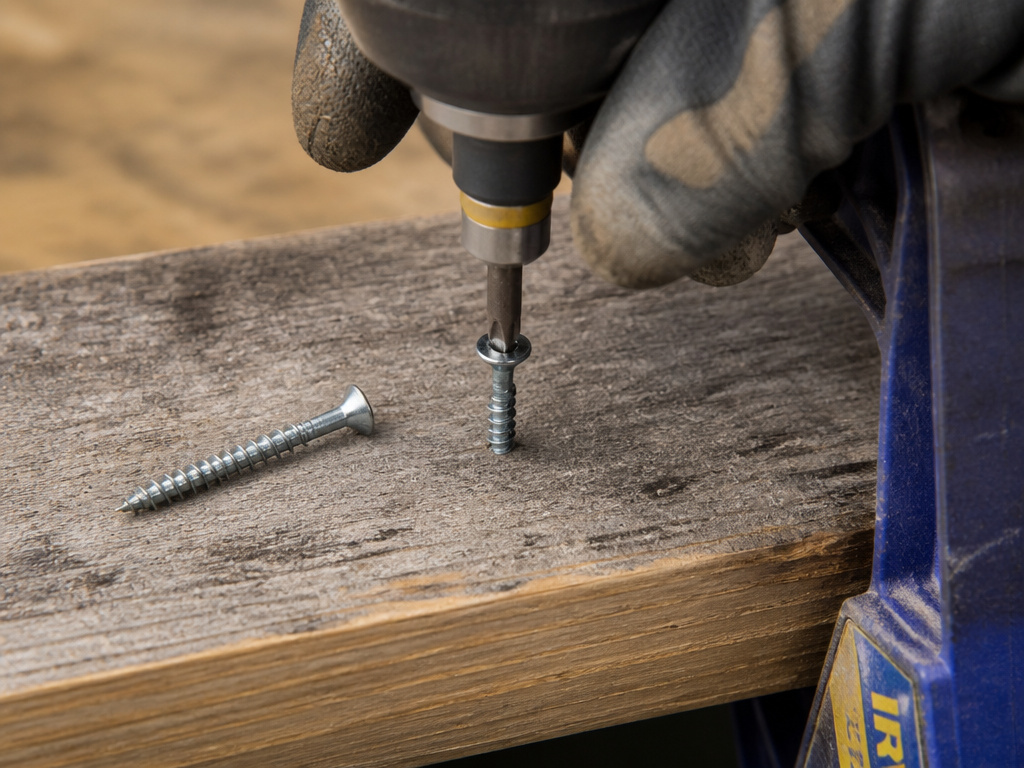
Before you touch a project, burn five minutes on a junk 2×4. This builds the muscle memory you can’t get from reading.
Grab a handful of deck screws and an impact-rated bit that fits them. Clamp the wood down.
Exercise 1: Feel the Trigger
Try driving a screw using only the lightest pressure on the trigger. Listen. The tool might not even start impacting until you press halfway. Now drive one while squeezing the trigger fully. Hear how the RPM and IPM climb? That’s variable speed.
Exercise 2: Find the Stop Point
Drive a screw until the head is just above the wood. Stop. Now, with your eyes closed, give the trigger one short, firm squeeze. Open your eyes. Is the screw flush, sunk, or stripped? That teaches you the “one last impact” threshold.
Exercise 3: Reverse Out
Switch to reverse. Use the same light trigger pressure to back the screw out. Feel how the tool breaks the fastener loose with a burst of impacts, then runs smoothly.
This scrap-wood drill is the single fastest way to go from nervous to competent. It turns the theory of speed control into a physical instinct.
Can You Use It as a Drill? The Manufacturer Split
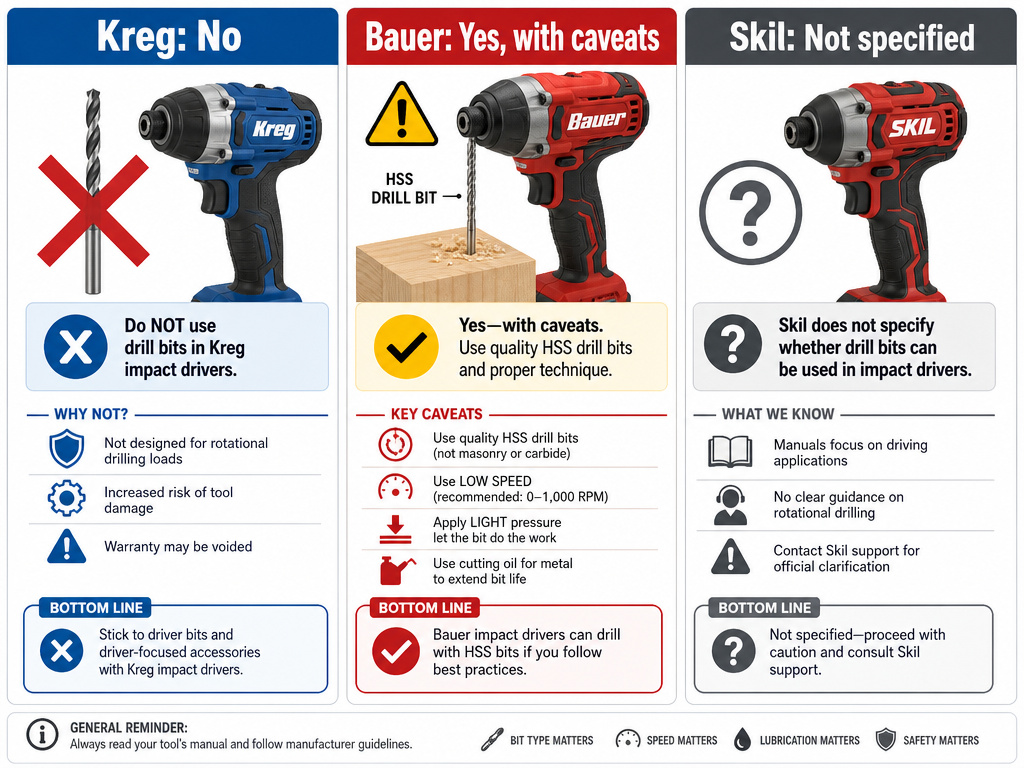
Here’s where your manual is law. Brands disagree.
| Brand / Model | Stance on Drilling | Key Instruction / Warning |
|---|---|---|
| Kreg Impact Driver (KPTDV025A) | No. | “The impact driver is not designed to be used as a drill.” |
| Bauer 20V Impact Driver | Yes, with caveats. | “When drilling a hole, let the tool do the work…” Provides specific guidance for drilling in wood with HSS or carbon steel bits. |
| Skil 20V Models | Not specified. | Manuals cover driving only; no drilling instructions given. |
If you own a Kreg, do not drill, as its manual states it is not designed for that use. However, the Bauer manual provides instructions for drilling in wood.
If you own a Bauer and decide to drill in wood, follow its rules to the letter: use only high-speed steel (HSS) bits, start at very low speed to prevent slipping, and let the tool feed itself without downward pressure. Even then, it’s inefficient. You’re using a sledgehammer for a job that needs a scalpel. For any drilling, a drill is the right tool.
Where this goes sideways: Using a standard drill bit adapter in the hex collet. This lengthens the connection and multiplies the hammering force on a bit not designed for it. The bit snaps, usually at the adapter junction. It’s a guaranteed way to waste a bit and send metal flying.
Troubleshooting: When the Tool Quits
You followed the steps, but the tool won’t start or suddenly stops. Don’t panic. The manuals list two common culprits.
Problem: Tool is completely dead.
- Check the battery charge. Recharge fully.
- Ensure the battery is clicked fully into the tool.
- Verify the direction switch is not in the center lock position.
Problem: Tool starts but stalls under load.
This is likely overload or overheating. The Skil 20V Brushless Impact Driver manual states: “If the tool does not work, it could be due to the tool being overloaded or the battery pack being too hot.”
- For overload: Release the trigger, wait a moment, and try again with less pressure. Let the tool impact through the resistance.
- For a hot battery: Turn the tool off and remove the battery. Let it cool under airflow. A hot battery protects itself by cutting power.
Problem: Screw head strips immediately.
- Your bit is worn or the wrong type. Swap to a fresh, impact-rated bit.
- You’re not holding the tool square to the screw. Angle drives the bit out of the head.
- You’re using too much trigger. Start slow, let the bit engage, then add speed.
Problem: Torque seems weak.
The Kreg manual explains torque varies with many factors: accessory size, bolt condition, thread rust, even material type. If you’re driving a critical fastener, the Bauer manual gives the only professional advice: “chase threads before assembling components and check the actual torque applied with a mechanical torque wrench.”
Safety, Maintenance, and the Fine Print
This isn’t scare talk. It’s the documented hazards you agree to when you pick up the tool.
Before you start:
- Dust and chemicals: The Skil manual carries a California Proposition 65 warning. Power tool dust may contain chemicals known to cause cancer or reproductive harm. Work in a ventilated area, wear a dust mask, and wash exposed skin afterward.
- Hearing and eyes: The impact noise is concentrated and sharp. Wear hearing protection. Always wear safety glasses, bits break, fasteners snap, debris flies.
- Secure your workpiece: Clamp it. A shifting board turns a controlled drive into a wild drill.
After you finish:
- Center the direction switch to lock the trigger.
- Remove the battery.
- Pull the collet to remove the bit.
- Clean the tool with a dry cloth. Don’t use solvents or water.
- Store it indoors. The Skil 20V Brushless Impact Driver specifies a storage temperature of 32–104°F (0–40°C). Your garage in winter or a hot car trunk can permanently damage the battery.
Maintenance is simple. Keep the collet clean, blow out dust with compressed air. Check the battery contacts for debris. That’s it. These tools are sealed. If it breaks, you send it in; you don’t open it up.
What to look for in an impact driver
Consider the tool’s rated voltage. The speed is measured in rotations per minute (RPM), and the impact rate is measured in impacts per minute (IPM). Higher numbers mean faster driving. Battery capacity affects runtime; a larger battery generally provides longer use and can help maintain consistent torque. Low voltage from a nearly discharged battery will reduce fastening torque. Remember, the actual torque delivered can vary based on factors like the condition of the fastener threads and the size of the accessory being used.
How to use an impact driver by hand
Before inserting a bit, set the direction switch to the center trigger lock position. Only use bits with a quarter-inch hex shank that are specifically designed for impact use. Insert the bit firmly and pull on it to ensure it is secure. To operate, apply pressure to the trigger; more pressure increases the speed. Always wait for the chuck to come to a complete stop before changing its rotation direction. When you are finished, release the trigger and center the direction switch to lock it. Remove the battery pack after use and store the tool indoors, out of reach.
Using sockets and driving bolts
For socket use, you’ll need a quarter-inch hex to socket adapter. Use only impact-rated sockets. When driving bolts, the torque applied will vary with the bolt’s size, grade, and the cleanliness of its threads. If you are tightening critical components, you should chase the threads first and then check the final torque with a mechanical torque wrench. Be aware that a longer fastening time results in increased torque, which can overstress, strip, or damage fasteners. Let the tool do the work, using only enough pressure to keep it engaged.
Frequently Asked Questions
What’s the most common rookie mistake?
Jumping straight to a project without practicing on scrap wood. People hear the noise, feel the power, and strip their first three screw heads because they’re fighting the tool instead of letting it work. Spend five minutes with a junk 2×4 first.
When should you use an impact driver instead of a drill?
Reach for the impact driver when you’re driving more than a handful of screws, dealing with long or large-diameter fasteners, removing stuck or rusted bolts, or working on any project where the high torque and speed will save time and wrist fatigue. Use the drill for drilling holes, driving small screws where control is paramount, or when you need a clutch to prevent over-tightening.
Can you put a drill bit in an impact driver?
You can, but you shouldn’t. You must use an impact-rated drill bit, and only if your manual (like Bauer’s) permits drilling. Standard HSS drill bits are not built to withstand the hammering action and will fail, often dangerously. Even with the right bit, an impact driver is a poor drill, it lacks the constant RPM and control of a drill. Use an impact-rated drill bit and only if your manual permits drilling.
How do you keep from stripping screws?
Use sharp, impact-rated bits that fit the screw head perfectly. Hold the tool square to the work. Start slow to let the bit seat, then apply steady, moderate trigger pressure. The moment the screw head is flush, release. The one extra impact is what strips it. If you’re sinking screws into hardwoods, a pilot hole is not a sign of weakness; it’s good practice.
Why is my impact driver so loud?
The noise is the internal hammer hitting the anvil thousands of times per minute. It’s the mechanism, not a defect. It’s also concentrated and high-pitched, which is why you must wear hearing protection for anything more than a few screws. If the noise changes to a grinding, rattling, or screeching sound, stop immediately, that’s a mechanical problem.
The Bottom Line
An impact driver is about surrender, not force. You give it an impact-rated bit, a solid setup, and a charged battery, then let its hammering action do the twisting. Your job is to guide it and know when to stop.
If you remember one thing, let it be this: that center-lock switch is your best friend. Use it every time you set the tool down. It’s the difference between a tool that lasts and an accident that happens.
For the vast majority of driving tasks, building a deck, assembling furniture, installing cabinets, a mid-range model like the Skil 20V Brushless or a model from a major brand is all you need. The real investment is in a set of quality bits you trust. Buy those once, and the driver becomes an extension of your intent, not just a noisy gadget in your hand.
