
How to Use Heat Shrink Tubing With a Heat Gun
This post contains affiliate links. As an Amazon Associate, we earn from qualifying purchases.
To use heat shrink tubing with a heat gun, you need a controlled temperature between 215°C and 250°C (419°F–482°F), a steady hand moving the gun 20mm from the surface, and a technique that shrinks the tubing evenly from one end to the other without letting the nozzle touch. The goal is a smooth, wrinkle-free finish that conforms tightly to the substrate without burning, blistering, or trapping air underneath.
That temperature range isn’t a guess. It’s the calibrated output from a TE Connectivity Thermo gun with a PR26 reflector, measured with a K-Type thermocouple, which should be set to 215–245°C. HellermannTyton’s manual cites a similar band: 230°C to 250°C measured 25mm from the nozzle. Get the heat right, and the polymer’s built-in stresses pull it tight in seconds. Get it wrong, and you get splits, cold spots, or a melted mess. This illustrates the core principle of how to use heat shrink tubing with a heat gun.
What follows is the manufacturer-sourced procedure for how to use heat shrink tubing with a heat gun that most DIY guides gloss over. We’ll walk through the six essential steps, explain why three major brands disagree on where to start heating, and show you how to spot the exact moment the job is done, before you overheat it.
Key Takeaways
- Set your heat gun between 215°C and 250°C (419°F–482°F) and maintain a 20mm (3/4 inch) distance from the tubing to prevent burning.
- Sources disagree on the starting point: HellermannTyton and some TE Connectivity guides recommend starting at one end and working along, while Panduit recommends starting in the center and working outwards for in-line splices.
- For dual-wall adhesive tubing, apply extra heat until you see adhesive ooze from the ends, that’s your visual cue for a complete seal.
- Never let the heat gun nozzle touch the tubing; contact causes immediate splitting and ruins the insulation.
- If the substrate is a large metal conductor, expect to apply heat longer, the thermal mass slows down the recovery process significantly.
Before You Start: The Non-Negotiables
This isn’t a place for shortcuts. The polymers in heat shrink tubing release fumes when heated, and the gun itself gets hot enough to cause third-degree burns in seconds. The manufacturer guides are unanimous on three points.
First, work in a well-ventilated area. TE Connectivity and HellermannTyton both specify this to avoid breathing in any vapors. Second, wear heat-resistant gloves. The tubing and the underlying wire or connector will stay dangerously hot for a period after you stop heating. Third, never use the gun near water or in damp conditions, it’s an electric tool with a live heating element.
Before you start: Wear heat-resistant gloves and safety glasses. Work in a ventilated space. Never point the gun at yourself or anything flammable. The reflector nozzle stays dangerously hot for a period after you switch the gun off.
Your workspace needs a clean, stable surface. Have a pair of sharp scissors or a razor blade for cutting the tubing, and some isopropyl alcohol and a rag if you’re covering a greasy connection.
The 6-Step Process for a Perfect Shrink
Follow this sequence. Swapping steps leads to wrinkles, air pockets, and a weak seal.
1. Select and Cut the Tubing
The rule is simple: pick the largest diameter that will still recover snugly. A tube that’s too loose won’t provide good mechanical protection. A tube that’s too tight is a nightmare to slide on and may not fully recover.
According to TE Connectivity, most heat shrink tubes have a 2:1 or 3:1 shrink ratio. This means a 1/2″ expanded tube shrinks down to 1/4″ or 1/6″, respectively. Check the spec sheet, not just the spool label. TE Connectivity explicitly warns to use published dimensions for design, not just a sample piece for fit.
Cut the tubing to length with a sharp blade. Burrs or ragged edges can initiate a tear during shrinking. Manufacturers have precise length tolerances: for a 100mm piece, the cut can be off by ±4.0mm and still be in spec. That’s your margin, not an excuse for a sloppy cut.
2. Prepare the Substrate
This step is what separates a permanent repair from one that fails in six months. The surface must be clean, dry, and free of oils or debris. For a wire splice, this means wiping the conductors and any connector with isopropyl alcohol. Panduit even recommends lightly sanding the cable insulation where the tube will contact it to improve adhesion.
Any grease or dirt will compromise the bond, especially with dual-wall adhesive tubing. It also creates a path for moisture to wick under the tubing later.
3. Position the Tubing
Slide the tube over the connection. Ensure it’s centered. If you’re covering a long splice, leave equal overlap on each end. Here’s the critical part: do not stretch the tube as you position it. Stretching it longitudinally thins the material and can cause it to split when the heat hits it.
4. Apply Heat: The Two Schools of Thought
This is where the official manuals on how to use heat shrink tubing with a heat gun diverge, and your choice depends on the shape of your workpiece.
- Method A (HellermannTyton & TE Connectivity for long runs): Start at one end of the assembly. Apply heat evenly around the circumference of the tube at that starting point until it begins to grip the substrate. This anchors the tube. Then, progressively move the heat source along the length. This method is excellent for long runs or when you need to push air out ahead of the shrinking zone.
- Method B (Panduit for centered splices): Start in the center of the tube and work your way out towards both ends. This is Panduit’s recommended method for in-line splices, as it minimizes the chance of trapping air in the middle of the connection.
For most general purposes, starting at one end is the more reliable technique. It gives you directional control.
5. Use the Right Technique
This is where feel matters. Turn your gun on and let it reach its set temperature. Hold the reflector nozzle about 20mm (3/4 inch) from the tubing surface. Never let it touch.
Keep the gun moving. Make small circles around the tube while slowly traveling down its length (or from the center out). You’re looking for the tubing to start wrinkling, then suddenly snap smooth and tight. The colour will also intensify, a pale red tube will become a deep, solid red.
Rotate the heat around the tube evenly to ensure even installed wall thickness. Whilst the tube is recovering, the hot air can be directed along the longitude to continue the shrinking process. . TE Connectivity Specification 114-120023
If you’re working with dual-wall tubing, you need more heat. The goal is to melt the inner adhesive liner. You’ll know it’s working when you see a small bead of melted adhesive ooze from the end of the tube.
6. Cool and Inspect
When the tubing is fully recovered, immediately move the heat gun away. Do not touch the assembly. It will be near 100°C and can burn you instantly. Let it cool to ambient temperature.
Once cool, inspect your work. The tubing should be smooth, conform perfectly to the substrate’s shape, and be free of wrinkles, blisters, or glossy spots (a sign of overheating). For dual-wall, check for that adhesive bead at each end.
What Does “Done” Look Like? (And What Does Failure Look Like?)
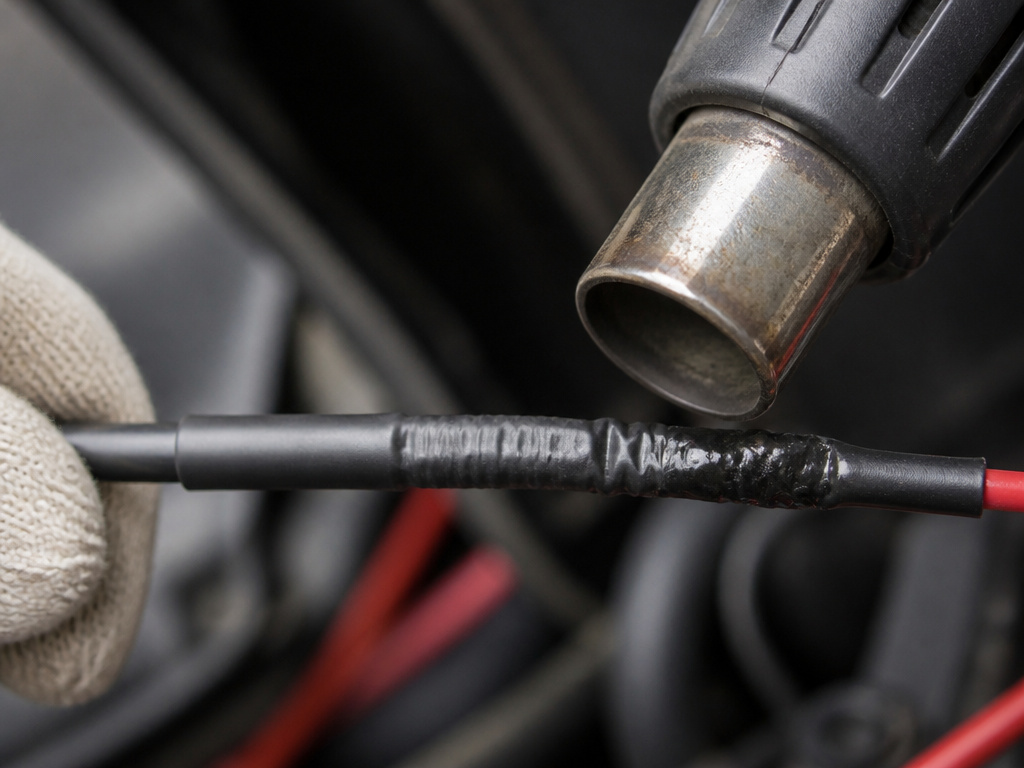
You can’t go by time. A small wire splice might take only seconds; a large connector on a thick cable might take significantly longer. Watch for these visual and tactile cues instead.
| Condition | What You See & Feel | What It Means |
|---|---|---|
| Perfect Shrink | Smooth surface, uniform colour, conforms to contours. Adhesive oozes from ends (dual-wall). | Correct temperature and technique. The tubing is fully recovered and sealed. |
| Underheated / Cold Spot | Wrinkled, loose section that didn’t shrink. Feels tacky if adhesive is present. | Insufficient heat applied to that area. Re-apply heat carefully. |
| Overheated | Glossy or matte blotch, blistering, a brown or black charred spot. Smells acrid. | Gun held too close or dwelled too long. The material is degraded. Must be replaced. |
| Split / Torn | A longitudinal crack in the tubing. | Tube was stretched during placement, gun nozzle touched it, or it was undersized for the substrate. |
The most common mistake is pulling the gun away too soon. If you see a wrinkle, keep the heat on it until it disappears. If you see a glossy spot, you’ve gone too far, stop immediately.
Choosing and Setting Your Heat Gun
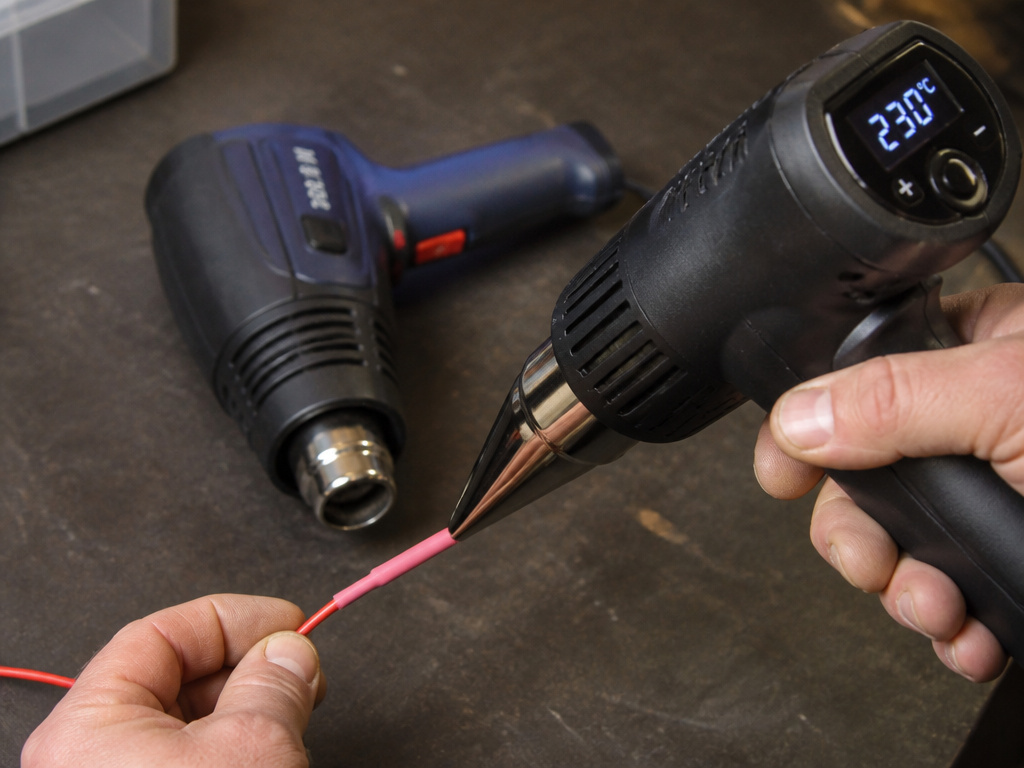
Not all heat guns are equal for this task. A basic two-temperature gun from the hardware store will work, but a model with adjustable temperature and a focused nozzle is better.
Look for a gun with an adjustable temperature that can cover the ranges recommended by manufacturers. This gives you the range you need. A concentrator nozzle is invaluable, as it focuses the airstream on the tubing and not the surrounding components. This is critical when using a heat gun on small electronics.
If you’re doing professional work, consider a calibrated tool like the TE-recommended Thermo gun CV-1981. For it, they specify the correct temperature setting of 215–245°C at the outlet when using a PR26 reflector.
Common mistake: Using the high setting (500°C+) on a basic heat gun. This will blister the tubing almost immediately. If your gun only has High and Low, use Low and hold it farther away, moving constantly.
When Things Go Wrong: Fixing a Botched Job
It happens. You overheat one spot, or the tubing splits. Here’s how to recover without damaging the wire underneath.
- Let it cool completely.
- Use a sharp utility knife or razor blade to carefully slit the damaged tubing lengthwise. Do not cut into the wire insulation beneath.
- Peel the old tubing off.
- Clean the substrate again as in Step 2.
- Select a new piece of tubing, ideally one size larger if the old one was tight.
- Re-shrink, applying less heat and paying closer attention to your distance and movement.
For small overheated spots on an otherwise good shrink, you can sometimes leave it if the underlying seal is intact. But for any split or exposed area, replacement is the only safe option.
Heat Gun vs. The Alternatives
A dedicated heat gun is the right tool. The reality of the heat gun vs hair dryer debate is this: while some sources mention alternatives like hair dryers or torches, a typical hair dryer doesn’t get hot enough for efficient recovery. TE Connectivity notes recovery starts at approximately 85°C (185°F), but the time to full recovery with a lower-temperature source may not be practical. You’ll be there all day, and the result will be loose and unreliable.
TE Connectivity’s guides explicitly warn against using an open flame. However, sources disagree on recommended heat sources, with Panduit mentioning a ‘torch or hot air gun.’ The soot damages the tubing, the heat is uncontrollable, and you risk melting the wire insulation or starting a fire. This is one task where there are no good heat gun alternatives; a heat gun is the specific tool for the job.
Frequently Asked Questions
Will a heat gun work on all types of heat shrink tubing?
Yes, a properly set heat gun is the recommended tool for polyolefin, PVC, and dual-wall adhesive tubing. The key is matching the temperature to the material. Thin-wall tubing typically needs a temperature within the ranges specified by manufacturers, such as 215–250°C.
How do I shrink tubing on a very small wire or connector?
Use the lowest effective temperature and a concentrator nozzle. Hold the gun slightly farther away (30-40mm) and keep it in constant, gentle motion. The smaller mass heats faster, so it’s easy to overdo it. Consider using a pair of tweezers or hemostats as a heat sink on the wire behind the connector to protect sensitive components.
The tubing shrunk but looks cloudy. Did I ruin it?
Not necessarily, especially with clear tubing. TE Connectivity notes that clarity is highest when the tubing is hot and reduces as it cools. If it’s smooth and tight, it’s probably fine. Cloudiness from overheating is usually accompanied by brittleness or distortion.
Can I re-use or re-shrink heat shrink tubing?
No. The shrinking process is permanent and irreversible. Once the polymer’s cross-linked structure has contracted, applying more heat will only degrade it. You must cut it off and replace it with a new piece.
Why did my tubing split lengthwise while I was shrinking it?
Three likely causes: you stretched the tubing while sliding it on, the heat gun nozzle made physical contact with it, or the tubing diameter was too small for the substrate (exceeding 80% of the supplied diameter). Always ensure a loose fit before heating.
The Bottom Line
Using a heat gun on heat shrink tubing is about control, of temperature, distance, and movement. Set your gun between 215°C and 250°C, keep the nozzle 20mm away, and move from one end to the other in a slow, circular pattern. Watch for the tubing to snap smooth and for adhesive to ooze if you’re using the dual-wall type.
The one spec to memorize: 80%. That’s the maximum your substrate should fill the supplied tubing diameter. Go over that, and you risk a split every time. Everything else, the brand disagreements on where to start, the extra heat for large metal parts, flows from that basic rule of physical fit. Get the size right first, and the heat application becomes straightforward.
