
How to Use a Cordless Caulking Gun: Step-by-Step Guide
This post contains affiliate links. As an Amazon Associate, we earn from qualifying purchases.
To use a cordless caulking gun, you load the tube, cut the nozzle at a 45-degree angle, puncture the inner seal, set the speed dial, and pull the trigger while moving the gun at a steady pace. The key advantage over a manual gun is the motorized feed, which delivers a consistent bead without hand fatigue, but it requires matching the tool’s power to your material, thick adhesives need a gun with at least 5000 N of feed force.
That feed force number isn’t marketing. It’s the ceiling. If your construction adhesive is cold or thicker than pancake batter, a gun rated for less will stall, leave a lumpy bead, and burn its motor out before the job is done. A cordless gun replaces forearm strain with a different kind of prep work, which is why it’s important to learn how to use a cordless caulking gun properly.
What follows is the setup most guides skip: how to read a spec sheet for the job in your hand, the one mistake that guarantees a drip, and the speed setting that turns a messy line into a clean seal when you compare a how to use a cordless caulking gun.
Key Takeaways
- Load the correct piston for your tube size (300ml or 600ml); a mismatched piston won’t create a seal and the gun will run without dispensing material.
- Cut the nozzle at a 45-degree angle with an opening half the width of your desired bead; a straight cut or too-small hole causes uneven pressure and a ragged line.
- Start with the variable speed dial on its lowest setting and increase only if the material doesn’t feed; high speed on thin caulk creates a mess that’s impossible to control.
- Prevent drips by releasing the trigger before the end of your seam and pulling the gun away while the rod is still retracting.
- Sources disagree on battery storage temperature: Ryobi’s manual recommends storage between 0°C and 20°C, while Makita’s Canadian manual warns against storage where temperatures reach or exceed 50°C.
How a Cordless Caulking Gun Actually Works
Forget the manual gun’s ratchet. Inside a cordless model, an electric motor turns a geared drive that pushes a steel rod forward. Your trigger press completes a circuit, and the rod advances the piston in the tube. The rod’s maximum push is its feed force, measured in newtons (N).
A cordless caulking gun converts battery power into linear mechanical force. A motor drives a geared mechanism that pushes a plunger rod against a piston inside the caulk tube. Variable speed control adjusts the motor’s output, regulating the flow rate of the material.
The Makita DCG180‘s motor delivers 5000 N of force. That’s enough to push a stubborn, cold silicone or a viscous construction adhesive. The Ryobi CCG-1801 lists its output as a no-load speed, 5.5 mm/s on high, which tells you how fast the rod can move when it’s not fighting anything. That distinction matters. Force (N) is for pushing through resistance; speed (mm/s) is for laying down a long, fast bead when the material flows easily.
The tool’s brain is the variable speed dial. It doesn’t just make the motor go faster. It changes the electrical signal to the motor, which changes torque, which is a key part of how to use a cordless caulking gun. On low, the motor has more torque to push stiff material. On high, it has less torque but moves faster for runny materials. Using high speed on a stiff adhesive is how you burn out a motor.
The 3 Specs That Decide If a Gun Can Handle Your Job
You don’t need every number on the sheet. These three will tell you if the gun fits the tubes you buy and the materials you use.
| Specification | What It Means | The Minimum You Need |
|---|---|---|
| Max Feed Force | The pushing power of the rod. | 5000 N for construction adhesives, thick silicones, or cold-weather work. |
| Holder/Stroke Length | The size tube the gun accepts and how far the piston travels. | A 214 mm stroke for standard 300ml (10oz) tubes. A 350 mm stroke for 600ml tubes. |
| Variable Speed Range | How finely you can control the flow rate. | A dial, not just a high/low switch. 0–28 mm/s (like the Makita) is a professional-grade range. |
Feed force is the big one. A gun rated for 3000 N might handle bathroom silicone on a warm day. Try to push a cartridge of PL Premium through it in a 50°F garage, and the motor will groan, stall, and eventually trip its thermal protection. The job stops until it cools down.
Stroke length is about the tube in your hand. The Makita DCG180 manual lists a 214 mm stroke for its short 300 ml holder and a 350 mm stroke for its long 600 ml holder. If you mostly use standard 10oz tubes, the short holder keeps the tool’s overall length down to a manageable 404 mm. For bigger jobs, the long holder makes sense, but the tool grows to 538 mm, over half a meter long. Match the holder to your common tube size.
The speed dial is your control for precision. A single-speed gun is a blunt instrument. With a variable dial, you can begin a bead slowly, increase speed for the long middle section, and reduce speed at the end to avoid a blob. It’s the difference between driving with a throttle and an on/off switch.
The 7-Step Process to a Perfect Bead
This is where the tool pays for itself. Follow this sequence to avoid the classic beginner mess.
1. Install the Correct Piston and Rod.
Before you touch a tube of caulk, check the gun’s rod and piston. Most guns come with a piston pre-installed for standard 300ml tubes. For a 600ml tube, you often need a different piston. Using the wrong one means the piston won’t seal against the tube’s inner walls. The gun will run, but nothing comes out.
2. Load the Tube and Cut the Nozzle.
Slide the tube into the holder, pressing it firmly against the piston. Cut the nozzle tip at a 45-degree angle. The opening should be roughly half the width of the gap you’re filling. A straight cut makes it hard to steer the bead into a corner. A hole that’s too small increases pressure and causes the caulk to burst out unevenly.
3. Puncture the Inner Seal.
Straighten a long nail or use the puncture tool that came with the gun. Push it through the cut nozzle until you feel it pop through the foil seal at the tube’s base. You must do this step. If you skip it, you’ll pull the trigger and get nothing but a humming motor.
4. Set the Speed and Test.
Turn the speed dial to its lowest setting. Point the gun at a piece of scrap cardboard or wood. Pull the trigger for two seconds. You want a smooth, consistent ribbon of material. If nothing comes out, the material may be too stiff for the low setting, increase the speed slightly and test again. Never start on high.
5. Apply with a Steady Pull.
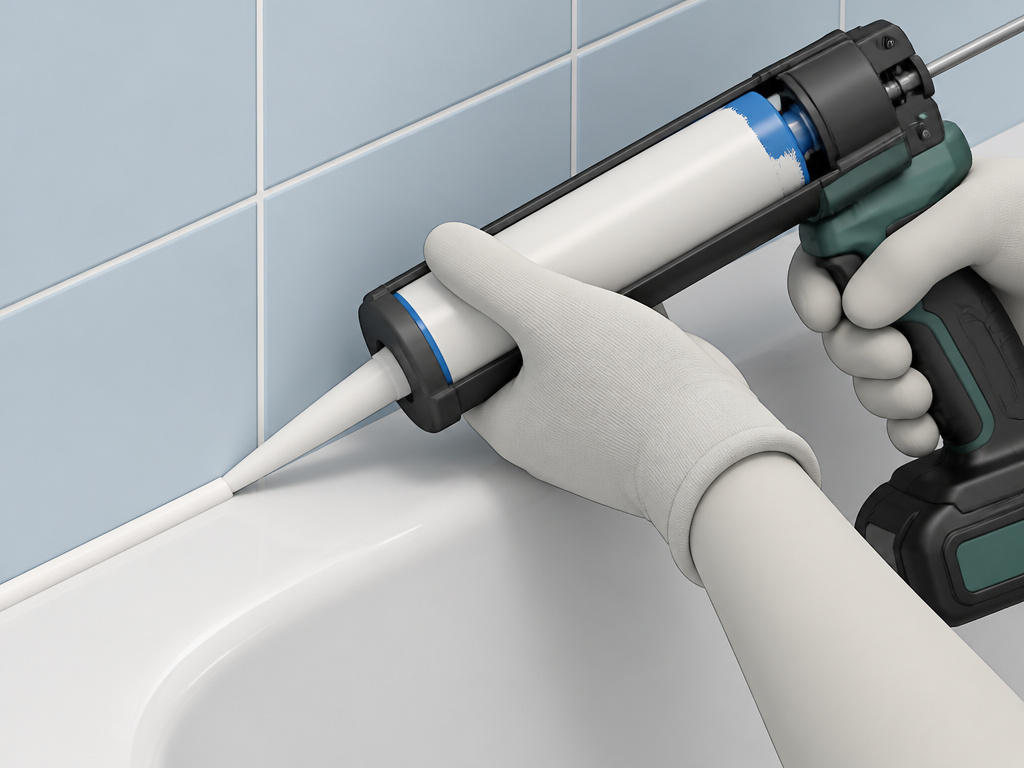
Hold the gun at a 45-degree angle to the surface. Place the tip at the start of your seam. Pull the trigger and immediately begin moving the gun along the gap at a consistent pace. Let the tool do the pushing. Your job is to guide it. The bead should fold into the gap, not ride on top of it.
6. Stop the Flow Before You Finish.
This is the drip-prevention move. Release the trigger about two inches before the end of your seam, but keep moving the gun. The rod will retract slightly, sucking a tiny amount of material back into the nozzle. It stops the drip.
7. Smooth Immediately (If Required).
For a finished look on visible seams, smooth the bead right away with a wet finger, a plastic smoothing tool, or a damp rag. For adhesive or structural caulk, leave it as-is; tooling can break the seal.
Where this goes sideways: Starting with the speed dial on high. Thin latex caulk will surge out, flooding the gap and oozing over the sides. You’ll spend more time cleaning up than caulking. Start low, test, and only increase if the material refuses to feed.
Troubleshooting: When Your Cordless Gun Won’t Play Nice

Even with the right steps, things can go wrong. Here’s how to diagnose the common failures.
| Problem | Likely Cause | The Fix |
|---|---|---|
| Motor runs, nothing comes out. | 1. Inner seal not punctured. 2. Wrong piston for tube size. 3. Material is too cold/stiff. |
Puncture the seal. Swap the piston. Warm the tube in a bucket of warm water. |
| Bead is lumpy or inconsistent. | 1. Speed is too high for material. 2. Nozzle cut is ragged or too small. 3. Moving too slowly. |
Lower the speed dial. Re-cut the nozzle cleanly. Maintain a steady pull pace. |
| Material drips after releasing trigger. | Rod not retracting (no drip-stop function) or trigger released at the seam’s end. | Release trigger 2 inches early. For guns without auto-retract, a quick reverse pull can help. |
| Motor stalls or sounds labored. | Material is too viscous for the gun’s feed force. | You need a gun with higher feed force (5000 N+). For now, warm the material and use the highest speed. |
| Battery dies extremely quickly. | Using high speed with a stiff material, overtaxing the motor. | Use the correct tool for the job. High speed is for flow, not for powering through resistance. |
The “material too stiff” issue is the most common complaint on owner forums. The Makita manual explicitly says: “Depending on the type and conditions of caulking material, it may not be fed at low speed; set the speed adjusting dial higher.” That’s a band-aid. The real solution is knowing your gun’s limits. A 5000 N gun is for thick stuff. A lighter-duty model is for smooth, pliable sealants.
Clearing a clog is straightforward. If material has hardened in the nozzle, remove the tube and use the puncture tool or a piece of wire to clear the channel. Never use a metal drill bit, it can score the plastic and create future snag points.
Cordless Caulk Gun Showdown: Makita vs. Ryobi vs. Milwaukee
They all perform the core task. The differences are in the details that matter on the third tube of the day.
Makita DCG180 (18V)
This is the workhorse. Its 5000 N feed force and 0-28 mm/s speed range are pro specs. It offers multiple holders (300ml and 600ml) and specific pistons for each. The downside is weight: the Makita DCG180 with a 600ml holder has a net weight of 2.6 kg, and adding a battery increases the total. It’s the right choice for contractors or serious DIYers who regularly use large tubes of viscous material. A cordless drill from the same battery ecosystem likely powers this gun.
Ryobi CCG-1801 (18V)
The value champion. It lists a no-load speed (5.5 mm/s high, 1 mm/s low) instead of feed force, indicating it’s designed for standard caulks and adhesives. It’s significantly quieter, with a sound power level of 70 dB(A). It’s lighter and more affordable. It’s perfect for the homeowner sealing windows, laying bathroom silicone, or doing occasional trim work. It won’t power through the thickest stuff, but it covers 90% of household tasks.
Milwaukee M12PCG (12V)
The compact specialist. It runs on the 12V platform, making it lighter and easier to handle in tight spaces. Milwaukee’s manual emphasizes using only M12-specific rods and carriages and keeping the piston clean to avoid internal damage. It’s the go-to for HVAC techs, plumbers, or anyone working overhead where tool weight and bulk are critical.
Your choice comes down to your battery system and job severity. For all of them, a consistent cordless tool maintenance routine, especially for the battery, is what gives you years of reliable service.
Safety & Maintenance: The Non-Negotiables
A caulk gun seems harmless. The hazards are pinching and chemistry.
Before you start: Keep hands and clothes clear of the plunger rod area. The rod moves with 5000 N of force and can pinch a finger or loose fabric instantly. Always work in a well-ventilated area and wear gloves and eye protection, as many caulks and adhesives emit fumes and can cause skin irritation.
Battery care is paramount. Sources disagree on specifics, so here’s the clear breakdown:
- Ryobi’s manual states battery storage should be between 0°C and 20°C.
- Makita’s Canadian manual warns not to store the tool or battery where temperatures reach or exceed 50 °C. The conservative rule? Store batteries in a cool, dry place, away from direct sunlight. When the gun is going back on the shelf for a while, remove the battery. This is advised in the Makita DCG180 (Canada) manual; the Makita India manual advises charging the battery if unused for more than six months.
Clean the rod and piston after every use, especially with sticky adhesives. A rag with a little mineral spirits works for most materials. A gummed-up piston will drag on the next job and strain the motor. The principle is similar to cleaning a pneumatic grease gun: residue left inside leads to poor performance and eventual failure.
Types of Caulk Guns
Manual guns rely on your hand strength and a ratchet mechanism to squeeze the tube. A cordless gun uses a battery-powered motor and a geared drive to push a steel rod. This motor provides a consistent feed force, measured in newtons, to push through stiff or cold materials without tiring your hand. The tool’s trigger controls the circuit, letting you start and stop the flow precisely. You can also adjust the speed, which is how fast the rod moves, to match the material’s viscosity for a smooth, controlled bead.
Common Caulking Gun Mistakes
If the caulk won’t come out, check for hardened material clogging the nozzle and remove it. For stiff material, warming it can make it flow. If the bead is too narrow, you may need to re-cut the nozzle tip to provide a larger opening. Sometimes the material won’t feed at a low speed setting; simply turn the speed dial higher. Always ensure you are using the correct piston for your cartridge, and replace any damaged cartridges. For safety, keep your hands and clothing clear of the moving rod and plunger area to avoid pinching.
Frequently Asked Questions
Are cordless caulking guns worth it?
For any project longer than a single tube, absolutely. They eliminate hand fatigue, provide consistent pressure for a better seal, and give you far more control. For a one-time small repair, a manual gun is fine. For sealing windows, laying bathroom silicone, or any trim work, a cordless gun makes a major difference.
How does an electric caulk gun work?
It uses a battery-powered motor to turn a geared drive, which pushes a steel plunger rod forward. When you pull the trigger, the motor engages and advances the rod, which pushes a piston inside the caulk tube. A variable speed dial controls the motor’s power, regulating how fast the rod moves and thus how much material is dispensed.
Do you push or pull a caulking gun?
You always pull the gun towards you. This gives you better visibility of the tip and the bead you’re laying down. Pushing the gun can cause you to ride over uncured caulk, creating a mess and breaking the seal.
Why is my cordless caulking gun dripping?
Dripping happens when material continues to ooze from the nozzle after you release the trigger. This is often because the gun lacks an automatic rod-retraction function (a “drip-stop”). To prevent it, release the trigger an inch or two before the end of your seam and keep the gun moving. The slight backward pressure can stop the flow.
Can I use any caulk or adhesive?
You can use any standard cartridge material, but you must match the gun’s power to the material’s viscosity. Thin latex caulks work in any gun. Thick construction adhesives, like liquid nails, or cold silicone require a gun with high feed force (like the Makita’s 5000 N). Always check the material’s instructions for any specific application notes.
The Bottom Line
A cordless caulking gun turns a tedious chore into a one-pass job. The real skill isn’t in pulling the trigger, it’s in knowing your tool’s limits. If you’re about to buy one, pick the platform you already own batteries for. For heavy-duty work, lean toward the high feed force of the Makita. For everything else, the Ryobi gets the job done quietly and affordably.
One final rule that reframes the whole task: if you’re fighting the gun, you’re probably using the wrong material for the conditions or the wrong gun for the material. Warm up a stiff tube. Switch to a more appropriate sealant. Or accept that some jobs need the 5000 N muscle. That’s the difference between finishing a project and wrestling with a tool.
