
What Is a Wide Belt Sander: Key Components Explained
This post contains affiliate links. As an Amazon Associate, we earn from qualifying purchases.
A wide belt sander is an industrial machine that uses a wide, continuous abrasive belt and a powered conveyor to flatten, finish, and precisely control the thickness of wood and composite boards like plywood and MDF. It’s not a handheld sander scaled up; it’s a thickness-calibrating workhorse built for volume, requiring three-phase power, compressed air, and serious dust collection.
That definition covers the what, but the why matters more. This machine exists because hand-sanding for flatness is guesswork, and a planer can’t finish a surface. The wide belt sander sits between them, turning rough lumber into dimensionally accurate, ready-to-finish panels in a single pass. If you’re new to shop tools, you might ask: what is a wide belt sander? It’s the tool that separates hobbyist output from professional, repeatable results.
The rest walks through the machine’s anatomy, the critical shop requirements most guides gloss over, a direct comparison to its closest cousin (the drum sander) when you compare a what is a wide belt sander, and the real-world numbers on air pressure, greasing, and dust collection that manufacturers don’t agree on. By the end, you’ll know exactly what this machine does and whether it has a place in your shop.
Key Takeaways
- A wide belt sander is a thicknessing and finishing machine, not just a big sander; it uses a conveyor to feed stock under a wide abrasive belt for uniform material removal.
- They are industrial-scale tools requiring 3-phase electrical power (often pre-wired for 230V), compressed air (with requirements varying by manufacturer), and heavy-duty dust collection (requirements vary wildly from 800 to 3500 CFM).
- For flat-panel work like tabletops and cabinet parts, a wide belt sander is faster and more consistent than a drum sander, but it cannot handle irregular shapes or end-grain sanding as effectively.
- Operating one safely requires understanding feed rate adjustment (faster for softwoods, slower for hardwoods) and pressure bar calibration to prevent “sniping” at the board ends.
What Does a Wide Belt Sander Actually Do?
At its core, this machine solves two problems: making a board a specific, uniform thickness, and giving it a ready-to-finish surface. Think of a sheet of plywood fresh from the lumber yard. It might be labeled 3/4″, but it’s rarely a true, consistent 0.750″ across its entire surface. Running it through a wide belt sander with a coarse-grit belt brings every point to that exact dimension. Switching to a finer-grit belt then removes the mill marks and leaves a smooth, scratch-pattern-free surface.
The process is mechanical and repeatable. You set the table height, which determines final thickness. The rubber conveyor belt carries the board into the machine. Above it, the wide sanding belt, often 25, 37, or 43 inches across and 75 inches long, spins at high speed on a contact drum or under a flat platen, abrading the top surface. Pressure bars before and after the sanding head hold the stock firmly against the conveyor to prevent lift. Understanding what is a wide belt sander reveals that what comes out the other side is dimensionally identical to every other board you run with the same settings.
This is the fundamental shift from a handheld sander: the workpiece moves past a stationary abrasive, not the other way around. It turns sanding from a skill-dependent art into a repeatable, mechanical process.
The primary applications are in flat-panel production. Cabinet shops use them to thickness cabinet sides and door panels. Furniture makers flatten table tops and chair seat blanks. Millwork shops prepare stock for flooring and moulding. It’s the go-to machine for anyone who needs more than a few boards to be perfectly flat, perfectly parallel, and ready for a final finish sanding by hand or with a finer power sander.
Key Components and How It Works
The machine can be broken down into its main parts. From the front, you see a large, flat table with a continuous rubber conveyor belt. This is your feed mechanism. The conveyor speed is adjustable, giving you control over the feed rate. A control panel houses the main power switches, conveyor controls, and emergency stop.
Above the table is the sanding head enclosure. Inside, the massive sanding belt loops over a drive drum, an idler drum, and often a third roller for tensioning. The belt tracks laterally (oscillates) during operation to distribute wear evenly. The sanding action happens either via a hard contact drum (for aggressive stock removal) or a soft platen behind the belt (for fine finishing). Many machines combine both in a single head or offer multiple heads for a progressive grit sequence.
The unsung heroes are the pneumatic systems. Air pressure is not optional; it’s what powers the belt tensioning, oscillation, and often the braking system. If pressure drops below a threshold, 5 bar for Laguna machines, the sander will stop functioning. This isn’t a gentle suggestion; it’s a operational requirement.
Finally, dust collection is integral, not ancillary. The machine has multiple large-diameter ports (often 5-inch) on top. A clogged or undersized dust collector doesn’t just make a mess; it allows sawdust to build up under the belt, causing overheating, poor finish quality, and rapid belt wear.
The Wide Belt Sander vs. Drum Sander: Key Differences
This is the comparison every new woodworker needs. Both machines thickness sand, but they approach the job from opposite directions.
A drum sander uses a cylindrical, sandpaper-covered drum that rotates over a stationary bed. You feed the workpiece by hand (on smaller models) or with a feed mechanism (on larger ones). The contact area is the narrow width of the drum. A wide belt sander uses a broad, flat belt moving over a larger contact area, with the workpiece moving on a conveyor underneath.
| Aspect | Wide Belt Sander | Drum Sander |
|---|---|---|
| Best For | High-volume flat panel work, consistent finish quality | Slower, controlled removal; end-grain sanding; irregular shapes |
| Contact Area | Large (full belt width) | Narrow (drum width) |
| Feed Method | Powered conveyor | Manual or powered feed carriage |
| Finish Consistency | Excellent, uniform scratch pattern | Can leave slight “snipe” or drum marks if not perfectly adjusted |
| Dust Collection Need | Very High | High |
| Typical Shop Scale | Industrial, large professional shop | Hobbyist to medium professional shop |
The wide belt wins on pure speed and finish consistency for flat stock. The conveyor feed is relentless, and the broad sanding belt avoids the helical scratch pattern a drum can leave. However, a drum sander has a major advantage: it can sand end grain and slightly irregular pieces because the workpiece is supported by the bed and presented to the drum. Trying to send a small, irregular chair part through a wide belt sander is a way to launch it across the room or jam the conveyor.
For a shop doing cabinet doors and tabletops, the wide belt is the clear choice. For a shop dealing with turned bowls, carved pieces, or small end-grain cutting boards, the drum sander’s flexibility is irreplaceable. It’s not about one being better; it’s about matching the machine to the material removal tools you use most.
Power, Air, and Space: The Non-Negotiable Shop Requirements
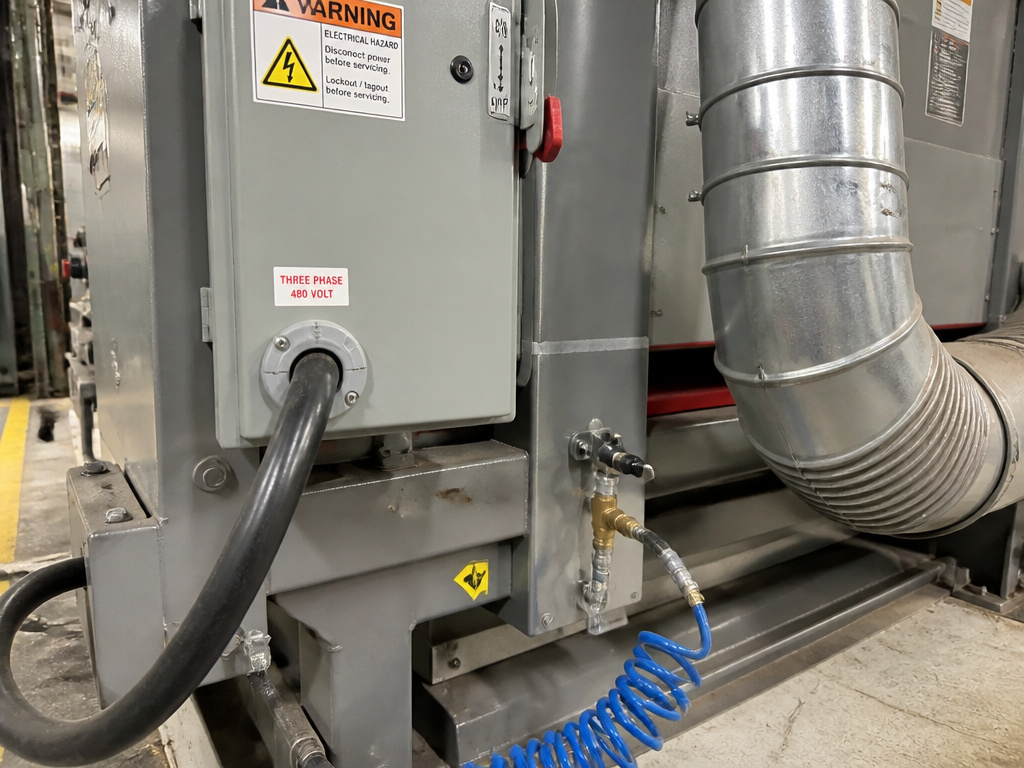
You don’t just buy a wide belt sander; you install it. The prerequisites filter out most home shops immediately.
Electrical: These are almost exclusively 3-phase machines. A common model like the Powermatic WB-25 has a 15HP main drive motor and is pre-wired for 230V. Converting it to 460V, if your shop runs at that voltage, requires purchasing and installing two specific overload relays, it’s not a simple switch flip. This isn’t a tool you plug into a standard 120V outlet.
Compressed Air: As noted, you need a clean, dry air supply capable of delivering a steady pressure, with requirements varying by manufacturer. The machine uses this air constantly for critical functions. An undersized compressor that cycles on and off will cause pressure drops that can stop the sander mid-operation.
Dust Collection: This is where the spec sheets diverge most dramatically. We will compare the numbers side-by-side.
| Machine / Source | Required Dust Collection CFM |
|---|---|
| Laguna Tools (General) | 3500 (minimum) |
| Powermatic WB-25 | 800 |
| Powermatic WB-37 | 1600 |
| Powermatic WB-43 | 1900 |
Why the huge gap? The Laguna manual gives a conservative, one-size-fits-all recommendation for worst-case sanding conditions. The Powermatic numbers are model-specific and likely reflect a more realistic, efficient hood design.
Space and Weight: The WB-25 weighs 1,760 lbs gross. You need clear space around it for loading and unloading, plus room for infeed and outfeed support for long boards. This is a permanent station in your shop, not something you wheel into a corner.
Step-by-Step: Running Your First Pass
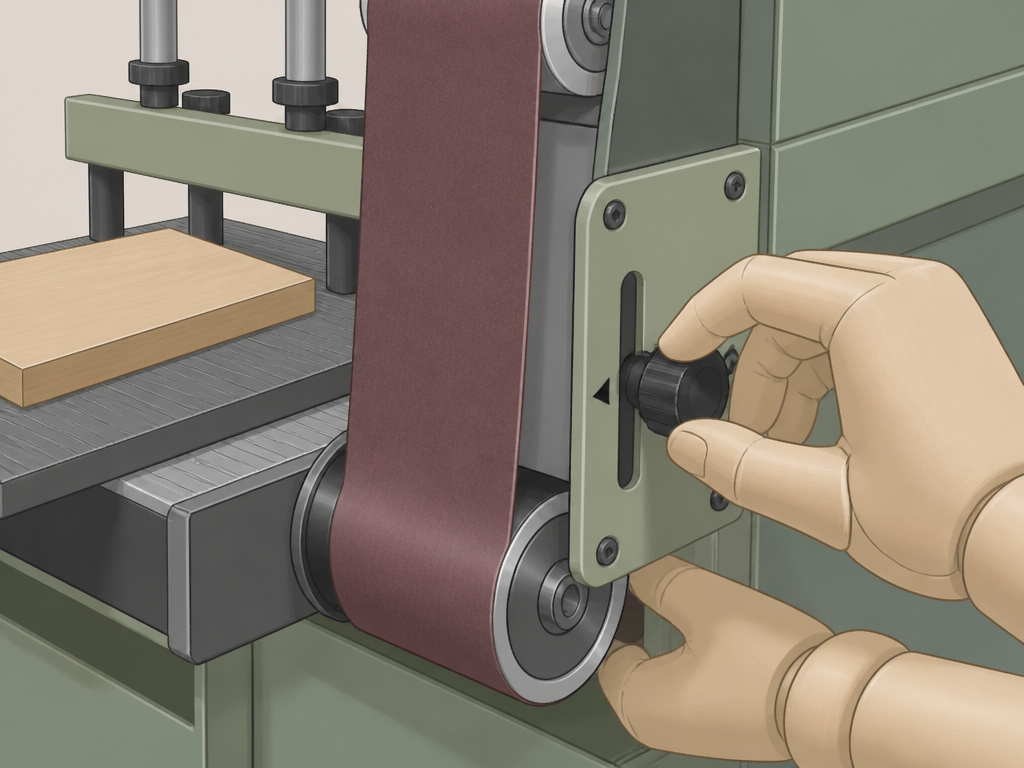
For this guide, we will start with a machine that is installed, powered, and connected to air and dust collection. Here’s how to run a board through safely and effectively.
- Install and Track the Sanding Belt. New belts must be centered on the drums. Turn on the sanding head (with the conveyor off) and use the tracking adjustment knob until the belt runs centered without walking toward either side. The Powermatic manual specifies letting the belt’s edge just touch the positioning wheels and allowing it to run for several minutes to settle.
- Set the Table Height. This determines your final thickness. Use the manual handwheel to raise the table until a sample piece of your stock just contacts the sanding belt. Lower the table by the exact amount of material you want to remove. For instance, to take off material, lower the table by the desired amount after making contact.
- Adjust the Pressure Bars. These bars, front and rear, must be parallel to the table and exert equal pressure on both ends. They should be set slightly below the level of the sanding belt. An incorrect setting here causes “sniping”, where the ends of the board get sanded more than the middle. If you see snipe, your front pressure bars are too low.
- Set the Feed Rate. The conveyor speed is infinitely variable. Start slow. The rule of thumb from Powermatic: soft woods require a higher feed rate, while hard woods require a lower feed rate. Crucially, only change the feed rate while the conveyor belt is running to avoid damaging the gearbox.
- Make the Pass. Place your board squarely on the conveyor, several inches from the front pressure bar. Engage the conveyor and let it carry the board in. Do not push or force it. Keep your hands well clear of the intake area. Let the machine do the work.
- Inspect and Repeat. Check the board for uniform thickness and finish. If you need to remove more material, lower the table incrementally and run it through again. For a finer finish, you would typically change to a higher-grit belt.
Common mistake: Assuming the factory pressure bar settings are perfect. They’re a starting point. Skipping the check with a sample board almost guarantees snipe on your first real workpiece.
This process highlights why it’s beneficial to understand general belt sander technique; the principles of grain direction, even pressure, and progressive grits still apply, just on a monumental scale.
Maintenance and Ownership: Where the Manuals Disagree
This is where your research pays off. The scheduled maintenance for a wide belt sander is rigorous, and manufacturers don’t agree on the intervals. Basing your schedule on the wrong manual can lead to premature wear or unnecessary downtime.
Greasing Frequency for Bearings:
- Powermatic: Grease bearings after every 150 work hours.
- Laguna Tools: Grease the machine after every 40 hours of operation.
Dust Collection Requirements:
Other critical schedules are more aligned:
- Drive Belt Tension: Check after the first 8 hours of use (Laguna).
- Gearbox Oil Change: First change at 100 hours, then every 2,500 hours with 90-weight gear oil (Laguna).
- Weekly Tasks: Check all nuts/bolts, inspect the sanding belt and cables, empty the air system water trap, clear dust hood blockages, and grease bearings.
- Belt Replacement: The sanding head motor uses multiple matched belts. If one fails, you must replace all belts with a matched set to avoid vibration and rapid wear.
This level of maintenance underscores the industrial nature of the tool. It’s not a drill you hang on the wall. It’s a station you maintain, much like you would learn to clean sanding belts for other tools to extend their life and performance.
Wide Belt Sander Cost and Scale
Wide belt sanders are serious investments that scale directly with their capacity. Industrial models are built for all-day production, featuring powerful multi-horsepower motors, heavy-duty frames weighing well over a ton, and wide sanding belts to handle large panels. These machines require robust three-phase power and significant dust collection. For the hobbyist or small shop, compact models exist but still demand substantial shop space, dedicated electrical circuits, and effective dust management. The price range reflects this scale, with industrial machines commanding a premium for their durability, width, and power, while smaller units represent a significant but more accessible capital outlay for serious woodworking.
Buying a Used Wide Belt Sander
Inspecting a used wide belt sander requires a thorough mechanical check. Examine the conveyor belt and sanding belt for cracks, glazing, or uneven wear. Check that the conveyor tracks straight and the pressure bars are parallel and adjustable. Listen for bearing noise or motor issues during a test run. Review the maintenance history; these machines require regular greasing of bearings, oil changes in gearboxes, and belt tension checks. Ask if critical components like the sanding head motor’s matched drive belts have been replaced as a set. Ensure you have the correct power supply and a dust collector with sufficient airflow, as requirements vary significantly by model. Keep the shipping material if possible for safe transport.
Frequently Asked Questions
Can a wide belt sander be used on metal?
While metalworking wide belt sanders exist, a woodworking model is not designed for it. The key differences are rotation speed (much slower for metal), platen/drum material (often steel or ceramic for heat dissipation), and the abrasive belt itself. Using a wood sander on metal can overheat and glaze the belt, damage the platen, and is generally unsafe. They are distinct machine classes.
What is the minimum board length for a wide belt sander?
For the Powermatic WB Series models, the minimum board length is 12 inches. Shorter pieces can be difficult to control under the pressure bars and may tip or jam. For very small parts, a dedicated hold-down fixture or a different type of sander, like a benchtop belt sander, is a safer choice.
Is a wide belt sander a “finish” sander?
It can be, but that’s not its primary job. With a very fine-grit belt (e.g., 220+), it can produce a surface ready for final finishing. However, for ultra-smooth surfaces free of any microscopic swirls, many woodworkers still prefer a final pass with a random orbital sander. The wide belt’s strength is in bringing panels to a uniform thickness and a consistent pre-finish surface.
How often do I need to change the sanding belt?
It depends on the material, grit, and amount of stock removed. A coarse belt removing heavy stock from rough lumber might last for a limited time before needing replacement or cleaning. A finishing belt (150+ grit) can last much longer. You change it when it stops cutting efficiently, shows visible wear or damage, or becomes clogged with pitch (in softwoods). Knowing how to replace a sander belt quickly is a key operational skill.
Can a hobbyist shop justify a wide belt sander?
Rarely. The cost, space, and infrastructure demands are significant. For a hobbyist doing occasional panel flattening, a well-tuned combination of a belt sander and planer or a drum sander is usually a more practical and affordable route to excellent results. The wide belt sander shines in environments where its speed and consistency pay for its footprint through volume.
The Bottom Line
A wide belt sander is a phenomenal tool for the right shop. It turns the messy, subjective task of flattening and thicknessing into a clean, repeatable mechanical process. But it’s not a magic box you simply buy and turn on.
The decision hinges on three hard numbers: your available 3-phase power, your air compressor’s sustained output (aim for the higher 80 PSI/6 bar spec to be safe), and your dust collector’s real CFM at the end of the duct. If any of those are a “maybe,” the machine will be a source of frustration, not productivity.
For a small shop, a used machine can be a gateway into professional-grade output, but only if you’re willing to become its mechanic. The maintenance isn’t optional, and as the manuals show, you can’t guess, you have to follow the specific schedule for your brand and model. If your shop’s output is measured in panels per day, not per month, and you have the infrastructure, it’s the right tool for the job. For everyone else, there are other excellent, less demanding paths to a perfectly flat board.
